

It's Saturday morning, you want soft poppy seed buns for the table, and the first uncertainty arrives before you've opened the flour. Should you start the dough now, or should you have started it last night? Then there's the filling: whole seeds won't give you the same texture as a properly ground paste, and a wet filling can escape before the buns finish baking.
This poppy seed bun recipe gives you a practical enriched dough, two fermentation paths, and clear checks for shaping and doneness. You'll also check seed safety and freshness before spending time on a batch that sugar and careful proofing can't rescue.
Table of Contents
- Ingredients and Clocks for Both Dough Methods
- Keep Seeds Safe and the Filling Fresh
- Mix Knead and Build the Poppy Filling
- Shape Proof and Bake the Buns
- Fix Leaks Dense Crumb and Off Flavors
- Store the Buns and Plan the Next Bake
Ingredients and Clocks for Both Dough Methods
For a Saturday-morning batch, use the following home-baking formula for about 12 buns. These are recipe quantities, not a nutritional formulation or a high-protein bread recipe.
Weigh the dough and filling
Measure the dough ingredients in baker's order:
- Bread flour: 500 g, plus a light dusting for the bench.
- Milk: 240 g, lukewarm for the straight-dough method.
- Egg: 1 large, about 50 g without its shell.
- Sugar: 60 g.
- Instant yeast: 7 g. If substituting active dry yeast, hydrate it in some of the measured milk according to its package directions.
- Fine salt: 8 g.
- Unsalted butter: 70 g, melted and cooled until barely warm.
For the filling, set out 150 g food-grade poppy seeds, 60–80 g sugar, and 2–4 tablespoons milk, adding only what the paste needs. You can replace part of the sugar with honey, but start with less milk because honey also loosens the mixture. Optional finely grated lemon zest adds brightness without making the filling wetter.
Reserve an additional beaten egg for brushing. You'll also need a scale, mixing bowl, dough scraper, rolling pin, lined baking tray, wire rack, and instant-read thermometer.
Choose your fermentation path
Straight dough is the simplest choice: mix everything, knead, let the dough expand, then fill and shape. Allow a flexible morning rather than promising buns at an exact minute.
For an overnight preferment, mix half the flour with half the milk and the yeast, cover, and refrigerate overnight. With these proportions, you'll have a stiff preferment, not a pourable poolish. Don't leave this milk-based mixture with the full yeast quantity at room temperature overnight; use cold storage and allow the finished dough to warm and expand before shaping.
The Djurenko poppy seed bun method supports a final proof of about 1 hour, baking near 175°C/350°F for 20–30 minutes, and a fully set enriched crumb near 88°C/190°F. Treat those as checkpoints, not permission to ignore dough that's still tight.
Poppy seed bun timing by method
| Method | Before shaping | Final proof | Bake |
|---|---|---|---|
| Straight dough | Mix and knead, then bulk until visibly expanded and airy | About 1 hour, judge by spring-back | 175°C/350°F, 20–30 min, center near 88°C/190°F |
| Preferment | Refrigerate the stiff starter overnight; mix remaining ingredients in the morning and bulk until airy | Use 45–75 min as a checking window, not a deadline | Same oven and internal target |
| Cold retard after shaping | Bulk about 1 hour at room temperature before shaping, extending if the dough is still tight | Overnight in fridge, then check after 30–45 min warmup; allow longer if needed | Same oven and internal target |
The times in the table are working schedule allowances for this formula, not guaranteed fermentation times. A chilled tray may need substantially longer than its initial warmup window.
Counter rule: Follow the sequence on the table, but let dough expansion and spring-back decide when you move on.
Keep this table beside the scale as your counter card.
Keep Seeds Safe and the Filling Fresh
Baking doesn't automatically make contaminated poppy seeds safe. Seeds can pick up morphine, codeine, and thebaine through contact with plant material during harvesting, so ingredient sourcing matters before you begin the filling.
The FDA's guidance on opiate alkaloids in poppy seeds describes EFSA's group acute reference dose of 10 micrograms per kilogram of body weight for combined morphine and codeine exposure, and reports that processing reductions can range from approximately 25% to 100%. That variability is why you shouldn't treat a home preparation method as a guaranteed decontamination process.
The same FDA guidance discusses research in which incorporating seeds into baked muffins didn't significantly reduce alkaloids, although washing and steaming produced decreases. A browned bun isn't a test of alkaloid content.
Start with food-grade seeds
Use seeds sold specifically as food by a reputable supplier. Avoid products intended for planting or other non-food uses, and don't use a lot that looks contaminated.
- Choose the supplier first: Buy a sealed food product with clear labeling.
- Prepare appropriately: Rinse or steep the seeds for this filling, drain them, and grind them into paste.
- Keep portions sensible: Dense seed fillings deserve particular care when serving children or large holiday platters.
- Follow local advice: If someone regularly eats substantial amounts of poppy seeds, consult the relevant food-safety guidance rather than estimating exposure from serving size alone.
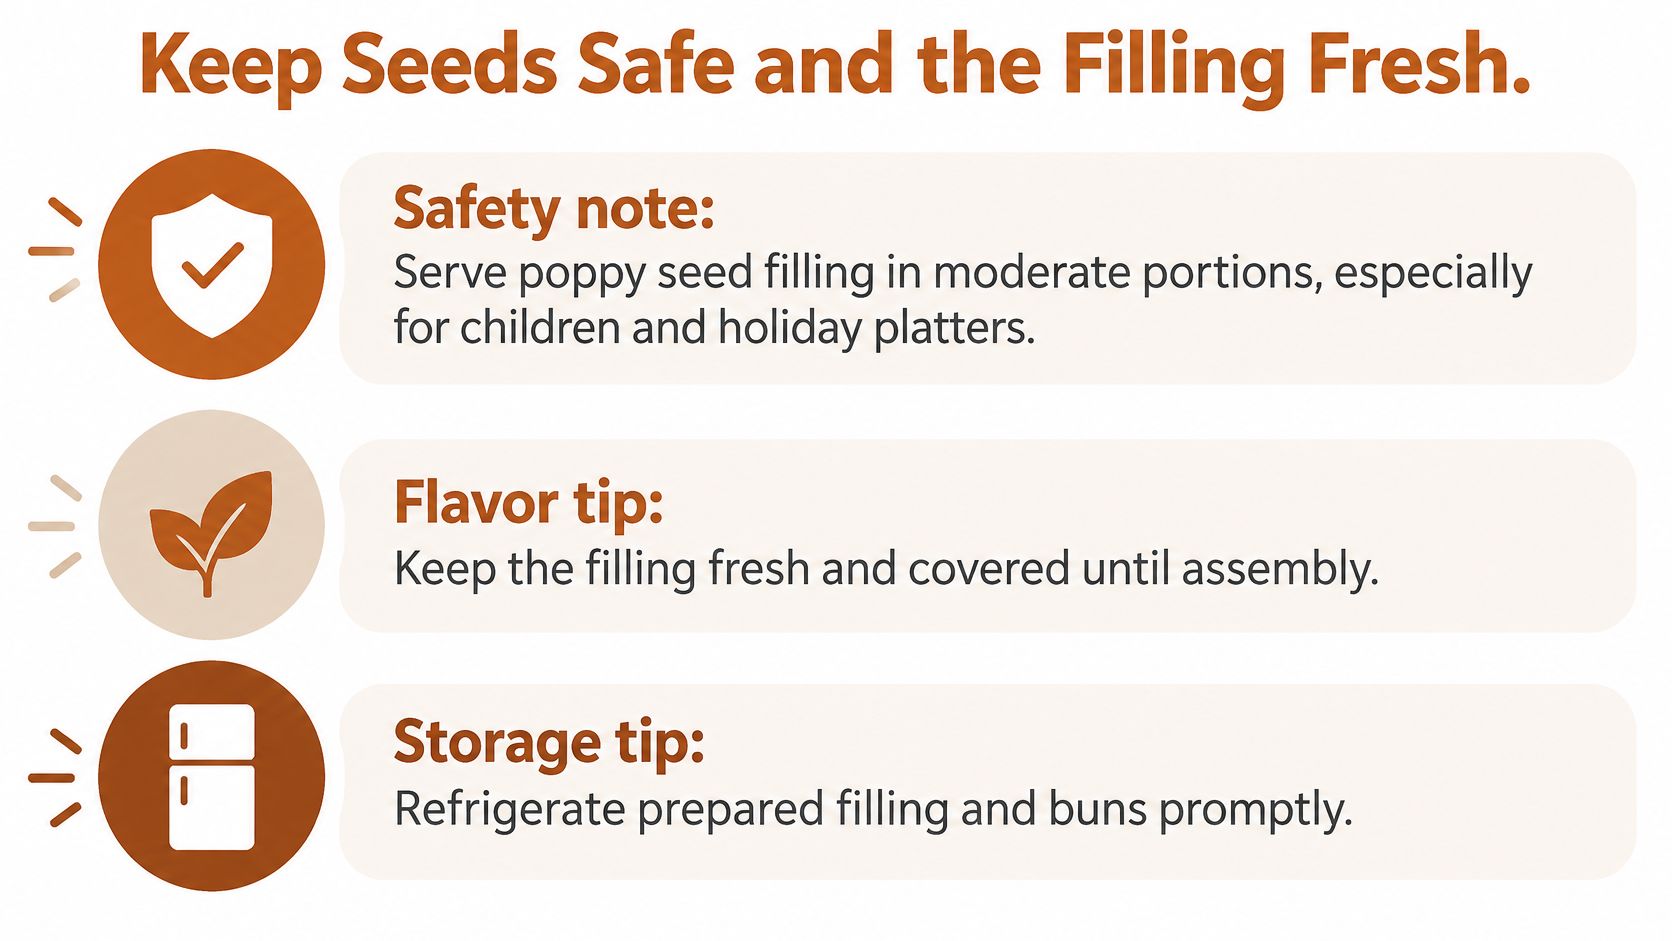
The checklist below separates serving precautions from flavor and storage habits.
Freshness is a separate check
Smell and appearance can help identify poor quality, but they can't establish alkaloid safety. A clean-smelling seed still needs appropriate sourcing.
For flavor, smell the seeds before grinding. If they smell stale, paint-like, or unpleasantly harsh, discard them rather than trying to hide the defect with honey or zest. Taste a small amount only after confirming that you have an appropriate food-grade product without obvious spoilage.
Keep unused whole seeds airtight and cold. Grind only what you intend to use, and keep prepared filling covered so its surface doesn't dry into a crust while the dough rises.
Light toasting is optional, not a requirement for a good filling. Stop when the seeds become aromatic; a dark roast can overwhelm their flavor and make it harder to judge whether the starting seeds were fresh.
A freshness check protects flavor. It does not replace buying food-grade seeds from a trustworthy supplier.
Aim for a filling that holds together on a spoon without leaving a puddle beneath it. If you make it ahead, refrigerate it rather than leaving a milk-containing paste on the counter until the next day.
Mix Knead and Build the Poppy Filling
Poppy seed buns belong to a wider Central and Eastern European family that includes Poland's makowiec, Slovakia's makovník, and Hungary's mákos bejgli, with doughs ranging from brioche-like to leaner sweet yeast preparations, as described by Human Food Atlas's history of poppy seed rolls. This version uses moderate enrichment so the dough stays manageable around a substantial filling.
Develop the dough before judging its stickiness
- Combine the dry ingredients. Whisk the flour, instant yeast, sugar, and salt until evenly distributed. You don't need to keep salt and instant yeast permanently separate; the useful habit is avoiding concentrated pockets in the bowl.
- Add the lukewarm milk and egg, then the cooled melted butter. Stir with a sturdy spoon or use a stand mixer's dough hook until no dry flour remains. Scrape the bowl's bottom, where flour often hides beneath a sticky mass.
- Knead until smooth, elastic, and slightly tacky. As a practical working window, allow roughly 8–12 minutes by hand or 6–8 minutes on low mixer speed, checking the dough rather than stopping automatically. It should stretch into a thin membrane before tearing, although it doesn't need the transparency of an exceptionally developed lean dough.
- Cover and let it bulk-ferment until visibly expanded. Press the surface gently: it should feel aerated, not like a firm lump of newly mixed dough. Don't insist on a dramatic doubling before moving on.
Avoid adding flour just because the dough clings to your fingers at the beginning. Kneading changes its handling, and a dough scraper lets you lift and fold it without covering the bench in flour.
For more detail on handling butter-enriched dough, the brioche dough guide explains the texture differences you'll encounter.
Make a cohesive filling
- Prepare the seeds while the dough rises. If toasting, use gentle heat and stop at the first clear aroma. Transfer the seeds to a heatproof bowl, cover with boiling water, and steep until softened.
- Drain through a fine sieve lined with a clean cloth if necessary. Press out free water, then grind in a poppy-seed mill or suitable grinder until the mixture begins to bind. A food processor may leave a coarser result, especially if its bowl is too large for the batch.
- Stir the sugar or honey into the warm ground seeds. Add milk gradually, stopping as soon as the paste spreads without dragging or crumbling. Cool completely before assembly.
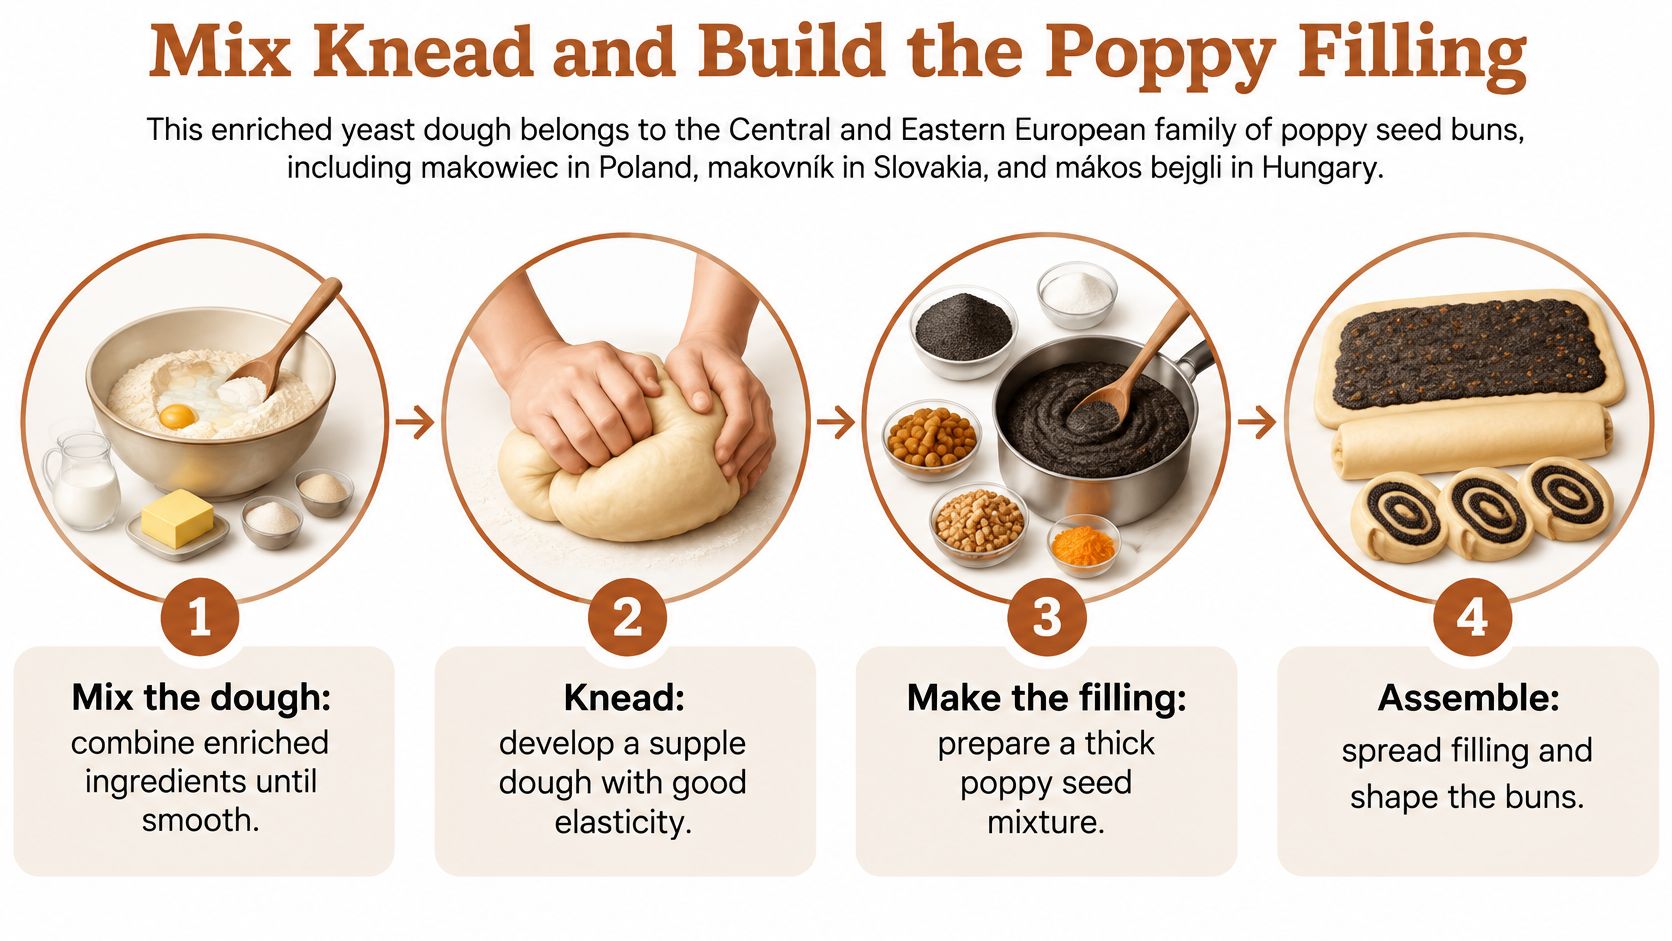
This process illustration shows the progression from mixed dough to filled pieces.
For the overnight path, break the refrigerated preferment into pieces and mix it with the remaining milk, flour, egg, sugar, salt, and butter. There's no need to add more yeast. The cold starter can delay the finished dough's expansion, so don't assume an overnight start always produces a shorter morning bulk.
Before shaping, check the workbench: lightly floured surface, expanded dough, cooled filling, and a lined tray within reach.
Shape Proof and Bake the Buns
A neat bun starts with an even piece of dough and a restrained filling layer. Don't stretch a thin patch over a mound of paste and expect the seam to hold during expansion.
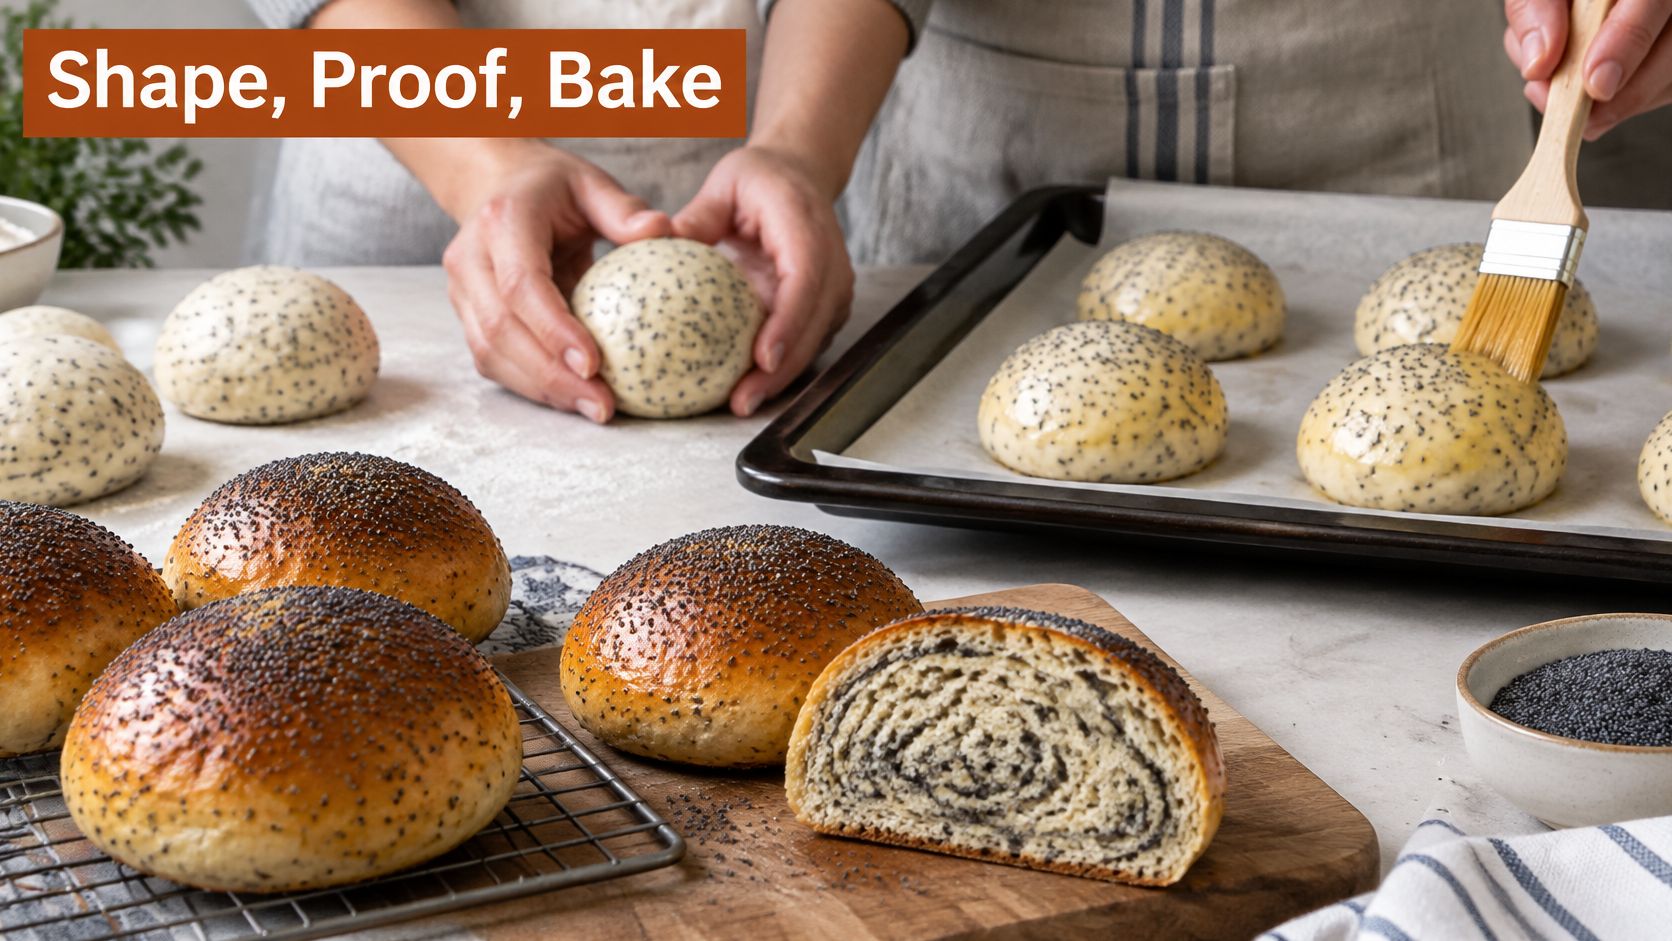
Use the shaping image as a visual guide to handling the dough without flattening all its air.
Build an even shape and a secure seam
- Divide the dough evenly. Weigh the whole dough and divide that reading by your intended bun count. For this formula, dividing into a dozen gives pieces of approximately 78 g before filling.
- Round the portions, then roll each into a short oval. If a piece springs back hard, cover it and let it relax while you work on another. Forcing it longer risks a thin center and thick ends.
- Spread a thin layer of cooled filling over each oval, leaving a bare border. Roll from a long edge into a rope, keeping the filling inside rather than squeezing it toward the seam.
- Pinch the seam closed. For a spiral bun, coil the filled rope and tuck the end underneath. Don't flour the sealing edge heavily, because a dusty surface won't adhere well.
- Arrange on the lined tray with room to expand. Leave more separation for individually browned buns, or use a suitable pan if you deliberately want soft pull-apart sides.
Proof until the dough responds slowly
- Cover loosely and let the shaped buns become puffy. A light finger press should leave an indentation that returns slowly. Immediate spring-back suggests the dough needs more time; a fragile surface that collapses under a gentle touch suggests it has gone too far.
The guide to proofing cinnamon rolls offers a useful comparison for reading filled enriched dough. With a refrigerated tray, check the center pieces as well as the warmer outside ones.
For controlled fermentation, our process leaves the hands-on work with you: knead your way, place the dough in the device for fermentation and proofing, then bake in your own oven. D'BakerAid doesn't change your recipe, ingredients, or method; its standard bake-ready time is about 80 minutes, separate from the overnight schedule described here.
- Brush gently with beaten egg. Keep wash from pooling around the base, where it can stick the bun to the liner. If adding seeds on top, use a thin scattering rather than a thick blanket.
For another view of dough handling, watch the demonstration before finishing your tray.
- Bake on the middle rack using the temperature on your counter card. Avoid opening the oven during the initial expansion. Check doneness through a doughy section rather than placing the thermometer tip in the seed filling.
A controlled bread-baking study published in the Journal of Food Engineering found that steam level affected heating, expansion, and crust quality. It doesn't establish a precise steam dose for these buns: if your oven offers controlled humidity, use only a brief initial phase, and never splash water onto egg-washed surfaces or hot oven glass.
Let the buns cool on a rack until the filling no longer smears when pulled apart. A browned exterior can still conceal a very hot center.
Fix Leaks Dense Crumb and Off Flavors
Inspect the tray before changing the recipe. A little escaped filling at one poorly sealed end calls for a different correction from uniformly heavy buns.
Start with the location of the defect. Leakage concentrated at seams points toward assembly; a heavy crumb across every bun suggests dough handling or proofing. Uneven browning across the tray may reflect oven position rather than an ingredient problem.
Match the symptom to the next change
Poppy seed bun problems and fixes
| Symptom | Likely cause | Fix |
|---|---|---|
| Filling leaks onto the tray | Warm paste, weak seam, or too much filling | Cool fully, seal firmly, place the seam underneath, and use a thinner layer; change the most obvious fault first |
| Dry or sandy filling | Seeds insufficiently ground to release their oil | Grind until the paste coheres; add milk only by the teaspoon |
| Dense heavy crumb | Extra flour or a short final proof | Stop flouring once the dough handles cleanly; allow a slow spring-back before baking |
| Torn spirals | Crust set before the bun expanded, or the shaped dough was underproofed | Check proof first; avoid early door opening and use only brief initial humidity if available |
| Pale soft crust | Excess steam or trapped moisture | Let the surface dry and brown after initial expansion |
| Bitter or paint-like filling | Oxidized seeds, not insufficient sugar | Discard the lot and replace it with fresh food-grade seeds |
Don't apply every fix in a row simultaneously. If the seam visibly opened, improve sealing before increasing proof time or changing oven humidity.
The same assembly discipline applies to other filled doughs: the pizza calzones recipe provides another useful example of keeping filling away from the sealing edge.
Separate flavor faults from fermentation faults
The American Society of Baking's guidance on poppy seeds recommends refrigerating ground seeds to slow rancidity. Grinding exposes more of the seed's oil, so the convenience of a large pre-ground supply comes with a freshness trade-off.
A stale filling won't improve if you extend fermentation. Likewise, a fresh, fragrant paste can still feel sandy if you haven't ground it sufficiently.
Next-batch note: Write down one symptom, one likely cause, and one change. Keep everything else consistent.
If the same weighed formula behaves differently between bakes, record the dough temperature and where you proofed it. A cold kitchen can stretch both fermentation stages; a warm spot can leave a tray ready before you've preheated the oven.
Keep the diagnostic table beside the cooling rack. Cut a fully cooled bun before judging crumb texture, because hot enriched dough can feel gummy even when it has baked through.
Store the Buns and Plan the Next Bake
Cool the buns completely before wrapping them. Trapped steam softens the surface and leaves moisture inside the container, particularly around the seed-filled folds.
For serving on baking day, keep the cooled buns covered until needed. If you're serving them for brunch, warm them gently rather than making them piping hot; the spiral stays clearer when the filling has time to settle.
Choose storage for the filling you made
Because this filling contains added milk, a cautious home-storage approach is to refrigerate leftover buns promptly once they've cooled. Room-temperature storage advice for plain bread isn't automatically a good fit for every moist, homemade filling.
- For the next serving: Keep refrigerated buns covered, then warm only what you need.
- For a later date: Freeze the fully cooled buns individually wrapped, with an outer freezer bag or airtight container.
- For reheating: Unwrap and warm in a low oven until the center is pleasantly warm. Avoid prolonged reheating, which dries the dough before the filling warms.
- For a quick snack: Split a bun, toast the cut faces gently, and add butter if you like.
A microwave can warm a bun quickly, but overheating makes the crumb chewy as it cools. Use short bursts if that's your only option, and eat the warmed bun promptly.
Repeat the formula before reinventing it
For the next bake, keep the ingredient weights unchanged and adjust the variable you observed. If fermentation was slow, choose a steadier proofing environment rather than adding more yeast immediately. If the filling tasted stale, replace the seeds before experimenting with sweetness.
Our recipe library contains about 30 tested recipes, with new recipes added monthly. The Paste & Bake app converts recipes into an 80-minute process and shows estimated annual time savings; D'BakerAid™ bread is bake-ready in about 80 minutes, although an intentionally overnight method remains a different scheduling choice.
You can browse the tested recipe library when you're ready to plan another dough. For this batch, the most useful next step is simpler: save your counter card with a note on how the finished dough felt when it was ready.
DBakerAid™ offers controlled fermentation and proofing for dough you knead, shape, and bake yourself, including enriched doughs like these poppy seed buns. Visit DBakerAid™ to explore the system if a steadier proofing environment is the part you want help managing.