

Easy bake white bread takes about 25 minutes of hands-on work, about 3 hours to come out of the oven and about 4 hours to reach the first slice on a standard room-temperature schedule. A fast-proof route cuts the total to about 3 hours before slicing.
You've probably got the flour out already and are trying to decide whether bread can fit around dinner, school pickup or tomorrow's lunch. It can, but the useful question isn't just how long the recipe takes. It's whether your kitchen is warm enough for the dough to keep that schedule.
A soft sandwich loaf needs ordinary ingredients, a scale and enough patience to let the dough expand before baking. The clock helps you plan; the dough tells you when to move.
Table of Contents
- Easy White Bread Timeline at a Glance
- Weighed Ingredients for One Pan Loaf
- How to Mix, Proof and Bake the Loaf
- Reading Dough Readiness Instead of the Clock
- Fixing Dense, Collapsed or Pale Loaves
- Adapting the Recipe for Machines, Ovens and Protein Loaves
- Pick Your Schedule and Bake This Week
Easy White Bread Timeline at a Glance
Allow roughly the same hands-on time whichever route you choose, then arrange the unattended rising around your day.
Timing by proofing route
| Route | Hands-on time | Out of oven | First slice |
|---|---|---|---|
| Standard, room temperature (70–80°F) | About 25 min | About 3 h | About 4 h |
| Fast proof, warm spot (85–90°F) | About 25 min | About 2 h | About 3 h |
| Fridge retard, overnight | About 30 min | The next morning, roughly 14–16 h after starting | Roughly 15–17 h after starting |
Treat these as planning windows, not appointments. At the longer end of both rises, the standard route will run beyond its headline estimate.
For the standard route, budget:
- Mixing and kneading: About 15–20 minutes, including weighing and bringing the dough together.
- First rise: About 60–90 minutes.
- Shaping: About 10 minutes.
- Second proof: About 45–60 minutes.
- Baking: About 30–35 minutes at 375°F (190°C).
- Cooling: At least 1 hour before cutting.
The rises account for most of the waiting. Kneading harder won't compensate for baking dough that hasn't expanded sufficiently.
Planning rule: Choose your route by when you can check the dough, not just when you can start mixing.
For an overnight loaf, leave room in the morning for the chilled dough to finish proofing. Refrigeration pauses your working day; it doesn't guarantee that the loaf will be oven-ready when you wake up.
Weighed Ingredients for One Pan Loaf
Start with a digital scale, a mixing bowl and a greased 9×5-inch loaf pan. Weighing matters because flour packed into a cup can make an otherwise sensible recipe unnecessarily stiff.
Ingredients for one 9×5-inch loaf
| Ingredient | Weight | Approx. measure | Job in the loaf |
|---|---|---|---|
| Bread flour | 500 g | About 4 cups, spooned and leveled | Gluten structure |
| Lukewarm water | 300–310 g | About 1¼ cups | Hydration, about 60–62% of flour |
| Instant yeast | 7 g | 1 packet, about 2¼ tsp | Leavening |
| Sugar | 12 g | 1 Tbsp | Yeast food and browning |
| Salt | 10 g | About 1¾ tsp, depending on crystal size | Flavor and rise control |
| Unsalted butter, softened | About 28 g | 2 Tbsp | Tender, softer crumb |
| Milk, optional swap | Up to 100 g in place of water | A scant ½ cup | Softer, slightly richer crumb |
The Illinois State Board of Education's bread-making instructional document places white-bread water absorption at approximately 60–62% of flour weight, equivalent to about 300–310 g water for 500 g flour before ingredient adjustments.
Adjust the water, not the whole formula
Begin with the lower water weight. If dry flour remains after thorough mixing, add water in small increments of about 5–10 g; don't chase a completely dry-to-the-touch dough by adding handfuls of flour.
A slight tack is useful. A stiff dough that cracks when folded needs attention, while a soft dough that briefly clings to your fingers may just need more kneading.
Sugar supports fermentation and browning, salt moderates the rise, and softened butter tenderizes the crumb. Milk makes a slightly richer loaf, but its crust can color sooner, so watch the top rather than increasing the baking temperature.
Use this guide to weighing baking ingredients if you're moving away from cups. Write your final weights on a recipe card, including any water adjustment, so the next loaf starts from a known formula.
How to Mix, Proof and Bake the Loaf
Set out an instant-read thermometer, a dough scraper and a cooling rack before mixing. Keep the scale nearby until the dough is fully combined.
Mix and develop the dough
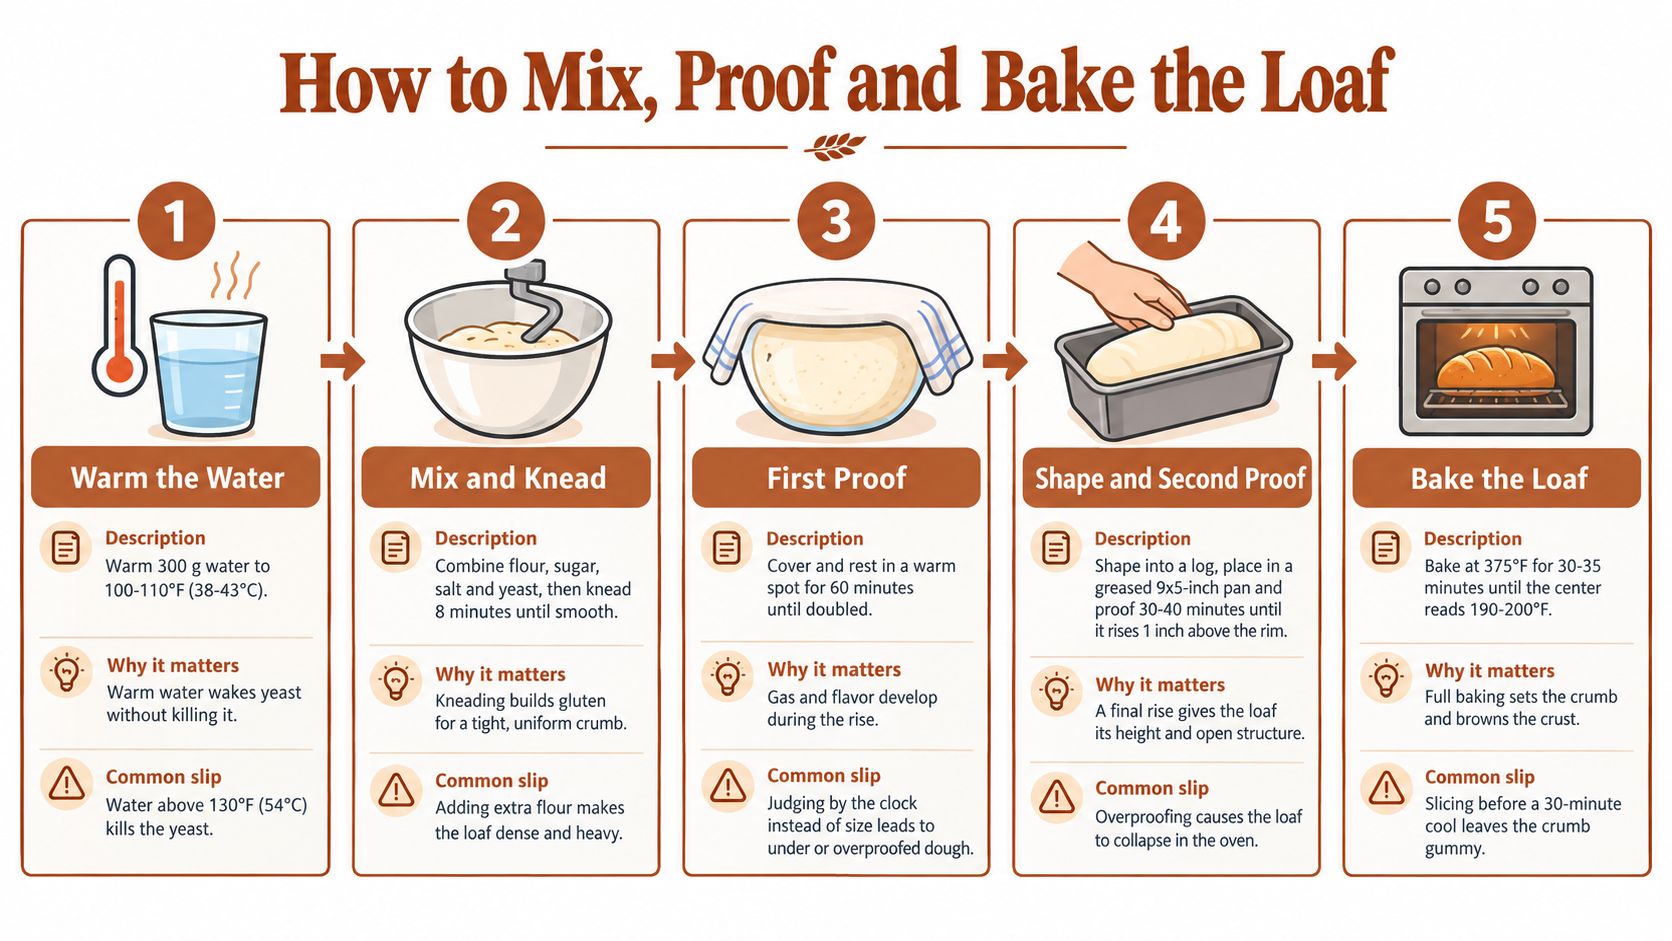
- Warm the water. Bring the initial water to about 100–110°F (38–43°C), checking with a thermometer rather than your hand. For active dry yeast, dissolve it and wait for visible foam; King Arthur Baking's yeast-bread primer recommends approximately 95–115°F liquid and a 5–6-minute wait, noting that damage begins around 120°F and yeast can be deactivated around 140°F.
- Whisk the flour, sugar and salt together, adding instant yeast directly to these dry ingredients if that's what you're using. Add the water or activated yeast mixture, then the softened butter, and mix until no dry flour remains; instant yeast doesn't need the separate soaking stage.
- Knead until elastic. Allow about 8–10 minutes by hand or 6–7 minutes in a stand mixer at a suitable dough-kneading speed. Stop when the dough is smooth, slightly tacky and able to stretch into a thin membrane without tearing immediately, rather than adding flour simply because it sticks at first.
The process graphic gives you a visual sequence. Use the detailed method for the temperature checks and full cooling period.
Rise, shape and bake
- Cover the bowl and let the dough rise in a comfortably warm environment, ideally around 75–85°F (24–29°C), allowing roughly 60–90 minutes as a starting estimate. Look for a distinctly puffy dough approaching doubled volume; a cool bowl of dough may need longer even when the room feels pleasant.
- Shape with tension. Press out the largest gas pockets, flatten gently and roll into a snug log that fits the pan. Pinch the seam closed and place it underneath in the greased pan, because a loose roll can spread unevenly or leave a tunnel through the slices.
- Cover loosely and allow approximately 45–60 minutes for the second proof, looking for a rounded dome about 1 inch above the rim. Begin preheating before the loaf reaches that point so you aren't leaving fully proofed dough waiting for a cold oven.
- Bake until the center is set. Bake at about 375°F (190°C) for 30–35 minutes, loosely tenting with foil after about 20 minutes if the surface is getting too dark. Check for a center temperature around 190°F (88°C), inserting the probe into the middle rather than measuring just beneath the crust.
- Turn the loaf out onto a rack and cool for at least 1 hour. Leaving it in the pan traps moisture around the sides, while slicing it hot compresses the soft interior and can make a properly baked loaf seem gummy.
Keep the oven closed during the early bake unless something needs correcting. Repeated checking releases heat without telling you much about the center.
Reading Dough Readiness Instead of the Clock
A recipe's timing assumes a dough temperature your kitchen may not provide. Cold flour, a chilly countertop and warm mixing water can produce a very different starting dough from the same ingredients in summer.
For the first rise, lightly flour a finger and press about half an inch into the dough. A dent that returns slowly while the dough remains visibly inflated suggests it's ready to shape; an immediate spring-back suggests it needs more time.
Match the check to the stage
During the second proof, look for a dent that returns only partway and leaves a small outline. A dent that stays fully open, especially in fragile or sagging dough, suggests over-proofing, although stickiness alone can also distort the test.
Use the bread poke-test guide alongside the loaf's height and surface condition. No single finger press is more reliable than the whole picture.
| Kitchen condition | Practical adjustment |
|---|---|
| Below about 68°F (20°C) | Allow roughly 1½–2 hours for the first rise and check about every 30 minutes |
| Above about 85°F (29°C) | Start checking around 45 minutes |
| Fast-proof setup | Keep the dough environment below about 90°F (32°C) |
| Overnight schedule | Refrigerate the shaped, covered dough for about 8–16 hours, then allow about 1 hour at room temperature before reassessing |
An oven with only its light on can provide gentle warmth, but measure it because some lights make enclosed ovens surprisingly hot. Alternatively, put the covered dough beside a cup of boiling water in a switched-off microwave.
Warm the space around the dough gently. Don't try to rescue a slow rise with direct heat.
For refrigerated dough, the morning warm-up is an estimate, not permission to bake a tight loaf. If the dough still looks low and resistant, let it continue proofing.
Fixing Dense, Collapsed or Pale Loaves
A dense, low-volume loaf doesn't automatically mean the yeast was expired. Under-fermentation and weak gluten can produce the same disappointing sandwich slices, and they need different corrections.
The Baking with Granny easy-bread guide provides a useful starting point for checking flour, yeast and warmth. Diagnose your own loaf by combining what happened during proofing with what you find after it cools.
Use the symptom to choose the next change
Loaf symptoms, causes and fixes
| Symptom | Likely cause | Fix on the next bake |
|---|---|---|
| Dense, tight crumb, low volume | Under-fermented or weak gluten | Knead to a window test and extend the first rise until the dough is puffy |
| Collapsed loaf, large irregular holes | Over-proofed, often in a warm room | Shorten the second proof and check at about 45 minutes |
| Dry, cracking dough or stiff ball | Too much flour | Weigh the flour and add water about 5–10 g at a time |
| Pale, soft crust, short oven rise | Oven not fully hot or thermometer off | Preheat about 30 minutes and verify with an oven thermometer |
| Gummy center, sticky slice | Underbaked or sliced while hot | Bake longer and cool at least 1 hour |
| Flat dough that never rises | Overheated mixing water or expired yeast | Check water temperature and test a pinch of yeast in warm water first |
For a tight crumb, think back to kneading. Dough that tore immediately when stretched needed more development; dough that stretched well but barely expanded needed more fermentation.
A collapsed top is different. If the dough was tall and delicate before baking, then sank, allowing an even longer second proof will make the next loaf worse.
Separate room problems from recipe problems
Dry cracks point toward hydration or surface drying, not a need for warmer proofing. Keep the dough covered and correct the water gradually rather than changing the yeast quantity.
A pale loaf needs an oven check before a formula change. Give the oven time to heat thoroughly, verify its temperature independently, and avoid assuming the preheat signal means the entire oven is evenly hot.
For a gummy middle, record both the center temperature and when you sliced it. A browned crust can conceal an underbaked interior, while early cutting can spoil the texture of a loaf that was fully baked.
Next-bake discipline: Change one variable, then keep the rest steady. Otherwise, you won't know which correction helped.
Keep a photograph and a short note with your recipe card. The homemade bread troubleshooting guide can help narrow the diagnosis when several symptoms appear together.
Adapting the Recipe for Machines, Ovens and Protein Loaves
A bread machine changes the mixing workflow, convection changes heat delivery, and a Dutch oven changes the loaf's shape and crust. Each one shifts the schedule, so treat printed minutes as a starting point and let the dough's behavior set the actual timing.
A dough-cycle machine plus a separate loaf pan gives you control of the final shape.
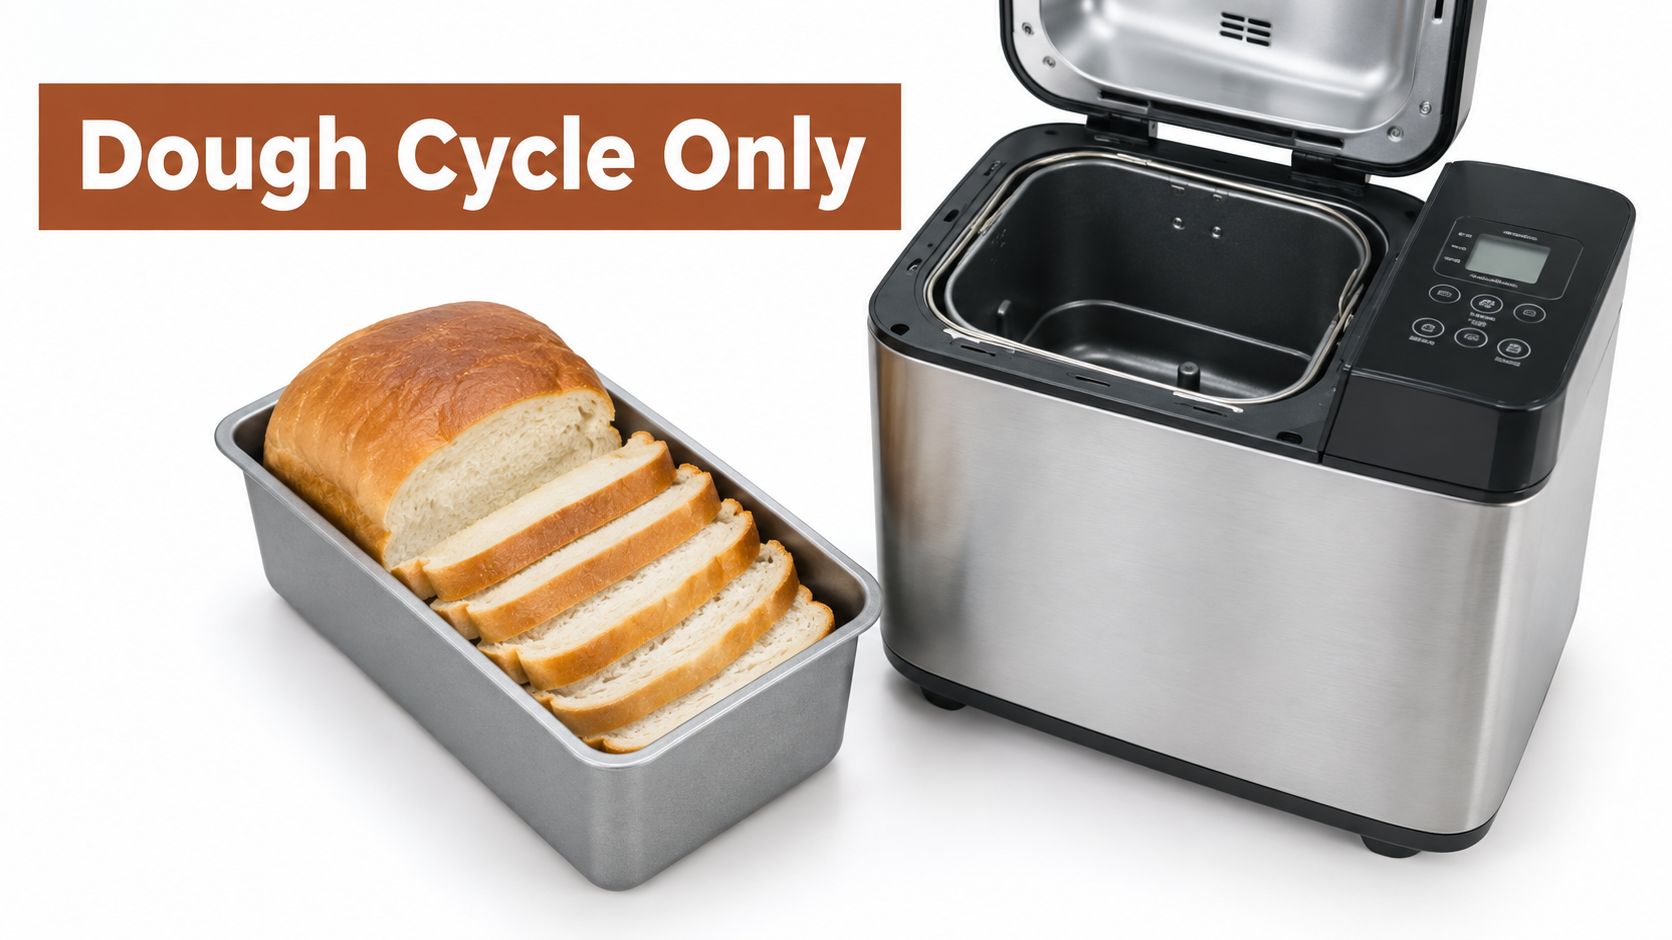
- Bread machine: Use the dough cycle, checking that the batch fits its capacity, then shape and bake in the loaf pan. Full-cycle results can run shorter or paler depending on the machine.
- Convection oven: Reduce the setting by about 25°F and start checking roughly 5 minutes early.
- Dutch oven: For a round adaptation, preheat the pot at about 450°F for 30 minutes, bake covered first and uncover to finish. The sandwich loaf's timing does not transfer unchanged.
- High altitude: Begin readiness checks earlier, because expansion can outpace the usual schedule.
Treat protein bread as a separate formula
Adding a scoop of powder to this white loaf will not give the same result. A dedicated homemade protein bread recipe balances whey, pea, soy or collagen isolate with vital wheat gluten and bread or whole-wheat flour.
DBakerAid's SureDough system offers temperature-controlled proofing programs, with an optional D'Steamer accessory. It sits alongside hand mixing and bread-machine dough cycles as one way to hold a steady proofing temperature, which matters more for doughs that forgive less.
The video provides another visual reference for the workflow.
Dedicated Pullman-style protein formulas are sized to the pan, and dough weight, baked yield and slice count all shift with the recipe and how thick you cut. Protein totals vary just as much with the flour blend and isolate brand, so read the label of the formula you choose rather than borrowing figures from another recipe.
| Protein recipe | Dough and crumb | Watch for |
|---|---|---|
| Whey + Sprouted Wheat | Stiff, slightly tacky dough; relatively cream-colored crumb | Faster crust browning |
| Vegan Pea + Whole Grain | Grey-green tint in the crumb | Beany flavor |
| Soy Multigrain Fitness | Darker-looking crumb than the whey versions | Stiffer handling |
| Seeded Whey + Flax | Cream-colored whey base with a seeded crumb | Faster crust browning |
| Collagen + Whole Wheat | Relatively cream-colored crumb | Collagen is not a complete protein |
For context, USDA-derived white-bread records put ordinary commercially prepared white bread at about 2.6–3 g protein per 29 g slice and approximately 9.4 g per 100 g. A dedicated protein formula is built to land above that baseline, but the margin depends on the recipe. Compare equal weights as well as slices, since thicker cuts inflate a per-slice comparison.
These protein doughs come off the mixer stiffer and slightly tacky, and they expand less than a plain white dough, so judge the proof by visible growth rather than waiting for a full double. Expect a tight, clean-slicing crumb that is soft but heavier, plus faster crust browning.
These are high-gluten loaves, not gluten-free bread. Since collagen is not a complete protein, that version should not be your pick if protein quality is the point.
Protein powder drives most of the ingredient cost, and it varies by isolate type and brand. Protein per dollar is the useful comparison, so check your local powder and loaf prices before assuming the homemade version saves money.
Pick Your Schedule and Bake This Week
Three routes fit this loaf: the standard route if you'll be home to check both rises, the warm route if you can monitor the proofing space, or overnight refrigeration if tomorrow morning is easier. The clock times differ between them, but the readiness checks stay the same: you're still looking for expansion and elasticity before shaping, and a fully heated oven before the final proof ends. For a first attempt, I'd choose the standard route and keep the formula unchanged.
- Before mixing: Weigh the flour and water, check the water with a thermometer and record when fermentation starts.
- Before shaping: Check expansion and elasticity rather than moving on because a timer rang.
- Before baking: Have the oven fully heated before the dough reaches its final proof.
- After cooling: Keep the loaf covered at room temperature for about 2–3 days, freezing sliced portions you won't use. Paper or cloth preserves a firmer crust but lets sandwich bread dry sooner than a bread bag.
- On the next bake: Adjust water, fermentation or baking time, not all three.
That last point matters because the right fix usually comes from the room conditions. A loaf that proofs slowly in a cool kitchen calls for a warmer spot or the overnight route; the same dough in a warm kitchen may need only a shorter fermentation window. Changing one variable at a time tells you which adjustment the room required.
Temperature control is worth considering if inconsistent room conditions regularly disrupt your baking. The system includes a 30-day money-back guarantee, so weigh the purchase against how often you'll use it rather than expecting an appliance to replace weighing, shaping and checking doneness.
For a dedicated protein formula instead of an improvised powder substitution, use the high-protein recipes and pick the whey, pea or soy version according to your preferences. Check the full recipe before buying ingredients.
DBakerAid™ offers controlled yeast fermentation and dough proofing for bakers who want less guesswork when the kitchen temperature changes. Visit DBakerAid™ to shop the system and decide whether controlled proofing fits your white-bread routine or high-protein baking plans.