

You're standing over a loaf that looks close. The dough is puffy, the oven is hot, and one decision remains: bake now, or give it another twenty minutes? You flour your finger, press the surface, and watch the dent. It springs back quickly, so you wait. Later, the loaf comes out squat with a tight crumb. Another day, you see almost no rebound, bake immediately, and still get a loaf that spreads.
The bread poke test is useful because it's fast, free, and takes only a few seconds. It's also easy to overtrust. The same indentation can reflect fermentation, temperature, hydration, flour strength, or the way you pressed.
The reliable approach is to treat the poke as one signal inside a small process-control system. Read it alongside dough temperature, volume, surface tension, and jiggle, then adjust for the dough in front of you.
Table of Contents
- The Two Seconds That Decide Your Loaf
- How to Perform the Bread Poke Test the Right Way
- Reading the Poke by Dough Type
- When the Poke Test Gives You a Lie
- Better Signals to Pair With the Poke
- Troubleshooting Overproofed and Underproofed Dough
- Your Poke-Test Protocol and Quick Answers
The Two Seconds That Decide Your Loaf
The classic scene happens at final proof. A baker leans over a banneton or loaf pan with a flour-dusted finger hovering above the dough, trying to decide whether the loaf has enough gas to rise in the oven or has already gone too far. The test seems almost absurdly simple. Press the dough, watch it respond, and bake according to the result.
That simplicity explains its staying power. Standard guidance describes a quick full spring-back as underproofed, a slow partial rebound as ready, and no spring-back as overproofed. The Perfect Loaf guide to the dough poke test describes it as a rapid final-proofing check, while also warning that cold dough straight from refrigeration can make the reading unreliable.
The trouble starts when bakers treat those three outcomes as universal. A cold dough may feel tight because its gluten hasn't relaxed. A warm, highly fermented dough may feel slack. A high-hydration dough can lose its shape under a light touch even when its fermentation is progressing normally. Enriched doughs, high-protein doughs, and doughs made with different flour strengths all change the meaning of the rebound.
Practical rule: A poke tells you how the surface responds at that moment. It doesn't tell you the entire fermentation history.
The test is still worth using. It gives you a quick read on tension and recovery, especially when you repeat it in more than one place and compare it with visible volume. The baker's job is not to find a magic indentation. It's to decide whether the dough has enough structure and gas to survive scoring, oven expansion, and baking.
Before changing your timing, get the physical technique right. A careless poke can create its own false result.
How to Perform the Bread Poke Test the Right Way
Start with the index finger, not two fingers pressed together. Lightly flour the fingertip so it releases from the dough without sticking, dragging, or tearing the surface. Too much flour can create a dry patch that hides the actual response.
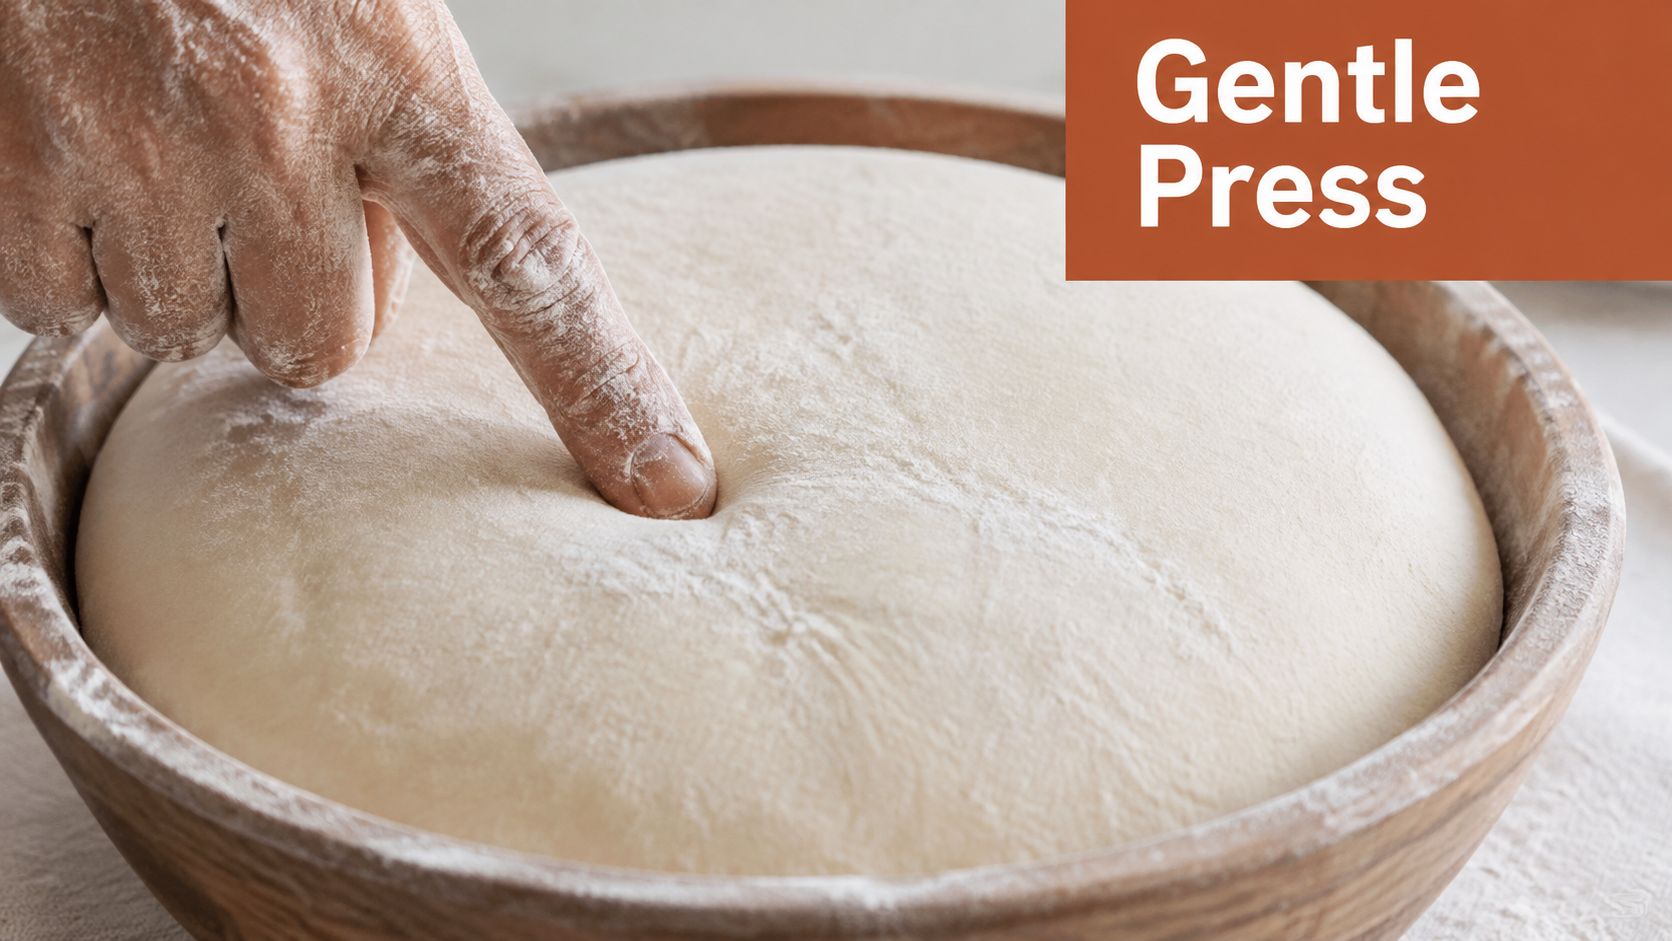
Choose the thickest central area of the dough. The edge of a loaf pan or the thin shoulder of a boule won't represent the interior as well as the middle. Press straight down about 1/2 inch, hold for roughly one second, and withdraw vertically. Don't twist your finger on the way out, and don't push hard enough to collapse the dough around the indentation.
Read both the rebound and the recovery
Watch the dough in two stages. First, notice the immediate spring as your finger leaves. Then watch whether the cavity slowly fills or remains open.
- Underproofed dough springs back quickly and almost completely. A fast rebound over the first few seconds usually means the gluten is still carrying substantial tension and the dough needs more time.
- Properly proofed dough responds slowly. The indentation rises gradually and leaves a faint, doughy mark that remains mostly visible for several seconds.
- Overproofed dough feels slack and fails to recover. The indentation stays open, the surface may dimple inward, and the dough can seem fragile rather than elastic.
These are working descriptions, not laboratory thresholds. The Challenger Breadware proofing guide recommends checking multiple spots because fermentation isn't perfectly even. It also advises rechecking dough that appears underproofed every 20 to 30 minutes, while a fully open indentation means you're already in the overproofing window and should bake promptly.
Press a second spot away from the first. If one location rebounds quickly and another recovers slowly, don't average the two blindly. Look at the loaf's overall volume and shape, then test again in a less disturbed area.
The poke test is a snapshot. A short video demonstration can help you see the difference between a quick rebound, a slow fill-in, and a surface that stays collapsed.
For shaped loaves, handle the dough gently after testing. The aim is to inspect the gas-filled structure, not to squeeze it flat. Bakers working with a basket can also review how a banneton proofing basket supports shaped dough before relying on a poke alone.
Reading the Poke by Dough Type
A poke that looks correct on a sandwich loaf may be misleading on cold sourdough or enriched dough. Fermentation speed, gluten extensibility, fat, sugar, and temperature all affect how the dough resists and recovers from pressure.
A lean sandwich dough at about 75 to 78°F often gives the cleanest textbook response. Active sourdough at a similar temperature can take longer to proof and may hold an indentation longer because its gluten network is more extensible. That doesn't automatically mean it has crossed into overproofing.
Cold-retarded dough is the common trap. A loaf pulled from a refrigerator around 38°F after 12 to 16 hours can feel firm and spring back as if it needs more fermentation, even though the cold has tightened the dough. Let it warm for 30 to 90 minutes before trusting the poke, unless your formula specifically calls for baking directly from cold.
Enriched dough deserves a different priority. Butter, eggs, and sugar can make brioche or panettone feel soft while also producing a delayed response. In those doughs, volume, doming, and the way the dough holds its shape are often more informative than the indentation alone.
Poke-Test Expectations by Dough Type
| Dough Type | Typical Proof Time | Correct Poke Response | Watch For |
|---|---|---|---|
| Sandwich loaf | 1 to 2 hours at 75 to 78°F | Slow fill-in with a faint mark remaining | A loaf that rises only 50 to 75% may be ready before it doubles |
| Room-temperature sourdough | 3 to 5 hours at similar room temperature | A lingering indentation with elastic recovery | Jiggly dough, bubbles, and a gently domed surface |
| Cold-retarded sourdough | 12 to 16 hours refrigerated, then warming time | Test after warming, not immediately from the refrigerator | A firm rebound can be a temperature effect |
| Enriched dough | Formula and room temperature vary | Delayed rebound, interpreted with volume | Softness can imitate readiness, while fat and sugar alter elasticity |
The table gives you a starting comparison, not a substitute for observation. Flour strength also matters. Stronger dough can maintain tension longer, while weaker or more extensible dough may show less resistance even when its internal gas development is adequate.
The right question is not “What did the poke say?” It's “Does this response make sense for this dough, at this temperature, with this amount of visible growth?”
When the Poke Test Gives You a Lie
The poke test doesn't fail because the baker lacks a special touch. It fails because the dough's physical state changes the signal.
Cold dough below 70°F can read tight and underproofed because the gluten hasn't relaxed. Warm dough above 85°F can rebound slowly and resemble overproofing even when the fermentation is still on schedule. High-hydration dough above 75% hydration can slump after pressing, creating an open mark that looks like a loss of structure.
The important limitation is that the provided baking guidance doesn't establish a validated universal conversion between temperature and apparent rebound. Claims such as a fixed number of extra minutes for every temperature drop sound precise, but they aren't safe to apply across different flours, yeast levels, hydration, and dough shapes. Use temperature as context, not as a mathematical correction.
How Dough Temperature Skews the Poke Test
| Dough Temp | Apparent Read | True State Often Is | Correction |
|---|---|---|---|
| Below 70°F | Tight, fast rebound | Fermentation may be further along than the poke suggests | Warm the dough and retest |
| About 75 to 78°F | More interpretable rebound | The standard signal is easier to compare with volume and jiggle | Use the poke with at least one additional cue |
| Above 85°F | Slow recovery or slack surface | Heat may be exaggerating softness | Check rise, structure, and fermentation history |
| Very high hydration, above 75% | Open dent and weak recovery | Slumping may reflect hydration rather than overproofing | Lead with volume, bubbles, and dough strength |
Enriched doughs add another complication. Butter and eggs change the way pressure travels through the dough, while sugar can alter fermentation behavior. A stiff starter or very strong flour can also absorb a press and return a tight reading without giving you a complete picture of the gas distribution.
Record the dough temperature when you test. Write down whether it was at room temperature, recently warmed, or taken from refrigeration, along with the visible rise and the time since shaping. Over several bakes, that simple log lets you calibrate your own formulas instead of treating every poke as an isolated truth.
Better Signals to Pair With the Poke
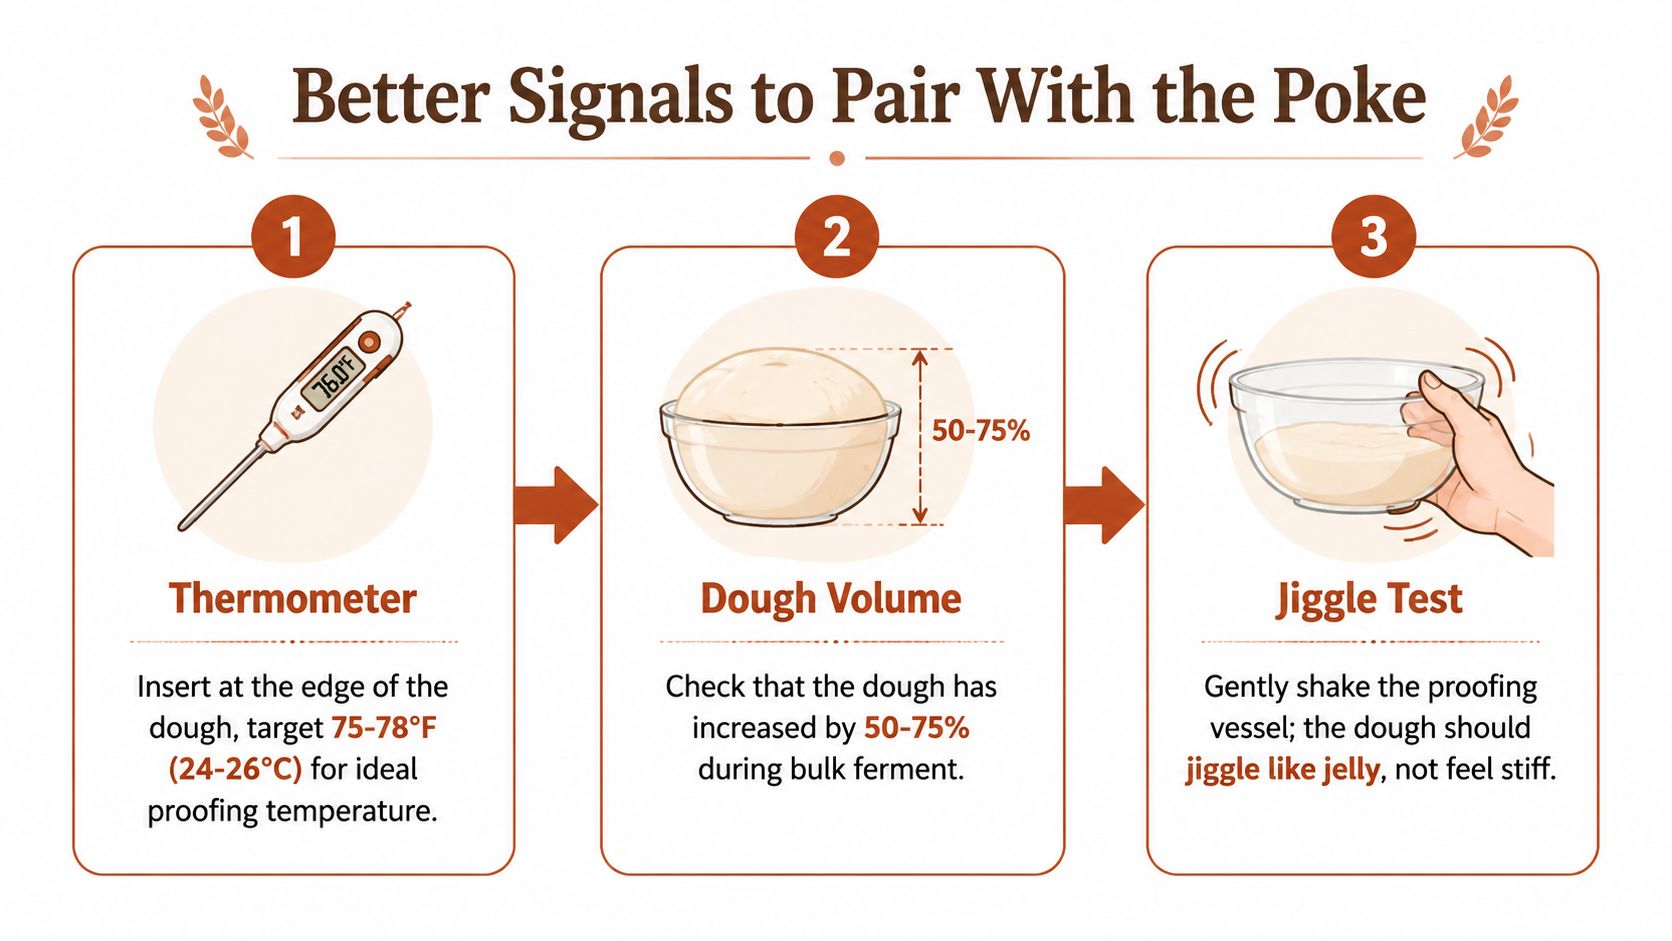
A dependable proofing decision uses several modest clues rather than one dramatic test. The poke helps you assess gluten tension and recovery, but temperature confirms the environment, volume shows gas accumulation, and jiggle tells you whether the dough has developed a coherent internal structure.
Use an instant-read thermometer at the edge of the dough, where you can avoid collapsing the center. For active bulk fermentation, a useful working range is about 75 to 78°F. During final proof, compare the dough temperature with the surrounding room rather than treating a single reading as a universal target.
Volume is the visual anchor. A sandwich loaf may be ready after rising roughly 50 to 75%, while a sourdough formula can follow a different expansion pattern. Don't force every dough to double. The shape of the container, flour strength, hydration, and the amount of headspace all affect what “ready” looks like.
Then gently shake the bowl or pan. A properly developed dough often jiggles like soft jelly. A stiff, unmoving mass may need more fermentation or relaxation, while a loose dough that ripples and collapses may have lost too much structure.
Run the decision in under a minute
- Check temperature. If the dough is unusually cold or hot, downgrade your confidence in the poke.
- Check volume. Compare the current height with the starting mark on the container or pan.
- Check movement. Look for a controlled jiggle, not a rigid block or collapsing puddle.
- Perform two light pokes. Compare the immediate rebound and the slow fill-in.
- Choose the action. Bake, wait and retest, or handle an overproofed dough gently.
Temperature is most useful when the dough has been refrigerated or the kitchen is unusually cool. Volume leads on enriched doughs, where the poke can be soft and delayed. Jiggle is especially valuable for sourdough bulk fermentation, while the final-proof poke becomes more useful after the dough has warmed and the surface tension is established.
For the relationship between proofing conditions and expansion in the oven, see this explanation of what oven spring is and how proofing affects it. The same principle applies here: a loaf needs enough remaining structure to expand, not merely an indentation that looks familiar.
Troubleshooting Overproofed and Underproofed Dough
The three-outcome rule is too blunt for rescue work. A fast spring-back is a warning, not a sentence. A motionless dent is serious, but you still need to inspect the dough's shape, surface, and strength before deciding whether the loaf is finished.
Underproofed dough usually feels tight and resists expansion. In the baked loaf, that often appears as a dense crumb, scoring that tears aggressively, and a paler crust. At the bench, the poke snaps back quickly without the slow, gradual fill-in that suggests the gluten has relaxed.
If you catch underproofing before shaping, give the dough a warm, protected place for 15 to 30 minutes, then reassess its volume and surface. During final proof, use shorter checks rather than repeatedly pressing the same spot. The sourdough troubleshooting guide is useful for separating a fermentation problem from a shaping or handling problem.
Overproofed dough tells a different story. The top may look excessively domed and deflate during scoring, the shaped loaf may flatten when turned out, and the baked interior can turn gummy. The poke stays open because the dough no longer has enough elastic strength to recover.
A fully open indentation is not a request for more time. It is a signal to bake or reshape immediately.
If the dough still has enough structure to handle, degas it gently, rest it for 10 minutes, and reshape with minimal handling. You won't restore every lost gas cell, but you may recover a serviceable loaf. Heavily overproofed enriched dough often won't support a second loaf attempt. Bake it as a flatbread or turn it into crackers instead of forcing it through another shaping cycle.
Your Poke-Test Protocol and Quick Answers
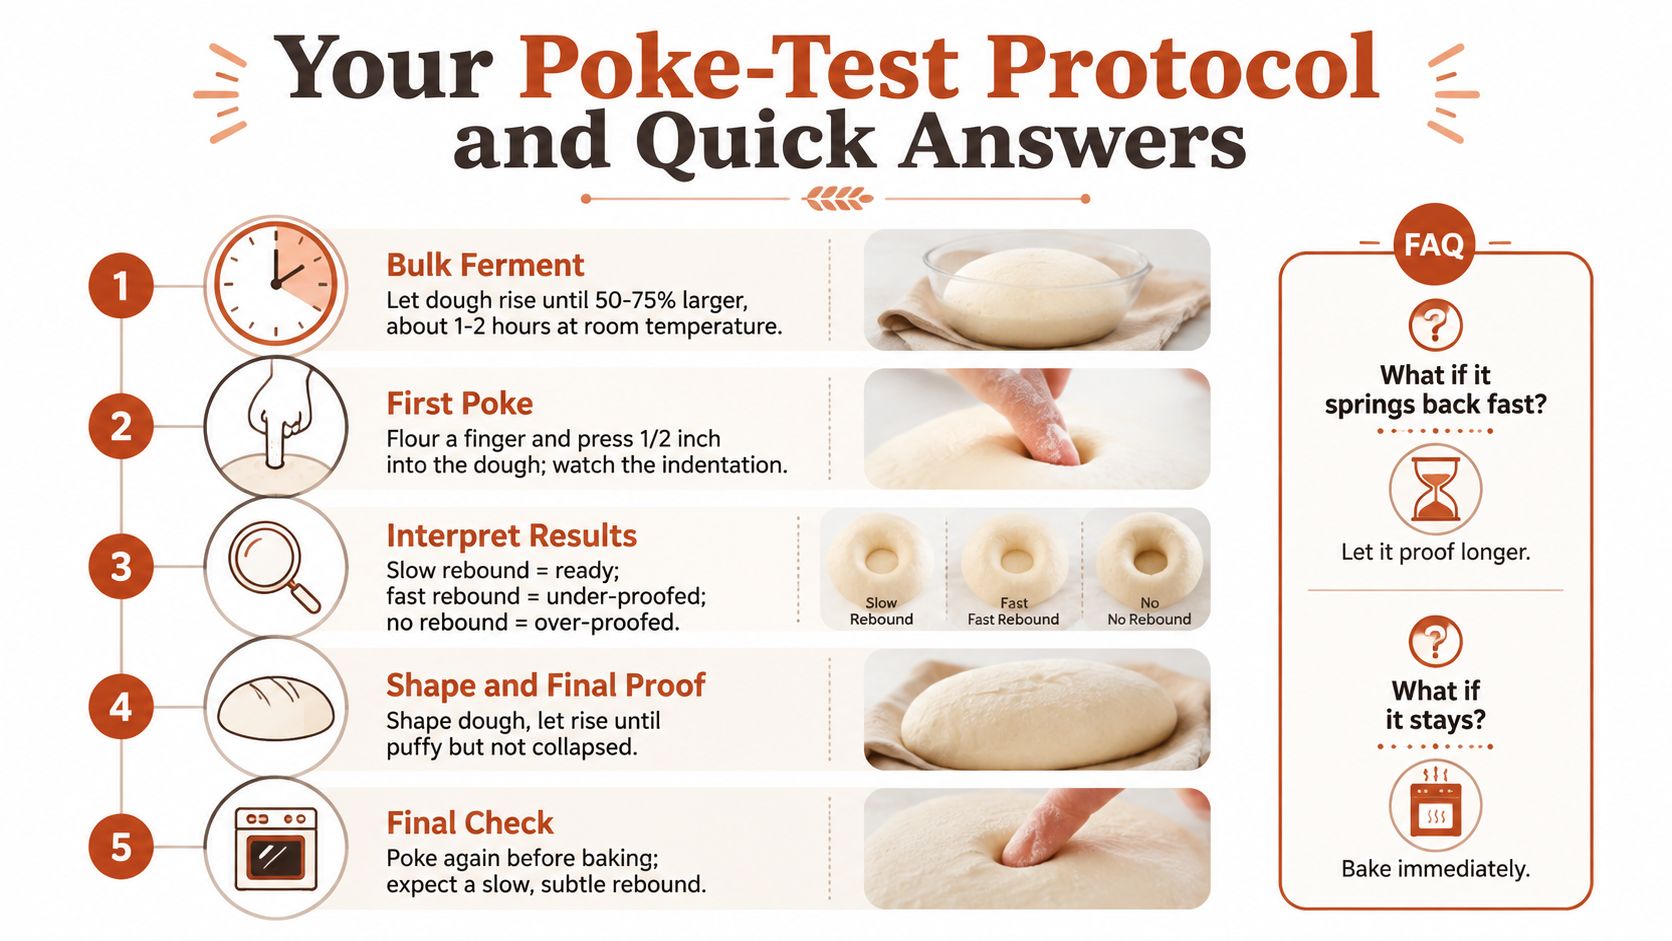
Use this bench-side protocol to turn the poke test into one process check, not a yes-or-no verdict:
- Track the dough before testing. Mark the container at the starting level, then note its rise, temperature, and surface activity. Volume gives the poke a reference point.
- Set a retest plan. If the first reading conflicts with the dough's volume or feel, wait briefly before checking again. Use a fresh spot rather than pressing the same indentation repeatedly.
- Adjust for temperature. Warm dough usually recovers faster. Cold-retarded dough can feel firm and give a misleadingly quick rebound, so compare it after some warming rather than treating the refrigerator reading as final.
- Check the container and loaf together. Compare the dough's height, bubbles, elasticity, and jiggle with the indentation. A slow-filling mark has more meaning when those cues point in the same direction.
- Record the decision. Note the dough temperature, approximate rise, poke response, and whether the loaf held its shape. These notes make the next bake easier to judge.
Quick answers
Does the poke test work for pizza dough? It can help after shaping, but relaxation, extensibility, and resistance to snapping back are better checks for pizza dough.
Should I poke during bulk fermentation? Use it sparingly. Volume, bubbles, and dough strength usually provide better guidance during bulk fermentation.
Why does a slow-filling dent feel ambiguous? Temperature, hydration, flour strength, and enrichment can all change recovery. Pair the poke with an independent cue before deciding.
Can I test cold-retarded dough straight from the refrigerator? You can observe it, but do not treat the result as definitive. Cold dough often feels firmer, so warming and retesting gives a more useful comparison.
If temperature swings make these comparisons difficult, DBakerAid™ combines a Stage 1 yeast fermentation bowl, a Stage 2 dough proofing bowl, and a temperature-and-time control hub. An optional D'Steamer supports humid baking conditions. Visit DBakerAid™ for details on the system.