

You pull a loaf from the oven, admire the browned crust, and feel optimistic until it cools. Then the loaf sinks on the rack, the knife drags through a gummy center, or the crumb reveals tight, uneven holes where you expected a soft sandwich slice. Homemade bread troubleshooting gets easier when you stop treating the symptom as the diagnosis.
Most failed loaves trace back to a small group of upstream variables, temperature, fermentation timing, hydration, measurement, gluten development, and bake completion. Read the loaf first, then reconstruct the process, and change one variable at a time. That approach works for ordinary yeasted bread, sourdough, and difficult high-protein doughs, where extra protein can make dough stiffer and less forgiving.
Table of Contents
- When Homemade Bread Goes Wrong
- The Diagnostic Workflow That Solves Most Failures
- Dense Crumb and Poor Rise
- Gummy Interior and Collapsed Loaves
- Thick Crust and Crust Color Problems
- Measurement Accuracy and Proofing Environment
- A Repeatable Troubleshooting Checklist
When Homemade Bread Goes Wrong
The disappointing loaf usually gives you more information than you think. A heavy loaf with a tight crumb points you toward fermentation or structure. A loaf that rises impressively and then wrinkles on the cooling rack points somewhere else. A dark crust over a sticky center suggests that the oven finished the surface before the interior, not that the recipe necessarily needs more flour.
Read the loaf before changing the recipe
Start with the outside. Did the dough rise evenly, or did it spread sideways? Did the top hold tension before baking? Did the crust brown gradually, or did it darken long before the center could set? Those observations tell you whether the failure began during mixing, fermentation, shaping, or baking.
Then slice through the center rather than judging the heel. Look for tight and uniform holes, large tunnels, a wet or glossy crumb, or a crumb that pulls apart cleanly. The texture often identifies the failed stage more accurately than the loaf's height.
Practical rule: Don't add flour, yeast, or water until you know which stage failed. A correction aimed at the wrong stage can hide the original problem and create a second one.
Temperature deserves early attention because yeast dough has a narrow effective window. Dough is commonly mixed around 78° to 82°F, proofed around 80° to 85°F, and often reaches an ideal post-mixing dough temperature around 84° to 86°F, as summarized in this bread science reference. Dough that runs cold ferments slowly, while dough that gets too warm can ferment past its useful strength.
That principle also explains why professional baking feels repeatable. Leavened bread has ancient roots, including evidence from Mesopotamia around 10,000 BC, while sourdough-style bread dates to at least 3700 BC in Switzerland, and baker's yeast became common only in the last roughly 150 years, according to the same historical overview. The tools changed, but the debugging logic stayed familiar: control temperature, timing, and hydration.
The Diagnostic Workflow That Solves Most Failures
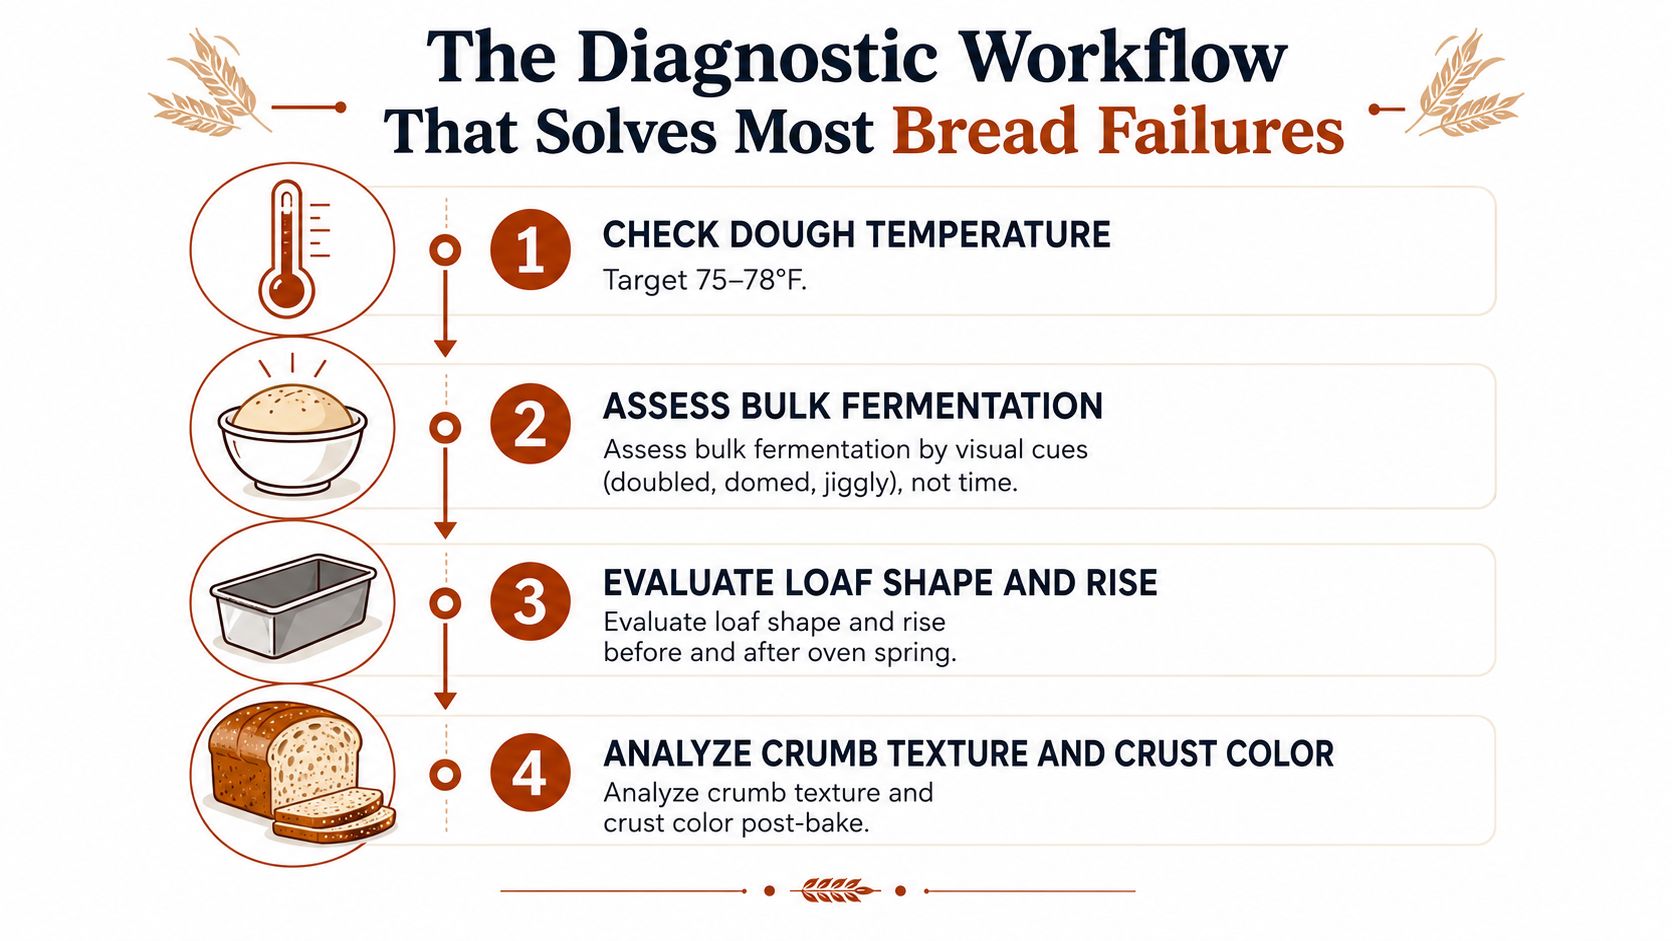
Troubleshoot in the order that controls everything downstream. Check dough temperature first, judge fermentation second, then audit measurement. This sequence keeps you from changing hydration when a cold ferment caused the failure.
Step one checks temperature
Probe the center of the mixed dough with an instant-read thermometer. For many yeasted doughs, a practical working target is around 75° to 78°F, although the recipe's intended dough temperature carries more weight than a universal target. Colder dough ferments slowly. Warmer dough may ferment faster and lose structure sooner, so adjust your expectations and watch the dough rather than following the clock blindly.
Measure the dough itself, not only the room. Water and flour temperature, mixing friction, and the bowl can all shift the final result. If the dough temperature is wrong, timing and texture will be wrong as well.
Step two evaluates fermentation
Mark the dough level in a straight-sided container. Look for noticeable expansion, a gently domed surface, and a dough that jiggles without appearing fragile. A finger indent that returns slowly usually gives a better readiness check than a fixed timer.
For sourdough, inspect the starter before mixing. It should show active expansion and hold a stable structure. A starter that bubbles and then collapses may create activity without enough lifting power.
Use the bread poke test guide to compare rebound speed with the dough's stage. Press consistently each time. Random pressure produces inconsistent readings and makes the test harder to interpret.
Step three audits measurement
Weigh flour and water, particularly for wet or enriched doughs. Volume measurement can vary substantially, especially with flour, so inaccurate dosing can imitate a fermentation or hydration problem. Review this measurement and bread-baking guidance when checking how measurement affects repeatability.
Record the dough temperature, fermentation observations, and ingredient weights before changing the formula. Change one variable per bake. Altering flour, water, yeast, proof time, and oven temperature together may improve the loaf, but it will not identify the failed stage.
Dense Crumb and Poor Rise
A dense crumb can come from insufficient gas production, weak gas retention, or a dough that never developed enough strength to hold its bubbles. The slice usually shows small, tight holes, often unevenly distributed, instead of a flexible structure with varied but connected air pockets.
Under-proofing is the first suspect
Under-proofed dough hasn't generated or retained enough gas before baking. It may feel firm, resist shaping, and spring back quickly when poked. Extend bulk fermentation until the dough has expanded noticeably and a light finger indent returns slowly. Don't automatically warm the dough and extend the time at once, because either change can be enough to move the dough into a different fermentation stage.
Weak or expired yeast creates a similar result. Before mixing a critical dough, dissolve the yeast in warm water with a pinch of sugar and wait for visible activity. If it stays inactive, replace it rather than trying to compensate with a long proof.
Structure controls rise
Insufficient kneading leaves gluten underdeveloped. Test the dough after kneading by stretching a small piece thinly. If it tears immediately instead of forming a translucent windowpane, continue developing it gently and reassess.
High-protein flour can also create a dense loaf when the dough doesn't contain enough water for that flour's absorption. The dough may feel stiff, resist expansion, and bake into a tight slice. Lower hydration by about 5% or switch to a flour that suits the formula. The trade-off is real: more hydration and longer fermentation can support a more open crumb, but they also raise the risk of slack dough and over-proofing.
| Symptom | Likely Cause | Corrective Step |
|---|---|---|
| Tight, uneven crumb | Under-proofed dough | Extend bulk fermentation and use visual cues |
| Little or no rise | Weak or expired yeast | Test yeast in warm water before mixing |
| Dough tears during stretching | Weak gluten development | Knead until the dough passes a windowpane check |
| Stiff, resistant dough | High-protein flour with insufficient hydration | Reduce hydration by about 5% or change flour |
| Open crumb attempt turns flat | Fermentation pushed too far | Shorten fermentation and strengthen shaping |
High-protein bread needs the same discipline, with less room for casual substitutions. Whey, pea, soy, and collagen isolates add protein, while vital wheat gluten and wheat flour provide the structure. These loaves are not gluten-free, and the plant-based versions still rely on wheat structure unless a separate gluten-free formula is used.
Gummy Interior and Collapsed Loaves
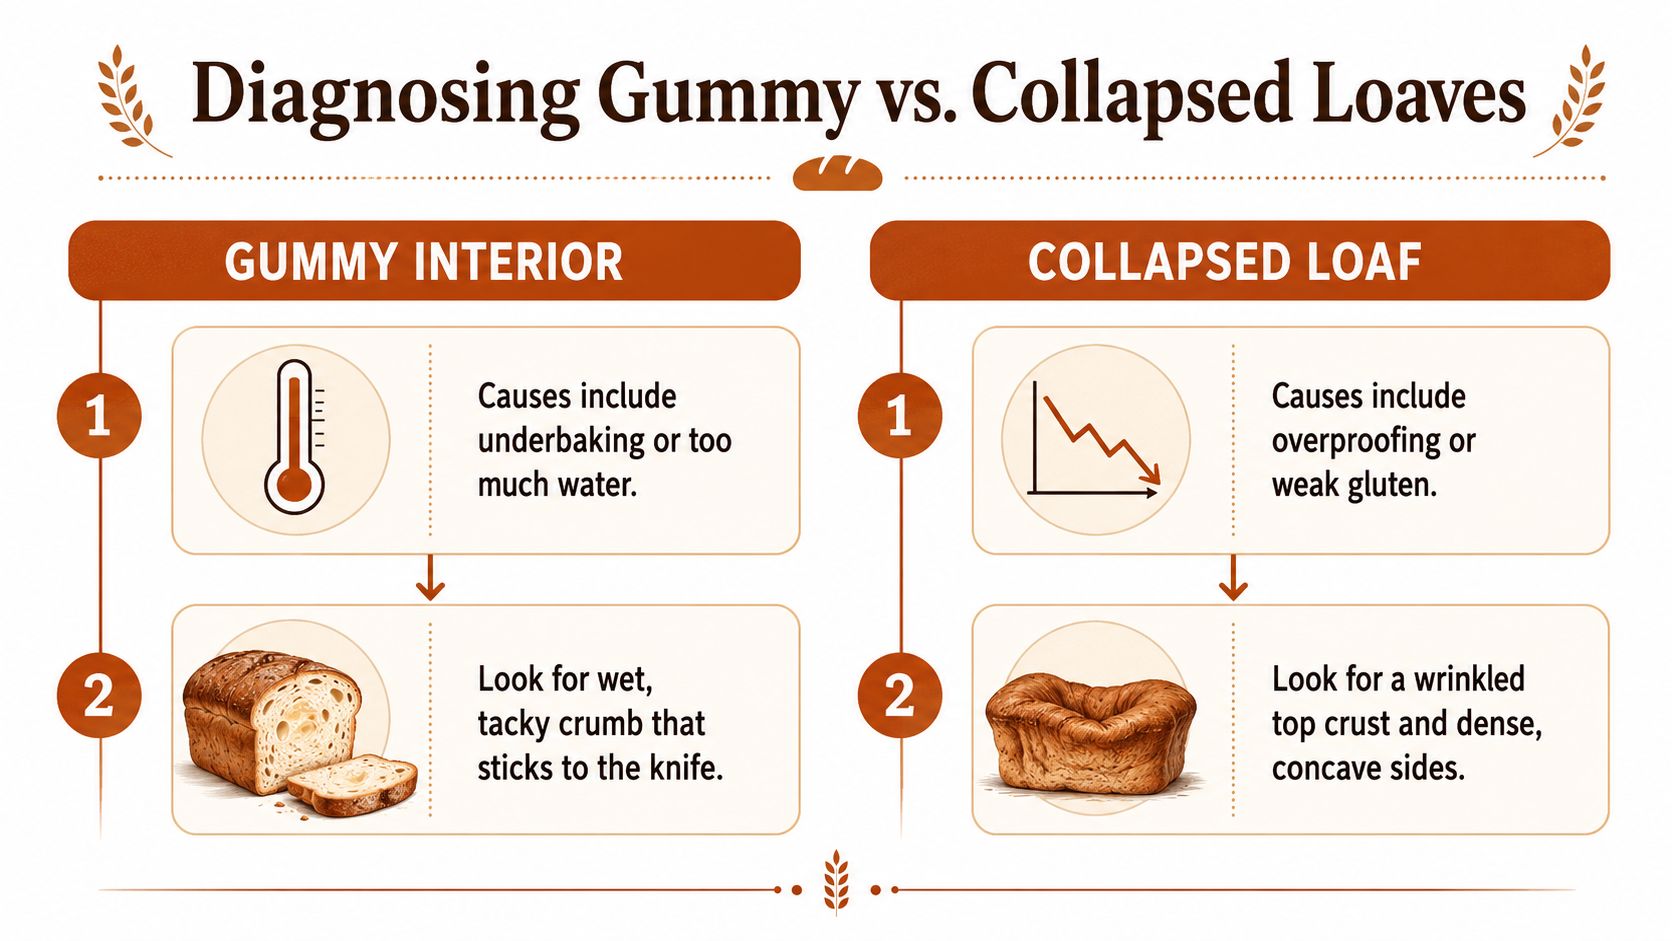
Gummy bread and collapsed bread require different checks. A gummy loaf has a center that never fully set. A collapsed loaf expanded, then lost the structure holding that expansion. Diagnose them in order: confirm doneness, review cooling and hydration, then inspect fermentation and dough strength.
Gummy centers need heat and patience
Bread is generally finished when its internal temperature reaches about 190° to 205°F, according to the bread-temperature reference. If the crust has already darkened, tent the loaf loosely and continue baking until the center reaches that range. A thermometer is more reliable than judging the crust alone.
Excess water for the flour can also produce a wet, tacky crumb. Cutting too soon creates the same misleading symptom. Transfer the loaf to a wire rack and let it cool for at least an hour before slicing, so carryover heat can finish setting the interior. If the center looks glossy and clings to the knife, record that result before changing the formula.
Collapse points to lost structure
If the loaf sinks after a dramatic oven rise, check proofing before changing hydration. Over-proofed dough has used much of its structural capacity. It may feel slack, spread during scoring, or fail to spring back when pressed gently. Underdeveloped gluten can fail similarly because the dough cannot retain the gas it produced.
Steam keeps the surface flexible during oven spring, but an unreliable steaming method or early door opening can let the crust set before expansion finishes. Keep the oven closed during the early bake and use one consistent steam method. The trade-off is control: more surface flexibility can support expansion, while poor timing can leave the loaf under-supported.
Use the poke test before baking, not after failure. Press lightly, observe the rebound, and compare it with the dough's volume and surface. Pair that observation with a windowpane check after kneading. Proofing cannot restore strength that the dough never developed.
Thick Crust and Crust Color Problems
Crust is a record of oven humidity, heat distribution, surface drying, and bake duration. A thick, leathery crust and a pale, brittle crust may look like opposite problems, but both usually come from a mismatch between the oven environment and the dough's stage.
A thick crust often means the surface dried or baked too aggressively. Excessive steam held for too long can produce a chewy shell, while a sugar-heavy dough or an oven that runs hot near the bottom element can over-bake the exterior. Vent earlier, lower the baking temperature by 25 degrees, or move the loaf away from the strongest bottom heat. For a softer crust, brush with milk or egg wash, but expect that finish to change browning and surface texture.
For a pale, brittle crust, check whether the oven reached temperature and whether the dough surface dried during proofing. Preheat a baking stone, use a steam tray during the first 15 minutes, and adjust the rack position if the top or bottom receives disproportionate heat. The objective isn't darker bread. It's enough heat and moisture for the crust to color while the crumb continues to expand.
| Crust Symptom | Likely Cause | Corrective Fix |
|---|---|---|
| Thick, leathery shell | Too much steam or excessive baking | Vent earlier and reduce heat |
| Dark bottom with pale top | Strong bottom element or low rack | Move the loaf higher and use a stone |
| Pale, brittle surface | Low heat, weak steam, or dried dough skin | Preheat thoroughly and add early steam |
| Crust darkens before center sets | Oven heat exceeds the dough's bake progress | Tent the loaf and continue baking |
For a controlled steam approach, use the guide to baking with steam and focus on keeping the oven closed during the initial expansion.
Measurement Accuracy and Proofing Environment
A recipe can be correct and still produce inconsistent bread if the flour dose changes from bake to bake. Scooping flour directly with a cup compresses it. Spoon-and-leveling reduces that error, but a digital scale remains the cleaner method because it measures the ingredient rather than the volume it happens to occupy.
This matters even more with high-hydration dough. A modest shift in flour changes the dough's effective hydration, which changes stickiness, gluten development, fermentation speed, and crumb density. Weigh the flour, water, yeast, salt, and any starter in the same bowl whenever possible.
Build a stable proofing environment
Fermentation responds strongly to temperature. Yeast activity is typically optimal around 25° to 35°C, peak carbon dioxide production is often observed around 32° to 38°C, and activity drops sharply above 40° to 43°C, as explained in this proofing science guide. That doesn't mean every home dough should proof at the peak gas-production temperature. It means temperature changes can alter the timing and strength of the process quickly.
Commercial proofers commonly operate around 37° to 41°C for buns, while industrial workflows can move dough from roughly 25° to 28°C at entry to about 36° to 38°C at exit, according to this professional proofing white paper. Home bakers don't need industrial equipment to use the same principle. They need a stable environment and a thermometer.
Read the dough, not only the clock
Use three visual checks:
- Volume test: Mark the starting level and watch for clear expansion.
- Dome test: Look for a gently domed surface rather than a flat or sunken one.
- Finger test: Press lightly and judge whether the indent rebounds quickly, slowly, or not at all.
Keep flour, water, a scale, and an instant-read thermometer together before mixing. The bread scale guide can help establish a repeatable weighing routine. Once those inputs stay consistent, fermentation becomes easier to interpret because fewer variables are moving at once.
A Repeatable Troubleshooting Checklist
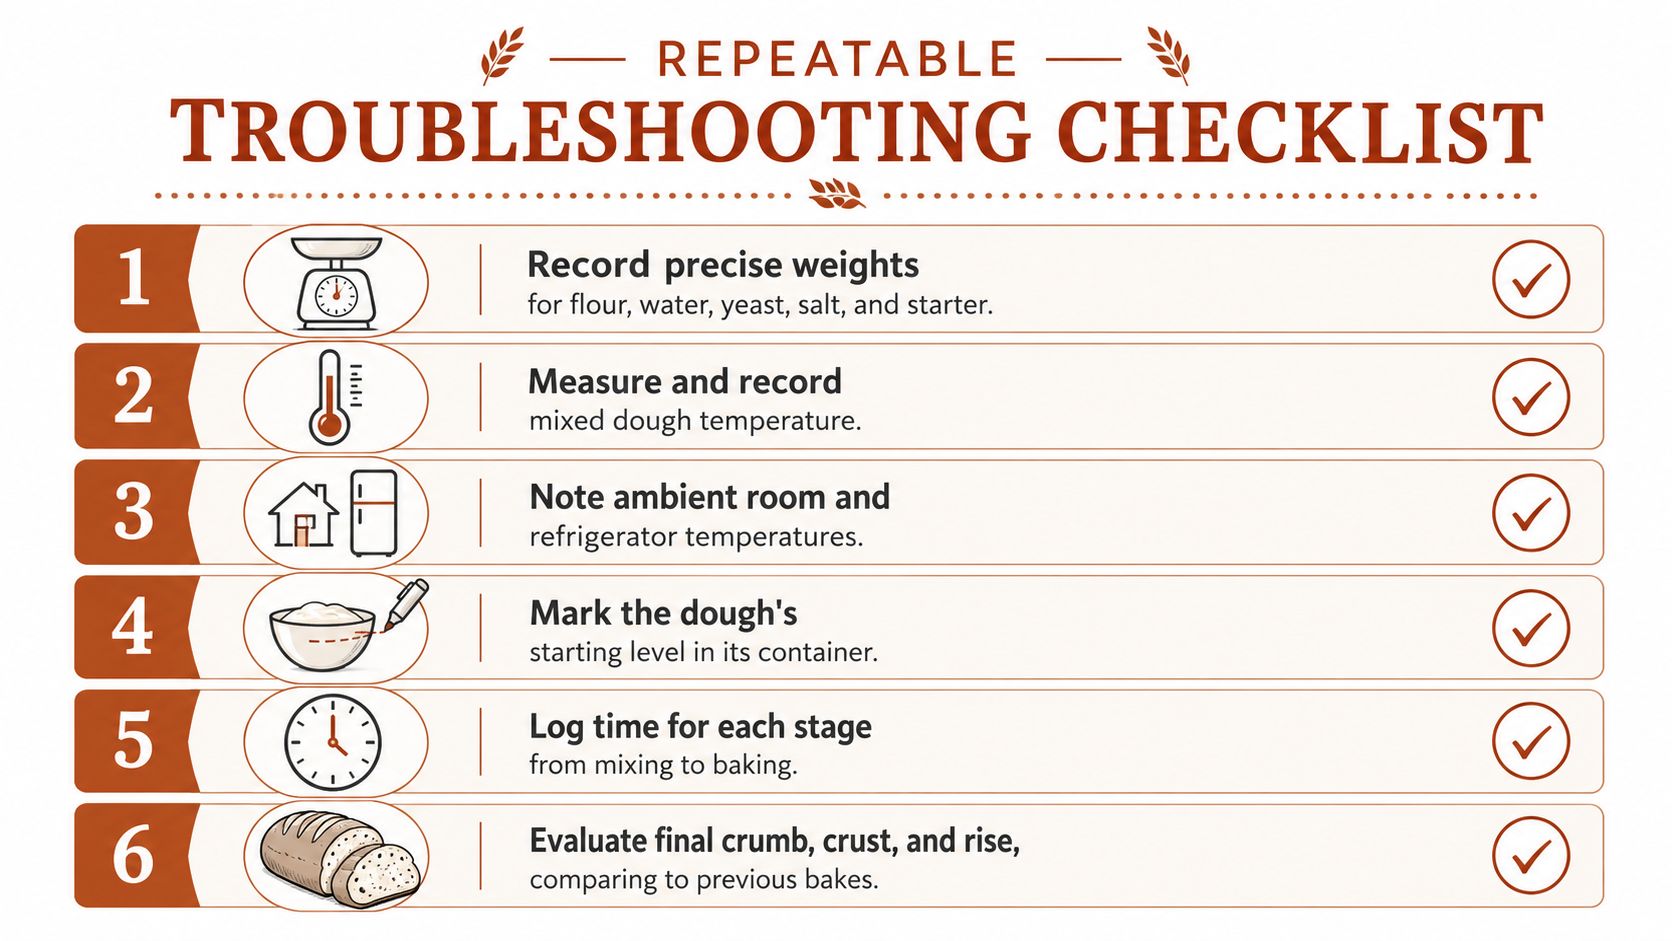
Good troubleshooting leaves a record. Before mixing, write down the flour, water, yeast, salt, and starter weights. Note the room and refrigerator conditions, then record when bulk fermentation and final proof begin and end.
After mixing, measure the dough temperature and inspect gluten development. During fermentation, mark the dough's starting level and record the time it reaches its target volume. Don't replace those observations with a fixed clock schedule, because the same dough behaves differently when its temperature, flour, or starter strength changes.
Record the bake, not just the recipe
Before the loaf enters the oven, check its shape, surface tension, and response to a light poke. After baking, measure internal temperature and inspect the center for a dry, set crumb rather than a glossy or elastic one. Tap the base as a secondary check, but don't use sound alone to overrule an under-temperature center.
Cool the loaf on a wire rack before slicing. Then log crust color, oven setting, rack position, steam method, substitutions, and the final crumb. That record turns a failed bake into a controlled experiment.
A practical station needs a digital scale, instant-read thermometer, proofing basket, and a dedicated workspace. For bakers who want tighter control over fermentation and proofing, D'BakerAid™ combines a Stage 1 yeast fermentation bowl, a Stage 2 dough proofing bowl, and a hub that controls temperature and time. Its optional D'Steamer supports steam baking, while the companion recipe app is available at dbakeraid.app.
Use this order every time:
- Weights: Confirm every ingredient before mixing.
- Dough temperature: Measure the mixed dough at the center.
- Environment: Note room and refrigerator conditions.
- Fermentation level: Mark the dough and observe expansion.
- Timing: Record each stage from mixing through baking.
- Finished loaf: Compare rise, crust, crumb, and internal temperature with prior results.
If you want the machine to handle the most variable parts of homemade bread, visit DBakerAid™ to explore its fermentation and proofing system. Use the recipe app and your bake log together, then start with one high-protein or specialty loaf and change only one process variable at a time.