

Most revival advice tells you to sniff the jar, feed it for a set number of days, and bake. Don't trust that shortcut. A starter can smell sour and still be too weak to lift dough, because the acid producers and the yeast don't always recover at the same speed. Judge a dried sourdough starter by what you can measure, its rise, its acidity, and how long it's been stored. Those three checks tell you whether you're looking at a culture that's alive, one that's merely acidic, or one that's actually strong enough to raise bread.
Table of Contents
- What Dried Sourdough Starter Is and How Drying Works
- Revive and Feed to Bake-Ready
- Fix a Weak Starter or Replace It
- How to Dehydrate Sourdough Starter at Home
- Storage Methods and How Long Dried Starter Lasts
- Choosing Between Dried and Fresh Starter
- Using Revived Starter in Recipes
What Dried Sourdough Starter Is and How Drying Works
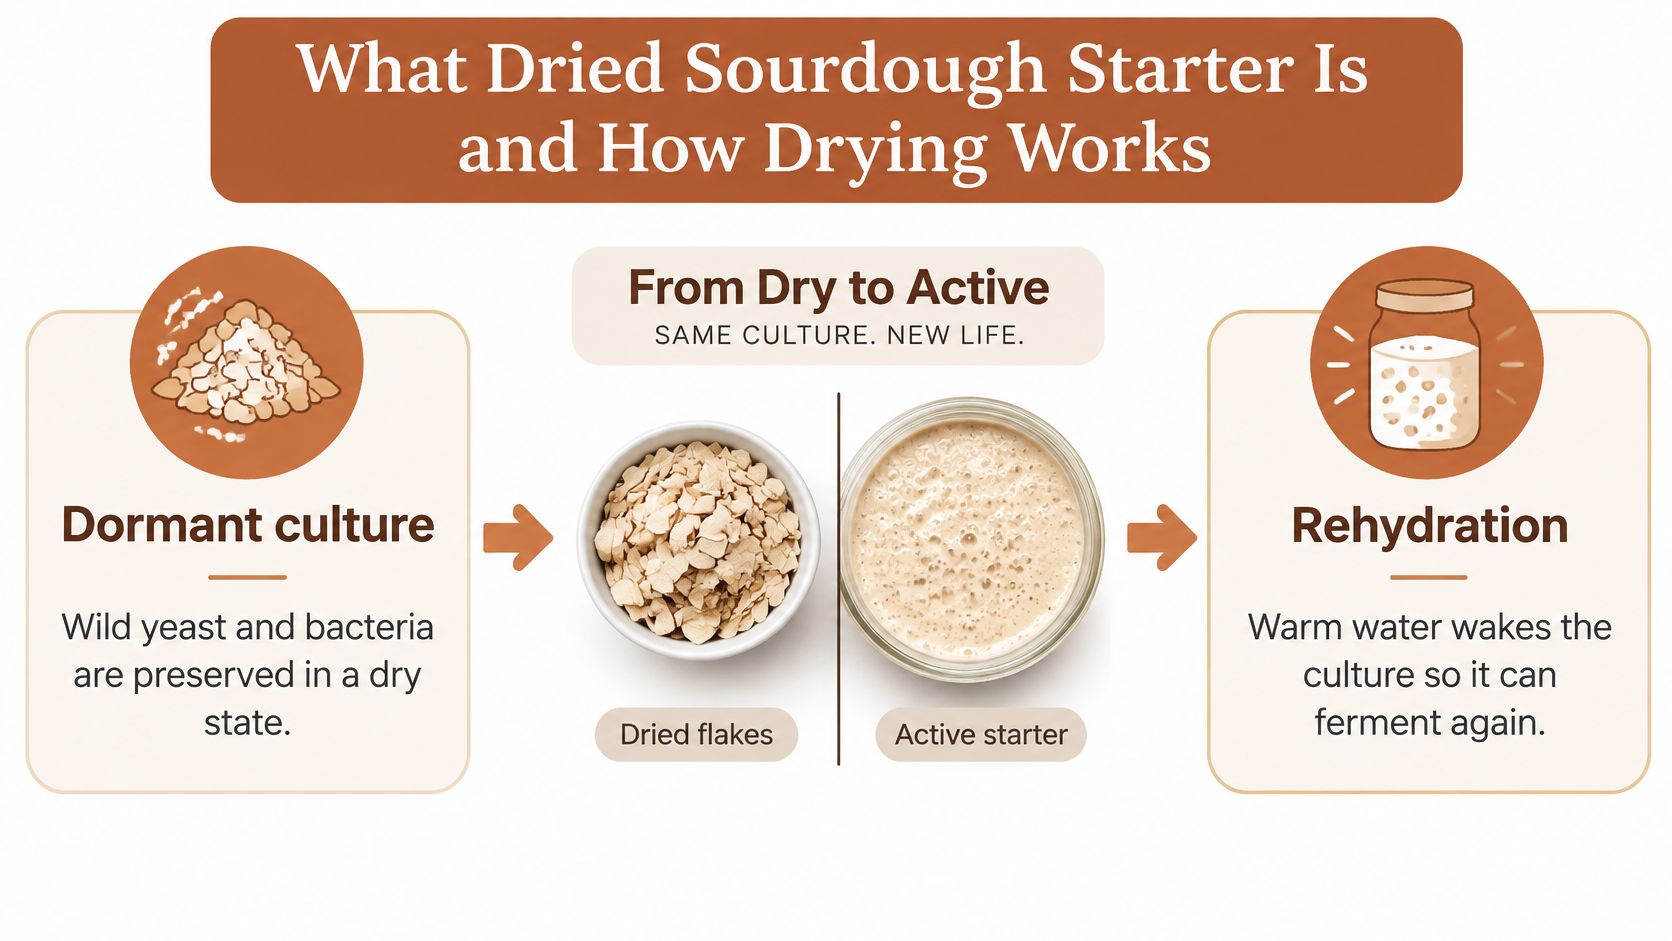
Think of freeze-dried coffee. It keeps its flavor potential in the jar, but it isn't a fresh cup until hot water and time bring it back. A dried sourdough starter works the same way. It's a dormant culture of wild yeast and lactic-acid bacteria with the water removed, not ready-to-use dough and not a packet of instant yeast.
Say a friend mails you flakes from a starter she has kept for years. What arrives isn't her active, bubbly jar. It's that microbial community paused. The yeast are there to make gas, and the bacteria are there to make acid and flavor, but neither can work until you give them water, food, and time to repair.
This visual maps that paused state and what wakes it.
Two Ways to Remove the Water
Freeze-drying removes water at low temperature and generally keeps the culture closest to fresh. Spray-drying removes water faster with heat, which is harder on cells, and its activity tends to decline faster in storage.
Protective ingredients act like cushions during that stress. Sugars such as trehalose and milk proteins help cell structures survive water loss. In a 2024 optimization study recorded by AGRIS, a freeze-dried culture with 35% skim milk, 7.5% maltodextrin, and 25% trehalose reached approximately 93% survival. A spray-dried formulation using 35% skim milk, 10% maltodextrin, and 15% trehalose achieved approximately 90% survival.
Read those numbers carefully. They're from controlled formulations in a lab, not a guaranteed revival rate for flakes dried on your counter. Home drying has no added protectants and less control over heat and oxygen, so your results can be lower.
Drying doesn't automatically preserve fermentation performance. Survival depends on the method, the protectants, and what happens in storage afterward.
What You Now Know
- It's dormant, not dead and not ready: Dried starter needs rehydration and feeding before it can ferment dough.
- Method matters: Freeze-drying is gentler, and spray-drying is harder on cells and declines faster.
- Storage starts the clock: Heat, oxygen, and moisture all shorten useful life, even before you open the packet.
Revive and Feed to Bake-Ready
Revival is a recovery process, not a single feed. Cells that survived drying may still be metabolically stressed, so they can produce acid before they produce much gas. That's why you measure rise instead of trusting smell.
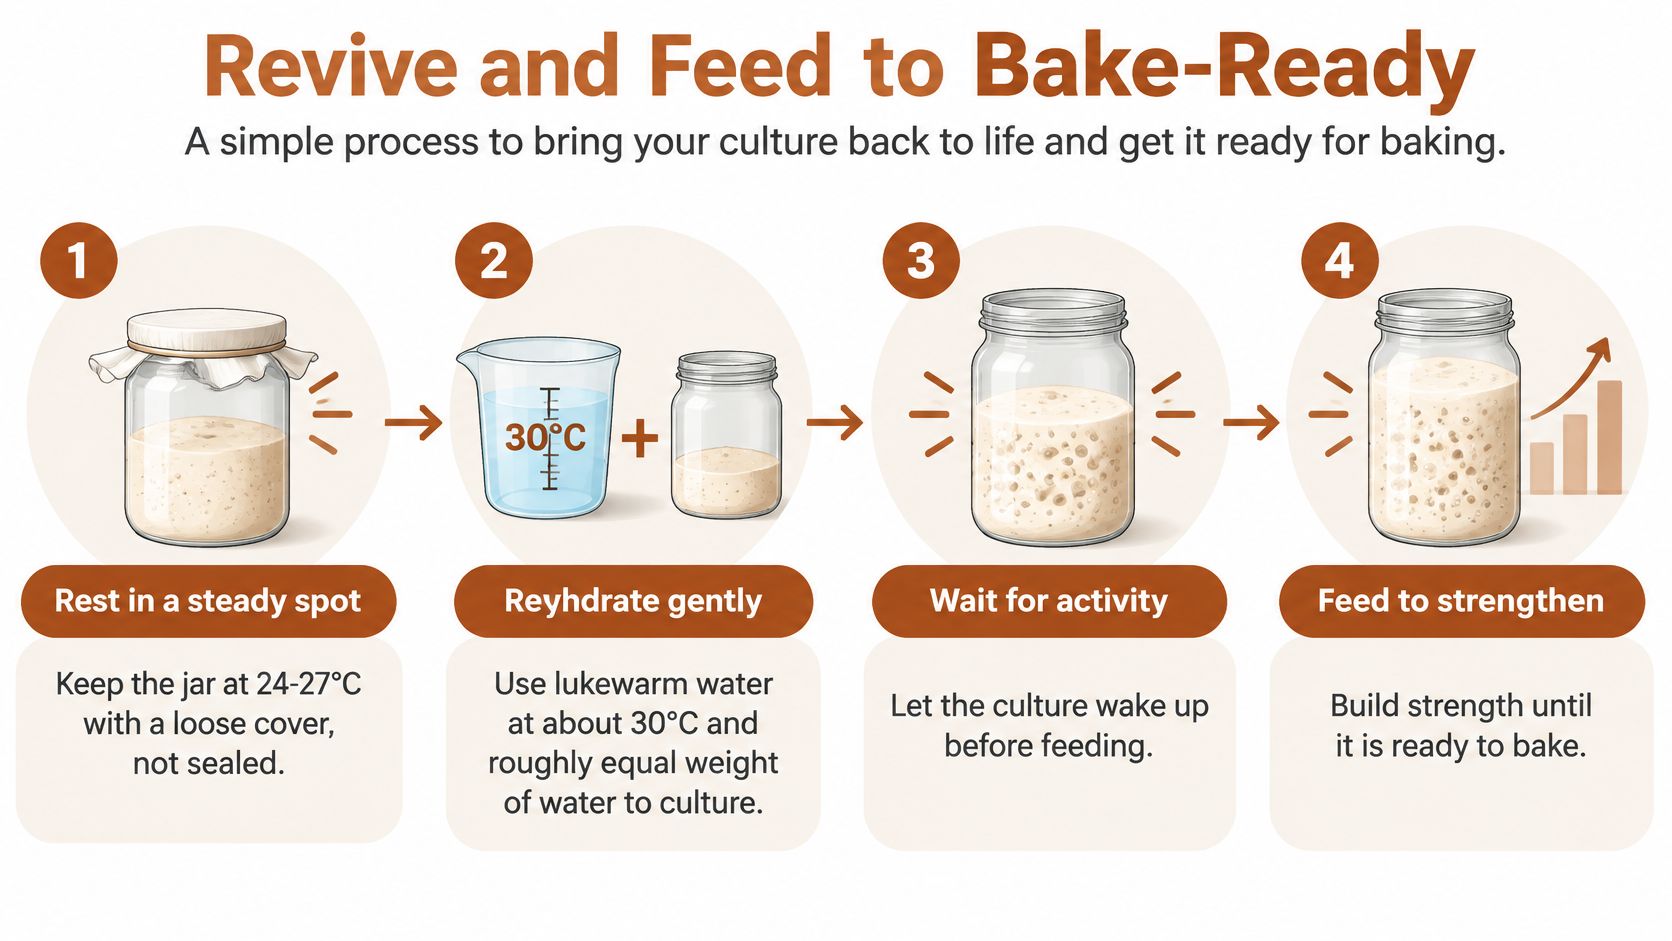
This sequence shows the four stages from dry flakes to a culture you can test.
The Revival Steps
- Set the jar in a steady spot: Keep it at 24-27°C with a loose cover, not sealed. Gas needs a way out, and steady warmth matters more than a hot spot. If you're using our Sourdough mode, it holds 27°C with rye flour and water at 50:50 by weight, and most starters are bake-ready within 5-7 days.
- Rehydrate gently: Stir the dried culture into lukewarm water at about 30°C, using roughly equal weight of water to culture. Wait 15-30 minutes until no dry flakes remain. Hot water can damage cells you're trying to save.
- Feed 1:1:1 by weight: Add, for example, 50 g flour and 50 g water to 50 g culture, and mix until no dry flour shows. Don't skip this first feed because the jar already smells active. Smell is not strength.
- Mark the starting level: Put a rubber band around the jar at the surface. Now rise is measured, not guessed.
- Check at 4 and 8 hours: Look for bubbles on the surface and walls and a clear move above the band. Note the time, not just the height.
- Move to 12-hour feeds: From day two, discard down to about 50 g and feed every 12 hours. Discarding keeps acid from building up so high that it slows the yeast you're trying to rebuild.
Temperature shapes what you taste as well as how fast it rises. The Czech Journal of Food Sciences technical review notes sourdough fermentation commonly occurs near 30°C, with working conditions spanning roughly 22-40°C, and warmer fermentation tends to favor lactic-acid production and fruitier notes. Keeping your jar at 24-27°C gives you a steadier balance while the culture recovers. That review also gives a useful readiness benchmark of pH approximately 4.2-4.5.
Watch the jar handling in this short demonstration before you judge your own first feed.
Storage age explains why two packets can behave differently on day one. A review in PMC on freeze-dried sourdough viability reports one type-I sourdough decreased by approximately 3 log10 CFU/g after six months at room temperature, from initial populations of about 9.17 log10 CFU/g LAB and 7.53 log10 CFU/g yeast. Fewer surviving cells means slower carbon-dioxide production at first, even when the culture is viable.
Week One Feeding Schedule for a Revived Starter
| Day | Feeding | Temperature | What to Expect |
|---|---|---|---|
| Day 1 | Revive and feed 1:1:1 by weight | 24-27°C | Some bubbles and rise; mild tang |
| Day 2 | Feed every 12 hours | 24-27°C | Rise within 4-8 hours |
| Day 3 | Discard to about 50 g, then feed every 12 hours | 24-27°C | Rise becoming consistent; pH moving toward 4.5 |
| Days 4-5 | Feed every 12 hours | 24-27°C | Doubling within 4-8 hours |
| Days 6-7 | Run readiness tests before baking | 24-27°C | Reliable doubling; pH about 4.2-4.5; pleasant tang |
| Slow or stalled | Keep 12-hour feeds and review the fixes | 24-27°C | Revival is taking longer; see the next section |
Two Tests Before You Bake
On days six and seven, run both tests, not one. The rise test asks whether the starter doubles within about 4-8 hours at your marked level. The acidity test asks whether a pH strip reads about 4.2-4.5.
A healthy jar on day one already hints at recovery, bubbles on the surface and walls, a rise of at least 50 percent, and a mild tang. That isn't bake-ready yet. Bake-ready is repeatable. If you want more detail on holding that steady environment, our guide to proofing sourdough starter covers temperature control step by step.
Practical rule: A sour smell with no rise means stressed, not dead. Feed, keep it warm, and measure again.
Fix a Weak Starter or Replace It
A slow starter isn't automatically a dead starter. That's the most common mistake with dried cultures. Bakers add more flour, feed more often, or throw the jar away on day three, when the problem is often storage age. A long-stored culture needs more time, not more food dumped into an acidic jar.
Packaging changes the timeline in a way you can measure. A 2024 study in PMC on dried starter maturation found that after 120 days, maturation time increased by about 20 hours in an aluminum-laminate pouch and by as much as 70 hours in LDPE packaging. The authors linked that slower activation to declining microbial viability. The same source reports yeast falling from 5.3 to 1.3 log CFU/g after drying while LAB declined less sharply.
That uneven loss explains the jar that confuses everyone. It smells properly sour, maybe even sharp, but the dough barely moves. The acid producers recovered. The yeast, which make the gas that lifts dough, didn't recover as well. You don't fix that by baking anyway and hoping.
Match the Symptom to the Fix
| Symptom | Likely Cause | Fix |
|---|---|---|
| Sour smell, no rise | Yeast weakened by drying; acid producers stronger | Warm to 24-27°C and feed 1:1:1 every 12 hours for three days |
| Slow rise past 12 hours | Cold spot or long storage age | Move to a warmer place; use whole-grain flour for the first feeds |
| Grey liquid on top | Hungry starter | Feed sooner or raise the ratio to 1:2:2 |
| Overflows by morning | Very active culture | Raise the feed ratio to 1:3:3 and keep the jar warm but not hot |
| Sharp acetone smell | Missed feeds | Feed twice a day for two to three days |
| Colored or fuzzy growth | Contamination | Discard the culture; do not scrape and use |
Some fixes show results in about a day. A sour jar that won't rise often responds within a few warm 1:1:1 feeds because you're diluting acid and giving yeast fresh food at a temperature they can use. Grey liquid on top is simpler still. That's hunger, and feeding sooner fixes it.
Other fixes take about a week. A long-stored culture with a slow rise has fewer viable yeast to rebuild from, so each feed is rebuilding population, not just providing lunch. Whole-grain flour for the first feeds helps because it brings more nutrients and a broader food supply than white flour alone.
Don't confuse activity with readiness when the jar overflows. A fast, frothy rise that collapses early can mean the culture eats through its food and peaks before you mix. Raising the feed ratio gives it more food and stretches that peak so you can catch it.
Sourdough also uses a longer dedicated proofing program in our system, and whole-grain, gluten-free and traditional sourdough recipes may need longer than the standard times. The same patience applies in a plain jar. A weak revived culture won't follow a fresh starter's clock, so plan around its rise.
The Go or No-Go Rule
By days five to seven, run three checks together.
- Rise: It doubles within 4-8 hours of a feed.
- Acidity: A pH strip reads 4.2-4.5.
- Appearance: There's no colored or fuzzy growth anywhere in the jar.
If all three pass, bake. Plan your dough around the starter's actual rise time rather than the recipe clock, especially on the first loaf. If one check fails, return to the week-one schedule for a few more days and test again. One failed check is information, not a verdict.
If two weeks of consistent 12-hour feeds at 24-27°C still produce no reliable rise, replace the culture.
Replacement means a sealed backup packet or a fresh start, not another week of feeding a jar that isn't responding. Contamination ends the discussion sooner. Colored or fuzzy growth means discard, every time, and don't scrape the clean-looking part into a new jar.
Keep records so the next revival is easier. Label the jar with the drying date, log your rise measurements and pH readings, and keep a sealed backup you haven't opened. That small log turns a frustrating guess into a diagnosis the next time a jar runs slow.
How to Dehydrate Sourdough Starter at Home
Drying your own starter is how you create that sealed backup. Start from strength, because drying reduces the population and you want as many survivors as possible going in.
Home Drying Steps
- Feed and wait for peak: Feed 1:1:1 and wait until the starter peaks, fully risen and bubbly. A fully active culture carries more survivors into the dry state.
- Spread it thin: Spread the peak starter about 3 mm thick on parchment or a silicone sheet. Thick layers stay wet in the middle, and wet middles invite spoilage.
- Dry with low heat only: Dry at room temperature in a clean, airy spot away from direct sun, or in an oven at its lowest setting with the door cracked. Heat damages cells, so keep it as low as your oven allows.
- Check for brittle: Check every few hours until the sheet is brittle and snaps cleanly rather than bending. If it bends, it still holds moisture.
- Break or grind: Break the sheet into flakes, then grind to a coarse powder if you want a finer, easier dose.
- Seal and label: Store in a sealed, dry container with the drying date on the label.
Home drying has no published survival rate, unlike controlled lab formulations with added protectants. Treat a home-dried batch as a backup that must prove itself. Test a small amount first. It should rehydrate fully and show a measurable rise within the revival timeframe before you rely on it as your only copy.
Storage Methods and How Long Dried Starter Lasts
Store dried starter sealed, cool, dark, and dry. Moisture is the main enemy because it wakes cells early in a packet with no food, and they decline from there. Heat and oxygen speed up the same loss.
Shelf life needs a precise definition here. A culture can still contain living cells and still bake badly. In a 2024 freeze-dried-sourdough study in PMC, viable LAB counts declined during 60 days of storage, with reported values ranging from 8.64 to 6.70 log CFU/g, even though more than 70% of microbial cells remained viable. Viable is not the same as strong enough to give you the same volume and speed.
Age shows up in leavening first. Harvard's overview of sourdough history places starter use at approximately 3700 BCE, and the storage research summarized with it found dried storage produced satisfactory results for about 30 days, while after 60-90 days no tested storage condition restored leavening comparable to unstored sourdough. Frozen storage preserved lactic-acid bacteria partially for up to 90 days, but it didn't fully reproduce fresh performance.
Storage Methods and Expected Performance
| Storage Method | Expected Useful Life | Notes |
|---|---|---|
| Sealed, room temperature, dark cupboard | About 30 days for satisfactory rise | Moisture is the main enemy |
| Sealed, room temperature, 60 to 90 days | Leavening no longer matches fresh starter | Expect a longer revival |
| Frozen | Lactic-acid bacteria partly preserved up to about 90 days | Does not fully match fresh starter |
| Aluminium-laminate pouch, 120 days | Maturation about 20 hours longer | Better barrier than LDPE |
| LDPE packaging, 120 days | Maturation up to about 70 hours longer | Avoid for long storage |
| Any form with colored or fuzzy growth | Not usable | Discard the culture |
Packaging is not a minor detail. A laminate pouch blocks moisture and oxygen far better than thin LDPE, and the revival gap after long storage reflects that. If you're mailing starter to a friend or storing it through a humid summer, the pouch matters as much as the cupboard.
Two actions cover most home storage. Write the drying date on every jar or pouch so age is never a guess. If you won't bake for about a month, move the sealed pouch to the freezer. For the routine that keeps a revived jar stable after storage, see our notes on sourdough starter maintenance.
The safety boundary doesn't move with storage method. Any colored or fuzzy growth means discard the culture. Drying preserves microbes, but it doesn't make a contaminated culture safe to rescue.
Choosing Between Dried and Fresh Starter
Dried starter suits occasional bakers, anyone who wants a backup, and anyone mailing or gifting a culture. Fresh starter suits bakers who bake often and want the fastest, most predictable rise. Neither is better in the abstract. Your baking frequency decides.
Dried and Fresh Starter Compared
| Factor | Dried Starter | Fresh Starter |
|---|---|---|
| Form at purchase | Dehydrated flakes or powder | Wet paste or liquid |
| Shelf life | Months when sealed and dry; performance declines with age | Indefinite with regular feeding; about 1 week between feeds in the fridge |
| Time to first bread | Several feeding days after revival | About 5-7 days from flour and water |
| Storage | Sealed, dry, cool and dark | Refrigerated, or kept at room temperature with regular feeds |
| Portability | Easy to mail or gift | Needs care in transit |
| Cost to start | About $9.95 per 10 g pack (2025 Etsy listing) | Flour and water |
| Consistency | Varies with drying method and storage age | Predictable once established |
Cost is where the trade-off gets concrete. A 10-gram pack of dehydrated sourdough starter listed by HearthHeritageCo on Etsy was $9.95 in 2025. A fresh starter built at home needs only flour, water, and time.
That doesn't make dried starter poor value. You're paying for an established culture and for portability. A packet can cross the country in an envelope, wait in a drawer, and still revive. A wet jar can't do any of that without care in transit.
Count the hidden time cost on both sides. Dried starter saves you building a culture from flour and water, but it adds several days of feeding before the first bake. Fresh starter costs almost nothing to start, but it charges you rent forever in feeds, fridge space, and attention when you travel.
Decision rule: Choose dried if you bake less than weekly. Keep fresh if you bake several times a week. Keep a sealed dried backup either way.
That backup is the point many bakers miss. Even committed fresh-starter bakers lose jars to a hot kitchen, a missed week, or a dropped jar. A dated packet in the cupboard turns that loss into a few days of feeding instead of starting over.
Using Revived Starter in Recipes
Once your starter passes both readiness tests, carry it into a recipe by weight and by peak timing.
- Feed 4-8 hours before mixing: You want the starter at peak, risen and active, not collapsed. Confirm the rise against your mark before you weigh it.
- Swap by weight: Use the weight the recipe lists for fresh starter. A revived culture may be slightly weaker, so adjust in small steps rather than doubling the amount.
- Judge bulk by volume: Expect slower bulk fermentation on the first bake. Use a marked container and look for a clear rise in volume rather than watching the clock.
- Keep the surplus: Hold feeding surplus in a sealed jar in the fridge for pancakes or crackers. If you want more ways to use flour you already have, these easy recipes to make with flour are a practical place to start.
- Settle into a routine: After the first successful bake, shift to a steady feeding schedule so the culture stays strong for the next loaf.
Log each bake, rise time, room temperature, and crumb. That record shows whether your starter is improving or slipping. For a full method built around a proven culture, our guide on how to make naturally leavened bread takes you from levain to finished loaf.
If holding a revived starter at a steady 24-27°C is the part your kitchen won't cooperate with, DBakerAid™ controls fermentation and proofing temperature for you, so rise and pH become repeatable instead of seasonal. Visit us to see how the Sourdough program supports revival, feeding, and proofing from the first flakes to the finished loaf.