

It's late afternoon, you want crusty bread for tomorrow, and you do not want to spend an hour kneading, checking, and guessing. You stir flour and water into a shaggy mass, cover the bowl, and wonder if something that sticky can possibly become a loaf. It can, if you give it time, watch the temperature, and bake it under a lid. That's the whole logic behind the best no knead bread recipe.
Table of Contents
- Why Skipping the Kneading Still Works
- Ingredients and Weights for the Best Loaf
- Fermentation Times by Kitchen Temperature
- How to Mix, Rest and Shape the Dough
- Baking in a Covered Dutch Oven for Open Crumb
- Fixing Sticky, Flat or Dense Loaves
- Bake Your First Loaf Tonight
Why Skipping the Kneading Still Works
Say you want a crackling crust and an open crumb without standing at the counter. You mix, cover, and walk away. During that long rest, water lets flour proteins organize into gluten, while yeast builds gas and flavor. A sealed pot later traps steam, so the loaf expands before the crust hardens.
The modern reference point arrived in November 2006, when Mark Bittman published Jim Lahey's Sullivan Street Bakery method in The New York Times no-knead bread recipe, using flour, water, salt, and a very small quantity of yeast left to rise for approximately 12 to 18 hours. Its current version specifies 3⅓ cups, or 430 grams, of flour. Suzanne Dunaway had published No Need to Knead in 1999, but the 2006 version set the format most home bakers still follow.
Expect three things. You'll get a thick, crackling crust, an irregular crumb, and a timeline that takes most of a day. The trade-off is a wet, sticky dough that needs light hands, not force. This version uses 70% hydration, one bulk rest, and a covered Dutch oven, with timing that shifts by kitchen temperature. The exact weights come next.
Ingredients and Weights for the Best Loaf
Weigh everything. Cups vary too much for a dough this wet, and a small error in water changes how it shapes and rises.
| Ingredient | Weight (500 g flour) | Baker's % | Notes |
|---|---|---|---|
| Bread flour | 500 g | 100% | Strongest gluten; all-purpose needs slightly less water |
| Water at 20-22°C | 350 g | 70% | Standard base for a sticky, shapeable dough |
| Fine sea salt | 10 g | 2% | Flavor and fermentation control |
| Instant yeast | 1 g (about 1/4 tsp) | 0.2% | Mix directly into the flour |
Scaling with baker's percentages
Every ingredient is a percent of the flour weight, so 350 g water ÷ 500 g flour = 70%. That means you can scale the same formula to 250 g or 1 kg of flour without rewriting it.
For a more open crumb, try the 75% variant at 375 g water. I'd start at 70% first. The 75% dough spreads more, sticks more, and punishes rough shaping, even though the holes can be larger.
Practical rule: Master 70% until you can shape it cleanly, then raise the water.
Bread flour at 12 to 13% protein gives the strongest network. All-purpose works, but use slightly less water and allow a longer rest. Whole wheat absorbs more, so it needs more water than white flour, added in small steps.
A reliable workflow targets at least 70% hydration and ferments for 12 to 24 hours at room temperature, according to Serious Eats and its better no-knead bread guidance. The same source notes a study found Salmonella increased by 0.5 log CFU/g after 6 hours and 2.4 log CFU/g after 24 hours at 21°C in no-knead dough. Use clean bowls and fresh ingredients, don't hold dough warm longer than needed, and bake it thoroughly.
Water and yeast details
- Water temperature: Use 20 to 22°C for a standard rest, and cooler water if you need to slow things down.
- Instant yeast: Mix it straight into the flour, no blooming needed.
- Active dry yeast: Bloom it in warm water first, or it may not disperse evenly.
- Before you mix: Put the bowl on a digital scale and write down your kitchen temperature.
Fermentation Times by Kitchen Temperature
Warmer rooms ferment faster. That's why a fixed overnight instruction fails in summer and frustrates bakers in cold kitchens. Pick the row that matches your room, then judge by the dough.
| Kitchen temperature | Bulk ferment time | Readiness cue | Final rise after shaping |
|---|---|---|---|
| Warm kitchen, 26-28°C | 6-10 hours | Doubled, bubbly, domed | 1-2 hours |
| Typical kitchen, 20-22°C | 12-16 hours | Doubled, bubbly, domed | 2-3 hours |
| Cool kitchen, 16-18°C | 18-24 hours | Doubled, springy when pressed | 3-4 hours |
| Fridge, 5°C | 12-16 hours | Doubled, slack, flavorful | 2-4 hours at room temperature |
| Fridge, 3°C | 16-20 hours | Doubled, slack, flavorful | 2-4 hours at room temperature |
Published guidance places cold fermentation around 3 to 5°C, at approximately 12 to 16 hours at 5°C versus 16 to 20 hours at 3°C, as summarized by Flourwise in its no-knead temperature guide. It also notes a warm final rise around 24 to 27°C. Two degrees in the fridge changes your schedule by hours, so don't treat cold as one setting.
How to adjust in your kitchen
If your kitchen runs warm, check at the early end of the range. Bubbles, a domed surface, and roughly doubled volume matter more than the hour on the clock. If your fridge runs warmer than its dial says, pull the dough sooner, because it has effectively been in a warmer row.
Mixed dough often runs warmer than the air, especially if your flour sat in a warm pantry. A probe thermometer removes the guesswork. Our guide to dough fermentation temperature and timing covers how to read dough temperature rather than room temperature alone.
A longer cold ferment adds flavor and flexibility. Refrigerated dough can rest 3 to 5 days for stronger flavor, then be shaped with one or two folds and proofed 2 to 4 hours before baking. Don't push a warm room ferment that long, since the dough will slacken and sour.
Write down the start time and the row you're using. Check at the earliest time in that range, not the latest.
Use this table before you mix. The steps that follow use its readiness cues and final rise times, so choosing your row first prevents the common mistake of shaping dough that is not ready or baking dough that has gone too far.
How to Mix, Rest and Shape the Dough
Work gently and in order. Each step protects the gas and structure that time built.
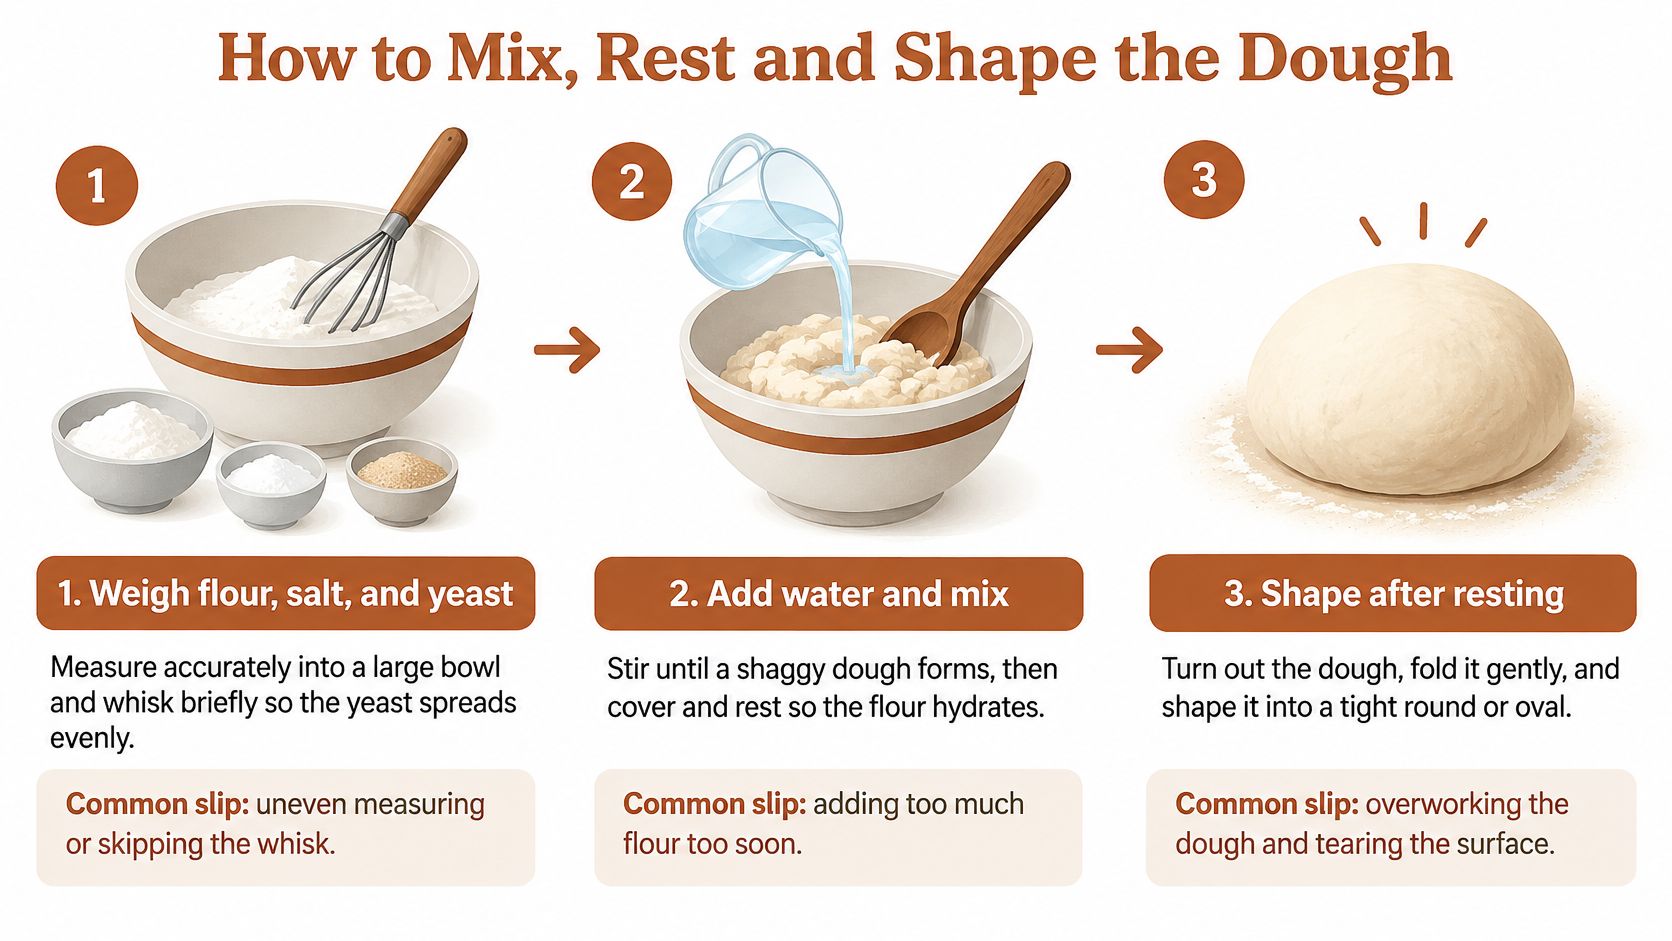
- Weigh and whisk. Put 500 g flour, 10 g salt, and 1 g instant yeast in a large bowl and whisk briefly. This spreads the yeast evenly, so you don't get pockets that rise at different speeds. The common slip is adding salt and yeast in separate piles and never dispersing them.
- Add water and mix. Pour in 350 g water at 20 to 22°C and mix with a spatula or wet hand for about 30 seconds, until no dry flour remains. A shaggy, sticky dough is correct. Adding extra flour now lowers hydration and can dry the crust later.
- Cover and start the bulk ferment. Cover with a lid or plastic wrap and leave it at the temperature in your chosen row. This rest builds gluten without kneading, while fermentation adds flavor. Don't keep opening the cover to poke it, since repeated handling knocks out gas.
- Check readiness early. At the earliest time in your row, look for roughly doubled volume, bubbles on the surface, and slightly domed edges. If it is still tight and smooth, give it more time. If it smells sharp and collapses when touched, you've gone too far for that temperature.
Shaping without tearing
- Fold and rest. Turn the dough onto a lightly floured surface, fold the edges into the center once or twice, and rest it 15 minutes seam side down. The fold adds tension and evens out large bubbles. Skipping it leaves a weaker structure that spreads in the pot.
Wet hands help more than flour when the dough sticks. For handling tips at higher water levels, see our notes on working with high hydration dough. Use a bench scraper to lift and turn, rather than pulling with your fingers.
- Shape and final rise. Shape into a tight round by pulling the surface toward the base until it feels taut. Place it on floured parchment, cover, and rest for the final rise in your row. A rushed final rise gives a dense loaf, even if the bulk ferment was right.
Test it with a gentle press. Ready dough springs back slowly and leaves a slight dent. If it snaps back instantly, wait. If the dent stays and the dough sighs, bake now and shorten the next final rise.
Handling cue: Sticky is normal. Tearing is not. If the surface rips, stop, rest it 10 minutes, and shape again with less pull.
Baking in a Covered Dutch Oven for Open Crumb
The pot is ready before the dough goes near it. A short preheat or a cold pot costs you the oven spring that opens the crumb, so give the cast iron its full time on the heat.
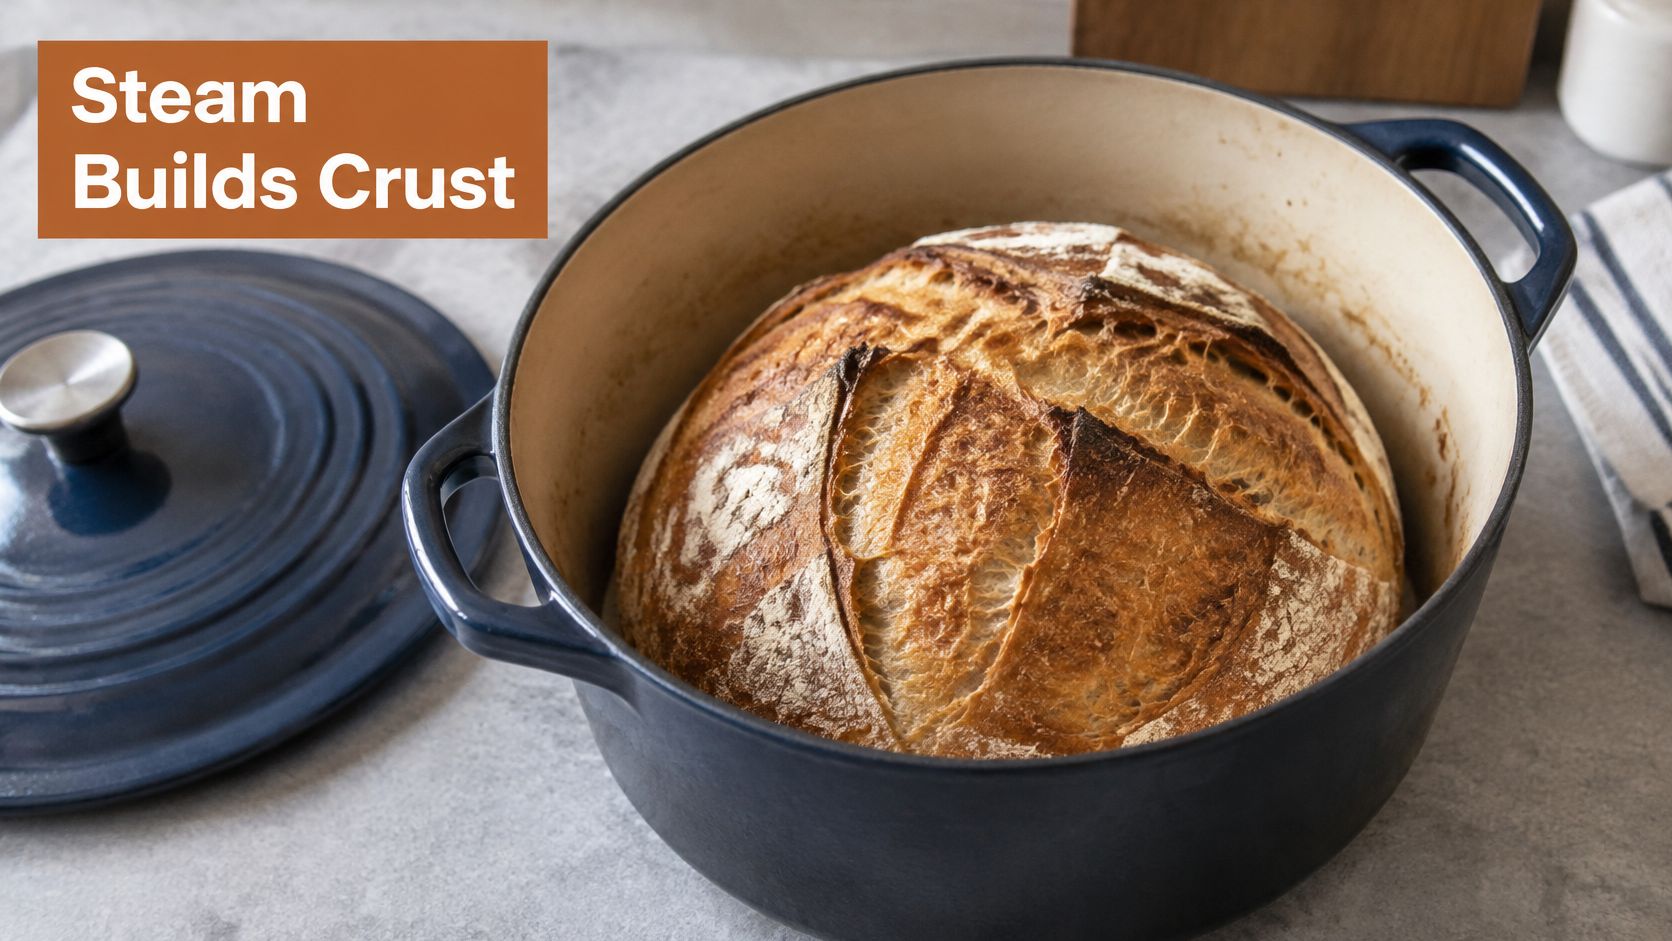
- Preheat the pot. Put a 5 to 7 quart cast-iron or enameled Dutch oven in the oven and preheat to 230°C (450°F) for 30 to 45 minutes. The vessel stores heat, and the dough needs that stored energy in the first minutes.
- Score the dough. Cut about 1/2 inch deep with a sharp blade, using one long slash or a cross, so expansion has a controlled opening.
- Load it. Lift the dough on its parchment and lower it into the hot pot. The parchment can stay under the loaf.
- Bake covered. Cover and bake for 30 minutes without peeking.
- Bake uncovered. Remove the lid and bake 15 to 20 minutes more until deep brown.
- Check temperature. The center should read 93 to 96°C (200 to 205°F).
- Cool fully. Cool on a rack for at least one hour before slicing, because the crumb is still setting.
The lid traps moisture released from the dough, and that steam delays crust setting so the loaf can expand, a mechanism described in Mashed on the recipe that changed home baking. Once the lid comes off, the surface dries and hardens, which is when the color builds. Dough that went into the pot cool from a slow kitchen may need the full uncovered time, while a warmer dough browns sooner, so judge by color rather than the clock alone.
Watch the covered and uncovered stages in this short bake demonstration before your first attempt.
Oven adjustments
Use the lower-middle rack so the base browns without scorching the top. If the top darkens too fast, drop to 220°C for the uncovered stage. An oven that runs cool gives a pale loaf, so an oven thermometer helps more than guessing from the dial.
Don't lift the lid early. That releases steam and gives a flatter loaf with a pale crust. Our guide to how to bake with steam at home explains the timing in more detail.
No Dutch oven? Preheat a baking stone or heavy sheet for 45 minutes, put a metal pan of hot water on the lower rack, and bake on parchment. Expect a flatter, paler crust, since steam escapes faster.
Fixing Sticky, Flat or Dense Loaves
Diagnose by symptom first, then change one variable. Most faults come from fermentation length, hydration, or oven heat, not from shaping alone.
| Symptom | Likely cause | Fix |
|---|---|---|
| Dense, gummy crumb | Under-fermented, or cut while still warm | Extend bulk ferment 2-4 hours; cool at least one hour |
| Flat, spreading loaf | Over-fermented or too wet | Shorten bulk ferment; tighter seam; try 70% water |
| Sticky dough that will not hold shape | High hydration, weak flour, or over-fermentation | Fold twice and rest 30 minutes; if it slumps, ferment less |
| Pale, soft crust | Lid on too long or oven not hot enough | Preheat pot 45 minutes; uncover last 15-20 minutes |
| Tight crumb with few holes | Short bulk ferment at 70% water | Ferment until doubled and bubbly; then try 75% water |
Wet but strong versus wet and failing
Wet but strong dough is sticky, yet it holds its shape after a fold and rises steadily. Wet and failing dough slumps, spreads sideways, tears easily, and smells sharp or sour. The first needs wet hands and patience. The second needs a shorter ferment next time, not more flour at shaping.
More water is not always better. Controlled testing found an 85% hydration dough produced a squat loaf with dense, rubbery sections, while a 68% dough rose better but had smaller holes, according to America's Test Kitchen on no-knead bread 2.0. Stay at 70 to 75% for white flour and judge the feel after a fold.
Whole wheat and rye need more water and sometimes a longer rest. Adjust in small steps of 5 g water, since bran absorbs slowly and a dough that feels dry at mixing can feel right an hour later. Don't chase whole wheat with white flour timing.
If the dough is strong but hard to handle, use wet hands and two folds. If it slumps, shorten the bulk ferment rather than adding flour.
Open crumb is not always the goal. For sandwiches and family toast, a tighter crumb holds fillings better and slices cleaner, so a 70% loaf baked a little sooner may suit you better than a dramatic, holey one.
Bake Your First Loaf Tonight
Bake the 70% loaf this weekend. Use the weights above and the 20 to 22°C row if that matches your kitchen. Weigh the flour and water, record the start time and room temperature, and check readiness at the earliest time in your row.
Bake covered for 30 minutes, uncovered for 15 to 20 minutes, and cool for an hour before slicing. On the next bake, change only one variable, such as moving to 75% water or extending the bulk rest by two hours. That way you know what caused the difference.
Once the basic loaf works, browse the D'BakerAid recipe library, which has about 30 tested recipes with new recipes added monthly. Keep the habit that matters most. Write down the start time, room temperature, and bake time for every loaf.
If your kitchen swings between cold mornings and warm afternoons, DBakerAid™ helps you hold fermentation and proofing steady so your timing table stays predictable from loaf to loaf. Explore the system and its guided programs at DBakerAid™, then bake your first 70% loaf with the temperature row that matches your room.