

You're halfway through mixing a loaf when the dough stops behaving like dough. It clings to your fingers, smears across the counter, and droops through your hands instead of forming the neat ball shown in the recipe. You add flour, then more flour, and wonder whether you've made a mistake.
Often, the mistake is assuming that wet dough is poorly mixed. High hydration dough is a deliberate formula choice. It can produce an open, irregular crumb, but it also asks more from your flour, fermentation, shaping, and baking setup. The useful question isn't “How do I make this dough less sticky?” It's “What hydration suits this flour, this loaf, and my handling ability?”
Table of Contents
- The Moment Your Dough Feels Different
- What Hydration Actually Means in Baker's Math
- How Higher Hydration Changes Crumb and Texture
- The Right Tools for Working With Wet Dough
- Why Technique Matters More Than Water
- Three Sample Formulas at Different Hydrations
- When Higher Hydration Is Not the Answer
- Troubleshooting the Most Common High Hydration Problems
The Moment Your Dough Feels Different
The baker's first warning usually comes through the hands. You scrape the last of the dough from the counter, your fingers are slick, and the dough stretches between your knuckles before dropping back onto the work surface. When you try to round it, the mass relaxes immediately. Instead of holding a ball, it flattens under its own weight.
That sensation has a precise meaning. Hydration is the weight of water compared with the weight of flour, expressed as a baker's percentage. A dough made with 400 grams of flour and 320 grams of water has 80% hydration. It contains 80 grams of water for every 100 grams of flour.
Bakers use the term “high hydration” differently. Some apply it to dough above 73% or 75%, while others reserve it for dough at about 80% hydration or higher, according to King Arthur Baking's explanation of bread hydration. In practical terms, 70% to 80% hydration is common in breads such as ciabatta, focaccia, and sourdough, while formulas above 75% often encourage the large, irregular holes associated with artisan loaves.
The number doesn't tell the whole story. A strong bread flour may absorb water that overwhelms a weaker flour, and whole-wheat flour may behave differently again. A 75% dough can feel manageable in one kitchen and nearly pourable in another.
Practical rule: If the dough spreads before fermentation has finished, don't automatically add flour. First ask whether the flour has absorbed the water, whether gluten has developed, and whether fermentation has gone too far.
The math comes next, but the hands are already giving you useful information. A dough that relaxes quickly needs a different process from one that holds its shape.
What Hydration Actually Means in Baker's Math
Calculate hydration with a simple formula:
Water weight ÷ flour weight × 100 = hydration percentage
For example, 500 grams of flour with 350 grams of water gives:
350 ÷ 500 × 100 = 70% hydration
That formula uses the main flour and water, but a complete dough may also contain milk, eggs, butter, or a liquid starter. Those ingredients contribute water, so experienced bakers calculate total hydration when they need a more exact picture. A liquid starter also contains both flour and water, which means its flour belongs in the total flour weight.
For a quick home-baking estimate, start with the main flour and water, then adjust your expectation upward if the dough includes a liquid starter, milk, or eggs. The baker's percentage calculator from D'BakerAid can handle the arithmetic when a formula includes several preferments or liquid ingredients.
Hydration Levels and Dough Behavior
| Hydration | Feel | Typical Uses |
|---|---|---|
| 60% | Soft clay, cohesive, and easy to round | Tight sandwich loaves and firm rolls |
| 70% | Supple, slightly tacky, and shapeable | Workhorse sourdough and everyday pan loaves |
| 75% | Spreading and elastic, with more handling demand | Rustic loaves, focaccia, and open-crumb bread |
| 80% | Very soft, extensible, and dependent on folds | Artisan sourdough and ciabatta-style dough |
| 85% and above | Glossy, slack, and difficult to shape | Advanced open-crumb formulas |
These descriptions are guides, not laws. A 60% dough often holds a tight ball, while a 75% dough may spread across the counter like thick batter. At 85%, the dough can slump into a glossy pool that barely holds a fold.
Use feel as a second measurement. If the dough rounds and stays rounded, hydration is probably moderate for that flour. If it spreads quickly but gains strength during folds, the formula may be appropriately wet. If it spreads and grows weaker, fermentation or flour strength may be the problem.
How Higher Hydration Changes Crumb and Texture
Water changes the interior of bread, not just the mixing experience. In a peer-reviewed study, raising hydration from 65% to 85% increased mean cell area from 0.35 mm² to 1.35 mm², while also increasing porosity and reducing hardness and chewiness, as reported in the study on hydration, rheology, and bread crumb structure.
That difference explains why a 65% loaf often produces smaller, more uniform cells and a firmer bite, while an 85% loaf can develop larger, irregular alveoli. The wetter dough stretches more readily around fermentation gases, so cells can expand before the crumb sets in the oven.
Higher hydration also changes the eating experience. A wet lean dough often gives you a thinner, crisper crust and a softer interior. The crust-to-crumb balance shifts because the expanded interior contains more open space and less compact, chewy bread. Freshly baked, that texture can feel light and extensible even when the loaf itself is substantial.
Openness Has Limits
Open crumb isn't automatically better crumb. A loaf full of large holes may be awkward for sandwiches, leak spreads, or contain a gummy interior if fermentation and baking aren't controlled. Flavor, strength, gas retention, and crumb quality depend on the entire process, not water alone.
The underlying structure becomes less stable as water rises. A 2021 study of wheat flour dough systems found that phase separation can occur within 24 hours when water content exceeds 55% on a wet basis, and that adding water in two stages improved stability at both 55% and 70% wet-basis hydration. That finding supports a practical approach: delayed water addition, folds, and controlled fermentation can make a wet dough more workable.
A separate PMC study of gluten architecture found continuous gluten networks with starch granules embedded in the matrix at 50% and 62% hydration, but those networks were more vulnerable to mechanical collapse under force. More water improves extensibility, yet it reduces the margin for rough mixing and aggressive shaping.
The Right Tools for Working With Wet Dough
High hydration dough doesn't require a crowded kitchen, but the right tools prevent avoidable frustration. Each item solves a specific handling problem.
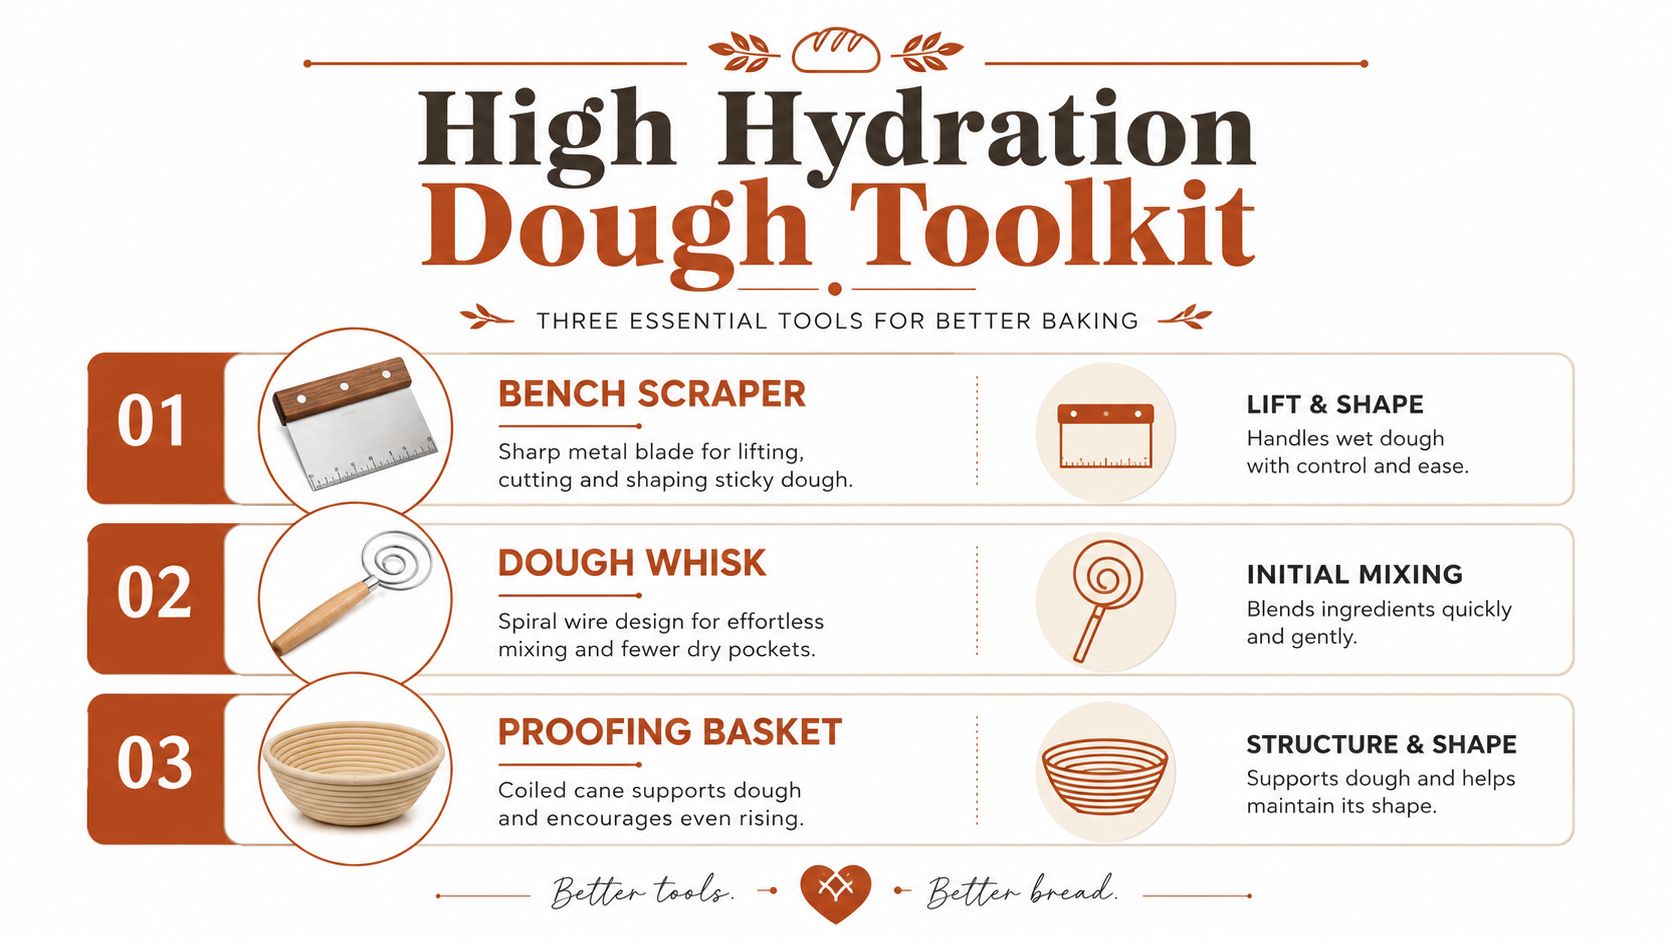
- Bench scraper: Use a sharp metal scraper to lift sticky dough from the counter, divide it cleanly, and tuck edges beneath the dough during shaping.
- Bowl scraper: Flexible plastic reaches the corners of a mixing bowl, helping you gather the dough without adding unnecessary flour.
- Dough whisk: A spiral whisk blends flour and water into a shaggy mass without compacting wet pockets against the bowl.
- Proofing basket: A banneton or couche supports the dough during its final rise. Line it with well-floured linen when the dough is especially slack.
- Dutch oven or covered La Cloche: A covered vessel traps steam while the dough expands, delaying crust formation long enough for oven spring.
- Digital scale: A scale accurate to 1 gram keeps your flour and water ratio consistent. Small measuring errors matter more as hydration rises.
- Rice flour: Rice flour stays relatively dry on the surface and helps prevent dough from bonding to linen or cane.
- Spray bottle and thermometer: A spray bottle can add surface moisture when appropriate, while an instant-read thermometer helps you check the baked loaf rather than guessing from crust color.
A wet hand is often more useful than a floured hand during folds. Water reduces sticking without coating the dough in extra flour, which would alter the formula. For shaping, use a light dusting on the bench and let the scraper do most of the lifting.
A temperature-controlled proofing system can also help when the dough's timing changes with room conditions. D'BakerAid™ combines a yeast fermentation bowl, a dough proofing bowl, and a control hub for temperature and time, with an optional D'Steamer for oven humidity. Its purpose is to make fermentation and proofing more repeatable, particularly with high-protein or specialty doughs. The system is listed at US$299.95 with a 4.9-star rating, and its companion recipes are available through the D'BakerAid recipe app.
Why Technique Matters More Than Water
A wet formula succeeds when the baker builds strength gradually. The flour needs time to absorb water, and gluten needs time to organize before the dough can hold gas. Mixing harder isn't always the answer.
Start with a short initial mix until no dry flour remains. Rest the dough for an autolyse of 20 to 60 minutes, then mix in salt and any remaining water. This staged approach gives flour time to hydrate before you ask the dough to carry its full water load.
Build Strength Without Tearing
Use folds instead of repeated aggressive kneading:
- Stretch and fold: Lift one side of the dough, stretch it upward without tearing, and fold it across the center.
- Coil fold: Slide wet hands under the middle, lift gently, and let the ends fold beneath the dough.
- Lamination: Spread the dough carefully across a damp work surface, then fold it back over itself to create layers of strength.
A practical sequence is a short mix, a longer autolyse, and four folds distributed across roughly two hours. The exact schedule depends on flour and temperature, but each fold should leave the dough smoother and more cohesive rather than shredded.
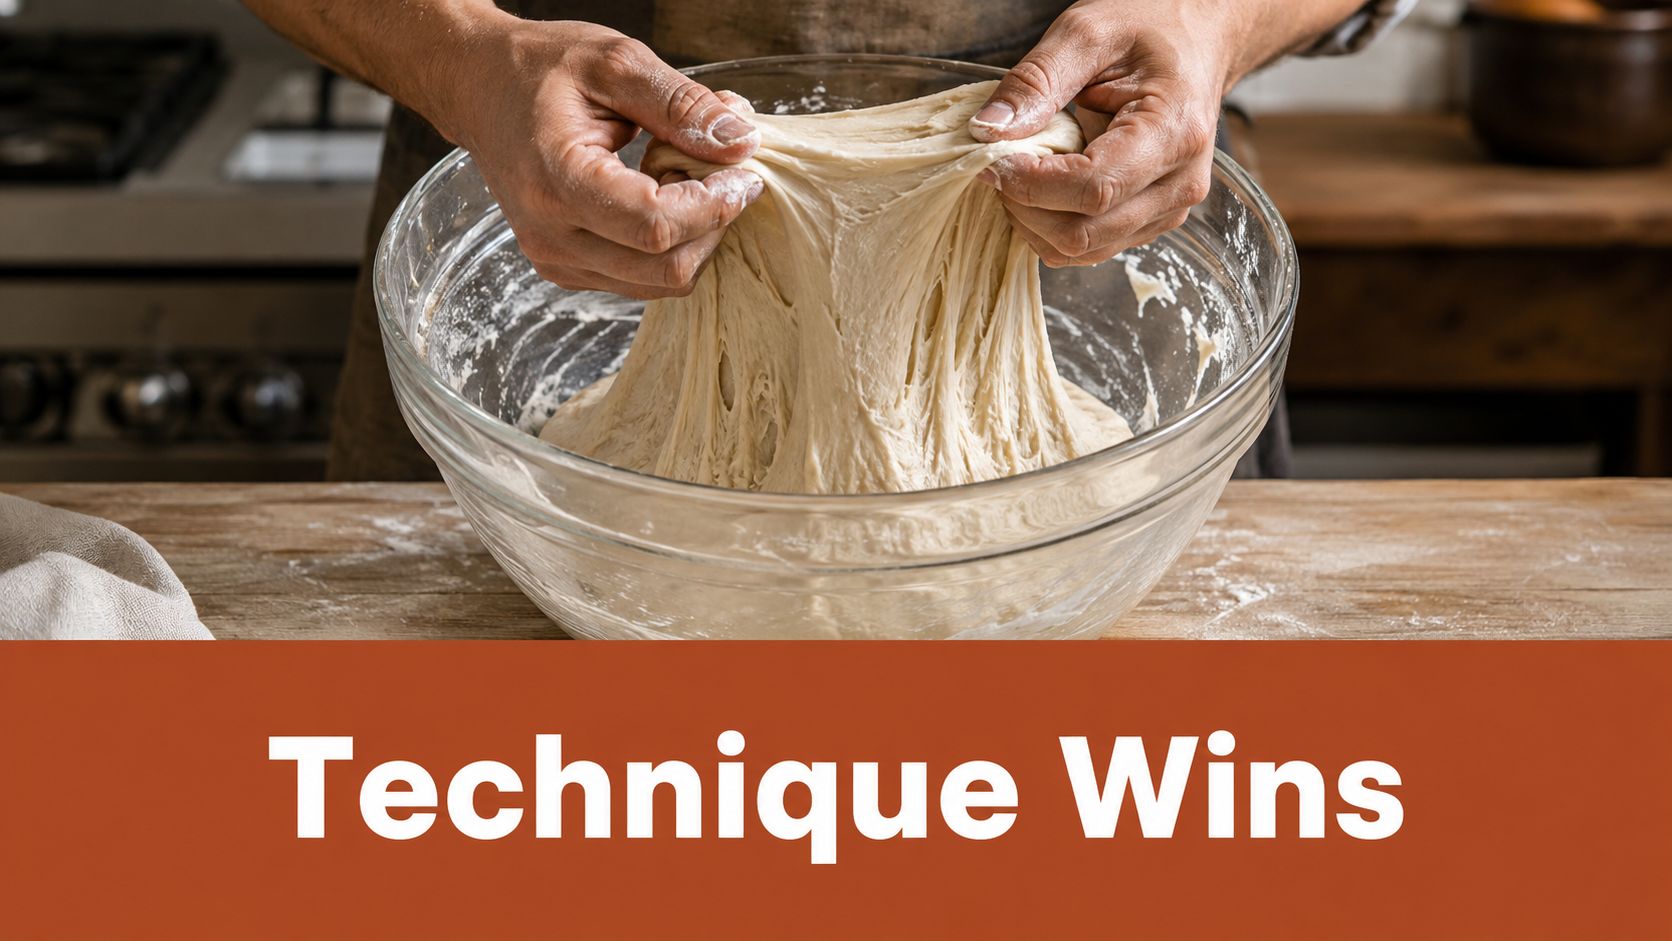
The stretch-and-fold method works because it strengthens the dough while preserving much of the gas already developing inside it. Stop folding when the dough holds a rounded edge and shows a smooth, elastic surface.
Fermentation temperature changes the balance between gas production and gluten weakening. Ambient sourdough often works around 24°C to 26°C, while a cooler kitchen may call for 22°C to 24°C. These are working ranges, not universal commands. Watch expansion, surface tension, and the dough's response to a gentle lift.
The research supports restraint. Higher water makes gluten more extensible but also more vulnerable to collapse, so an overlong bulk can turn a promising dough into a spreading mass. Shape when the dough has strength and passes a windowpane check, not only when a timer says it's ready.
Three Sample Formulas at Different Hydrations
These formulas show how hydration changes handling and finished texture. The percentages are approximate because starter hydration affects the final calculation, but the comparison remains useful for choosing a starting point.
Three Hydration Formulas Compared
| Ingredient / Step | 70% Formula | 80% Formula | 90% Formula |
|---|---|---|---|
| Bread flour | 500 g | 500 g | 450 g |
| Whole wheat or spelt | None | 100 g whole wheat | 50 g spelt |
| Water | 350 g | 480 g | 450 g |
| Active starter | 100 g | 100 g | 100 g |
| Salt | 10 g | 11 g | 10 g |
| Dough character | Cohesive and shapeable | Soft and extensible | Slack and highly delicate |
| Main handling | Minimal folding | Four stretch-and-fold sets | Brief autolyse and one lamination |
| Proofing support | Standard bowl | Bannetons or baskets | Heavily floured banneton |
| Expected result | Even crumb for sandwiches | Open crumb and thinner crust | Very open crumb if fermentation is exact |
| Skill level | Beginner-friendly | Intermediate | Advanced |
The 70% formula is a workhorse loaf. Mix the 500 grams of bread flour with 350 grams of water, then add 100 grams of starter and 10 grams of salt. It should hold its shape with limited folding and produce an even crumb suitable for sandwiches. Expect a total dough weight close to 960 grams before handling losses, and begin checking the bake when the loaf has developed a firm, browned crust.
The 80% formula combines 500 grams of bread flour, 100 grams of whole-wheat flour, 480 grams of water, 100 grams of starter, and 11 grams of salt. The additional flour brings the total flour higher, so calculate the final hydration from the complete formula if precision matters. Four sets of folds should build enough strength for an open, irregular crumb. A rustic formula such as D'BakerAid's ciabatta recipe gives a useful reference point for working with a wetter dough.
The 90% formula uses 450 grams of bread flour, 50 grams of spelt, 450 grams of water, 100 grams of starter, and 10 grams of salt. Use a brief autolyse, laminate once, and transfer the dough to a heavily floured banneton. It will be the most difficult to shape and the most likely to spread if fermentation runs long, so choose it as an experiment rather than a daily sandwich loaf.
When Higher Hydration Is Not the Answer
A larger hydration number can make a loaf more difficult without making it more enjoyable. The decision depends on the bread style, flour strength, desired crumb, and your ability to shape and steam the dough.
Public guidance often labels dough above 73%, 75%, or 80% as high hydration, which makes the term less useful by itself. The Perfect Loaf's hydration discussion highlights the more important question: the right hydration changes with flour type, bread style, and baker skill. A recent 2025 study reported optimal starch crystallization and overall bread quality at 80% hydration, while a 2026 hydration index classified 78% and 80% as hard, 85% as very hard, and 90% as expert-level and pancake-like.
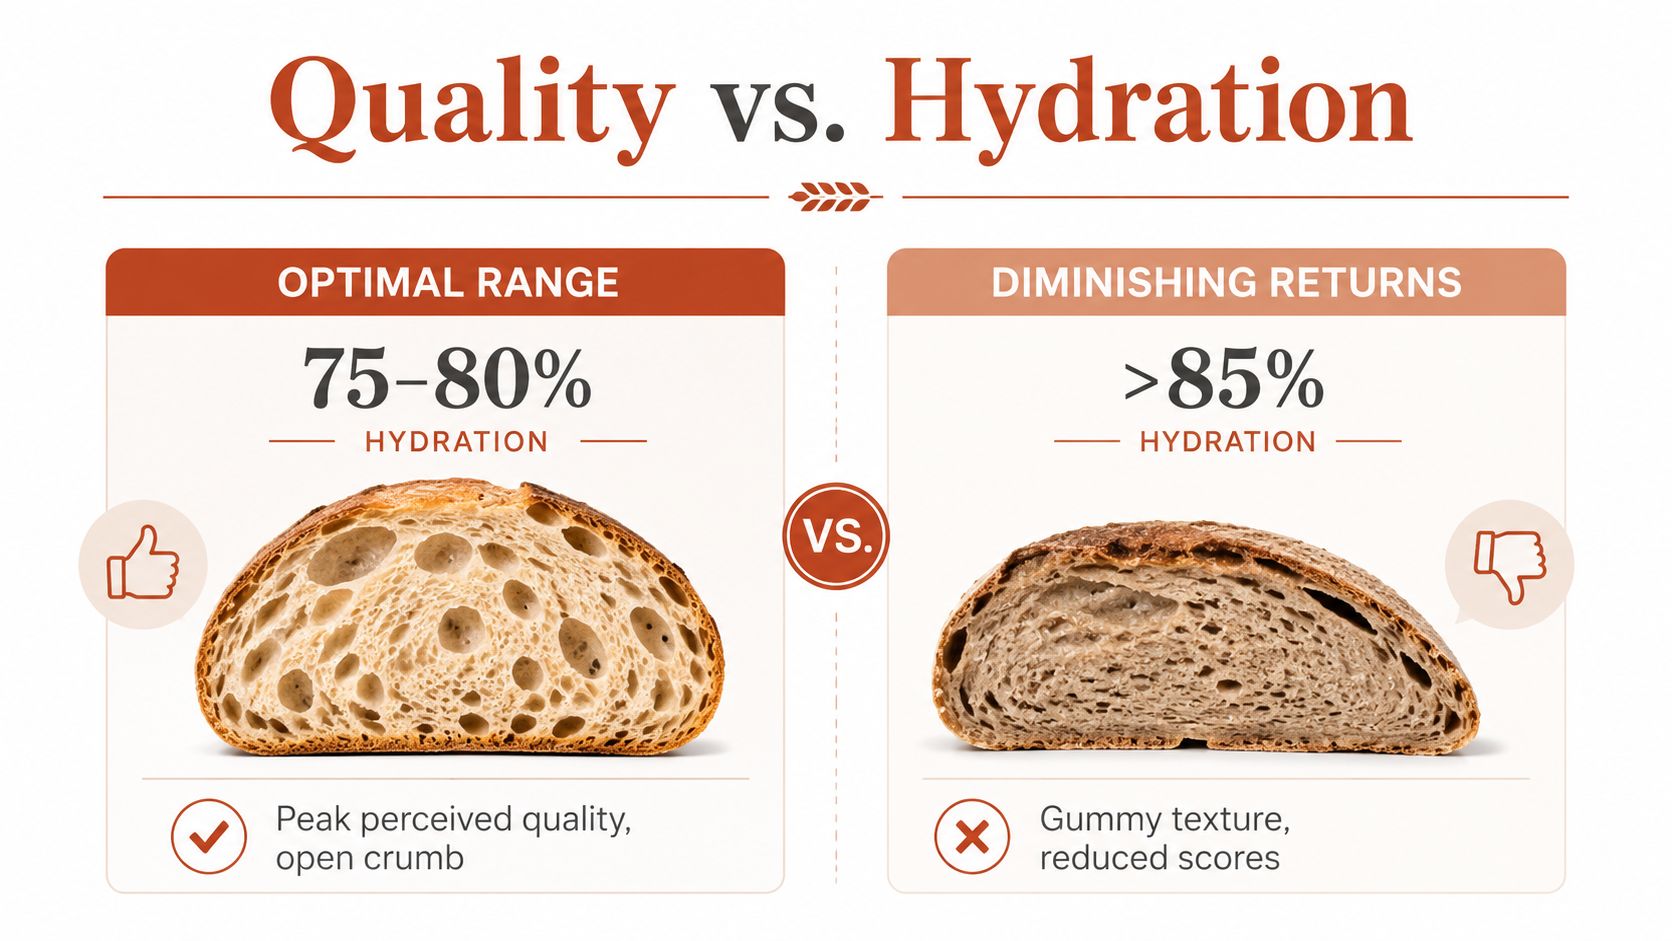
Those findings point to a practical ceiling. Above the range that your flour can support, dough sticks to the banneton, spreads during scoring, and loses oven spring. A home oven without reliable steam makes the problem worse because the surface can set before the slack dough has expanded.
Match Water to the Loaf
Enriched doughs such as brioche and challah often need a more moderate hydration because eggs, butter, and sugar already change the dough's handling. A lean loaf made with weaker flour may also collapse if pushed above the level it can absorb. Strong bread flour and whole-wheat flour can tolerate different amounts of water, so copying a hydration percentage from one recipe into another isn't reliable.
Better target: Choose the highest hydration that still lets you mix, fold, shape, proof, score, and bake the loaf with control.
A 75% loaf with a resilient, open crumb may be more successful than an 85% loaf that spreads flat and bakes gummy. The best high hydration dough isn't the wettest one. It's the one that gives you the texture you want without exceeding the structural limits of your flour and process.
Troubleshooting the Most Common High Hydration Problems
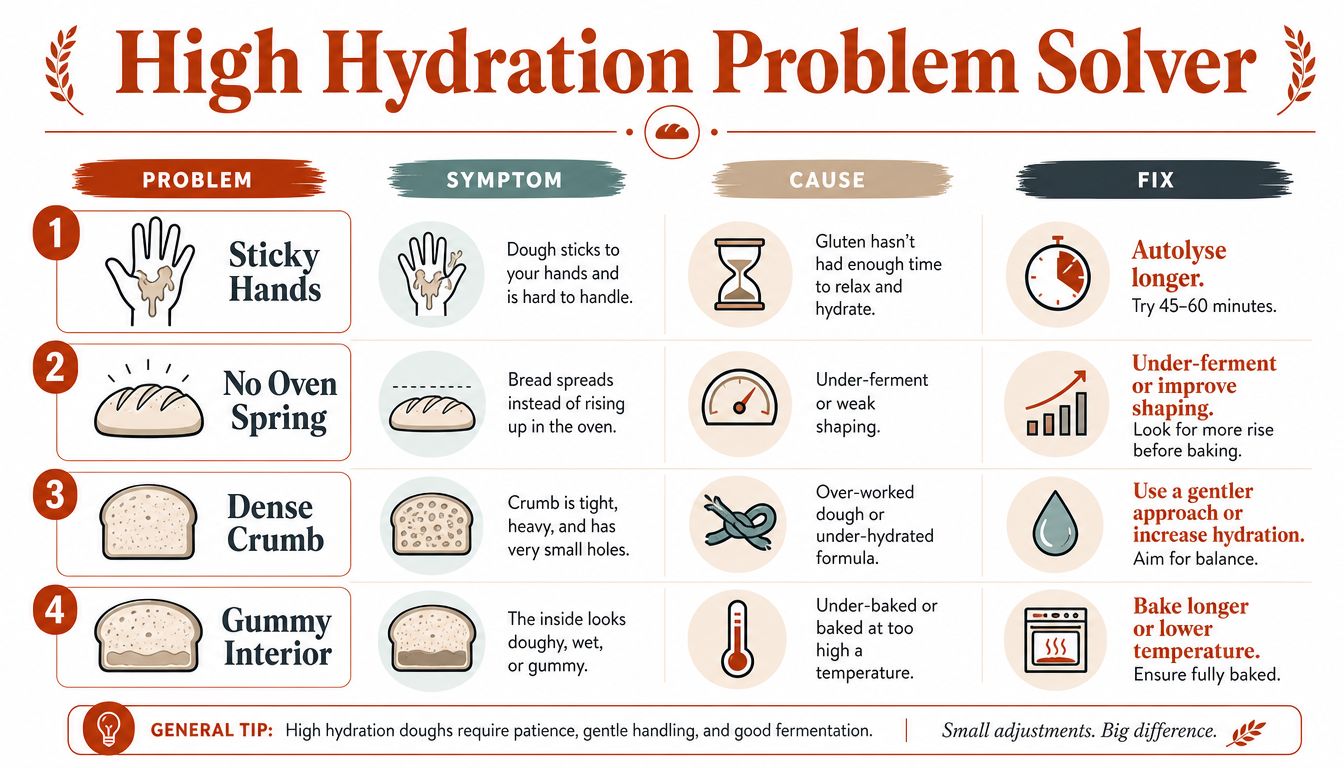
Diagnose the symptom before changing the formula. Wet dough can feel sticky because it needs more time, because gluten is weak, or because fermentation has already damaged the structure. Each cause requires a different response.
- Sticky hands during mixing: Extend the autolyse so the flour has more time to absorb water. Wet your hands for folds, and only reduce water by 2% to 3% on the next bake if the dough remains unmanageably loose.
- Dough spreads flat on the counter: Check for underfermentation or insufficient folding. Add a coil fold and allow another 30 minutes of bulk fermentation, then reassess the dough's strength.
- Banneton collapse or wrinkled surface: The dough may be overproofed, or it may have needed a stronger preshape and bench rest. Use less fermentation time next time and handle the dough gently during shaping.
- Dense, gummy crumb: The loaf may be underbaked or the oven may not have supplied enough steam early in the bake. Extend the covered portion of the bake, then consider lowering hydration for the following attempt.
The smallest effective change is usually the best one. Don't reduce water, shorten fermentation, add more flour, and change the oven temperature in the same bake. Alter one variable, record what happened, and let the next loaf tell you whether that change solved the problem.
If you want more repeatable control over the fermentation and proofing stages, DBakerAid™ offers a precision bread-making appliance system with separate fermentation and proofing bowls, timed temperature control, and an optional steamer. Use it to make wet, high-protein, or specialty doughs more consistently, then start with the hydration level your flour can support.