

You've got a bowl of dough on the counter, and the question is familiar: has it been kneaded enough, or are you about to bake a loaf with weak structure? The clock can't answer reliably. Dough temperature, flour, hydration, mixing, and fermentation all change how quickly gluten develops.
The windowpane test gives you a useful physical answer. Stretch a small piece of dough until it becomes a thin membrane that lets light through without tearing. For ordinary bread, that visual check can prevent underdeveloped dough from producing a squat, weak loaf. For high-protein dough, though, the important question isn't whether the dough "passes." It's whether the level of gluten development matches the formula and the fermentation plan.
Table of Contents
- What the Windowpane Test Tells You About Your Dough
- How to Perform the Windowpane Test Without Tearing the Dough
- Reading the Results and Matching Gluten Development to Your Bake
- Why the Test Looks Different With Whole Grain Enriched and High Protein Doughs
- Pairing the Windowpane Test With Precise Proofing for Consistent Results
- Troubleshooting Common Windowpane Test Mistakes and Quick Fixes
What the Windowpane Test Tells You About Your Dough
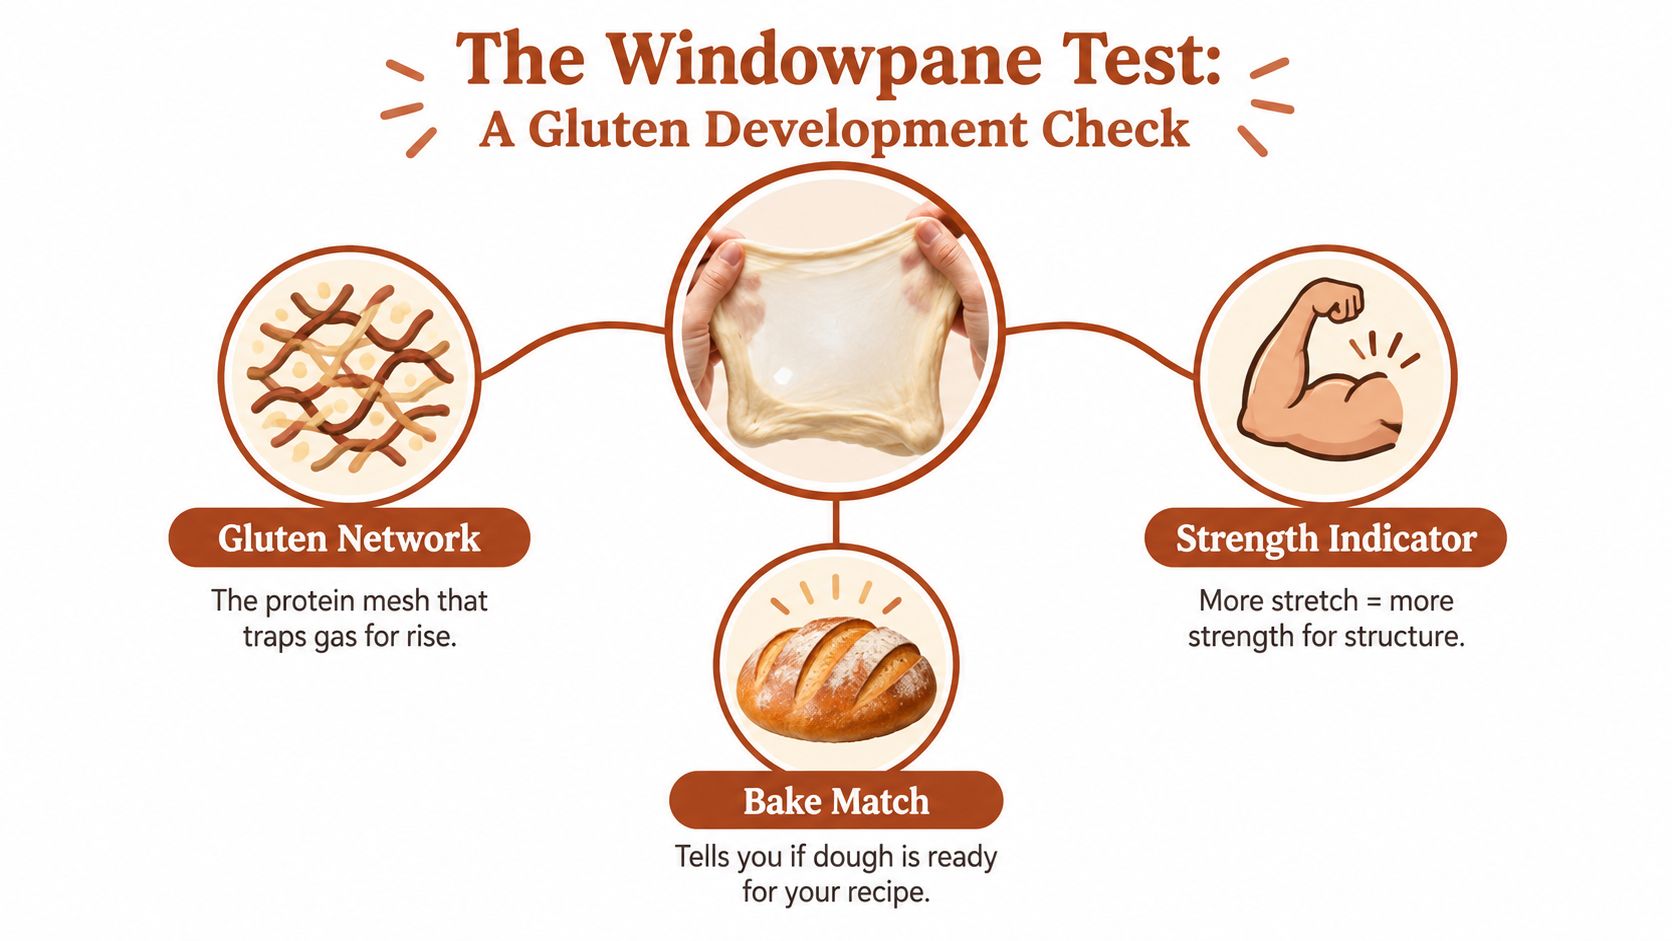
A loaf rises because yeast produces gas and the dough holds on to it. Gluten provides the flexible protein network that surrounds those gas pockets. If the network is too weak, bubbles escape, the dough spreads, and the baked crumb lacks volume. If the dough can stretch without tearing, it has a better chance of retaining gas through fermentation and supporting oven spring.
That's why the test remains useful after decades of home-baking fashions. Bakers stretch a small piece of dough into a thin, translucent membrane and hold it toward a light source. A strong, sufficiently developed sample becomes almost see-through in the center before it breaks. The method was popularized in English-language artisan baking during the 1990s and 2000s, although bakers had used the practical check informally for much longer. In professional bakeries, you'll also hear gluten film test, a reminder that this isn't merely a social-media trick. TasteLab's glossary entry on the windowpane test describes the same bakery concept and its role in judging gluten development.
What the membrane predicts
The test doesn't tell you whether the dough is delicious. It tells you whether its structure is ready for the job you're asking it to do.
- Gas retention: A developed gluten network can hold fermentation gases instead of allowing the dough to collapse or spread.
- Oven spring: Dough with enough strength and extensibility can expand rapidly during the early bake.
- Loaf volume: The network helps the loaf maintain shape as the internal crumb sets.
A tear isn't automatically a disaster. It can mean the dough needs more mixing, a fold, or a short rest. The most common mistake is treating the result as a permanent verdict instead of feedback from the dough.
Bench rule: The windowpane is a control point, not a performance test. Match the membrane to the bread you're making.
That distinction becomes especially important with homemade protein bread. High-protein formulas combine isolate powders, vital wheat gluten, and flour. They often feel denser, stiffer, and slightly tacky compared with a basic white dough. The windowpane still helps, but chasing an exceptionally delicate sheet can push the dough past its useful point and reduce extensibility.
How to Perform the Windowpane Test Without Tearing the Dough
Start by pinching off a small piece of dough. Bakers commonly use a marble-sized, ping-pong-ball-sized, or golf-ball-sized sample, depending on how much dough is available and how easily the piece can be handled. You don't need a large portion. A small sample gives your fingers better control and keeps you from disrupting the main dough unnecessarily.
Flatten the piece slightly, then let it rest briefly. A few minutes is enough for the gluten to relax after mixing. Testing immediately can make a strong dough look weak because its network is still tight and resistant to extension. The independent guidance collected by King Arthur Baking also emphasizes a short rest and gentle stretching, while noting that the test itself can take about ten seconds once the sample is ready. King Arthur Baking's practical windowpane guide covers this rest-and-stretch workflow.
Stretch with patience, not force
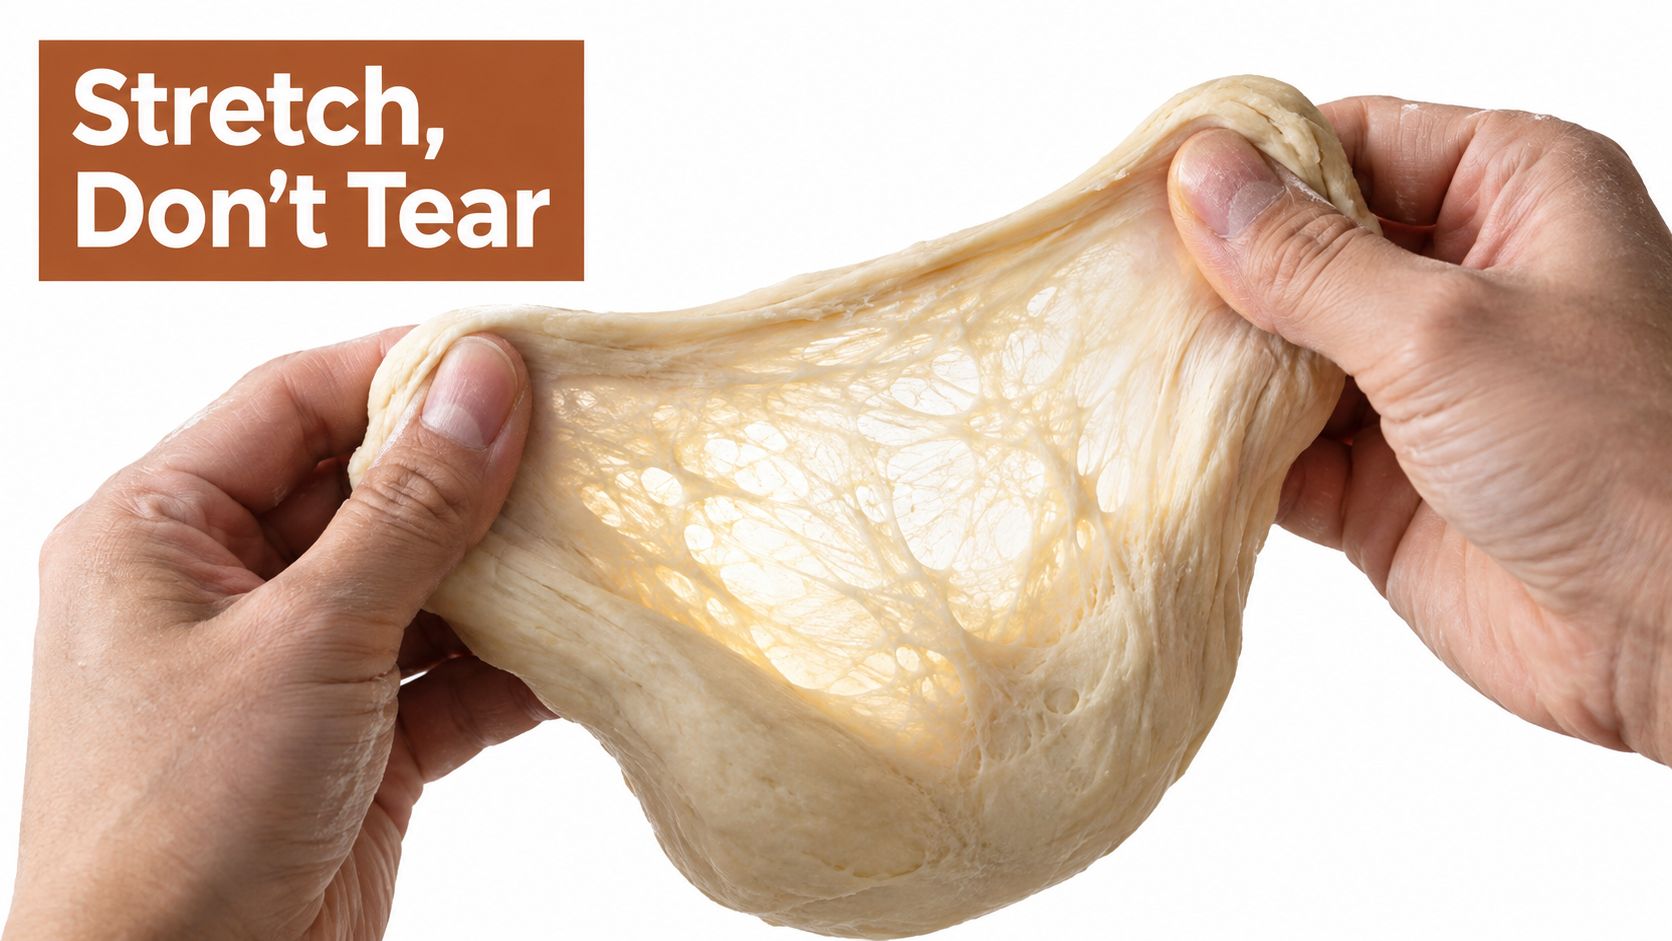
Hold the sample between your thumbs and fingertips. Begin pulling outward slowly, distributing the tension across the piece rather than dragging from one point. Rotate the dough as you go so the center thins evenly. You're looking for a membrane, not a wrestling match.
If the dough stretches into a smooth, translucent center, it has developed useful strength and extensibility. If it tears at the first sign of resistance, either the gluten network needs more development or the dough needs time to relax. Add a short period of mixing or use folds during fermentation, then test again.
Pulling too hard creates a false failure. A sharp yank concentrates stress in one weak spot and can tear even well-developed dough. Jay Arr Bread's windowpane guidance also cautions that cold dough may appear stronger and less extensible than it really is, so test at room temperature after a rest whenever possible.
A sample that becomes thin but remains slightly opaque can still be appropriate. Whole-grain particles, seeds, fats, and protein ingredients change the appearance of the membrane. Don't keep stretching until the dough is destroyed just to produce a perfectly glassy sheet.
Folds can rescue a formula that doesn't respond well to extended kneading. A brief rest followed by a controlled stretch-and-fold technique can build strength while preserving more extensibility than aggressive mixing.
After testing, return the main dough to its bowl and decide based on the formula. A quick sandwich loaf may need a stronger membrane before its single rise. A long-fermented dough may be ready with much less visible development because time and fermentation continue changing its structure.
Reading the Results and Matching Gluten Development to Your Bake
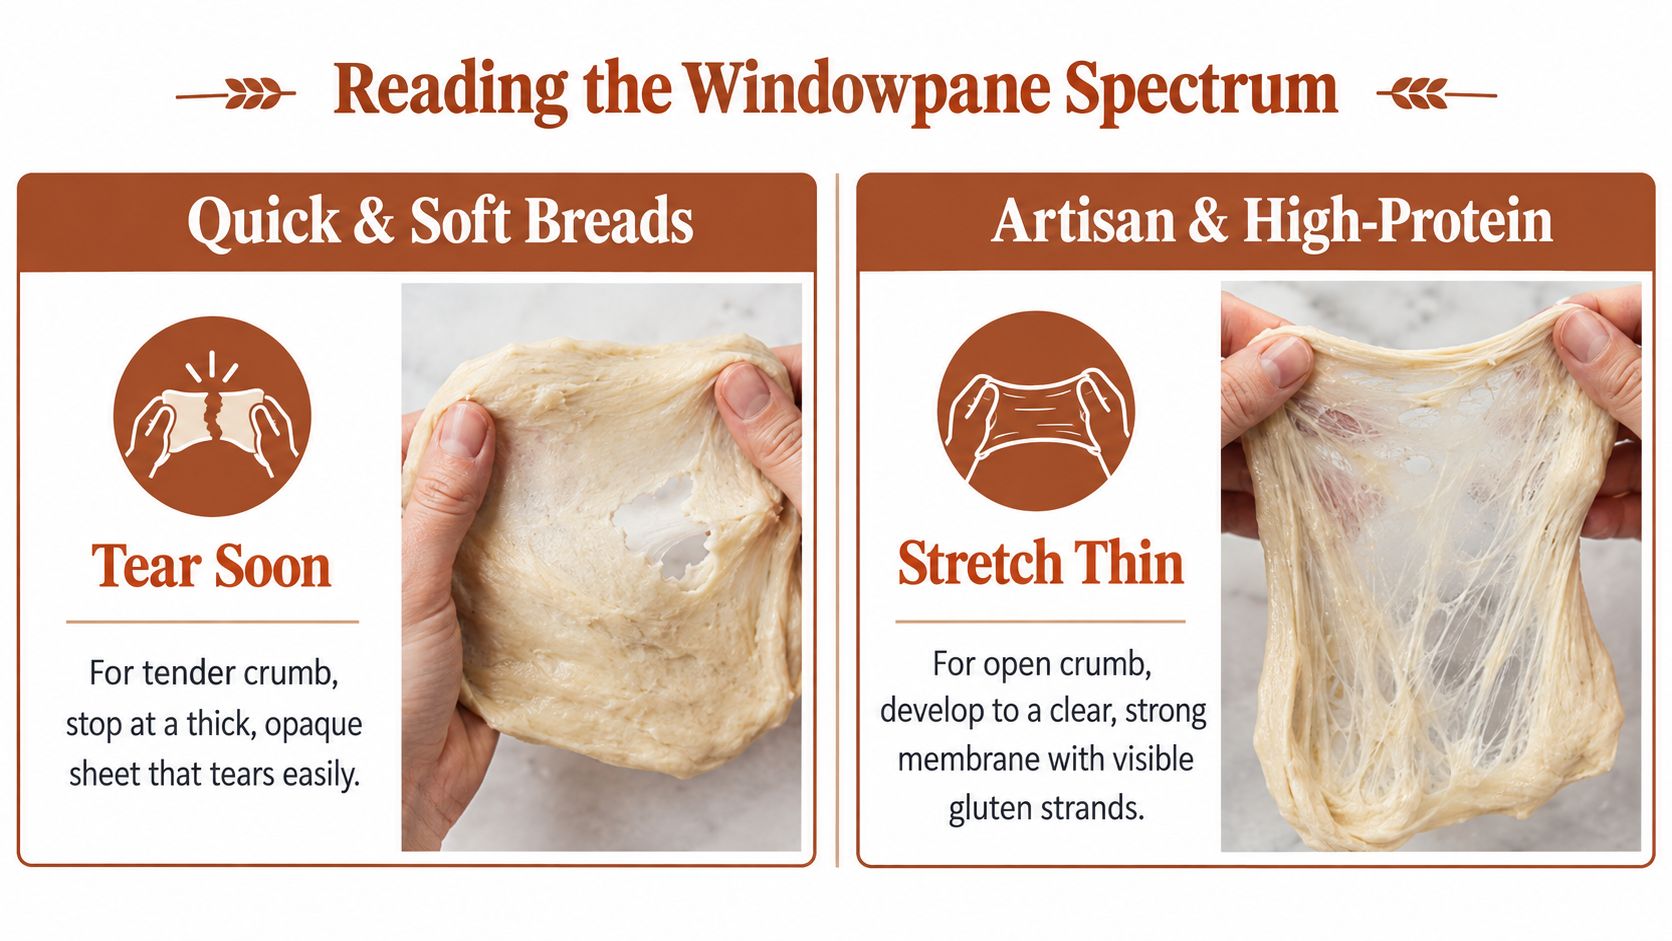
The windowpane test works best as a spectrum. A thin, clear membrane is one endpoint, but it isn't the correct endpoint for every loaf. Fermentation length, flour choice, hydration, enrichment, and handling all determine how much gluten development you need before the dough moves on.
For a quick bread that rises only once, one independent bakery guide places the target at about 100% gluten development at the end of kneading. Long-fermented doughs such as sourdough may need only 20–30% development, while intermediate bulk-fermented doughs commonly sit around 60–80%. These are process benchmarks, not universal laws. Busby's Bakery's kneading guidance connects the desired development level to the fermentation strategy.
Let the formula set the target
An autolyse can change the reading before mechanical mixing begins. A rest of 30–60 minutes can improve dough extensibility, allowing the sample to stretch farther even though you haven't mixed it to a full visual windowpane. If you test before that relaxation has taken effect, you may add unnecessary mixing and end up with a dough that feels tight rather than supple.
| Dough approach | Useful reading | What to do |
|---|---|---|
| Quick, single-rise bread | Close to full development | Look for a strong, thin membrane before moving ahead. |
| Intermediate bulk fermentation | Partial to substantial development | Accept a developing window, then use time and folds to build structure. |
| Long-fermented dough | Limited early development may be enough | Preserve extensibility and let fermentation contribute to strength. |
The test's practical question is therefore: how much development does this dough need now? A transparent membrane usually signals that the gluten network is well organized and capable of holding gas. A thick, opaque sheet signals partial development. A sample that tears immediately suggests more work or more relaxation is needed, unless the formula naturally resists a clean window.
Why overworking can be just as unhelpful
More mixing isn't automatically better. Once the dough has reached the development appropriate for its process, continued mechanical work can reduce the extensibility you need for shaping and expansion. The sample may look strong but feel rubbery, and the main dough can resist shaping instead of stretching smoothly.
For high-protein bread, this distinction matters. Protein isolate and vital wheat gluten increase the structural demand on the dough, but they also make the dough feel firmer than ordinary sandwich dough. Use the test to confirm that the network is forming, not to force every formula into the same clear-film standard.
Why the Test Looks Different With Whole Grain Enriched and High Protein Doughs
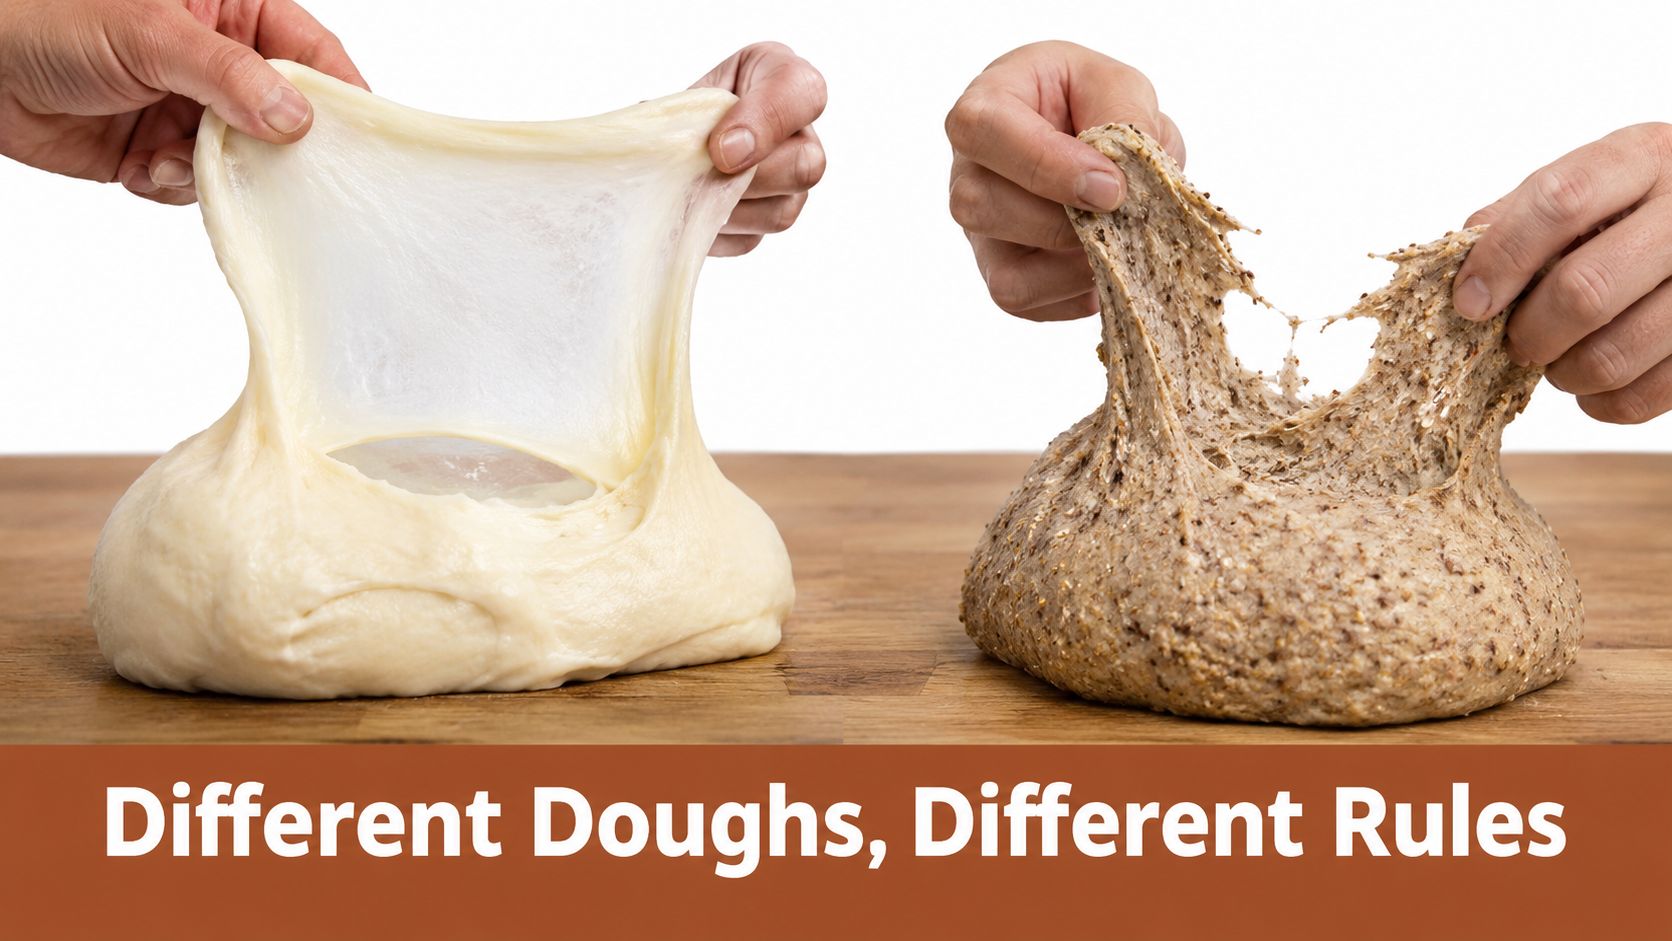
A perfect windowpane is easiest to see in a refined-flour dough with enough protein and relatively few ingredients that interfere with gluten formation. It becomes less reliable as the formula gets more complex. Lower-protein flour, whole-grain particles, added fats, seeds, and other ingredients can create a sample that tears or stays opaque even when the finished loaf will be sound.
Bran and germ interrupt the continuity of the gluten network. Fats coat flour proteins and soften the structure. Seeds and coarse particles create physical weak points in the sample. A dough can therefore show a partial window and still have enough strength for its intended crumb.
Judge the sheet against the loaf
For refined white dough, a thin membrane with visible light transmission is a useful endpoint. For whole-grain dough, a slightly opaque sheet that stretches before tearing may be sufficient. For enriched dough, look for cohesion, elasticity, and a smooth surface rather than demanding a pristine film.
The same caution applies to high-protein bread. D'BakerAid's protein formulas use whey, pea, soy, or collagen isolate alongside vital wheat gluten and bread or whole-wheat flour. They are high-gluten recipes, not gluten-free recipes. Their dough feels denser, stiffer, and slightly tacky, and the baked loaf has a tighter, uniform crumb that's soft but heavier than airy white bread.
Protein source changes appearance too. Whey and collagen tend to stay close to a normal cream color. Pea can produce a slightly grey-green, beany tone, soy tends to be tan or darker, and whole-grain versions bake browner. The crust may brown a little faster, while the finished loaf generally slices cleanly.
The right question isn't “Did I get glass?” It's “Does this dough have the strength and stretch its ingredients and fermentation require?”
For bakers adjusting flour, this guide to flour protein content is a useful companion to the physical test. Flour protein, hydration, and fermentation should be read together. A partial window in a whole-grain loaf can be a success, while the same result in a quick refined-flour loaf may indicate underdevelopment.
Pairing the Windowpane Test With Precise Proofing for Consistent Results
A windowpane result is only useful when you know what the dough must do next. Gluten development prepares dough for fermentation, while temperature, humidity, and time determine how that structure expands. Warm dough usually feels relaxed and extensible. Cool dough can feel tight, so the same formula may produce a different test result at different temperatures.
For straight-dough fermentation, aim for around 80–85°F, following the Home Baking Association's yeast-bread temperature guidance. Shaped dough commonly proofs around 90–100°F in a draft-free, humid space. The same guidance describes using a briefly warmed oven and a bowl of steaming water as a simple proofing setup.
Humidity protects the dough's surface while it expands. A baking technology guide places professional final proof commonly around 78–82°F with increased humidity. This overview of fermentation and proofing techniques explains why humidity belongs in the proofing equation, not as an optional finishing detail. For a broader explanation of how fermentation affects dough condition, see this guide to fermentation science and proofing control.
The practical connection
Test at a point that matches the formula, not at an arbitrary stage. A long-fermented dough may need only moderate gluten development before fermentation because time and folds continue building strength. A short, fast formula usually needs more development before the dough enters the proof. Whole-grain and enriched formulas also require a practical target rather than a perfect transparent film.
Once the dough passes the appropriate benchmark, track volume, elasticity, and surface tension instead of relying on a fixed clock. Dough with less development may benefit from additional folds and a longer fermentation. Heavily mixed dough may need gentler handling to avoid tightening before shaping.
D'BakerAid's SureDough system combines fermentation and proofing bowls with a control hub for temperature and time, plus flour-specific programs and ±0.5°C control. More consistent conditions make windowpane readings easier to compare, particularly with high-protein doughs that react noticeably to room-temperature changes.
The optional D'Steamer adds humidity during the opening stage of baking. It supports the process after gluten development, shaping, and proofing have been judged correctly.
Troubleshooting Common Windowpane Test Mistakes and Quick Fixes
Most failed windowpane checks come from the test, not the dough. Pulling too fast, testing cold dough, or demanding a clear film from a whole-grain formula can send you in the wrong direction.
The sample tears immediately
If the center breaks as soon as you apply tension, the dough may need more development. Add a short period of mixing or use folds, then allow the dough to relax before testing again.
If you tested directly after mixing, don't assume the gluten is weak. Rest the sample for a few minutes and retest at room temperature. A tight dough often stretches very differently after relaxation.
The dough tears when you pull
Yanking concentrates force in one location. Use slow, steady tension and rotate the sample so the center thins evenly. The test should feel controlled, not like you're trying to prove the dough wrong.
The dough is cold and rubbery
Cold dough can appear stronger and less extensible than it really is. Warm the dough through normal room-temperature resting, then test again rather than adding unnecessary mixing.
The dough never becomes clear
Check the formula before chasing more gluten. Whole-grain, enriched, lower-protein, and additive-heavy doughs may produce only a partial or opaque window. If the dough is cohesive, elastic, and appropriate for the intended loaf, proceed rather than overworking it.
A final bench checklist
- Retest after rest: Give tight dough a few minutes to relax.
- Retest after development: Use brief mixing or folds when the sample tears too soon.
- Move to fermentation: Proceed when the dough matches the development level required by its formula.
- Trust context: Accept a partial window when whole grain, enrichment, seeds, or specialty proteins make a perfect membrane unrealistic.
For high-protein bread, the windowpane test is most useful when it's paired with controlled fermentation rather than treated as a standalone pass or fail. The same principle applies whether you're making a whey loaf, a vegan pea-and-soy formula, or a conventional sandwich bread.
D'BakerAid™ controls fermentation and proofing with a Stage 1 yeast fermentation bowl, a Stage 2 dough proofing bowl, and a temperature-and-time hub, with optional steaming support for the bake. Visit DBakerAid™ to see how its controlled process can make difficult high-protein dough more repeatable at home.