

You've added oats to a familiar sourdough dough, but it doesn't behave the way you expected. It feels sticky during mixing, tightens during the folds, and somehow still bakes with a damp, heavy middle. The fix usually isn't more flour or a longer ferment. It's choosing an oat form, accounting for the water it holds, and stopping fermentation while the wheat dough still has strength.
This sourdough oatmeal bread recipe starts with soaked rolled oats and a wheat-dominant dough. Use the first loaf to establish your water requirement, then adjust one variable at a time. You're aiming for a slice that's moist and gently chewy, not an airy white loaf with oats scattered through it.
Table of Contents
- Oat Form Water and a Working Loaf Formula
- How to Build the Starter and Mix the Dough
- Bulk Temperature Folds and When to Stop
- Shape the Loaf Then Proof and Bake With Steam
- Texture, Taste and the Beta-Glucan Trade-Off
- Repeat the Loaf and Decide What to Change
Oat Form Water and a Working Loaf Formula
Start with 450 g bread flour and 50 g rolled oats, then add 100 g active starter, 10 g salt, and up to 360 g water. Hold back 25–50 g of that water until the dough has rested. These are working recipe quantities, not a promise that every flour will need the full amount.
Weigh the oats dry. Take their soaking water from the measured recipe water rather than adding an unrecorded splash. That distinction matters more than whether the dough looks wet immediately after mixing.
The working batch
| Ingredient | Weight | Baker's percentage |
|---|---|---|
| Bread flour | 450 g | 90% |
| Rolled oats, weighed dry | 50 g | 10% |
| Active starter at equal flour and water weights | 100 g | 20% |
| Salt | 10 g | 2% |
| Water, including oat-soaking water | Up to 360 g | 72% |
The percentages use the combined bread flour and dry oats as the base, with the starter listed separately. Including the starter's flour and water changes the hydration calculation, so don't compare percentages from different recipes without checking their denominator. Use our baker's percentage calculator when scaling the batch or accounting for starter contributions.
A useful comparison is Pantry Mama's oatmeal sourdough formula, which uses 400 g water, 500 g flour, and 100 g oats and warns that cutting the water can leave dough dry, dense, and difficult to stretch. A high nominal hydration doesn't necessarily mean there's plenty of free water available to the wheat flour.
Oat form, share of flour, and water behavior
The shares below are practical starting points for adapting this dough. For porridge, calculate the oat share from its dry oat weight, not the weight after cooking.
| Oat form | Share of flour | Water move | Prep | Crumb result |
|---|---|---|---|---|
| Briefly soaked rolled oats | 10–20% | Hold back 5–10% of the water and assess after the rest | Soak 20–30 minutes | Mild chew and the most reliable open crumb of these options |
| Oat flour | About 10% | Expect a firmer water demand than rolled oats | Mix into the initial hydration rest | Tighter crumb if the dose climbs |
| Cooled porridge soaker | About 10–15%, measured as dry oats before cooking | Count porridge water and reduce free mixing water | Cook, cool fully, then mix | Moist loaf that can feel slack |
| Fine oat bran | Keep the share low | Strong water binding, so soak rather than dust in dry | Soak before mixing | Can reduce volume; particle size also affects beta-glucan behavior |
| Raw oats added late | Avoid | They continue absorbing water through proofing | Don't use this method | Dense loaf and an apparently weaker rise |
Choose soaked rolled oats for the first bake. Steel-cut oats need cooking, so treat them as porridge and record the cooking water. Instant oats soften quickly, so soak briefly and judge the rested dough before using the reserve.
Water rule: A dough that feels sticky isn't necessarily overhydrated. Wait until the oats and flour have hydrated before deciding it needs less water.
Keep a note beside the formula showing how much reserve remains. Without that record, you won't know whether the next loaf needs a different oat preparation or more water.
How to Build the Starter and Mix the Dough
Use a starter that has expanded clearly and smells cleanly acidic. A jar that produces a few bubbles but barely rises isn't ready to carry an oat-containing loaf.
The sequence matters because oats absorb water without supplying the gluten-forming proteins that wheat contributes. The review of oat ingredients in bread supports a wheat-dominant formulation with approximately 10–20% oats, staged water addition, and a 20–30-minute hydration rest rather than copying a wheat-only dough unchanged.
Prepare the culture and oats
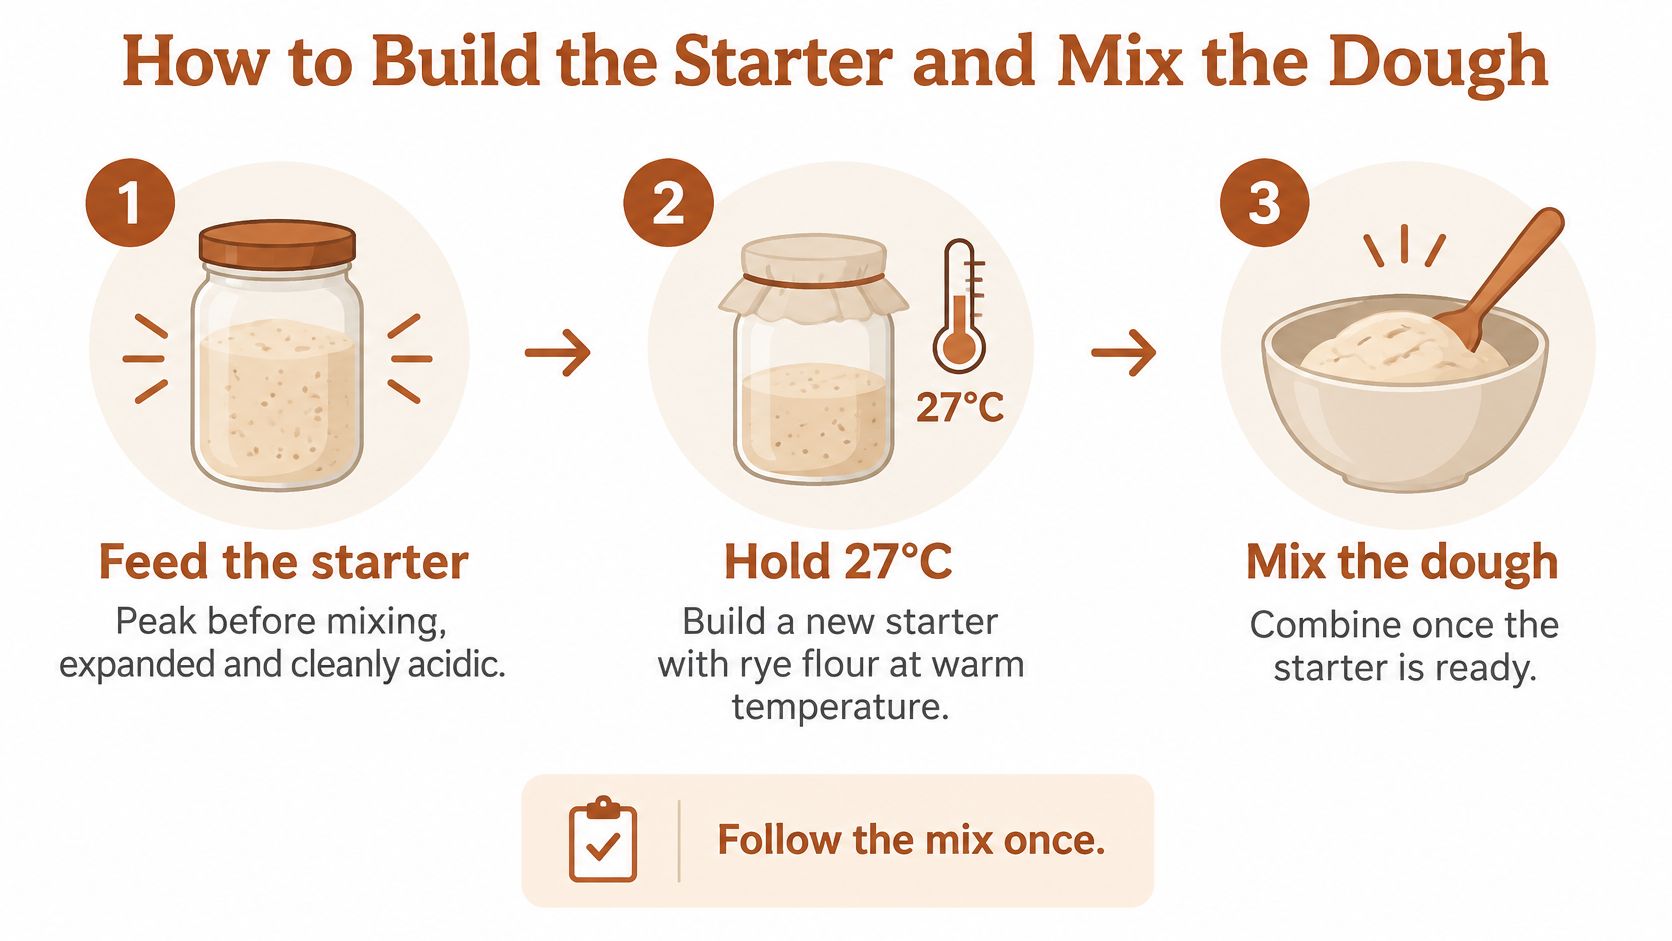
- Feed the starter so it peaks before mixing. For a new culture, our Sourdough method uses rye flour and water at 50:50 by weight, held at 27°C; most starters are bake-ready within 5–7 days. Readiness still means reliable expansion after feeding, not merely reaching a calendar date. The rye sourdough guidance from Just Cook It is useful for understanding rye-based starter preparation, while our sourdough starter feeding ratio guide helps you plan refreshments around mixing time.
- Prepare the oats before they enter the dough. Wet the rolled oats with water taken from the batch allowance, cover, and let them soften. If you cook a porridge instead, cool it fully before mixing. Hot oats can raise the dough temperature sharply and damage the culture where they touch it.
Use this starter-preparation sequence as a visual reminder before weighing the final dough.
Mix without chasing a dry surface
- Combine the active starter, bread flour, soaked oats, and most of the remaining water. Mix until there are no dry flour pockets, then cover and rest. Because starter is already present, this is more precisely a fermentolyse, although recipes often call it an autolyse. Don't leave dry flour under the dough and expect folding to incorporate it later.
- Add the salt, then work in reserved water in small pours. Pinch and fold until each addition disappears before deciding on another. Stop adding when the dough stretches into a cohesive flap without immediately tearing or flowing through your fingers.
- Finish with a cohesive, slightly tacky mass. Scrape it into a straight-sided container and mark the starting height. If it pours like porridge, stop adding water rather than assuming extra folds will repair it.
For an established culture, refrigerate it between bakes and refresh it at room temperature before use. Give a sluggish starter further feedings until its rise becomes predictable. Whole-grain and traditional sourdough doughs can need longer than standard yeast-dough schedules, so don't force them into a short proofing timetable.
Bulk Temperature Folds and When to Stop
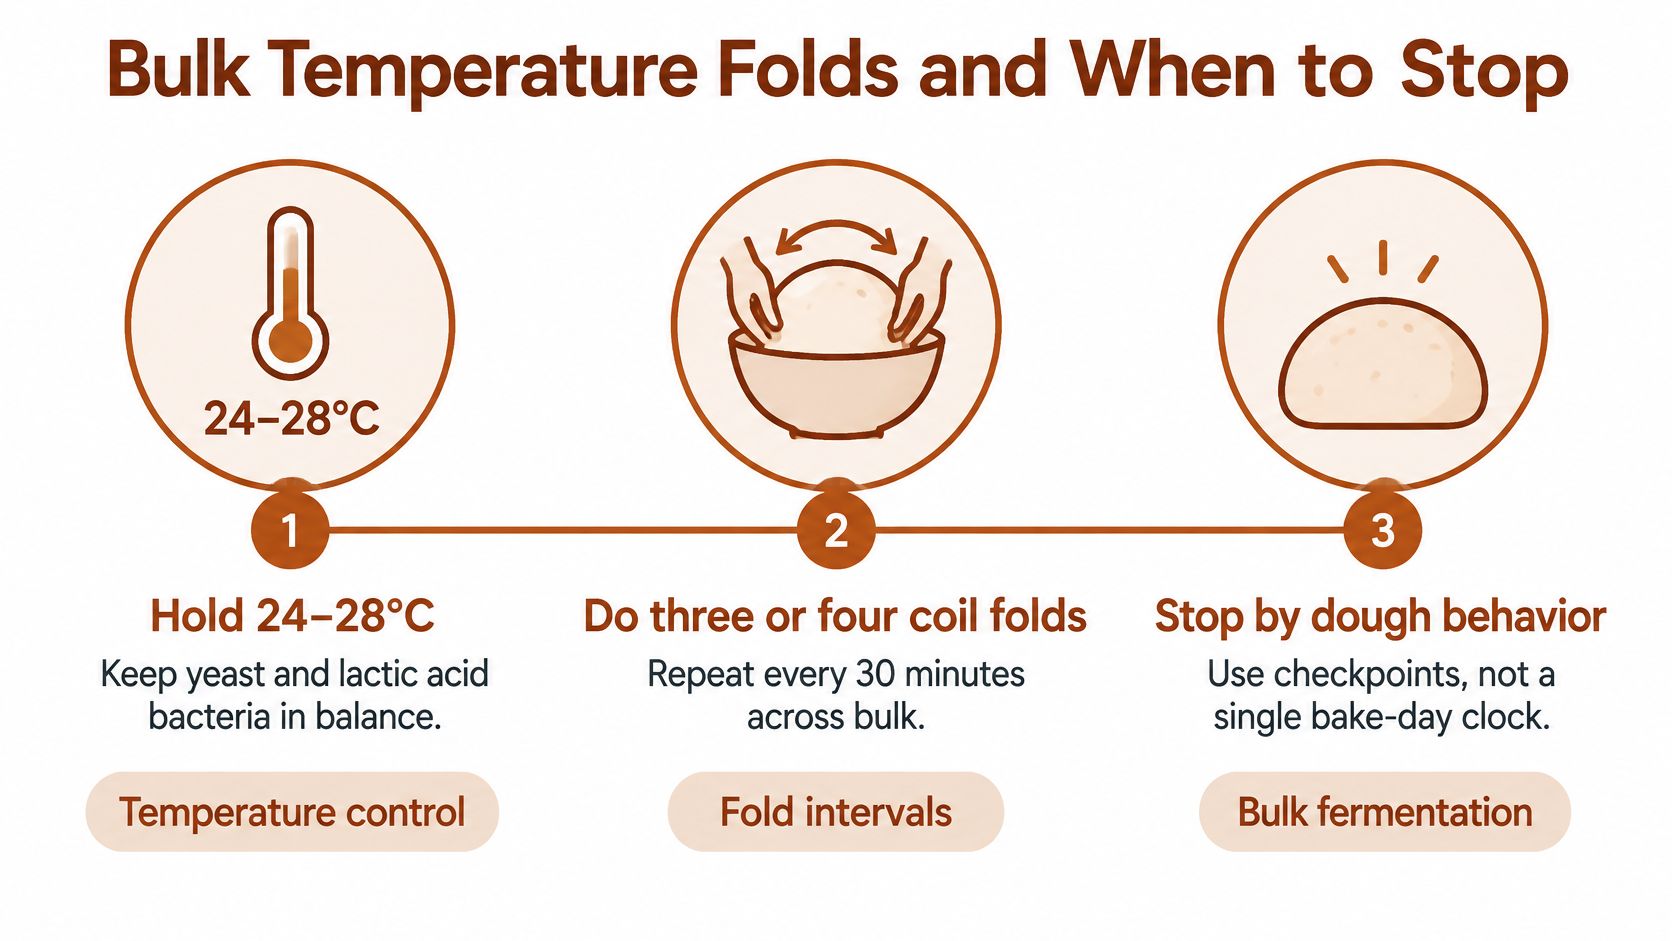
Hold the dough around 24–28°C and end bulk fermentation at about 50–75% expansion, not a full double, using the practical fermentation benchmarks summarized in the review of sourdough microorganisms and fermentation conditions. Measure the dough itself with a probe thermometer. A warm room doesn't tell you whether a cold bowl of dough has reached the intended temperature.
Mark the container before fermentation starts. Judge expansion against that mark, not against your memory of how full the bowl looked after mixing.
Bulk checkpoints from mix to shape
| Phase | Target | Duration | Stop when |
|---|---|---|---|
| Starter at peak | Clean acidic aroma and clear expansion | Feed to align its peak with mixing | The top has domed and expansion begins slowing |
| Initial hydration rest | Flour hydrated, salt still out | 20–30 minutes | No shaggy-dry patches remain |
| Coil folds | Dough around 24–28°C | Three or four folds, about 30 minutes apart during the first 2 hours | The dough holds a coil and its surface smooths |
| Bulk after folds | Moderately warm dough, not a hot shortcut | Fermentation can fall within a broader 6–24-hour window | Volume is up about 50–75% and the dough remains resilient |
| Optional acidity check | Approximately pH 4.2–4.5 as an additional reference | Use alongside temperature and dough condition | Stop earlier if the oat dough becomes fragile |
These are checkpoints, not independent instructions to keep fermenting until every cell in the table matches. A dough that has reached its expansion target shouldn't stay warm just to satisfy an acidity number.
Wet your hands, lift the dough gently from the middle, and let its ends tuck underneath. Rotate the container and repeat as needed to form a supported coil. Stop stretching before the surface tears, then leave the dough undisturbed between folds.
Why hotter isn't automatically better
The fermentation review describes an experimental comparison in which dough at 35°C reached pH 4.28 in about 9.5 hours, while dough at 25°C took about 11 hours to reach pH 4.35. Faster acidification isn't the same thing as better gas retention, easier shaping, or a better loaf.
A 2019 whole-wheat sourdough study indexed by FAO AGRIS found the greatest phytate degradation at 25°C, while 35°C negatively affected several bread-quality and sensory measures. Phytate can bind minerals including iron, zinc, calcium, and magnesium, but these findings don't establish a guaranteed nutritional result for this oatmeal formula.
Don't use heat to rescue a weak starter. You can accelerate acidification without building the dough strength you need.
An under-fermented loaf tends toward a tight interior and limited oven spring. An over-fermented dough becomes increasingly sticky, fragile, and difficult to tension. A sharply sour smell can support that diagnosis, but smell alone isn't a stopping test.
For a workable day, feed the starter ahead of mixing, mix when it peaks, and complete the folds early in bulk. Let the marked container determine shaping time rather than a lunch or dinner deadline. Use refrigeration after shaping if your schedule needs an overnight pause.
Shape the Loaf Then Proof and Bake With Steam
A finished bulk should leave you with aerated dough that still releases as a connected mass. Use a bench scraper and lightly floured hands rather than pulling the dough out in pieces.
The shaping goal is a supported outer skin, not a tightly compressed ball.
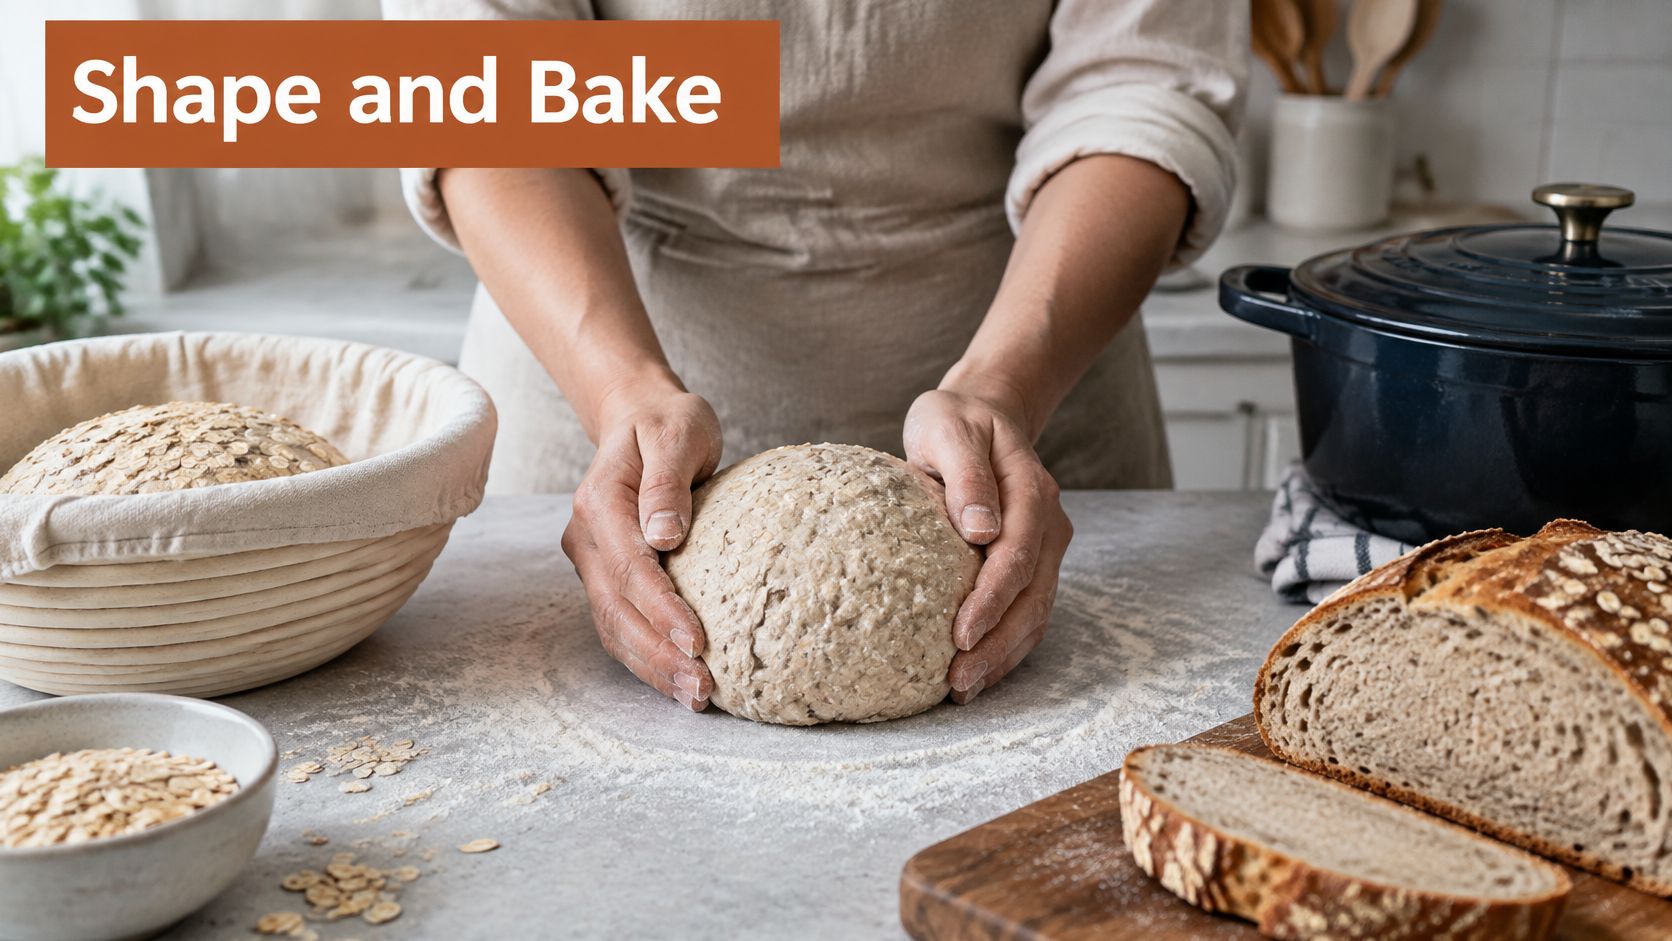
Preserve the gas while building tension
- Tip out and pre-shape gently. Ease the dough onto the counter, make a loose letter fold, and rest it for 15–20 minutes as a practical bench-rest starting point. Cover it so the surface doesn't dry. If it spreads immediately, use the scraper to support it rather than adding repeated handfuls of flour.
- Shape a boule or bâtard by folding the dough inward and drawing it gently against the counter. Stop when the surface becomes taut. Aggressive kneading at this stage expels gas and can tear the skin around the oat pieces.
- Proof until a floured finger indentation returns slowly. A fast rebound suggests the dough needs longer; a dent that remains while the surrounding dough weakens suggests you've waited too long. For the overnight route, use the cold-proof window given in the bulk guidance, but remember that refrigeration slows fermentation rather than stopping it immediately.
Our process leaves kneading and shaping with you, then the home oven finishes the loaf. A temperature-controlled proofing bowl doesn't shape the bread or bake it.
This wheat-and-oat loaf isn't gluten-free. Rice-, tapioca-, and potato-starch formulas belong to a separate recipe category and require different structure-building methods.
Steam first, then dry heat
- Preheat a covered Dutch oven or bread pot thoroughly. Use 230–245°C as the working oven range for this loaf, adjusting within it for your oven's browning behavior. Transfer the dough on suitable baking parchment, score it with a bread lame, and replace the lid carefully.
- Uncover after the loaf has expanded and the score has opened. Continue baking until the crust is deep gold and the sides feel firm rather than soft. If the base darkens too quickly, move the pot higher in the oven or place a baking sheet on the rack beneath it.
A covered pot traps moisture from the dough during the initial expansion. For an uncovered setup, our guide to baking with steam explains how to create that early humid environment, then let the oven dry for browning.
Watch the steam-baking demonstration before choosing your oven setup.
- Cool completely on a rack before slicing. A warm oat crumb can smear under the knife even when the loaf has baked properly. Expect a moist, slightly heavier slice than white sourdough, with no wet streak at the base and no paste left on the blade.
Crust color alone won't confirm that the middle is set. If the loaf colors before it feels structurally firm, shield the top and continue baking rather than accepting a dark crust over an underbaked center.
Texture, Taste and the Beta-Glucan Trade-Off
The longest ferment isn't automatically the healthiest. Fermentation can change oat beta-glucan in ways that don't track neatly with stronger sourdough flavor.
In an oat-sourdough experiment published in the International Journal of Food Science & Technology, total beta-glucan fell from 4.89% to 4.23% after 12 hours, while soluble beta-glucan initially increased and then declined. An 8-hour fermentation retained relatively high soluble and high-molecular-weight beta-glucan and produced high viscosity under those experimental conditions.
That's a reason to avoid extending fermentation merely for a presumed benefit. It isn't a validated timer for this wheat-and-oat loaf, and it doesn't justify baking dough before it has fermented properly.
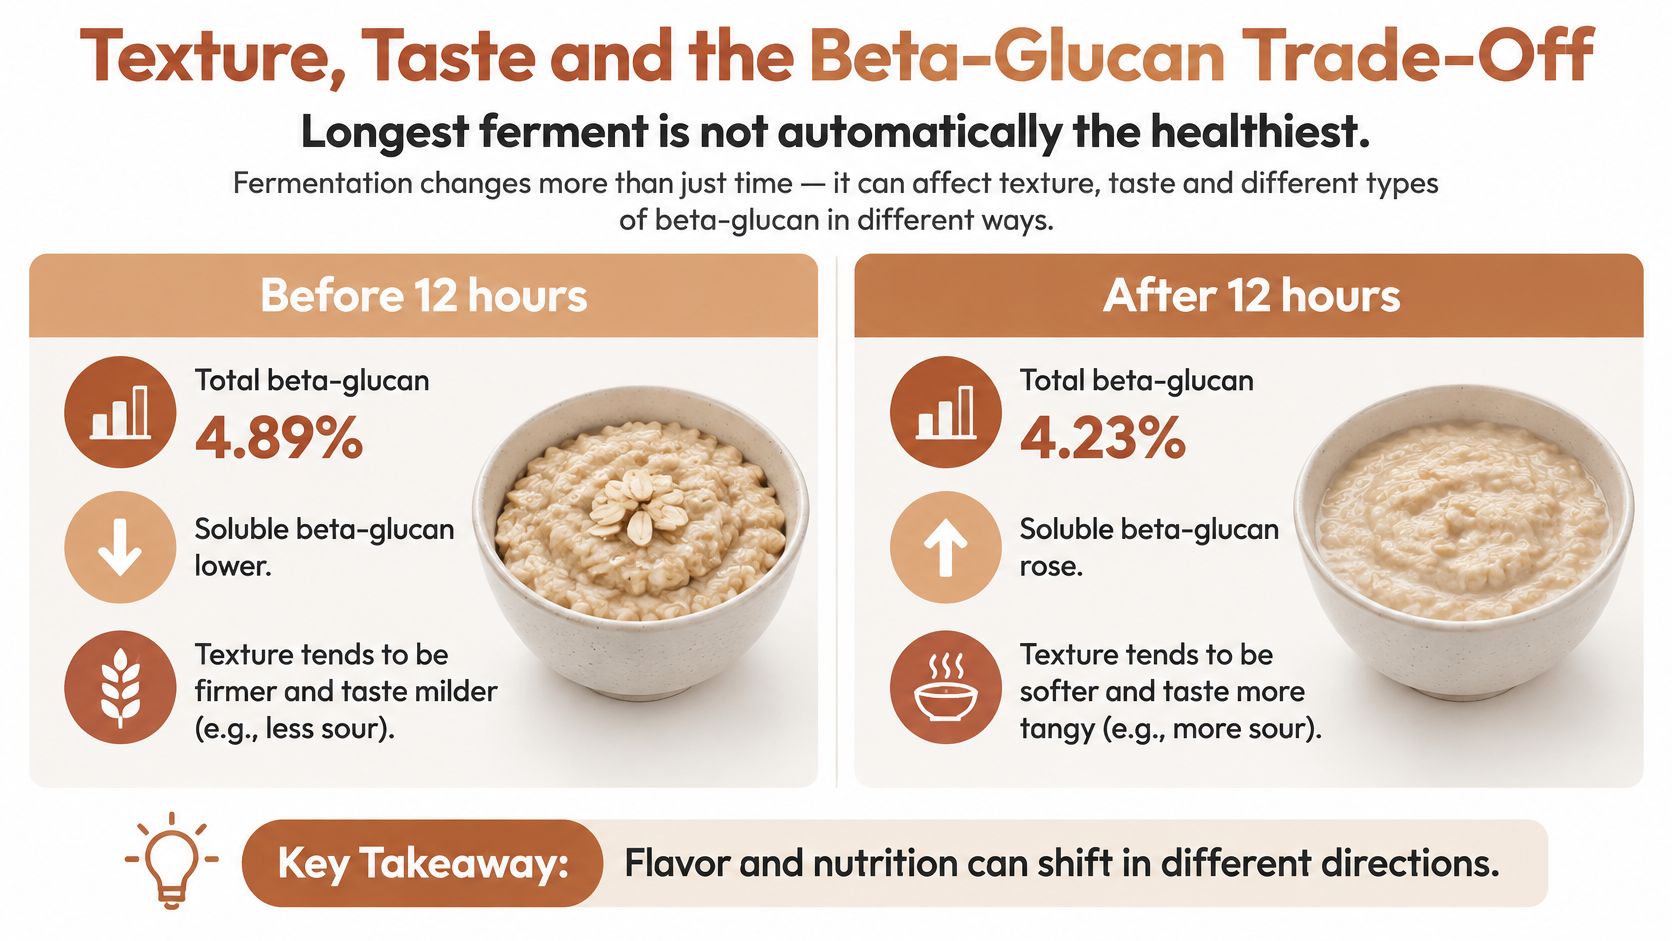
The important distinction is between total beta-glucan, soluble beta-glucan, and molecular size. They aren't interchangeable measurements. The soluble fraction can change direction during fermentation, so a simple before-and-after image can't describe the full process.
Compare preparation methods without changing everything
Use an 8-hour-style ferment as a planning reference, not a nutritional guarantee. The sensible aim is a dough that develops within a manageable warm fermentation rather than one deliberately held long after it's ready.
For a useful kitchen comparison, keep the dry grain weights and shaping method consistent:
| Oat preparation | What to hold constant | What to assess after cooling |
|---|---|---|
| Overnight porridge | Dry oat weight and recorded total water | Moisture, gumminess, and whether the loaf spreads |
| Briefly soaked rolled oats | The same wheat base and fermentation endpoint | Visible oat pieces, chew, and loaf height |
| Finely milled oat flour | The same oat share, without extra bran | Crumb fineness, firmness, and water requirement |
Porridge disperses softened oat starch through the dough and can produce a moist interior. Rolled oats retain more identifiable texture and make water adjustments easier to track. Oat flour distributes throughout the wheat dough, so increasing it changes the whole crumb rather than adding chewy inclusions.
Longer fermentation and smaller bran particles can reduce beta-glucan molecular weight. That doesn't mean coarse oats always deliver a superior result, or that fine oat flour has no value. Record the preparation and judge the bread you can measure, including volume, moisture, and chew.
Nutrition boundary: A successful home bake can demonstrate good texture. It can't demonstrate beta-glucan retention or a specific physiological benefit without analysis.
Fix the fault you can identify
- Dense and gummy: Reduce the oat loading toward the base formula, finish water adjustment after the hydration rest, and handle the dough gently. Also check whether you sliced it warm or removed it from the oven too early.
- Dry and difficult to stretch: Use more of the measured reserve on the next bake. Don't automatically add flour just because hydrated oats make the surface tacky.
- Sour, fragile, or collapsed: Shape sooner and move to a cold proof while the dough still has structure. A grey tone alone doesn't prove over-fermentation, so assess strength and expansion too.
This recipe is ordinary wheat bread with oats, not a concentrated high-protein loaf. Don't assign it protein-powder recipe macros or assume its calories from the word sourdough. Calculate nutrition from your actual ingredients and finished serving weight if you track macros.
Repeat the Loaf and Decide What to Change
Bake the soaked-rolled-oat version first, and record the water you used rather than the maximum printed in the formula. On the next bake, change either the oat preparation or the reserve-water addition, not both.
A useful bake record doesn't need a spreadsheet. Keep it beside the flour so you can use it before mixing rather than reconstructing the dough from a photograph afterward.
Keep a record that leads to a decision
- Ingredient choice: Note the bread flour brand and whether the oats were rolled, instant, milled, or cooked.
- Water used: Record the soaking water, mixing water, and reserve that went into the dough.
- Fermentation: Write down the dough temperature and photograph the marked container when you shape.
- Finished crumb: Cut only after cooling, then note whether it's moist, gummy, dry, or clean-slicing.
If the crumb is dry but the loaf holds its shape, adjust water before changing fermentation. If the dough stretches well but collapses during shaping, investigate fermentation before buying stronger flour. If the loaf is moist and slices cleanly but feels heavier than white bread, that may be the expected oat texture rather than a fault.
Buy temperature control for a temperature problem
A kitchen that swings from cool mornings to warm afternoons makes repeatability harder. Our D'BakerAid precision dough station isn't a bread machine: you still mix, fold, shape, and bake in your own oven, while the hub controls fermentation and proofing temperature.
The Sourdough program holds 27°C, runs by design for up to 24 hours, and is safe for unattended overnight operation. That operating window isn't an instruction to leave every dough warm overnight. Choose the endpoint by dough condition, and use a cold proof when you need to slow fermentation.
For a different baking project, see the high-protein recipes. Those dedicated sandwich-loaf formulas use concentrated protein ingredients and vital wheat gluten; they're high-gluten loaves, not this oatmeal sourdough and not gluten-free. Adding protein powder casually to this formula would create a new hydration and structure problem, not a measured protein bread recipe.
Keep the next bake simple: repeat the ingredients, improve the weakest checkpoint, and compare the cooled slices. Consistency comes from controlling a known variable, not changing the oats, flour, water, and schedule together.
DBakerAid™ offers controlled fermentation and proofing while you keep your own mixing, shaping, and oven-baking method. If fluctuating kitchen temperatures are the missing piece in your oatmeal sourdough routine, visit DBakerAid™ to shop the precision dough station and explore the recipe guides.