

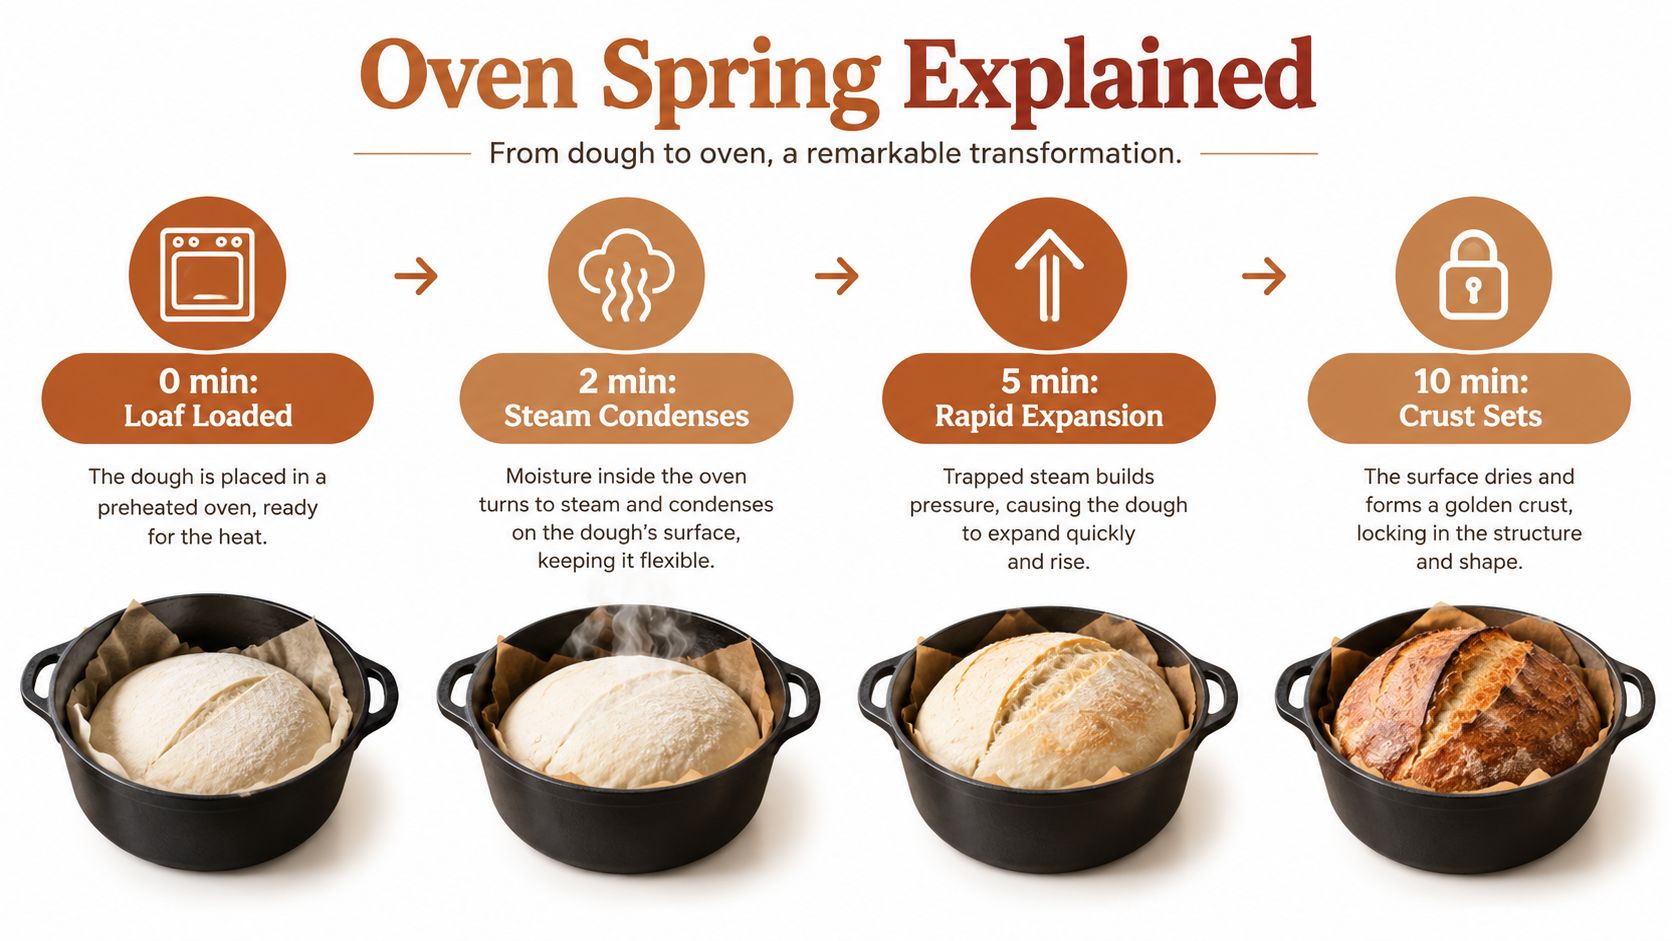
The surprising part of oven spring bread is that most of the rise doesn't happen slowly across the full bake. It happens in a short thermal window, usually the first 10 minutes, while trapped gases expand, yeast briefly remains active, and the dough surface is still flexible. Technical bread references place the end of oven spring around an internal dough temperature of 55–60°C, when starch gelatinization and dough setting lock the structure in place (Serious Eats explains the critical baking window).
That changes how you troubleshoot a loaf. Steam matters, but steam alone can't rescue weak gluten, poor fermentation, a slack shape, or a cold baking surface. A loaf rises when gas, heat, humidity, scoring, and dough strength arrive in the right order.
Table of Contents
- What Oven Spring Actually Means in Baking
- The Four Mechanisms That Drive Oven Spring
- Building Dough That Can Hold a Spring
- Scoring and Loading the Oven for Maximum Rise
- Common Oven Spring Myths Worth Dropping
- Diagnosing Why Your Loaf Did Not Rise
- A Repeatable Oven Spring Checklist
What Oven Spring Actually Means in Baking
Oven spring is the brief, visible expansion that begins as shaped dough enters a fully heated oven. Carbon dioxide expands, water becomes vapor, ethanol vaporizes, and yeast may remain active briefly before heat stops fermentation. The rise is concentrated in the first 10 minutes, although baking references describe the useful phase as roughly 10–15 minutes (Serious Eats covers the early oven-spring phase, while this baking-technology guide discusses the first 8–15 minutes).
Oven spring covers only this early bloom. Later baking sets the crumb, redistributes moisture, and browns the crust. Those changes finish the loaf, but they do not produce the same dramatic expansion. A free-standing boule can open along its score and gain height, while a Pullman loaf has less freedom because the pan controls its shape.
The thermal window
Oven spring is a race between expansion and setting. Heat reaches the outer dough first, while the interior remains extensible. Gas pressure pushes against gluten, steam increases internal pressure, and the score provides a controlled opening for that expansion. As the dough approaches roughly 55–60°C internally, starch gelatinizes and the structure hardens, ending the spring (technical coverage of the oven-spring mechanism).
That timing makes loading and surface condition important. If the crust dries before expansion, pressure may force a weak seam or tear the side. If fermentation has already consumed much of the dough's capacity, the oven can expand only the gas that remains. Treat oven spring as a time-limited structural event, not a promise of continuous rising throughout the bake.
High-protein dough makes this constraint more noticeable. Whey, pea, soy, or collagen isolate can change handling, so fermentation and proofing must be reliable before the dough reaches the oven. For related guidance on how flour protein content affects dough behavior, see the linked explanation. Bakers troubleshooting crumb texture can also review this guide to shred in bread.
The Four Mechanisms That Drive Oven Spring
Oven spring is controlled by a narrow heating window, the dough's ability to hold pressure, and what happens during the first 8–15 minutes of baking. Heat alone cannot produce height. The loaf must still contain expandable gas, flexible gluten, and enough surface moisture to delay crust setting. A bread-science breakdown identifies thermal gas expansion, dissolved carbon dioxide, and water turning to steam as major contributors (the oven-spring guide breaks down these contributing mechanisms). The figures are useful for understanding the process, not for predicting every dough.
Heat expands what fermentation created
The first mechanism is gas expansion. Carbon dioxide trapped during fermentation enlarges as the dough heats, while ethanol also vaporizes. This expansion is strongest before the crumb structure sets, so a thoroughly preheated oven and immediate loading protect the available rise.
The second mechanism is dissolved carbon dioxide. Some carbon dioxide remains in solution during proofing and is released as the dough warms. That release adds pressure while the gluten is still able to stretch.
Water supplies the third mechanism. It becomes vapor, raising pressure inside the dough and pushing against the gluten-starch matrix. Steam also keeps the surface flexible, delaying crust formation while the interior expands. This technical explanation covers humidity and early baking.
Yeast and gluten decide whether expansion becomes height
Yeast activity does not stop the instant the dough enters the oven. It can continue while the interior warms toward roughly 55–60°C, although the structure sets around that range (Lesaffre discusses unexpected yeast activity during baking). Gluten determines whether the resulting pressure becomes height or turns into spreading, collapse, or an uncontrolled split.
| Mechanism | Active temperature window | Baker control |
|---|---|---|
| Thermal gas expansion | Early heating, before crumb setting | Load onto a thoroughly preheated surface |
| Carbon dioxide release | As dough warms through the early bake | Manage fermentation and avoid exhausting the dough |
| Water vapor and steam | Strongest during the first 8–15 minutes | Keep the surface humid, then vent for browning |
| Yeast activity and gluten extension | Yeast contributes until the dough approaches 55–60°C internally | Build strength, proof carefully, and score a taut surface |
These controls work together. Steam can delay crust formation, but it cannot create gas in weak or over-fermented dough. Strong gluten can hold pressure, yet a dry surface may set before expansion is complete. Fermentation also determines how much capacity remains when the loaf enters the oven. This overview of fermentation science explains why the dough's pre-oven condition matters as much as the oven itself.
Building Dough That Can Hold a Spring
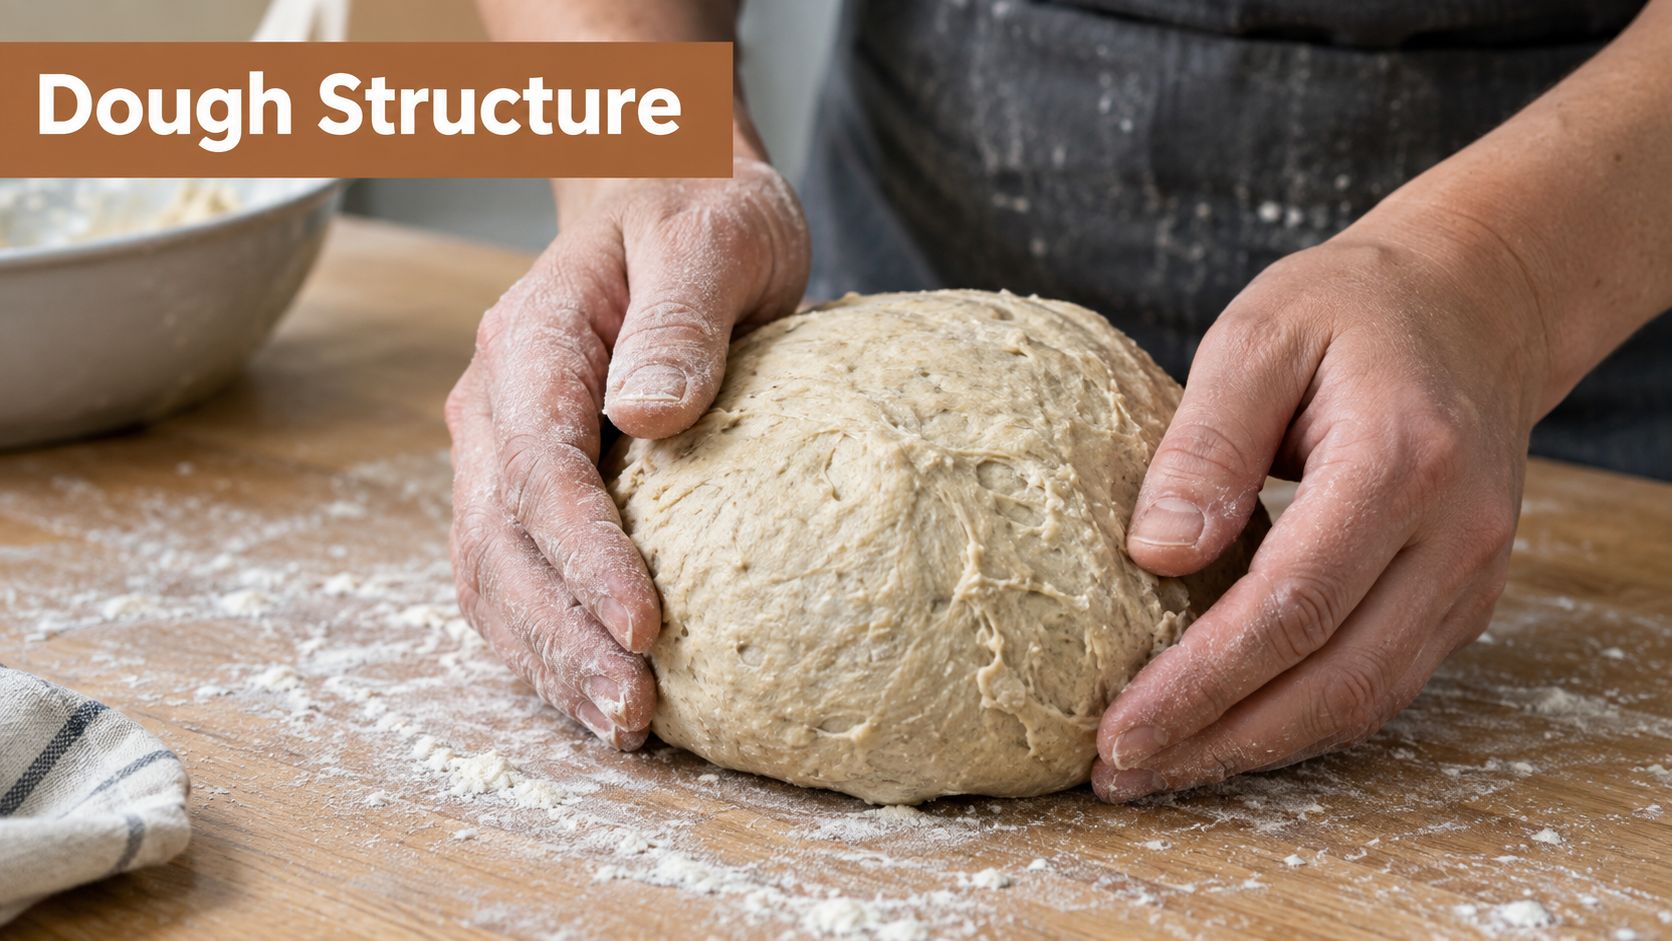
The oven can't manufacture strength that the dough never developed. Before scoring, the loaf needs enough gluten organization to trap gas, enough fermentation to create internal pressure, and enough remaining capacity to expand again under heat.
Build the network before shaping
Start by mixing until the flour is fully hydrated, then give the dough a rest if the formula allows it. An autolyse can make the dough more extensible and easier to develop, but it isn't a substitute for full gluten development. Use the windowpane test rather than a fixed kneading time. Stretch a small piece gently. If it forms a thin membrane before tearing, the dough has useful strength.
For lean loaves aimed at an open crumb, a hydration range of 68–78% is workable, with 75% a strong home-oven starting point. Higher hydration can produce a more open interior, but it also makes shaping and loading less forgiving. A stiff dough is easier to handle, yet it may resist expansion if the gluten hasn't relaxed sufficiently.
Ferment for capacity, not maximum size
Bulk fermentation should leave the dough aerated and elastic, not exhausted. Cooler dough, around 24–26°C, generally gives you a longer fermentation window and more control. A cold retard around 4°C for 8–14 hours can build flavor while slowing activity, but it won't repair dough that's already over-proofed.
Final proof is where many loaves lose their potential. A practical target is roughly 50–75% volume increase, not necessarily doubling. The dough should feel inflated and resilient. Press it lightly. A slow rebound indicates that the network is holding gas while retaining some expansion capacity.
Shape with enough tension to create a smooth, taut outer skin. A loose seam or under-shaped boule may spread during loading and then rupture along the weakest point. Conversely, aggressive shaping can squeeze out the very gas pockets you need. The best shape is firm enough to stand, but not so tight that the dough fights the score.
Scoring and Loading the Oven for Maximum Rise
Scoring and loading decide whether the dough's stored gas becomes height or escapes as a blowout. The dough is most vulnerable immediately before baking, and the first 8–15 minutes determine much of the final lift. A slow transfer, cold baking surface, or repeated door opening can waste that short expansion window.
Make the cut a pressure valve
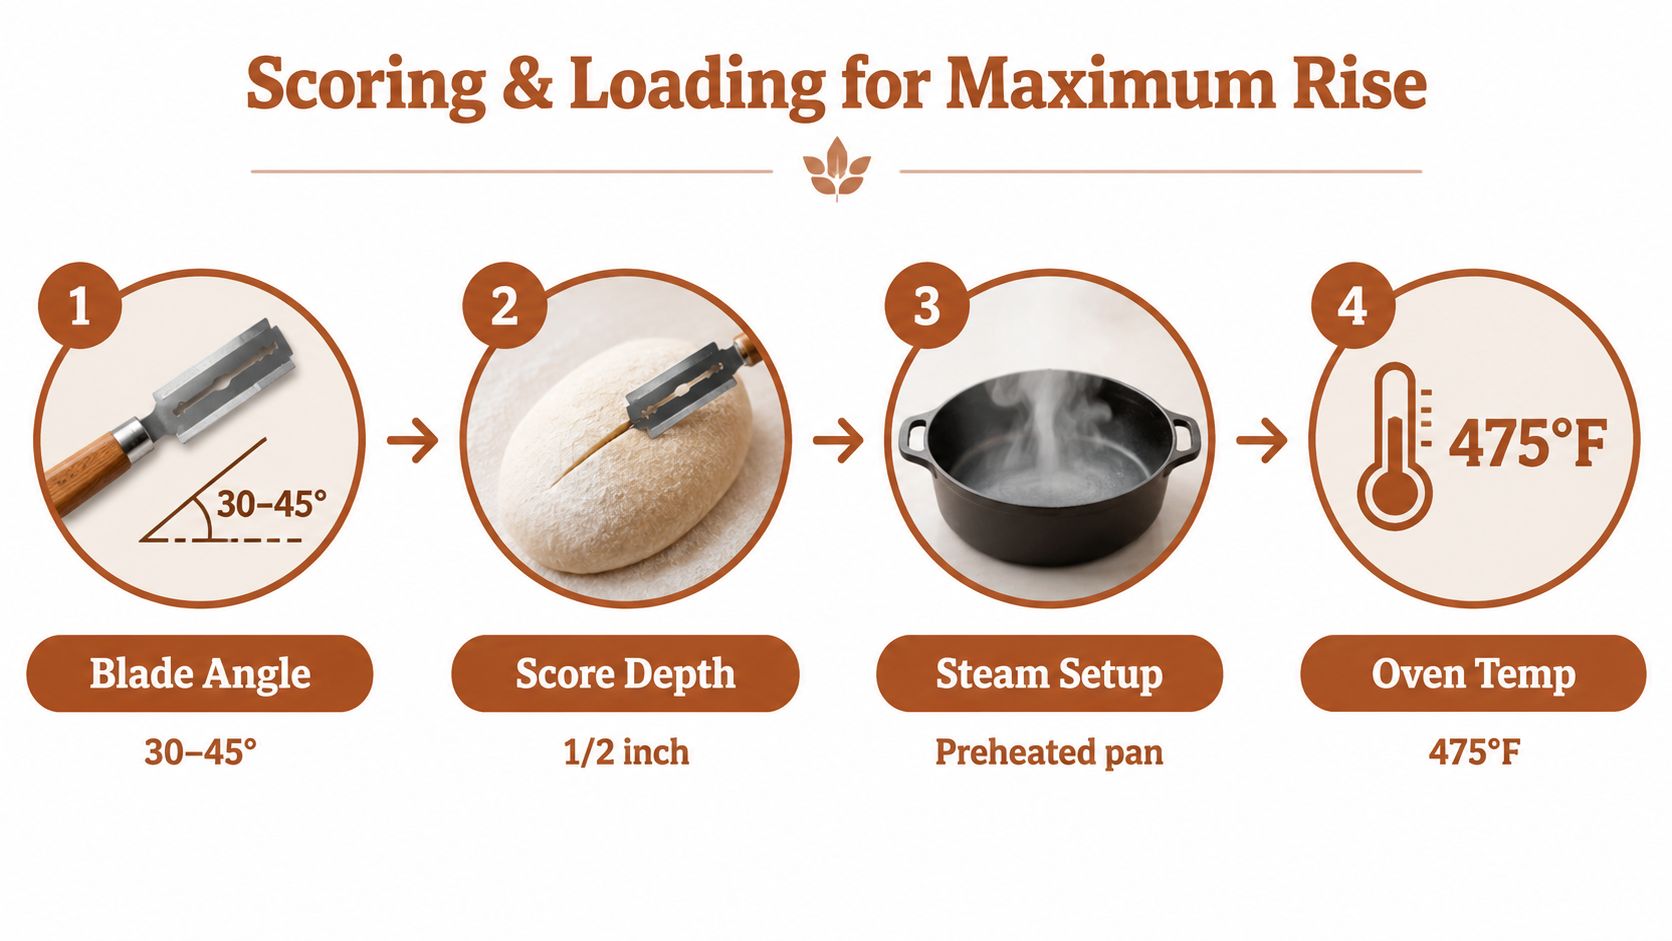
Use a sharp straight razor or lame. Hold it at roughly 20–30° for a shallow, angled cut across a taut surface. Start around 5–8 mm deep, increasing toward 10–15 mm when the loaf needs a stronger opening. The cut should be clean rather than ragged. A dull blade drags across the skin, compressing dough instead of giving pressure a controlled route outward.
A single long slash suits a boule. A batard can take two or three coordinated cuts. For a pronounced ear, hold the blade more aggressively, around 60–70° to the surface, so the upper flap lifts instead of splitting downward. The pattern controls where pressure is released and whether the loaf opens evenly.
Practical rule: Score immediately before loading, then close the oven within about 30 seconds. The exposed cut dries quickly, and a dry surface loses flexibility before expansion begins.
Match the depth to the dough. A shallow score on a highly elastic loaf may seal before the interior expands. A deep score on slack or over-proofed dough may spread instead of lifting. The crumb reflects the same mechanics. A controlled opening can support a lighter, more organized interior, while a random blowout often leaves dense areas beside large torn voids.
Load onto stored heat
Preheat a stone or steel thoroughly at around 240–250°C. Prepare parchment before scoring so the transfer takes one movement. A Dutch oven is more forgiving because its enclosed chamber captures moisture released by the dough. Its dimensions limit loaf size, however, and its walls make loading more hazardous.
Do not reshape after final proof. Transfer the dough, add steam if needed, and shut the door. Opening the oven during the first 12 minutes releases heat and humidity while the loaf is expanding. Lowering the temperature too soon can also reduce the initial force of the bake.
The loading sequence should be rehearsed before the dough is scored. Have the peel, parchment, blade, mitts, and steam setup ready. Every extra pause increases the time the dough spends exposed, and a soft dough can lose shape before it reaches the hot surface.
Choose steam for control, not superstition
Steam keeps the dough surface moist and pliable, delaying crust formation while the loaf expands. Practical guidance places useful early-bake humidity around 75–85%, while some steam environments reach 80–100% before venting later. For a home target, aim for roughly 70–90% relative humidity during the first 10–12 minutes, recognizing that ordinary ovens rarely measure or hold it precisely. The useful window is short, as baking-technology guidance also explains.
A preheated metal tray is inexpensive. Pour roughly 150–250 ml of boiling water into it at loading, but expect inconsistent output and some condensation risk. Wear proper protection, and keep hands and face away from the steam plume.
A covered Dutch oven is often the simplest reliable method. It traps moisture from the dough and limits air exchange, but it restricts loaf dimensions and can leave the surface pale until the lid comes off. A wall-oven spritz is quicker, though results depend on where the water lands and how fast the chamber recovers.
A dedicated injector or controlled-humidity oven provides a more repeatable environment. D'BakerAid's optional D'Steamer is one example of a system designed to control humidity during the early spring phase instead of relying on one pan of water. Vent after the useful expansion phase so dry heat can finish browning and crust development. This explanation of steam's role in bread explains why humidity supports early expansion without being needed throughout the bake.
Steam preserves the opportunity to expand; it cannot create one. If fermentation has gone too far or the gluten network is weak, high humidity may leave a flexible surface over a loaf that still lacks lift.
Common Oven Spring Myths Worth Dropping
More steam always means more rise. It doesn't. Steam helps by delaying crust formation, but its useful role is concentrated in the early bake. Keeping the chamber humid too long can interfere with crust color and leave the exterior soft, while excessive condensation can damage the surface. The target is a flexible skin during expansion, followed by dry heat for setting and browning.
A deep slash guarantees an ear. A cut only works when the dough has surface tension, the blade is sharp, the angle is appropriate, and the proof is close to correct. Cut too deep into a slack loaf and the dough may spread through the opening rather than lifting a flap.
A hotter oven automatically produces better spring. Heat must arrive before the structure sets, but more heat isn't an automatic upgrade. A very aggressive bake can set or rupture the crust unevenly. For most home loaves, thorough preheating around the established high-heat range matters more than chasing an extreme setting.
A longer proof makes a taller loaf. Over-proofed dough has less gas-holding capacity left. It may enter the oven looking impressive, then flatten because the gluten has relaxed beyond its useful limit. The goal is a dough that's expanded but still elastic.
Enriched dough can't spring. Brioche and similar doughs can expand, but fat and eggs make gluten development and shaping more demanding. They need closer fermentation control and a stronger initial skin. Oven spring is a balance of stored gas and structural resistance, not a single steam trick.
Diagnosing Why Your Loaf Did Not Rise
A failed loaf usually leaves mechanical evidence. Read the shape before changing the recipe. If you alter flour, yeast, hydration, proofing, temperature, and steam at the same time, you won't know which change helped.
Four visible failure patterns
A blowout or weak side rise often points to inadequate gluten development, over-proofing, or both. The loaf either can't contain pressure or has lost the tension needed to direct it upward. The highest correction is to confirm a strong windowpane before shaping and shorten bulk fermentation by roughly 25–30% at the same kitchen temperature. That adjustment is especially useful when the dough looks puffy but feels fragile.
A loaf with no lift despite a neat score may have formed a dry skin too early. Steam must arrive immediately, not halfway through baking. Load quickly and make sure the dough enters the oven near 24–26°C, so the interior isn't starting from a cold, sluggish state.
If the score opens but the crust splits somewhere else, inspect seam tension and gluten damage. Re-shape more deliberately and add 1–2 folds late in bulk to reinforce the network without aggressively degassing the dough.
A loaf that shows strong spring but turns flat on the cooling rack likely has a crumb that hasn't set. An under-baked interior below roughly 92°C can collapse as steam redistributes. Check the center before removing the loaf, then cool it fully on a rack before slicing.
| What you see | Likely cause | One fix |
|---|---|---|
| Blowout or weak side rise | Weak gluten or over-proofing | Improve windowpane development and shorten bulk fermentation |
| Score stays tight and loaf barely lifts | Surface dried before expansion | Add steam within the first 90 seconds |
| Score opens, but side splits | Poor seam tension or damaged gluten | Re-shape firmly and add 1–2 late-bulk folds |
| Good oven spring, then collapse while cooling | Crumb remains under-set | Bake until the core reaches about 92°C or higher |
Don't treat these temperatures and timing points as universal substitutes for observation. Flour, inoculation, dough size, and oven behavior all shift the result. Use the diagnosis to change one major variable, then bake again under otherwise similar conditions.
A Repeatable Oven Spring Checklist
A reliable bake is less about performing one dramatic trick and more about removing small delays. Use this sequence for a lean loaf, then adjust only after you know what the dough and oven are doing.
Before the dough reaches the oven
- Check the dough. Aim for final hydration around 70–78%, full gluten development by the windowpane test, and a final proof at 24–26°C. A gentle finger press should rebound slowly by roughly 2–3 mm, not snap back immediately or remain completely indented.
- Prepare the heat. Preheat the deck, stone, or steel for 30–45 minutes at around 245–260°C. Put the empty steam tray in place before loading, or heat the Dutch oven according to its design.
- Stage the transfer. Have parchment, lame, gloves, and boiling water ready. The fewer decisions you make after scoring, the more of the early thermal window you preserve.
The loading sequence
Score 5–8 mm deep at an angle of roughly 30–45°, then load within about 15 seconds. Pour 150–200 ml of boiling water into the prepared tray, close the door, and leave it shut through the initial expansion phase. The exact water amount is less important than safe handling and immediate humidity.
At around 10 minutes, vent the steam and reduce the oven toward 220°C for the finishing phase. Bake until the center reaches about 95°C, then move the loaf to a rack. Steam supports early expansion, but dry heat is needed to finish the crust and drive off excess moisture.
Cooling and the honest trade-off
Rest the loaf on a rack for at least 1 hour before slicing. Cutting early can compress a crumb that hasn't finished setting, making the interior seem gummy even when the bake looked successful.
Oven spring is worth pursuing for boules, baguettes, and other breads where open crumb and vertical lift define the style. It matters less for sandwich loaves, Pullman loaves, and 100% whole-grain hearth bread, where a tighter structure may be the practical target. Chasing maximum expansion adds handling and timing demands. The right result isn't always the tallest loaf. It's the loaf whose structure matches how you plan to eat it.
If high-protein dough is your focus, D'BakerAid's system combines a fermentation bowl, proofing bowl, and temperature and time hub to make difficult doughs more repeatable, with an optional D'Steamer for the humid opening of the bake. Visit DBakerAid™ to review the system, then see whether its controlled workflow fits your preferred oven-spring bread recipe.