

A fermentation temperature control kit can turn inconsistent bread into a repeatable process. Dough fermentation is commonly managed around 22–27°C, and a shift of only 2°C can halve or double the effective fermentation rate.
That's why one loaf rises beautifully while the next stays dense, gummy, or underdeveloped, even when you use the same flour and recipe. Temperature changes yeast activity, gas production, enzyme behavior, gluten development, crumb structure, and flavor. For high-protein bread, where the dough is already stiffer and more demanding, uncontrolled fermentation makes the problem worse.
Table of Contents
- Why Temperature Control Transforms Home Baking
- The Science Behind Fermentation Temperature
- Traditional Proofing vs Controlled Fermentation
- How Precision Enables High-Protein Bread Success
- Choosing the Right Fermentation Control System
- Applications Across Bread Types
- Maintenance and Troubleshooting Tips
Why Temperature Control Transforms Home Baking
Most home bakers start by placing dough somewhere that feels warm. The problem is that “warm” changes throughout the day. A kitchen near a window behaves differently from one beside an oven, and a winter countertop behaves differently from a summer countertop. Fermentation continues, but not at a predictable rate.
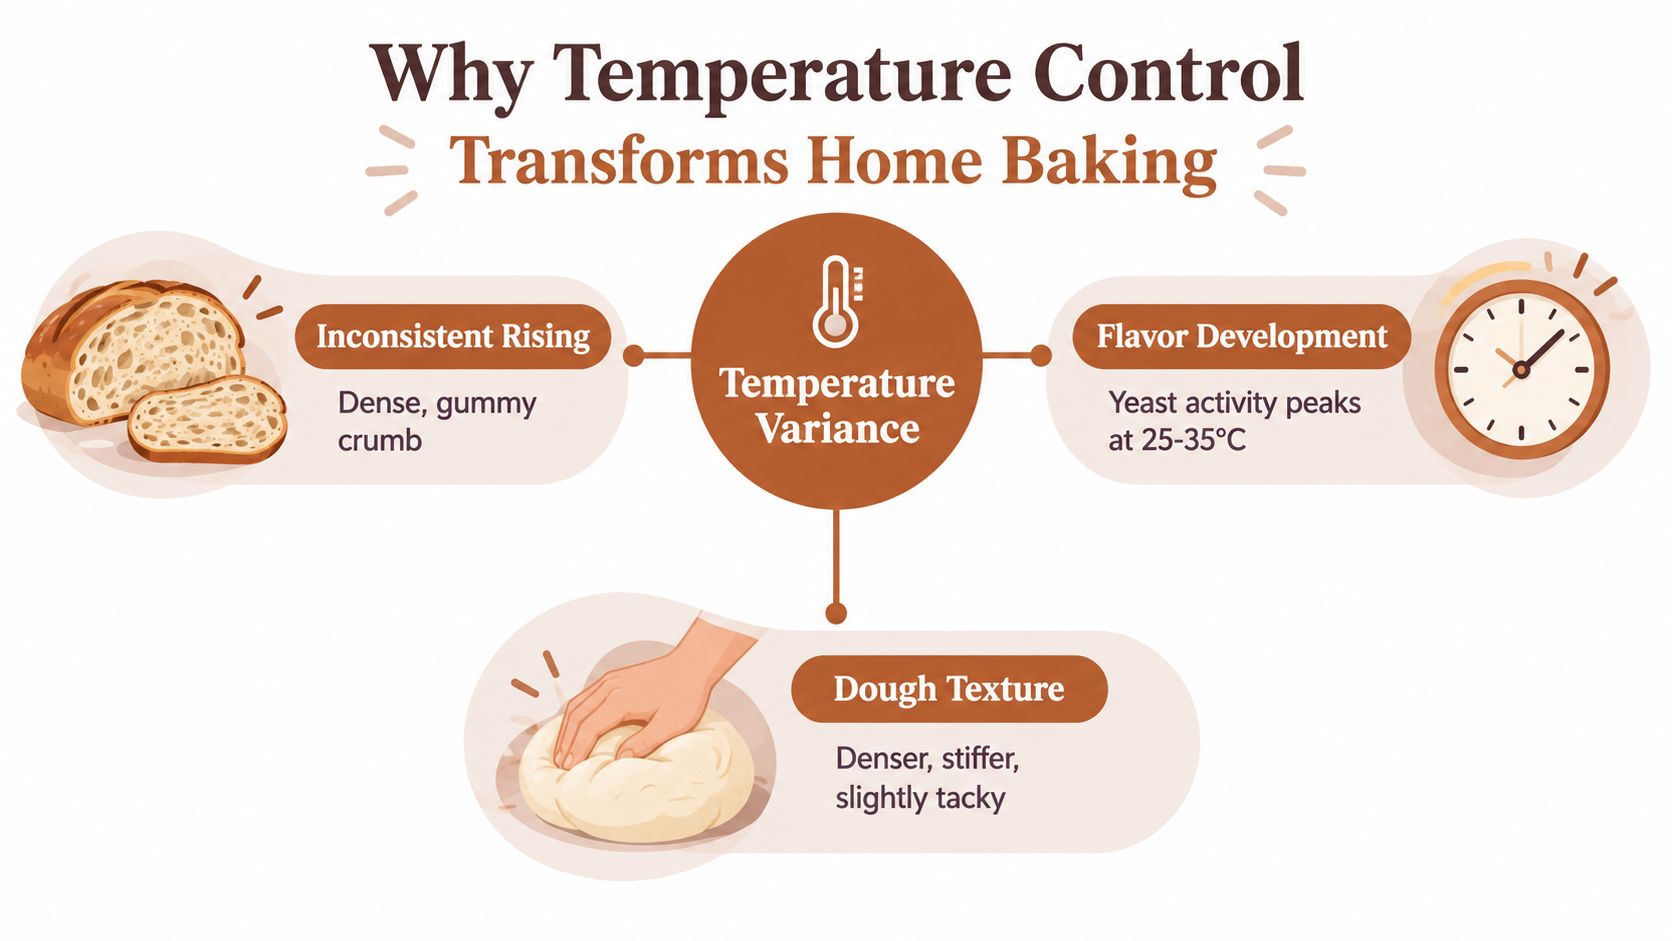
A baking review explains why this matters. Dough fermentation is often managed around 22–27°C, and a 2°C change in final dough temperature can halve or double the effective fermentation rate. Temperature also affects gas production, loaf volume, crumb structure, and finished bread quality (baking technology review).
The variable most bakers underestimate
Yeast doesn't read the clock on your recipe. It responds to its environment. A dough that needs a certain amount of time at one temperature may reach the same development much sooner or later somewhere else.
That makes a fixed recipe schedule unreliable unless the dough temperature stays reasonably stable. You can use visual signs, such as volume increase and elasticity, but the starting point is still easier to manage when fermentation isn't constantly speeding up and slowing down.
This is particularly important for sourdough. A starter can look active in the morning and sluggish later because the room changed, not because the flour or culture suddenly failed. The same principle applies to enriched dough and high-protein dough, where the right balance between fermentation and gluten development determines whether the loaf gains strength before it overproofs.
Practical rule: Treat temperature as an ingredient in the process, not as background weather.
A controlled chamber also makes your troubleshooting more useful. If the temperature is stable, you can examine flour strength, hydration, yeast quantity, mixing, or shaping without guessing whether the room caused the failure. The same principle applies outside bread. Bakers who want to compare methods for other heat-sensitive kitchen processes can also review this guide to optimal matcha water temperature, where small temperature changes affect the final result.
The Science Behind Fermentation Temperature
Yeast responds to temperature within a working range, not to one universal “perfect” setting. Expert bakery guidance places baker's yeast activity typically around 25–35°C, with peak carbon dioxide production in dough often observed around 32–38°C. Activity drops sharply above roughly 40–43°C, so adding heat can damage fermentation rather than reliably speeding it up (proofing science guidance).
Carbon dioxide is only one part of fermentation. Yeast produces gas, enzymes break down starches, and those reactions affect flavor and dough behavior. Gluten must hold the gas while the dough develops enough strength to expand without collapsing. High-protein dough makes this balance harder: its stronger gluten network can resist expansion, leaving a dense crumb when fermentation does not generate enough gas or time for the dough to relax.
Match the temperature to the outcome
Warm fermentation moves dough faster, which can suit a short schedule. It also narrows the window for action. A high-protein dough that develops too quickly may reach its limit before you notice, then lose structure during shaping or baking.
Cool fermentation gives the dough more time. A 2023 study of rich bakery products found optimal sweet-dough fermentation at 8 hours at +5°C and +15°C, and 16 hours at +10°C. Long, cool fermentation extended total fermentation time by 10–36 hours compared with warmer conditions. A separate sourdough optimization study found that very long cool schedules, well past 60 hours, can still produce an optimum. Time and temperature must therefore be chosen together (published fermentation study).
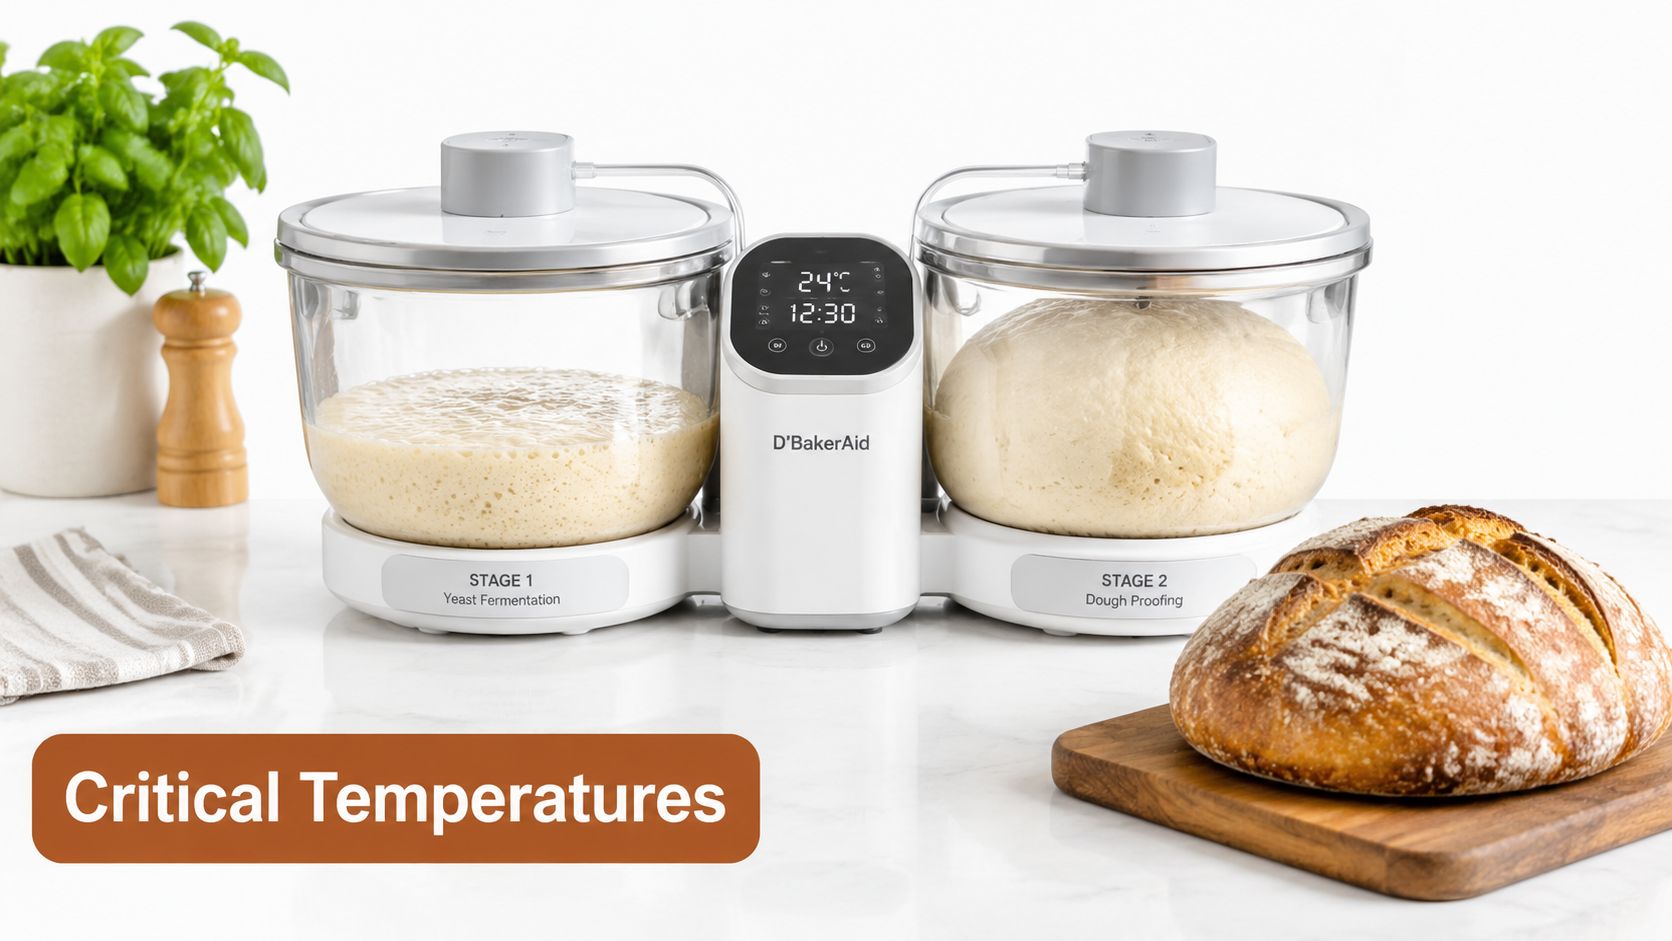
A fermentation temperature control kit lets you choose slower flavor development or a faster production schedule without depending on a spare room. The useful setting is the one that gives yeast enough activity while allowing the dough to build flavor and structure. This practical guide to fermentation control connects those biological changes with a repeatable home process.
Traditional Proofing vs Controlled Fermentation
A warm spot on the counter can work. It can also create a different loaf every time.
Traditional proofing depends on room temperature, airflow, heating cycles, sunlight, and the temperature of the bowl and ingredients. You may get a strong rise on one day and a slow, tight dough on another. The recipe hasn't changed, but the environment has.
What the traditional method gets right
Ambient proofing costs nothing and gives experienced bakers useful sensory feedback. You learn to judge dough by elasticity, surface tension, aroma, and volume rather than treating a timer as an absolute instruction. For simple doughs and flexible schedules, that can be enough.
The weakness appears when the dough needs a narrow fermentation window. A warmer room accelerates yeast activity. A cooler room slows it. By the time you check the dough, it may have moved past the ideal point or may still need substantial development.
What a controlled system changes
A dedicated system removes much of that environmental variation. Instead of placing a bowl in the warmest available location, you select a temperature and duration, then monitor the dough under stable conditions. A controller that manages both heating and cooling is more useful than a chamber that only warms, especially when the room changes sharply.
Humidity matters too. Final proofing guidance commonly places the target around 70–85% relative humidity, because a dry surface forms a skin that restricts expansion. Industry guidance also treats temperature, proofing time, and humidity as joint variables rather than separate settings (bakery proofing reference).
A standard oven with its light on, a microwave, or a closed cupboard can provide warmth, but these methods don't necessarily provide stable humidity or even temperature. They're useful improvised tools, not precise fermentation systems.
The practical trade-off is straightforward. Ambient proofing is cheap and flexible. Controlled fermentation costs more and adds equipment, but it gives you a stable baseline. If you bake occasionally and don't mind adapting each batch, ambient proofing may be sufficient. If you want the same loaf structure repeatedly, control is the more dependable option.
How Precision Enables High-Protein Bread Success
High-protein bread isn't difficult because protein is bad for bread. It's difficult because extra whey, pea, soy, collagen, vital wheat gluten, and whole-grain ingredients change how the dough absorbs water, develops strength, and holds gas.
The result is usually denser, stiffer, and slightly tacky dough. These loaves generally rise by 50–75% rather than doubling, so waiting for a conventional “double in size” signal can push them too far. The crumb can be tight and uniform, but the loaf should still feel soft and slice cleanly.
A two-stage system helps separate the jobs. Stage 1 handles yeast fermentation in a dedicated bowl. Stage 2 proofing gives the shaped dough another controlled environment before baking. D'BakerAid's SureDough system is designed around that separation, with a hub controlling temperature and time for both stages. The high-protein bread guide provides the recipe context.
The five recipe formats use whey, pea, soy, or collagen isolate alongside vital wheat gluten and bread or whole-wheat flour. They aren't gluten-free. They're high-gluten loaves designed to use gluten structure to support the added protein.
High-protein bread recipe comparison
The recipe figures below are approximate and depend on the protein brand, flour, and slice thickness (D'BakerAid recipe data).
| Recipe | Protein per loaf | Protein per slice |
|---|---|---|
| Whey + Sprouted Wheat | ~170g | ~10.6g |
| Vegan Pea + Whole Grain | ~171g | ~10.7g |
| Soy Multigrain “Fitness” | ~170g | ~10.7g |
| Seeded Whey + Flax | ~163g | ~10.2g |
| Collagen + Whole Wheat | ~184g | ~11.5g |
A three-slice serving supplies about 31–34g of protein, depending on the recipe, which fits the common 30g-per-meal target used by many fitness-focused eaters. That doesn't make every loaf nutritionally complete, and the collagen recipe shouldn't be treated as a sports-protein substitute because collagen isn't a complete protein.
Temperature control helps the dough develop at a predictable pace instead of compensating for its stiffness with excessive heat. That's the difference between a loaf that is compact and edible and one that has a soft, structured crumb.
Choosing the Right Fermentation Control System
An inconsistent loaf often points to the fermentation environment rather than the recipe. A system for occasional sandwich bread can be simple, while one handling sourdough, laminated dough, enriched dough, and high-protein loaves needs separate settings and a more controlled workflow.
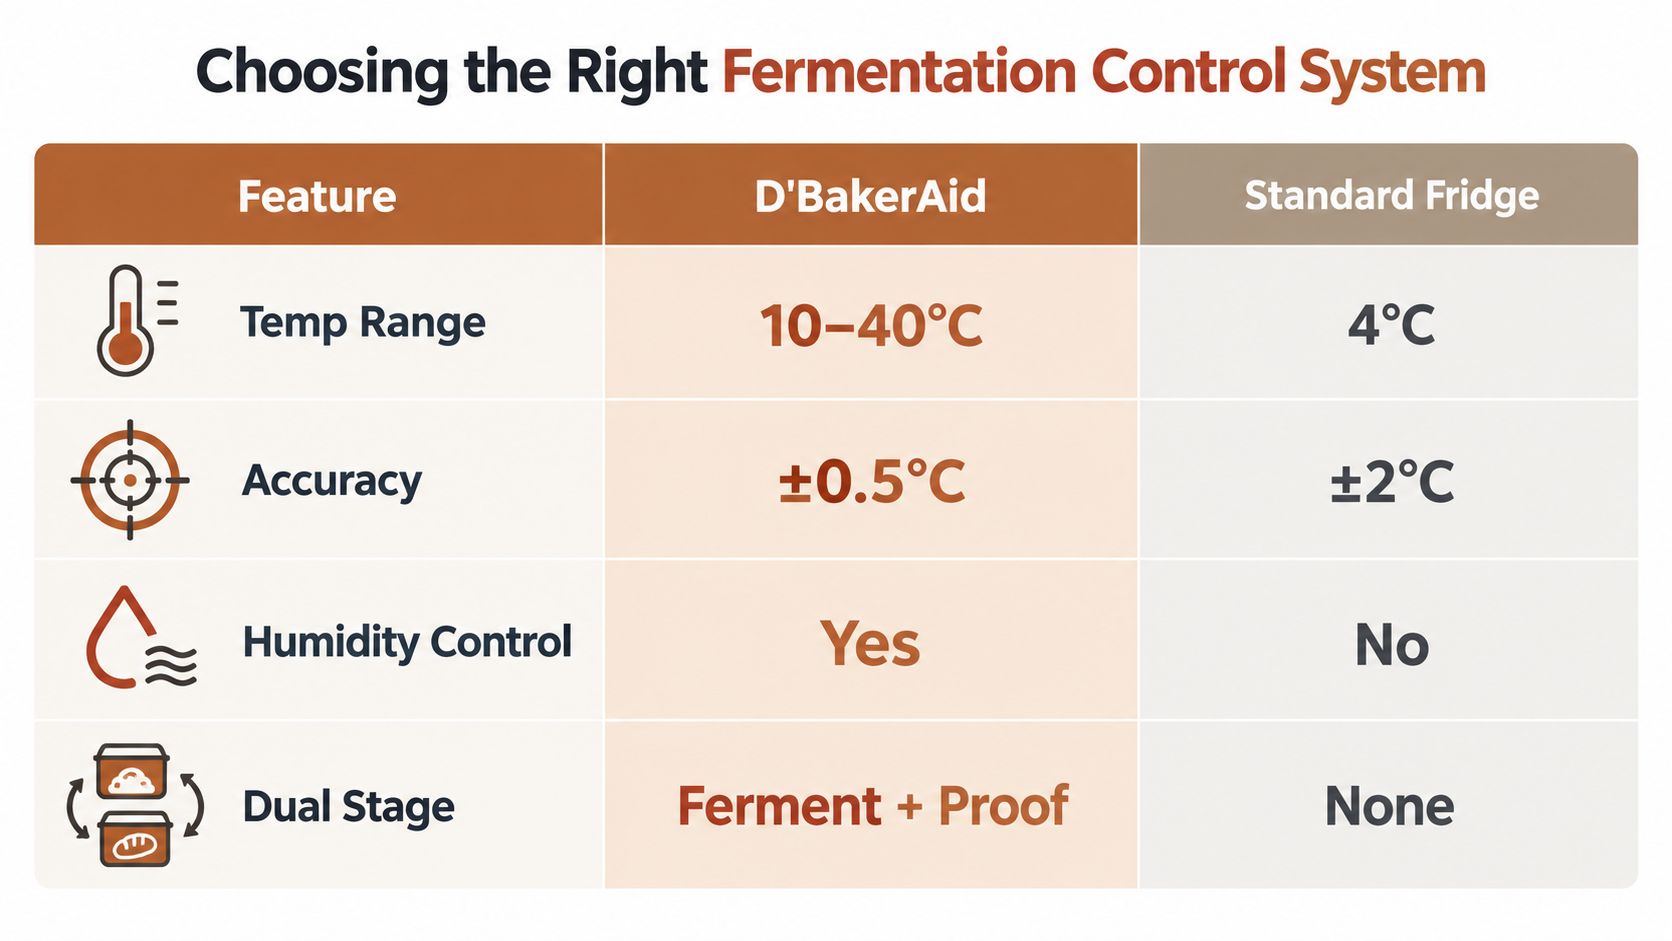
Prioritize temperature stability, probe accuracy, humidity management, capacity, and cleaning access. A useful proofing environment should hold final-proof conditions near 30–35°C with humidity in the low-to-mid 80% range, while still allowing adjustments for different doughs (proofing process guidance). High-protein doughs benefit particularly from this control. Added whey, pea, soy, or collagen proteins can make dough stiff and slow to expand, so excessive heat is a poor substitute for a stable fermentation schedule.
Check these before buying
- Temperature range: Confirm that the system supports warm proofing and cooler fermentation. A single high setpoint limits the dough styles you can handle.
- Accuracy and overshoot: A controller that swings beyond its target can produce uneven results despite a precise-looking display. Around ±1°C is a practical benchmark for repeatable proofing.
- Humidity: Dry heat can form a skin that restricts expansion. If humidity is not built in, check whether the chamber can safely hold an easy-to-clean moisture source.
- Separate stages: A yeast fermentation bowl and a dough proofing bowl help when the dough needs different conditions before and after shaping.
- Probe placement: The probe should reflect the dough environment, not air beside a heating element. A thermowell or insulated vessel-side probe may provide a more useful reading than an exposed ambient sensor.
- Vessel fit: Check glass bowls, plastic tubs, conical containers, and Pullman pans for clearance. Poor airflow or hot and cold spots can undermine precise control.
- Cleaning: Removable bowls, accessible seals, and smooth internal surfaces make regular sanitation practical.
D'BakerAid combines a Stage 1 yeast fermentation bowl, a Stage 2 dough proofing bowl, and a temperature-and-time hub, with an optional D'Steamer for oven humidity. Its two-stage setup suits high-protein doughs because fermentation and final proof can be managed separately, reducing the temptation to overheat a dense dough. The companion recipe app is available at dbakeraid.app. For a broader equipment comparison, see this guide to the best bread proofing box.
A converted refrigerator can handle larger fermentation projects, but it requires a separate heat source, controller, carefully positioned probe, and humidity plan. It offers flexibility and capacity, though setup and cleaning demand more hands-on work.
Applications Across Bread Types
A single kitchen may need to ferment sourdough overnight, proof croissants without melting their butter, and develop a strong high-protein sandwich loaf on the same day. Temperature control makes those schedules manageable because each dough can follow conditions suited to its structure rather than one default setting.
Sourdough rewards a stable environment during long fermentation. The practical lesson from sourdough research is not to copy one fixed schedule, but to recognize that extended fermentation leaves little room for temperature swings. Judge readiness by volume, strength, and aroma, then record the result for the next bake.
Laminated dough requires tighter handling. Croissants and similar doughs need a cool proofing environment that allows expansion while keeping the butter workable. The temperature ranges discussed in bakery temperature guidance provide a useful starting point, but dough temperature and butter consistency still determine the final setting.
Match the program to the dough
- Sourdough: Hold a steady temperature and use the dough's condition, not the clock alone, to decide when fermentation is complete.
- Croissants: Protect the butter layers during proofing, then allow shaped pieces to expand gradually.
- Enriched dough: Eggs, butter, and sugar can slow fermentation, so controlled warmth helps without forcing the dough.
- High-protein sandwich bread: Give the dough enough time to build structure. A slower rise can produce a more even crumb than aggressive heating.
This matters especially with D'BakerAid. Its separate fermentation and proofing stages let a dense, protein-rich dough develop strength before final shaping, reducing the temptation to compensate with excessive heat. That separation addresses a common source of dense crumbs: pushing fermentation faster than the dough can organize its structure.
A kit cannot fix weak flour, inactive yeast, excess salt, poor mixing, or incorrect hydration. It creates a repeatable environment, making those problems easier to isolate.
Maintenance and Troubleshooting Tips
Clean the bowls and any dough-contact surfaces after every bake. Dried dough can hide in seams, seals, and around sensors, where it becomes difficult to remove and may affect later batches. Use the cleaning method recommended for the equipment, and keep electrical components away from standing moisture.
Check the door or lid seal when humidity seems unstable. A chamber that loses moisture can produce a dry dough skin even when the temperature reading looks correct. Condensation on the walls isn't automatically a failure, but pooled water, blocked vents, or uneven heating needs attention.
Diagnose the process in the right order
- Verify the reading. Compare the displayed temperature with a separate reliable thermometer, and make sure the probe isn't touching a hot wall or sitting beside the heater.
- Inspect the dough. If it barely moves, check yeast freshness, salt measurement, flour temperature, and hydration before blaming the controller.
- Look for hot and cold spots. Uneven results across the same batch can indicate poor circulation, an overloaded chamber, or a container that blocks airflow.
- Check proofing humidity. A dry surface points toward insufficient moisture or a poor seal, while excessive condensation may indicate too much moisture or inadequate ventilation.
- Record each batch. Note dough temperature, room conditions, fermentation duration, rise, and final crumb. That record turns troubleshooting into process improvement.
Sensor calibration and seal inspection should be part of routine care, not something you do only after a failed bake. Replace damaged probes, clean residue before it hardens, and leave removable parts fully dry before storage. A controlled system can only improve repeatability when the hardware and the dough are both handled consistently.
DBakerAid™ offers a temperature-and-time controlled fermentation system with separate bowls for yeast activation and dough proofing, which directly addresses the instability behind dense or uneven bread. Visit DBakerAid™ to review the system, then use the recipe app to choose a high-protein loaf that fits your baking routine.