

You're standing at an empty counter on a Saturday afternoon with a bag of flour, a packet of yeast, and no clear idea which loaf won't punish you for being new at this. That's the right place to start. These eight easy bread recipes with yeast are ordered by how forgiving they are, from a no-knead boule that does most of the work while you wait to two high-protein Pullman loaves that demand tighter control.
Each one teaches a different skill. You'll learn how wet dough should feel, when a rise is finished, and why a loaf can look right and still bake dense. Don't pick at random. Bake them roughly in order and you'll build judgment instead of just following timers.
The core biology is simple. Saccharomyces cerevisiae converts sugars into carbon dioxide, and the gas stretches the gluten network. Temperature drives the pace, and in one controlled test the undergraduate science journal experiment at Oklahoma State found the 30°C sample averaged 1,659.4 parts per million of carbon dioxide, more than cooler samples. Warm helps. Hot enough to damage yeast doesn't.
Practical rule: Judge dough by size, feel, and slow spring-back after a light press, not by the clock alone.
Table of Contents
- 1. No-Knead Crusty Bread
- 2. Classic Honey Oat Sandwich Loaf
- 3. Soft Yeast Dinner Rolls
- 4. Overnight Focaccia
- 5. Easy Yeast Pizza Dough
- 6. Soft Cinnamon Rolls
- 7. High-Protein Whey + Sprouted Wheat Pullman Loaf (D'BakerAid)
- 8. Vegan High-Protein Pea + Whole Grain Pullman Loaf
- How the eight easy yeast breads compare on bake time, oven temperature, and best use
- Pick One Loaf and Bake It This Weekend
1. No-Knead Crusty Bread
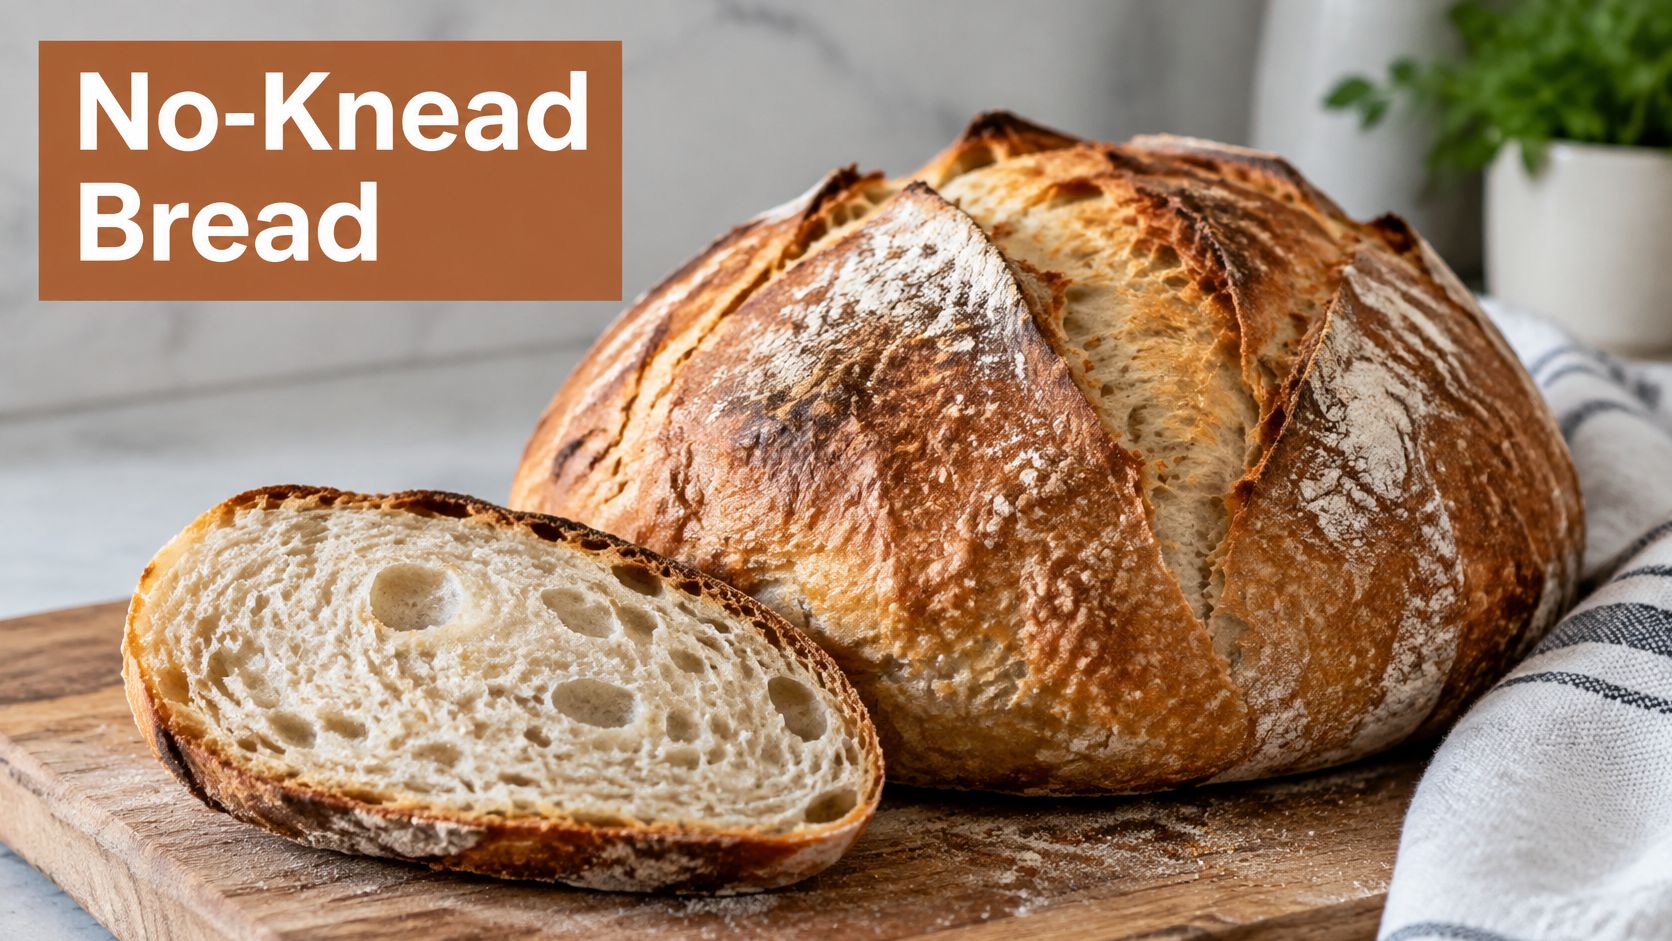
Start here if you've never baked with yeast. This rustic boule uses flour, water, salt, and a small amount of yeast, then rests long enough for gluten to develop without kneading. Sullivan Street Bakery's method, adapted for home ovens, shows why the long rest works. You stir, you wait, you bake in a covered pot, and steam trapped inside gives you a crisp crust you'd struggle to get any other way as a beginner.
The dough below is wet, shaggy, and rather ugly at first. That's normal.
What Can Go Wrong
The most common failure is impatience. Cut the rest short and the crumb stays tight and gummy because the gluten never organized itself. The second failure is a cold pot. If you skip preheating, the bottom stays pale and the loaf spreads instead of springing up.
Widely shared home versions use a 7-quart cast-iron pot, and size matters less than heat. Get the pot properly hot, handle the dough with a scraper and well-floured hands, and don't try to shape it like a firm sandwich dough. You're folding a wet mass into a rough ball, nothing more.
- Preheat the pot thoroughly: Give it at least 30 minutes so the bottom crust sets on contact.
- Bake covered first: Keep the lid on for about 30 minutes, then uncover to brown.
- Flour your hands well: Wet dough sticks to dry skin and tears instead of folding.
If you're stocking up before your first bake, bread baking supplies from Australia can cover the basics. Serve this one the same day, torn at the table with soup. Day two, it makes excellent toast.
2. Classic Honey Oat Sandwich Loaf
This is the loaf you'll bake every week. A simple enriched dough of flour, water, honey, a little fat, and salt, with rolled oats worked in for a soft crumb and mild sweetness. It slices cleanly, toasts well, and doesn't fall apart under sandwich fillings, which is more than a lot of beginner loaves manage.
Here's the texture you're aiming for before we talk technique.
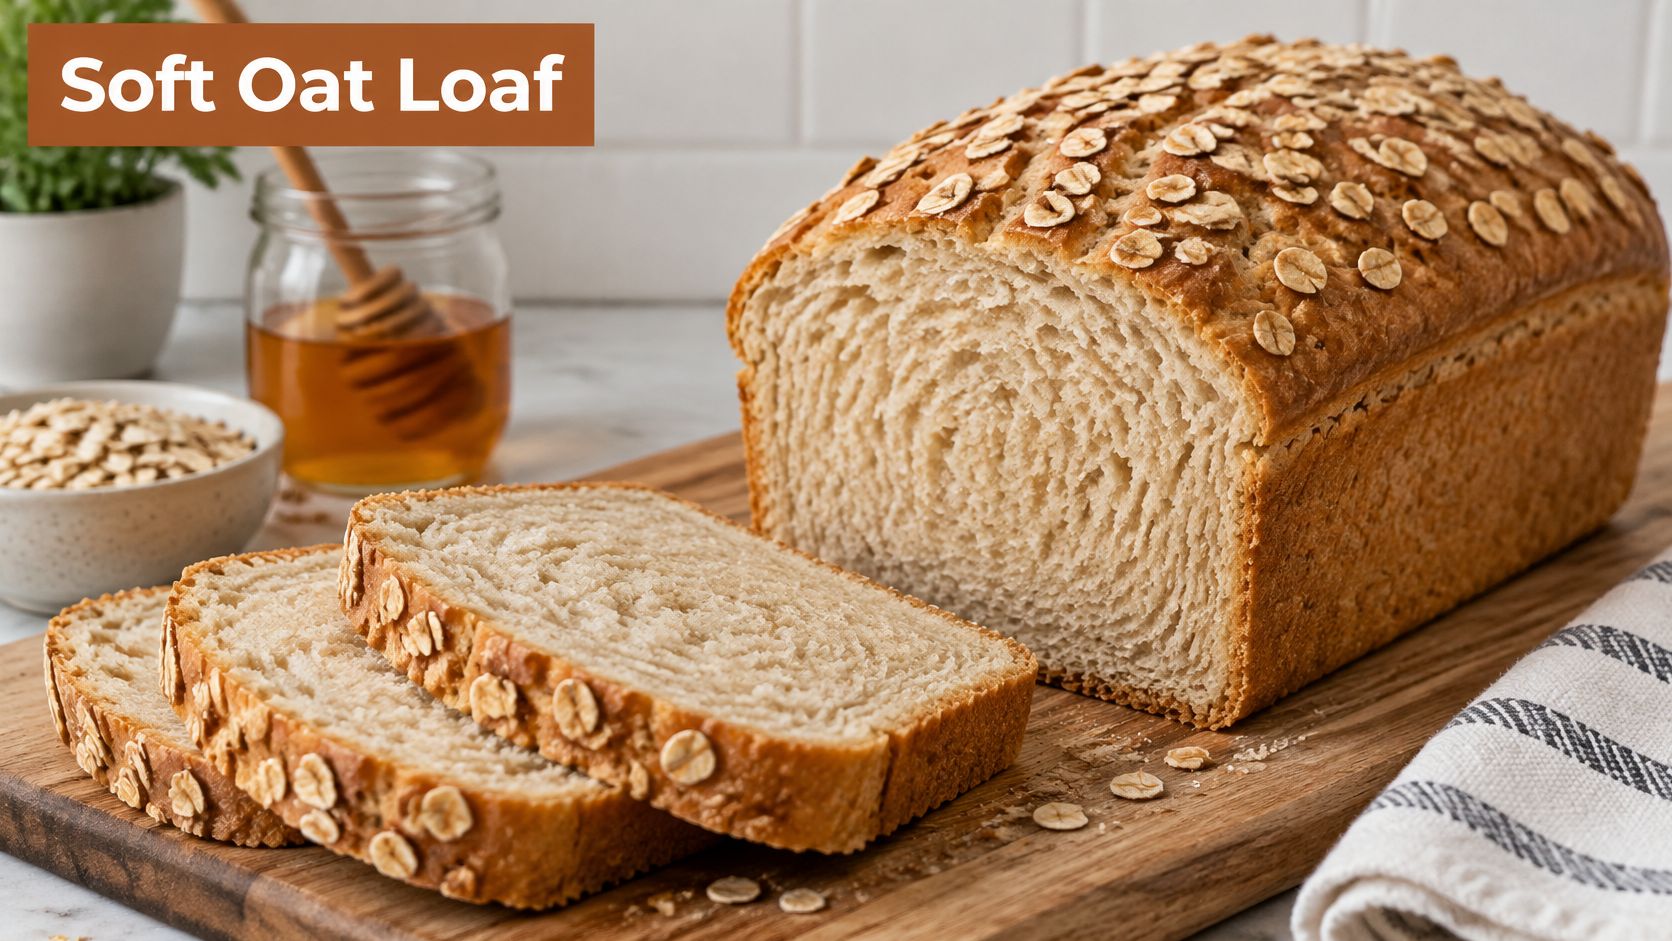
Let the dough double before shaping. That first rise is where the flavor and structure come from, and rushing it gives you a loaf that tears at the side in the oven. Shape it snugly into the pan, seam down, and proof until it crowns just above the rim.
Knowing When It's Done
Color lies. A honey loaf browns early because of the sugars, so a golden top can hide a raw center. Check the internal temperature with an instant-read thermometer instead of trusting your eyes, and tap the bottom for a hollow sound as a second check.
Cool it fully on a rack before slicing. Cut too early and the steam still inside turns the crumb gummy, no matter how well you baked it. I recommend waiting even when the kitchen smells too good to be patient.
Say it's Sunday evening and you need lunches sorted for the week. This loaf, sliced thick on Monday for toast and thinner by Wednesday for sandwiches, is the practical answer. It freezes well sliced, with parchment between pieces so you can pull out two at a time.
3. Soft Yeast Dinner Rolls
Rolls forgive beginners in a way loaves don't. One batch of slightly sweet, enriched dough makes a pan of individual portions, so if your shaping is uneven, you lose a roll, not a whole loaf. They bake fast, about 15 to 20 minutes, and the feedback loop is quick. You'll know within an hour what you'd do differently.
Portioning Is the Whole Trick
Use a kitchen scale and divide the dough into equal pieces. Eyeballing gives you some rolls that burn while others stay doughy in the middle. Roll each piece against the counter under a cupped hand until the surface pulls tight. That surface tension is what makes them rise up instead of out.
- Space them with intent: About one inch apart gives soft sides, closer gives pull-apart rolls that share edges.
- Brush with butter right away: Melted butter immediately after baking keeps the crust soft instead of leathery.
- Weigh every piece: Equal weight means equal baking time across the pan.
Slightly underproofed rolls tear at the seams. Slightly overproofed rolls deflate. Err a touch under, because they keep expanding for the first minutes in the oven.
Holiday tables are the obvious use case, and pull-apart rolls baked in a single round pan travel well to someone else's house. For a weeknight shortcut comparison, Amisa breakfast rolls in 188g packs show what you're improving on at home. Your version will be softer, warmer, and cheaper per batch once the technique clicks.
4. Overnight Focaccia
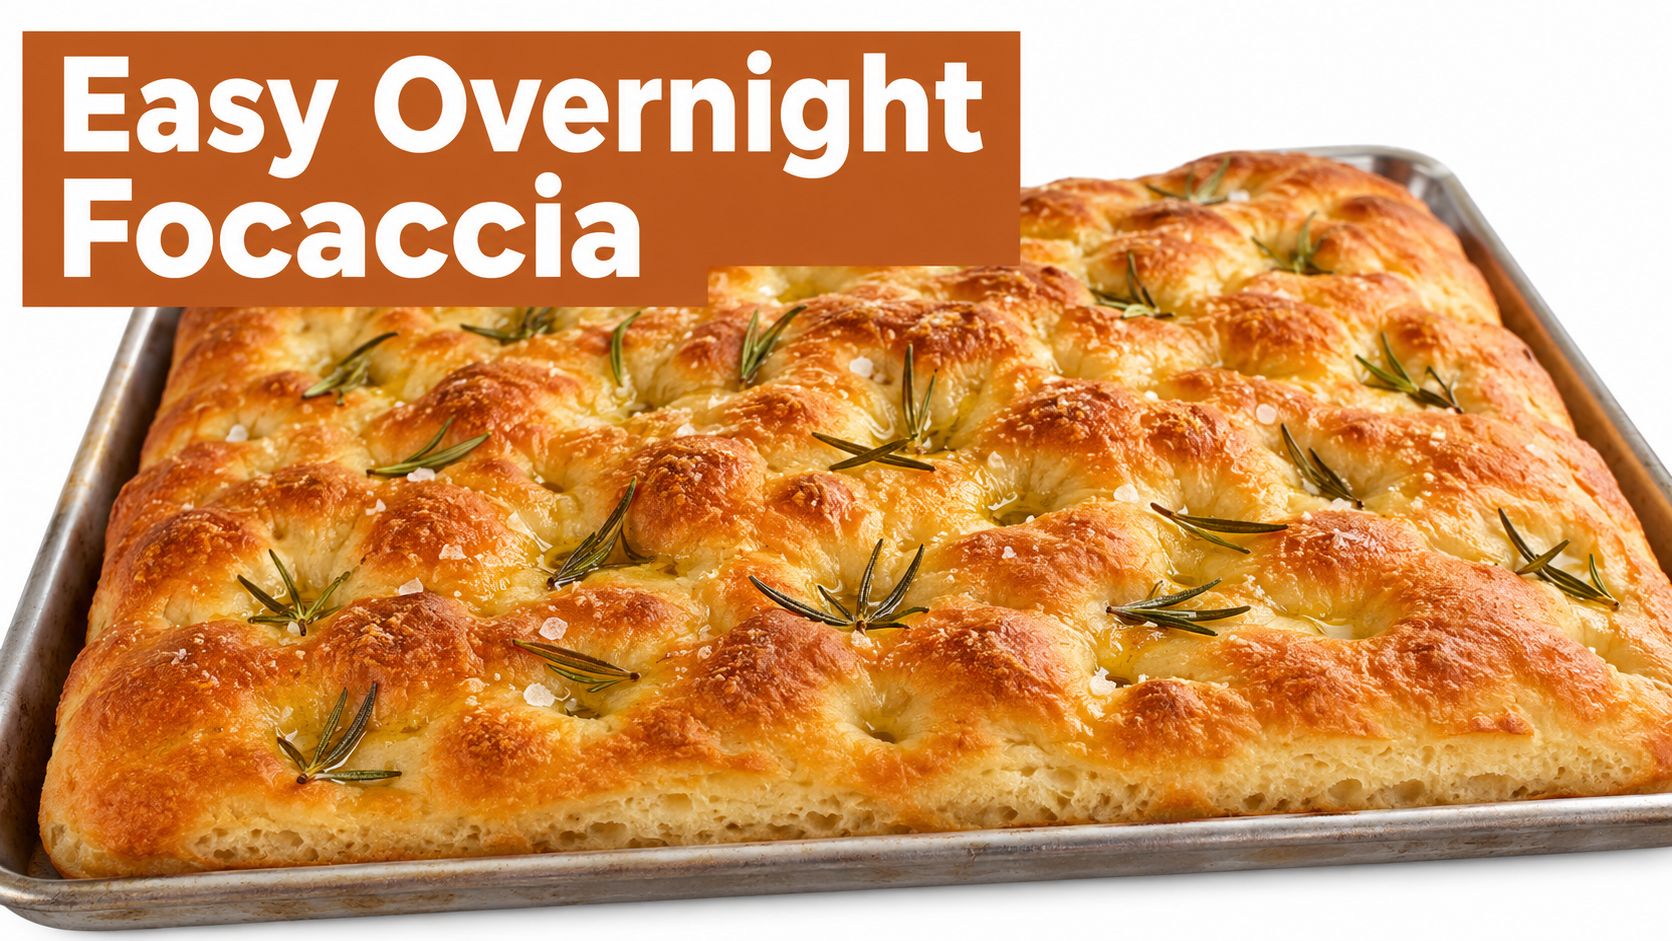
Focaccia looks like bakery work and behaves like a beginner project. The dough is wet, rich with olive oil, and left to rise slowly, often overnight in the fridge. You stretch it in a sheet pan, dimple it, and bake. There's no tight shaping, no scoring, no loaf pan geometry to worry about.
This is the finished look, blistered edges and all.
The slow, cold rise is doing real work here. Cooler, longer fermentation builds aroma that a fast warm rise skips, and research on fermentation temperature summarized in the University of Copenhagen research profile on wheat bread crumb aroma found that fermentation at 5°C produced higher concentrations of several aroma esters, including ethyl acetate and ethyl hexanoate. Your fridge overnight is a flavor decision, not just a scheduling convenience.
Handling Without Deflating It
Oil the pan generously, tip the dough in, and let it rest before you stretch. If it springs back, walk away for a few minutes instead of forcing it. Forced dough tears and loses the bubbles you spent all night building.
Watch the dimpling and stretching technique here before your first attempt.
Dimple with oiled fingertips, right down to the pan. Those wells hold oil and keep the dough from puffing into one big balloon. Finish with flaky salt just before baking so it stays on the surface where you'll taste it.
If the overnight rhythm suits you, the same planning applies to overnight pizza dough. Cut focaccia into squares for sandwiches, or serve it warm next to soup and let people tear pieces off. Both work.
5. Easy Yeast Pizza Dough
Pizza dough is the fastest payoff in this list. Flour, water, yeast, salt, and a little olive oil, one rise, and you're stretching crust the same evening. One batch makes two or three pizzas, so a Friday night with friends is a realistic first outing.
Same Day or Cold and Slow
Same-day dough is mild and reliable. Refrigerated dough, held a day or two, is chewier and more flavorful, and it stretches more easily because the gluten has relaxed. Neither is wrong. Pick based on when you remembered to start, which for most of us decides the question.
Temperature control matters more than most recipes admit. The American Society of Baking guide to final proof identifies approximately 35–37°C (95–100°F) as a recommended final-proof range and about 60–65 minutes as a typical proofing duration, while stressing that flour strength and dough type change the settings. A cold kitchen will not match that timing, so watch the dough, not the timer.
- Preheat stone or steel for a full hour: Maximum oven temperature, no shortcuts, or the base steams instead of crisping.
- Rest resistant dough: If it snaps back while stretching, cover it and wait 15 minutes, then try again.
- Dust the peel: Semolina or a light flour dusting keeps the topped pizza from gluing itself down.
Stretch from the center out: Leave the outer rim untouched and you'll keep the puffy, blistered edge everyone fights over.
Neapolitan-style home pizza on preheated steel is the stretch goal here. Start thicker and simpler, with modest toppings, because a wet, overloaded pizza defeats even good dough. Two plain cheese pizzas teach you more than one ambitious disaster.
6. Soft Cinnamon Rolls
Now you're into enriched dough with a job to do. Cinnamon rolls add butter, milk, and sugar to the dough, then a filling of butter, brown sugar, and cinnamon, then a glaze. Every layer is simple. The skill is sequencing them without letting the dough get too warm, too dry, or too rushed.
Roll the dough into an even rectangle. Spread the filling to the edges except one long side, which you need clean to seal the log. Roll tightly from the opposite side, because a loose roll unravels into spirals with hollow centers.
Cutting and the Overnight Option
Cut with unflavored dental floss, slid under the log and crossed over the top. A knife drags and squashes the spiral you just built. Space the rolls in the pan with a little room to expand into each other, since touching sides stay soft.
Proofing is where these succeed or slump, and the details in this guide to proofing cinnamon rolls are worth reading before a holiday bake. Cover loosely and refrigerate overnight if you want them for breakfast. Cold rolls go into the oven after a short counter rest while it preheats, and nobody has to wake up at dawn to mix dough.
Humidity during proofing is the quiet variable. The King Arthur Baking yeast bread primer notes that proofing spaces may require approximately 75–80% relative humidity to prevent a skin forming on the dough. A dry skin restricts expansion even when the inside has fermented perfectly, which is why covered, draft-free proofing matters for a soft roll.
Weekend brunch is the natural home for these. Bake a full pan, glaze while warm, and freeze leftovers individually. Twenty seconds in a microwave brings a frozen one back to something close to fresh.
7. High-Protein Whey + Sprouted Wheat Pullman Loaf (D'BakerAid)
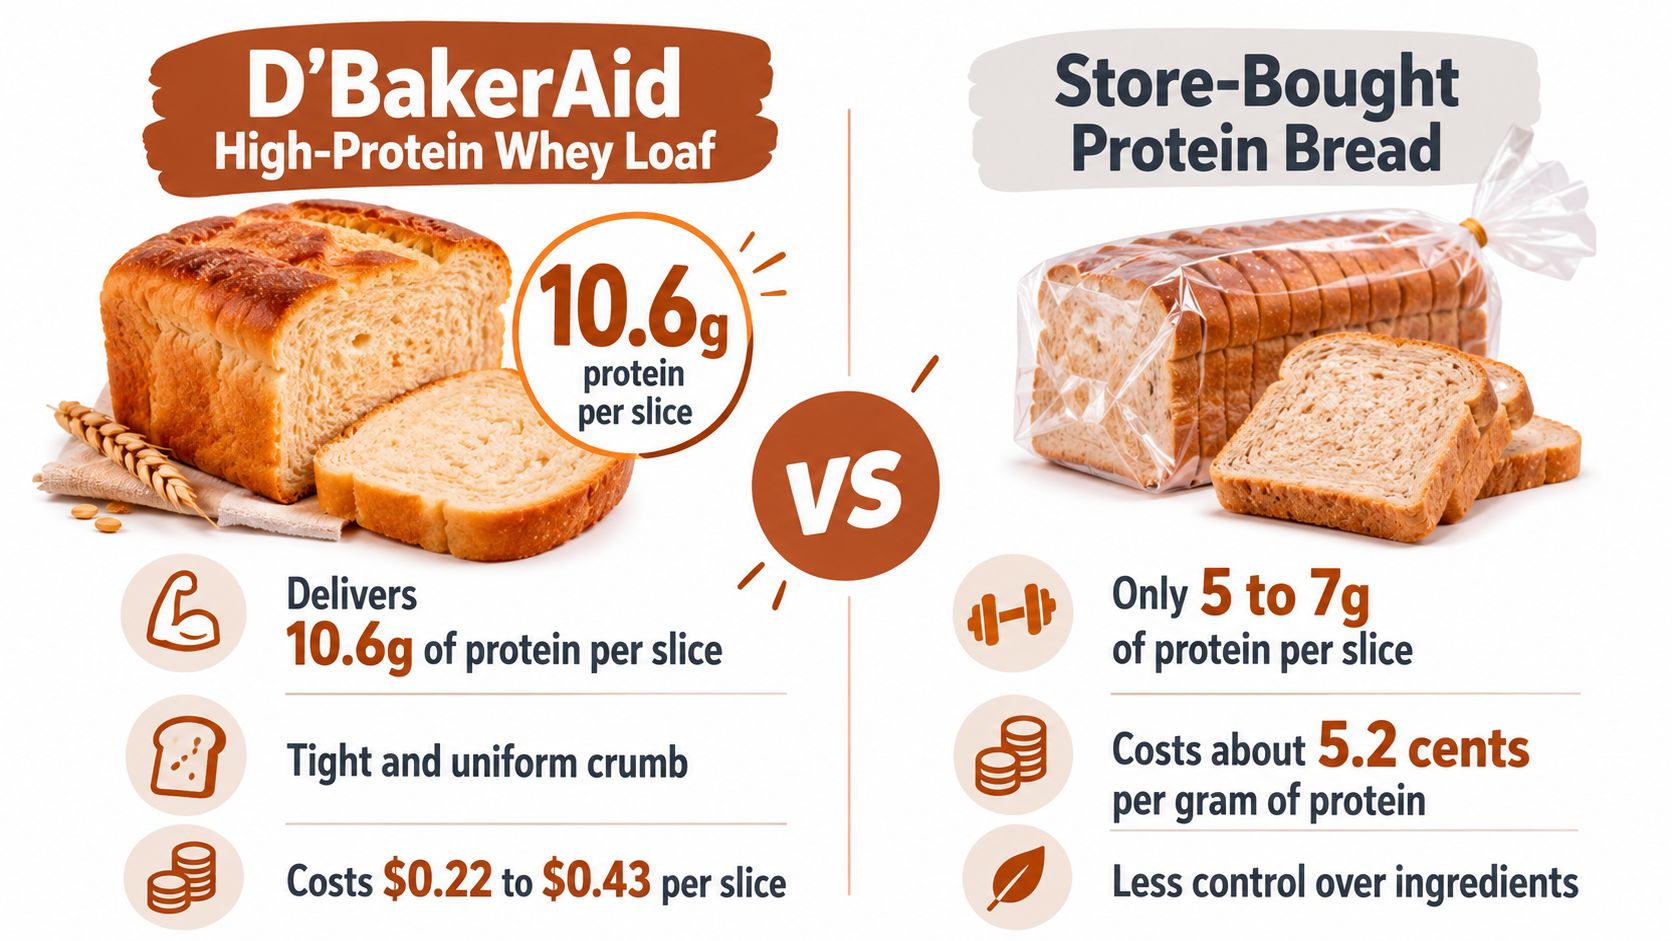
After the cinnamon rolls, this is a bigger step: a compact, protein-focused loaf that asks more of the dough than a basic sandwich bread. Whey protein isolate and sprouted wheat make the crumb denser, so watch the rise rather than waiting for the dough to double. The free 30g-protein loaf recipe is available in the DBakerAid app.
For a broad comparison, the USDA-linked nutrition database entry for white bread lists about 8.8 g of protein per 100 g for commercially prepared white bread. Compare nutrition labels by weight, since slice size can vary. For more guidance on how to make high-protein bread, focus on consistent fermentation and dough handling.
Set Your Expectations Honestly
This dough is denser, stiffer, and slightly tacky than a basic sandwich loaf. It may rise about 50–75% rather than doubling; waiting for a full double can push it past its best proof and lead to a collapsed loaf. The crumb is tight and uniform, the crust browns a bit faster, and the loaf is not gluten-free.
If you are choosing a separate gluten-free loaf, use these buying tips for gluten-free protein loaves. For this wheat-based loaf, compare costs by protein content and account for the price of protein powder.
8. Vegan High-Protein Pea + Whole Grain Pullman Loaf
This plant-based loaf combines pea protein isolate, vital wheat gluten, and whole-grain flour. It is still a wheat loaf, so it is not gluten-free. Compared with a simpler yeast bread, the added protein makes the dough less forgiving: judge its rise by the dough's expansion, not by expecting it to double.
Flavor Is the Trade-Off
Pea protein can give the crumb a slightly grey-green cast and a mild beany flavor, especially when the bread is untoasted. Choose fillings that complement that flavor, and let the loaf cool fully before slicing so the dense crumb can set.
- Toast slices lightly: Heat firms the crumb and softens the beany note.
- Use bold fillings: Hummus, roasted vegetables, and spiced toppings pair well with the pea flavor.
- Cool completely before slicing: Cutting too soon can leave the center gummy and make clean slices difficult.
- Stop at a 50–75% rise: Waiting for the dough to double can push it past its best rise and cause it to collapse.
A Lowes Foods listing for Nature's Own Life Wheat + Protein bread showed a price of US$7.49 and 22 g of protein per two slices, or 11 g per slice. Packaged bread offers convenience; baking at home gives you control over the ingredients and flavor.
For a plant-based lunch, pair slices with a protein-rich filling rather than relying on the bread alone. This loaf also works for everyday sandwiches, provided you enjoy the pea flavor and give it enough time to cool before cutting.
How the eight easy yeast breads compare on bake time, oven temperature, and best use
Use these times as practical starting ranges. Focaccia thickness, pizza oven heat, and loaf-pan size all affect the final bake, so check the bread itself rather than relying on the clock alone.
| Item | Bake Time | Oven Temperature | Best For |
|---|---|---|---|
| No-Knead Crusty Bread | About 30 minutes covered, then finish uncovered | 450–500°F | Beginners seeking a crusty artisan-style loaf |
| Classic Honey Oat Sandwich Loaf | 30–40 minutes | 350–375°F | Sandwiches and toast |
| Soft Yeast Dinner Rolls | 15–20 minutes | 350–375°F | Weeknight dinners and holiday meals |
| Overnight Focaccia | 20–25 minutes | 425–450°F | Sharing, snacking, and sandwiches |
| Easy Yeast Pizza Dough | 8–12 minutes | 500–550°F | Homemade pizza |
| Soft Cinnamon Rolls | 20–25 minutes | 350–375°F | Brunch and holiday treats |
| High-Protein Whey + Sprouted Wheat Pullman Loaf (D'BakerAid) | 30–40 minutes | 350–375°F | High-protein sandwiches |
| Vegan High-Protein Pea + Whole Grain Pullman Loaf (D'BakerAid) | 30–40 minutes | 350–375°F | Plant-based, high-protein sandwiches |
For a first bake, the no-knead loaf is forgiving because it asks for little shaping; if the crust browns before the center is done, keep baking and check the loaf again. Rolls bake quickly, so watch for even browning. Focaccia can dry out if left in too long, while pizza needs a hot oven and close attention to avoid a scorched base.
The Pullman loaves bake at moderate heat, but their higher-protein doughs are less forgiving of overproofing. Use the recipe's rise cues, and allow the baked loaf to cool before slicing so the crumb can set.
Pick One Loaf and Bake It This Weekend
Don't overthink the starting point. The no-knead boule and the honey oat sandwich loaf both teach dough handling with very little risk, and either one gives you a real loaf on your first attempt. Bake one of them twice before you move on. The second bake is where you learn, because you already know what the dough looked like last time.
From there, rolls and pizza dough build speed and confidence. Rolls teach portioning and surface tension in small, low-stakes units. Pizza dough teaches you to read gluten relaxation with your hands. Focaccia sits comfortably alongside both, since the overnight method rewards planning more than skill.
Enriched doughs come next, and they ask more of you. Cinnamon rolls need sequencing, temperature awareness, and patience through two rises and a fill-and-roll stage. If your cinnamon rolls come out soft and even, you can handle almost any enriched dough a home recipe throws at you.
The high-protein loaves are the final step for a reason. They use everything you've learned about proofing endpoints, because a dough that only rises 50–75% punishes anyone still baking by the clock. They're high-gluten, not gluten-free, they slice clean, and they turn bread from something you work around into something that carries a meal. Set expectations accordingly and they're a practical, repeatable bake.
Whatever you choose, keep notes. Write down your kitchen temperature, how long the rise took, and what you'd change. Vague advice to find a warm place is where beginners get stuck, and the Home Baking Association guidance on temperature for yeast bread production places desirable bulk fermentation around 27–29°C (80–85°F) and final proofing around 32–38°C (90–100°F). A few degrees in either direction changes your timing, and your notes are how you stop being surprised by that.
Treat each bake as a test you can repeat, not a verdict on your ability. A dense loaf tells you something specific about proofing, humidity, or temperature, and specific problems have specific fixes. If you want the fermentation and proofing stages handled with steadier control while you learn, the DBakerAid™ system is one relevant option, with flour-specific programs for the doughs in this list.
Flour, yeast, a free afternoon. That's enough. Pick the first loaf and start.
If inconsistent rises are the part of yeast baking that keeps defeating you, DBakerAid™ controls yeast activation and dough proofing at steady temperatures, then supports the bake with real steam in your own oven. Its guided programs cover everything from sandwich loaves and pizza dough to the high-protein Pullman loaves above, so your second attempt can match your first success. Visit the site to see the system, browse the recipes, and choose your next bake.