

Most guides answer “what is the dark chocolate melting temperature?” with one number. That answer is convenient, but it's the wrong starting point for reliable pastry work. Dark chocolate doesn't behave like a single chemical with one fixed transition point. Its cocoa percentage, cocoa butter content, recipe formulation, and crystal structure all affect when it softens, liquefies, and sets properly.
For practical tempering, dark chocolate is generally melted to about 45–50°C, cooled to roughly 27–29°C, then rewarmed to about 31–32°C. Those temperatures describe a controlled process, not one universal melting point. The most useful question is whether you're making ganache, coating a cake, molding decorations, or creating chocolate that must set with shine and snap.
Table of Contents
- Why Dark Chocolate Does Not Have One Melting Point
- The Science of Cocoa Butter Crystal Forms
- The Three-Stage Tempering Process for Dark Chocolate
- Safe Methods to Melt Dark Chocolate
- Troubleshooting Common Chocolate Failures
- Applying Temperature Knowledge to Baking and Pastry Work
- Frequently Asked Questions About Dark Chocolate Melting
Why Dark Chocolate Does Not Have One Melting Point
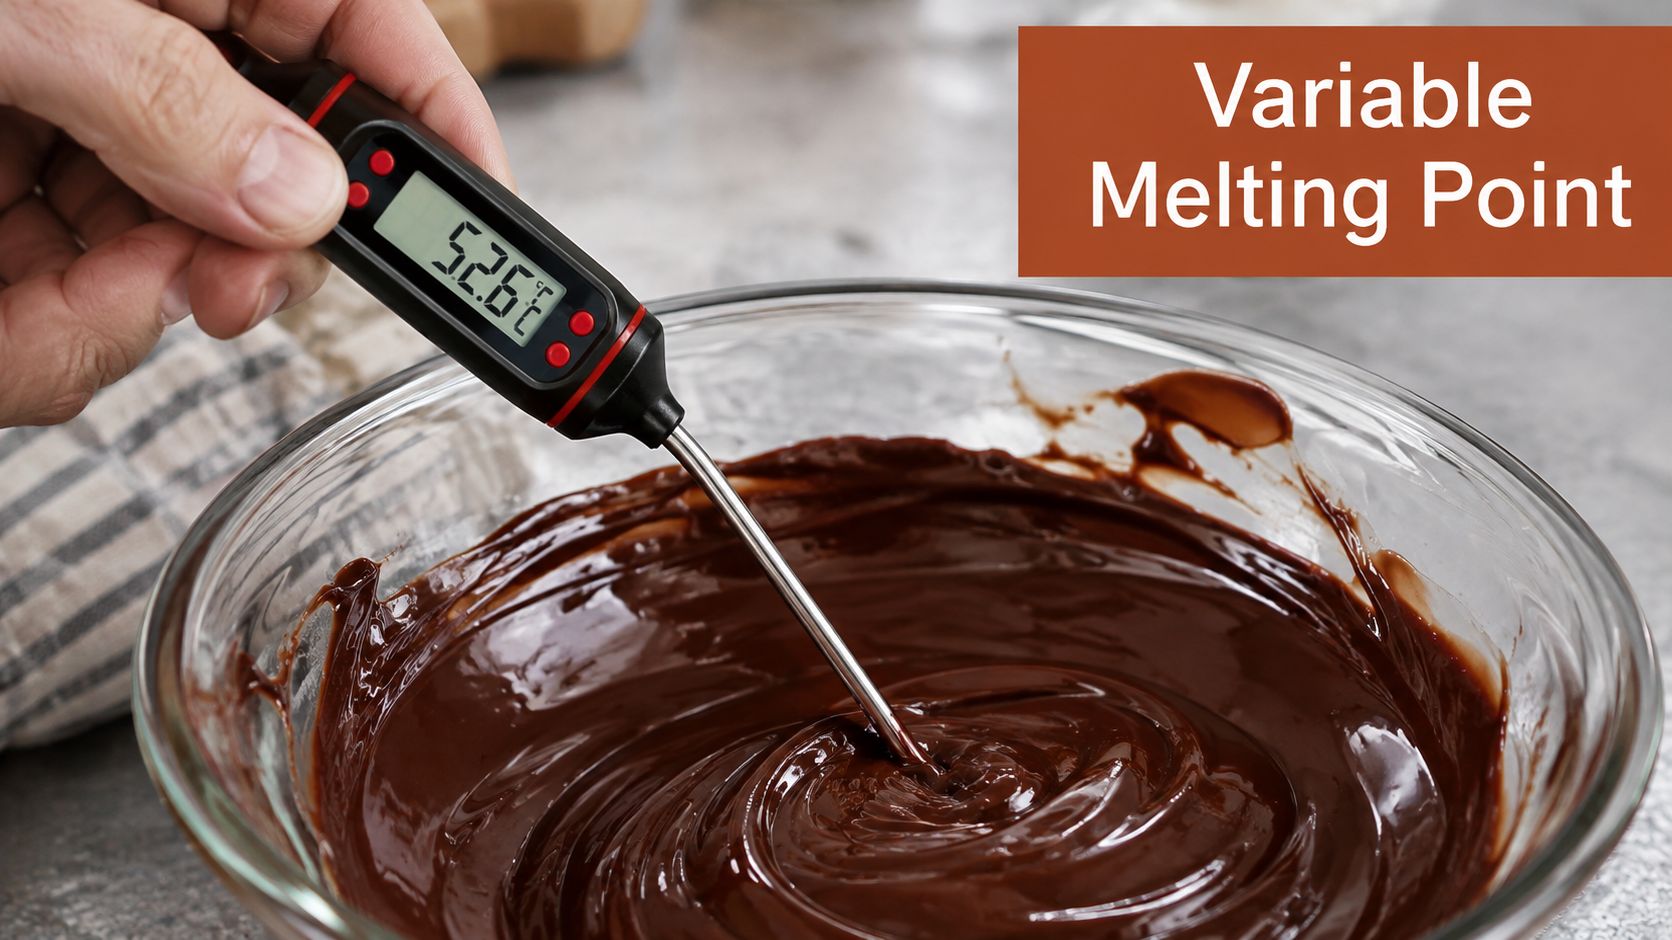
A chocolate bar can feel firm on the counter, soften in your fingers, and become fluid in a bowl at a much higher temperature. Those observations aren't contradictory. They reflect different stages of cocoa butter behavior, not one simple melting event.
The fat phase that controls this behavior is cocoa butter. Technical references place cocoa butter's practical melting range at about 32–35°C, while dark chocolate itself may soften around 34–38°C and melt near 32–34°C when the desired working crystals are present. Callebaut's cocoa butter and tempering guidance explains why crystal structure matters as much as the chocolate's label.
A bar with a higher cocoa percentage may resist softening longer, but cocoa percentage alone doesn't tell you everything. The amount and type of cocoa butter, added fats, sugar, particle size, and the chocolate's tempering state all influence the result. Educational material on chocolate polymorphism even describes very high-cacao dark chocolate, including 86%+ cacao, as potentially resisting the start of melting until around 46°C, which shows why generic charts can mislead. The Beloit College explanation of polymorphic chocolate structures provides the useful scientific context.
Softening is not the same as tempering
When a recipe says to melt dark chocolate, it may only require a smooth liquid. Brownies, cake batter, and many ganaches don't need the stable crystal network required for a glossy molded shell. Heating the chocolate gently until fluid may be enough.
Tempering has a stricter purpose. You melt the existing crystal structure, deliberately encourage the stable form to develop, and keep the chocolate within a narrow working range. A 70% bar and a very high-cacao bar may therefore require slightly different handling even when both are sold as dark chocolate.
Practical rule: Use a product-specific tempering chart when appearance, snap, contraction, or shelf stability matters. A generic dark chocolate melting temperature is only a starting point.
The Science of Cocoa Butter Crystal Forms
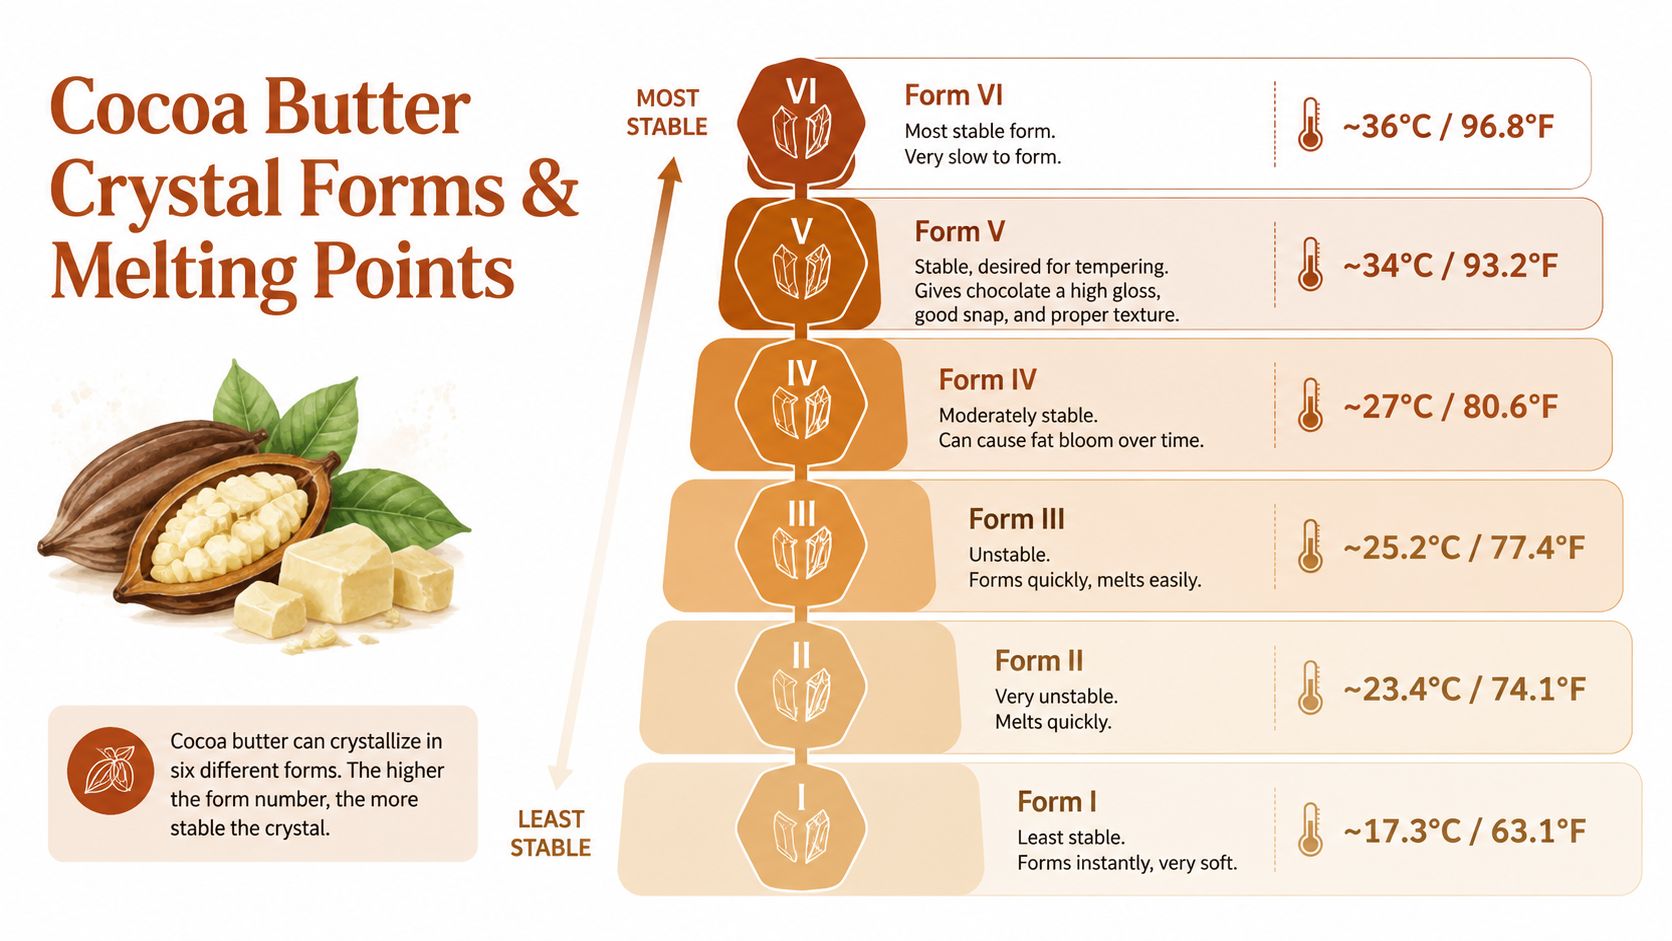
Cocoa butter is polymorphic, which means it can arrange itself into several different crystal forms. These forms contain the same fat molecules, but their molecular arrangements produce different firmness, melting behavior, gloss, and stability.
The six forms span a wide temperature range. Form I melts at about 17.3°C, while Form VI melts at about 36.3°C. The lower forms are less stable and melt more readily. Form V, the crystal temperers actively seek, melts at roughly 33.8°C and is associated with the combination most bakers want, a shiny surface, clean snap, and stable structure. This food-science reference explains cocoa butter's crystal behavior and melting points.
Why Form V matters
Form V is stable enough to hold chocolate in a finished shape, but it melts close to body temperature. That balance is deliberate. Properly tempered dark chocolate should remain solid in a reasonably cool room, then melt smoothly in the mouth.
Form VI is more stable and has a higher melting point, but it isn't automatically the ideal result for ordinary confectionery. Chocolate can become excessively firm, difficult to contract cleanly, or less pleasant to work when crystals continue changing after tempering. Professional chocolate work aims for a controlled crystal network, not the highest possible melting point.
| Crystal form | Approximate melting point | Practical behavior |
|---|---|---|
| Form I | ~17.3°C | Low-melting and unstable |
| Form II | Lower than the desired tempered form | Soft and unstable |
| Form III | Lower than the desired tempered form | Limited firmness |
| Form IV | Higher than the earlier forms | Firmer, but not the preferred finish |
| Form V | ~33.8°C | Stable, glossy, clean snap |
| Form VI | ~36.3°C | Very stable, firm, and higher melting |
The exact temperature behavior of a finished chocolate depends on its formulation, not only on the crystal label. That's why a few degrees can separate a bar that contracts cleanly from one that stays dull, streaked, or soft.
The Three-Stage Tempering Process for Dark Chocolate
Tempering isn't just melting chocolate and letting it cool. It's a controlled sequence that clears the old crystal pattern, encourages the desired form, and brings the chocolate back to a usable fluid temperature.
| Stage | Temperature range | Purpose |
|---|---|---|
| Melt | ~45–50°C | Liquefy the chocolate and erase unstable crystal memory |
| Cool | ~27–29°C | Encourage stable Form V crystals to develop |
| Rewarm | ~31–32°C | Restore fluidity while preserving the working crystal network |
Stage one is the reset
Begin by melting the dark chocolate to about 45–50°C. Many professional guides narrow the practical upper target to 49–50°C, and Valrhona's tempering guidance treats 50°C as a practical ceiling for dark couverture.
The point isn't to make the chocolate hotter than necessary. You're clearing existing cocoa butter crystals so the structure can be rebuilt in a controlled way. Excessive heat can produce scorched flavors, encourage fat separation, and make the later tempering stages harder to manage.
Stage two creates the seed
Cool the melted chocolate to roughly 27–29°C. This is the stage many home bakers rush, especially when using a warm kitchen or a bowl that retains heat. If you don't cool far enough, you haven't given the stable crystal network enough opportunity to form.
You can cool by stirring over a cool surface, adding tempered seed chocolate, or using another validated tempering method. Keep the mixture moving and monitor the actual chocolate temperature rather than trusting the bowl's exterior.
Stage three returns it to working condition
Rewarm the chocolate to about 31–32°C. That range keeps the mixture fluid enough for dipping, molding, or spreading while preserving the Form V crystals that give the finished chocolate its gloss and snap. This technical tempering guide describes the same cooling and rewarming logic.
For a practical chart that keeps the stages together, use this dark chocolate tempering temperature chart. The chocolate should be smooth and fluid, but it shouldn't feel hot. If it rises above the working range, cool and adjust it rather than continuing to use it and hoping the set will recover.
Safe Methods to Melt Dark Chocolate
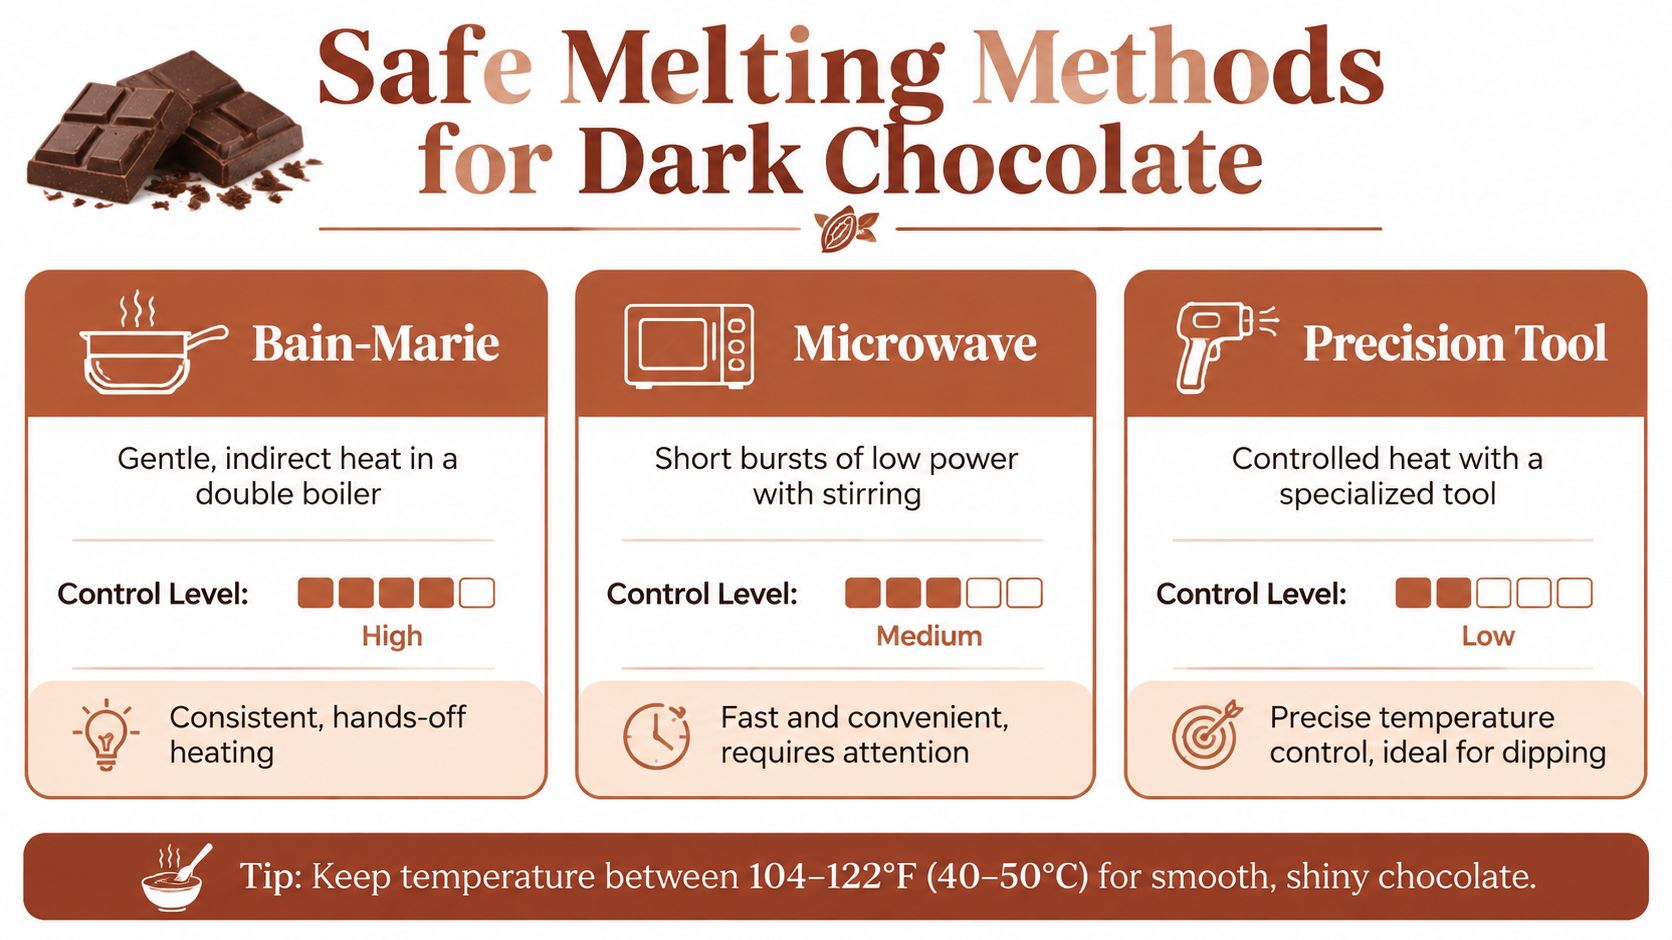
The right melting method depends on how much control the recipe demands. A bowl of chocolate for brownies can tolerate a simpler approach than a batch intended for molded bonbons or thin decorative shards.
Bain-marie
A bain-marie, or double boiler, uses gentle indirect heat. Place the chocolate in a dry bowl over warm water, making sure the bowl doesn't sit in the water and that steam can't enter the chocolate.
This method provides steady control when you stir frequently. Its main failure point is water contact. Even a small amount of steam or condensation can make chocolate seize, turning it thick and grainy instead of smooth.
Microwave
Microwaving is quick, but it creates hot spots. The chocolate may look solid while the center or bottom is already dangerously hot.
Use short heating intervals and stir thoroughly between them. The stirring redistributes heat and lets the remaining solid pieces melt without forcing the whole batch to a high temperature. Stop before the chocolate looks completely liquid, then use residual heat to finish the job.
Precision temperature tools
A temperature-controlled appliance can reduce the swings that make tempering difficult, particularly when the tool heats gently and the bowl is easy to monitor. D'BakerAid™ includes a low-temperature chocolate and butter melting mode designed for controlled melting in its stainless bowl, which can be useful when you want to avoid setting up a double boiler.
No method removes the need to measure. A thermometer remains the most dependable way to distinguish gently melted chocolate from chocolate that has overheated beneath a solid-looking surface. For a home method that combines melting and crystal control, follow this guide to tempering chocolate at home.
Troubleshooting Common Chocolate Failures
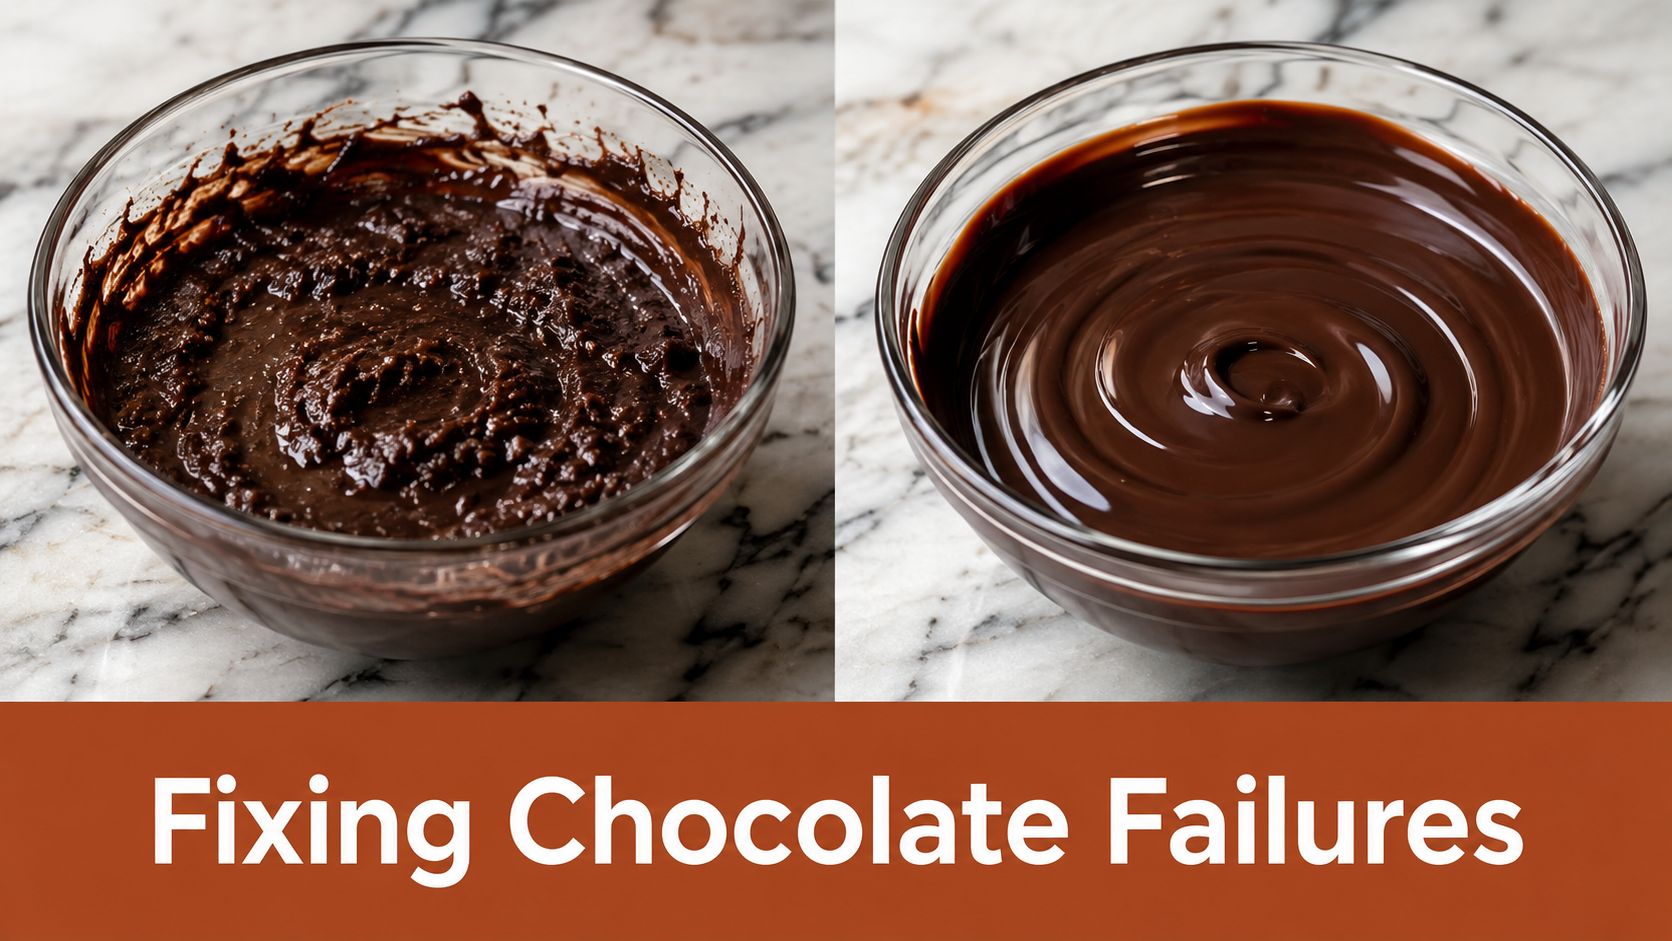
Chocolate failures usually leave clues. A grainy mixture, a dull coating, or pale streaks after setting points to a different problem, so the appearance helps you diagnose the technique rather than blaming the recipe.
Seized chocolate
Seized chocolate becomes thick, stiff, and grainy. Water is usually responsible. Steam from a bain-marie, a wet spatula, condensation, or a damp bowl can cause sugar and cocoa particles to clump instead of remaining dispersed in fat.
If the chocolate is going into a sauce, ganache, or batter, adding more liquid gradually can sometimes bring it back into a smooth emulsion. If the chocolate must remain a coating or molded shell, adding liquid changes the formulation, so it won't return to its original use. A small amount of compatible fat may loosen it for some applications, but rescue isn't guaranteed.
Overheated chocolate
Chocolate that has gone too hot may taste scorched, smell harsh, become dull, or separate. Dark chocolate is typically melted to about 45–50°C, and holding it above the practical ceiling can damage flavor and make the crystal reset less predictable. Valrhona's professional tempering reference is useful when you need a defined upper limit.
If the chocolate is smooth and only slightly above target, cool it while stirring and restart the tempering sequence. If it has a burned aroma or visibly separated fat, use it in a cooked filling rather than expecting a flawless shell.
Bloom
White or grey streaks are usually fat bloom or sugar bloom. Poorly controlled cooling, unstable crystal forms, temperature swings, and moisture can all affect the surface. Bloomed chocolate isn't necessarily spoiled, but it won't have the appearance or snap of properly tempered chocolate.
For couverture work, melt it fully and temper it again. Keep finished pieces away from heat and moisture, and don't place a warm mold directly into a cold, damp environment.
Applying Temperature Knowledge to Baking and Pastry Work
The need for tempering depends on the finished job. A dipped strawberry needs a firm, glossy coating that releases cleanly and resists smearing. A brownie doesn't. Treating both applications the same wastes time in one case and creates avoidable failures in the other.
Match the process to the result
Use tempered chocolate for molded decorations, dipped fruit, thin shells, curls, and pieces that need a clean break. Form V crystals provide the structure behind that finish, so the cooling and rewarming stages matter.
For brownies, cookies, cakes, and many ganaches, smoothly melted chocolate is often sufficient. The chocolate will be mixed with other ingredients, and the final texture comes from the full recipe rather than from a standalone cocoa butter shell.
Coloring introduces another variable. Water-based color can seize chocolate, so use a product designed for fat-based chocolate work and follow the manufacturer's handling instructions. This guide to coloring melting chocolate covers the practical distinction between compatible and incompatible colorants.
Control the environment
A warm kitchen shortens your working time. The chocolate may remain fluid but lose its carefully formed crystal balance if the bowl, tools, mold, or work surface adds too much heat. Work with dry equipment, keep molds at a suitable room temperature, and avoid placing freshly tempered pieces where heat will soften the surface.
Shipping and storage also expose weak tempering. Chocolate that sets with unstable crystals may look acceptable at first, then develop streaks or a soft finish after temperature changes. Proper tempering improves stability, but it doesn't make chocolate immune to heat. The formulation and final destination still determine whether a decoration will hold.
A glossy finish isn't proof of good tempering by itself. The real test is the combination of shine, contraction, firmness, and snap after the chocolate has fully set.
Frequently Asked Questions About Dark Chocolate Melting
Can bloomed chocolate be tempered again?
Usually, yes. Melt the chocolate completely, then repeat the dark chocolate tempering sequence. If bloom came from poor crystal structure, recrystallization can restore the finish. Sugar bloom caused by moisture may leave texture damage, so use the chocolate in a filling if the surface remains rough.
How can I test temper without a thermometer?
Spread a small smear of chocolate on a cool, dry surface and watch how it sets. Properly tempered chocolate should develop a smooth appearance and firm texture rather than remaining tacky or streaked. This is only a screening test. A thermometer gives you much better control during the actual process.
Why do chocolate chips behave differently from bar chocolate?
Chips are formulated to hold their shape during baking, so they may melt less freely and produce a thicker mixture. Bar or couverture chocolate generally melts more evenly because it's designed for a smoother fluid phase. Check the ingredient list and use the product intended for your application.
Does oil or butter change the melting point?
Yes. Added fats interfere with the cocoa butter crystal network and change the chocolate's texture and setting behavior. That can make a sauce or ganache smoother, but it also means the mixture may no longer temper or set like pure chocolate.
What is the practical working temperature for dark chocolate?
After melting and cooling, rewarm dark chocolate to about 31–32°C for working. This tempering reference identifies that range as the practical point where the chocolate remains fluid while preserving its stable crystal structure.
DBakerAid™ brings controlled low-temperature chocolate melting into a broader home baking system, alongside fermentation and proofing tools for repeatable dough work. Visit DBakerAid™ to see how its temperature-focused approach can help you manage chocolate more consistently and bake with fewer preventable variables.