

Most chocolate tempering thermometers don't fail because the sensor is wildly inaccurate. They fail because the baker measures the wrong place, trusts a surface reading, or buys a tool that can't resolve the narrow working range in front of them. A premium display won't rescue chocolate measured against the bowl wall, and an infrared thermometer can report a reassuring number while the center of the chocolate sits somewhere else entirely.
I've burned through enough cheap thermometers to stop judging them by brand, price, or oversized marketing claims. For chocolate, the order matters: choose the sensing method first, check the accuracy and response-time ceiling second, then fix your measurement technique. The right thermometer is a contact probe with a slim tip, quick response, and accuracy suited to fractions of a degree. The rest of the decision depends on whether you temper occasional bars, weekly bonbons, or larger batches.
Table of Contents
- Why Most Tempering Thermometers Fail Before the Chocolate Does
- Temperature Windows for Dark, Milk, and White Chocolate
- Probe Versus Infrared Sensors for Tempering
- Five Specifications That Matter When You Buy a Chocolate Thermometer
- Technique Beats Tool When Tempering at Home
- Matching the Thermometer to Your Kind of Baking
- The Honest Buyer's Checklist and Where DBakerAid Fits
Why Most Tempering Thermometers Fail Before the Chocolate Does
A chocolate tempering thermometer has one job, but it has to do that job inside a very small margin for error. Tempering melts existing cocoa butter crystals, cools the chocolate while encouraging the desired stable structure, then gently reheats it to a workable temperature. If the thermometer lags or reads a hot bowl instead of the chocolate, every later step is built on bad information.
The popular advice is usually too simple: buy a fast digital thermometer and check whether the chocolate has reached the target. That advice misses the two failures I see most often at home.
The first failure is probe placement
The probe needs to read the chocolate mass itself, not the container. A bulb touching the metal or glass wall can pick up the bowl's temperature, while a tip sitting near the surface can miss a cooler or warmer center. Stirring before measuring matters because chocolate can develop temperature gradients as it melts, cools, and reheats.
A thermometer with excellent published accuracy still produces a bad result if the sensor sits in the wrong location. This practical point is emphasized in chocolate tempering thermometer guidance from Chefs Compliments, which recommends measuring the chocolate mass, avoiding container contact, stirring, and checking more than one spot.
The working rule: A precise thermometer in the wrong spot is less useful than a slightly less precise thermometer placed correctly in the center of the chocolate.
The second failure is infrared overconfidence
Infrared thermometers are quick and contactless, but they read the surface. That can be useful in narrow professional situations where chocolate is spread thinly and kept in constant motion. It's a poor primary method for a bowl of melted chocolate, where the surface can differ from the interior.
That's why I rank tools by depth of measurement, accuracy, response time, probe design, and workflow fit, not by how futuristic they look. The next section establishes the temperature windows. Then the sensor comparison shows why contact probes win for ordinary bowl tempering, followed by the buying specifications and technique habits that turn a good tool into consistent results.
Temperature Windows for Dark, Milk, and White Chocolate
A thermometer cannot guide tempering until you know the temperature it must measure. Chocolate moves from a hot melt through cooling and back to a narrow working range. That final range changes with the chocolate because dark, milk, and white chocolate contain different proportions of cocoa solids, milk ingredients, and cocoa butter.
For the working stage, use approximately 31–32°C for dark chocolate, 29–30°C for milk chocolate, and 28–29°C for white chocolate. These ranges align with Cargill's chocolate tempering instructions.
Use the right target for the chocolate
| Chocolate Type | Working Temp (C) | Working Temp (F) | Why the Window Matters |
|---|---|---|---|
| Dark | About 31–32°C | About 87.8–89.6°F | Too much heat can destroy the stable crystals needed for shine and snap. Too little heat makes the chocolate thicken and set unevenly. |
| Milk | About 29–30°C | About 84.2–86°F | Milk chocolate works at a lower temperature, so a small overshoot can break the desired crystal structure. |
| White | About 28–29°C | About 82.4–84.2°F | White chocolate has the narrowest low-temperature working range and can become thick if it cools too far. |
The usual sequence starts by melting chocolate to roughly 40–50°C, or 104–122°F, then cooling it to about 27°C, or 80.6°F, before bringing it back to the final working range. The temperature sequence and chocolate-specific targets are also summarized in this chocolate tempering temperature chart.
A thermometer does not need to show a dozen decimal places. It does need to distinguish one degree from the next without wandering or rounding too aggressively. Otherwise, dark chocolate may appear ready while it is still too warm, or white chocolate may seem workable after it has started to thicken.
Why a few degrees matter
Cocoa butter forms several crystal structures. Tempering aims to encourage the stable structure responsible for gloss, a clean break, and a firm set. Holding chocolate too hot can erase that structure. Cooling it too far makes the mass stiff and uneven, leaving less time to work before the crystal formation is properly controlled.
Temperature resolution is therefore the test for every thermometer specification in this article. If a tool cannot show narrow differences inside these working windows, it is not a serious chocolate tool, regardless of its marketing copy. The sensor also has to measure the chocolate's interior, not merely the surface.
Probe Versus Infrared Sensors for Tempering
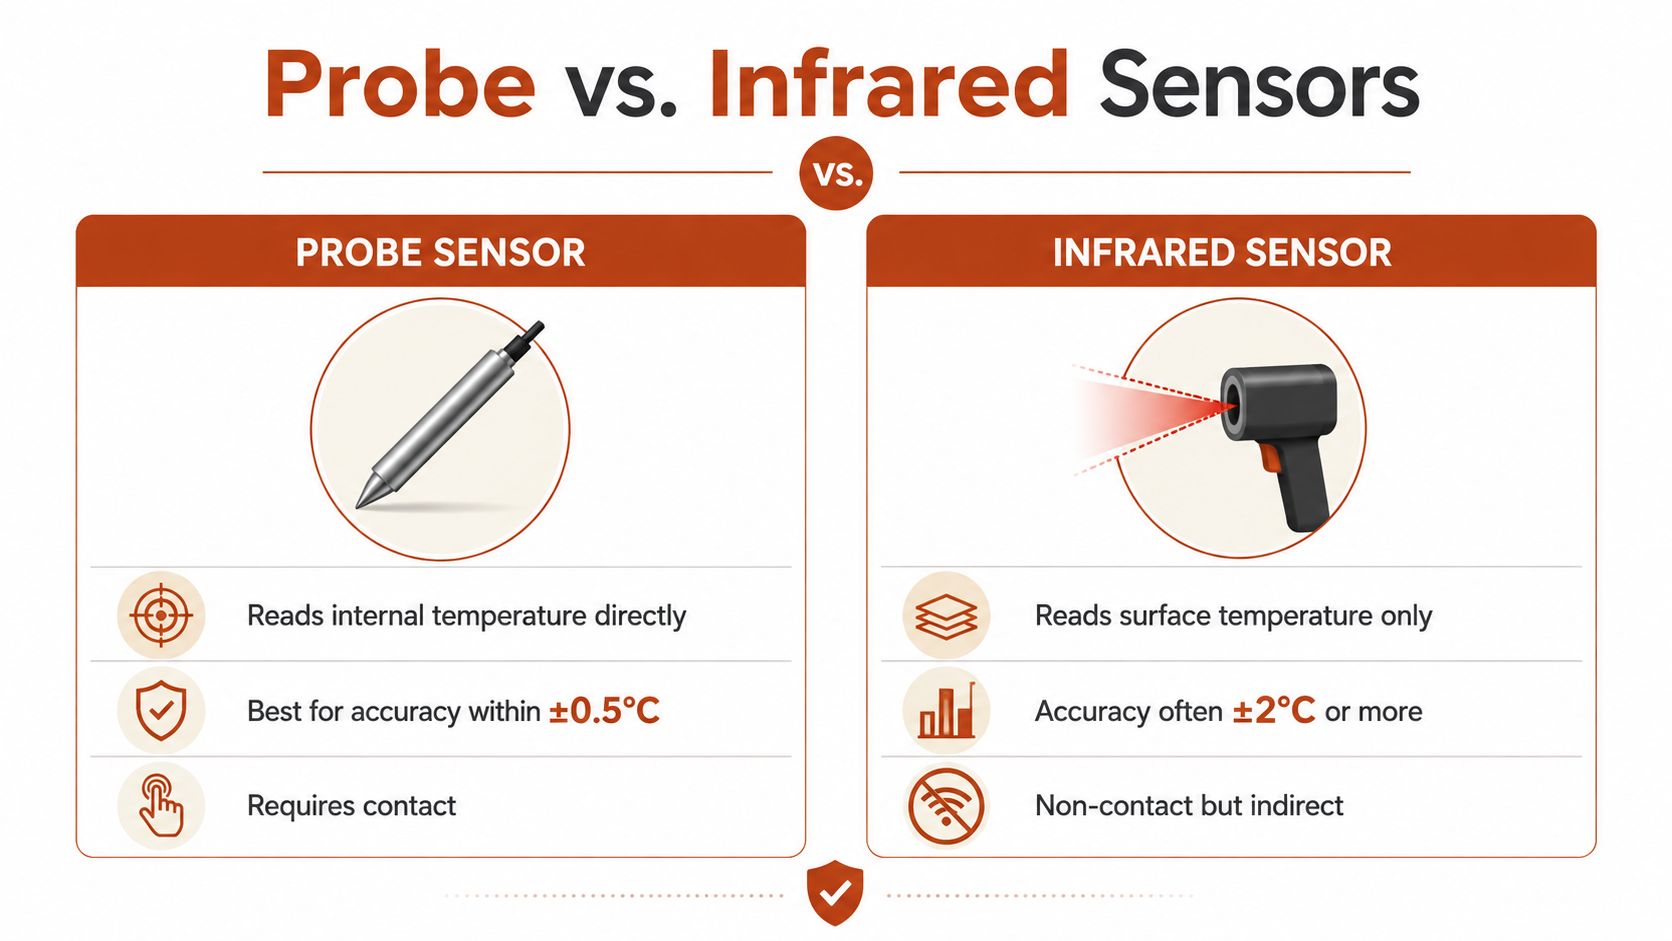
Sensor choice matters less by brand than by where it measures. A contact probe reads chocolate through direct contact with the mass. An infrared thermometer reads emitted radiation from the exposed surface. Both have a place, but only one should be your default for bowl tempering.
How the methods compare
| Criterion | Contact Probe | Infrared Sensor |
|---|---|---|
| Reading location | Measures the contacted chocolate area | Measures the exposed surface |
| Speed | Fast enough for routine tempering when designed for quick readings | Very fast and contactless |
| Accuracy ceiling | Better suited to narrow tempering windows | More dependent on surface conditions and measuring distance |
| Batch flexibility | Works in bowls, pots, and small batches | Best on exposed, relatively uniform surfaces |
| Main risk | Incorrect placement or contact with the bowl | A surface value that does not represent the working mass |
A probe is the stronger choice for melted chocolate in a bowl, provided the tip sits inside the chocolate without touching the metal or glass. Stir gently while checking, then measure away from the bowl wall and base. A reading taken against the container can reflect the container instead of the chocolate.
Infrared earns its place when the chocolate is spread thinly across a slab or tray. It is quick, clean, and useful for checking an exposed layer during continuous agitation. It is less reliable as the only tool for a deeper bowl or a small batch, where placement and uneven cooling make the reading easier to misinterpret.
Contact probes are not maintenance-free. Keep the tip clean, insert it far enough to measure the chocolate rather than the air, and avoid scraping it against the bowl. A narrow probe also gives you more control in a small quantity. These practical details matter more than a crowded display or an impressive list of modes.
The ThermoWorks guidance on candy thermometers uses a demanding accuracy benchmark for pastry work, around ±0.2°C, while highly skilled users may manage with roughly ±0.5°F. That standard fits chocolate because its working windows leave little room for careless measurement.
For ordinary bowl tempering, buy a fast contact probe first. Keep an infrared thermometer as a secondary tool for thin, exposed chocolate, not as your sole thermometer.
Here's a short visual demonstration of the temperature-checking workflow:
A home tempering machine can control the heating and cooling sequence more consistently, but it still needs dependable temperature input. Read this guide to chocolate tempering machines for home use before treating the machine as a substitute for checking the chocolate itself.
Five Specifications That Matter When You Buy a Chocolate Thermometer
A chocolate thermometer earns its place by controlling the working window, not by borrowing features from meat or soup thermometers. Prioritize the sensor that measures the chocolate's interior, reacts quickly, and stays dependable at the final working temperature. Surface-only readings and vague precision labels are where tempering goes wrong.
Accuracy
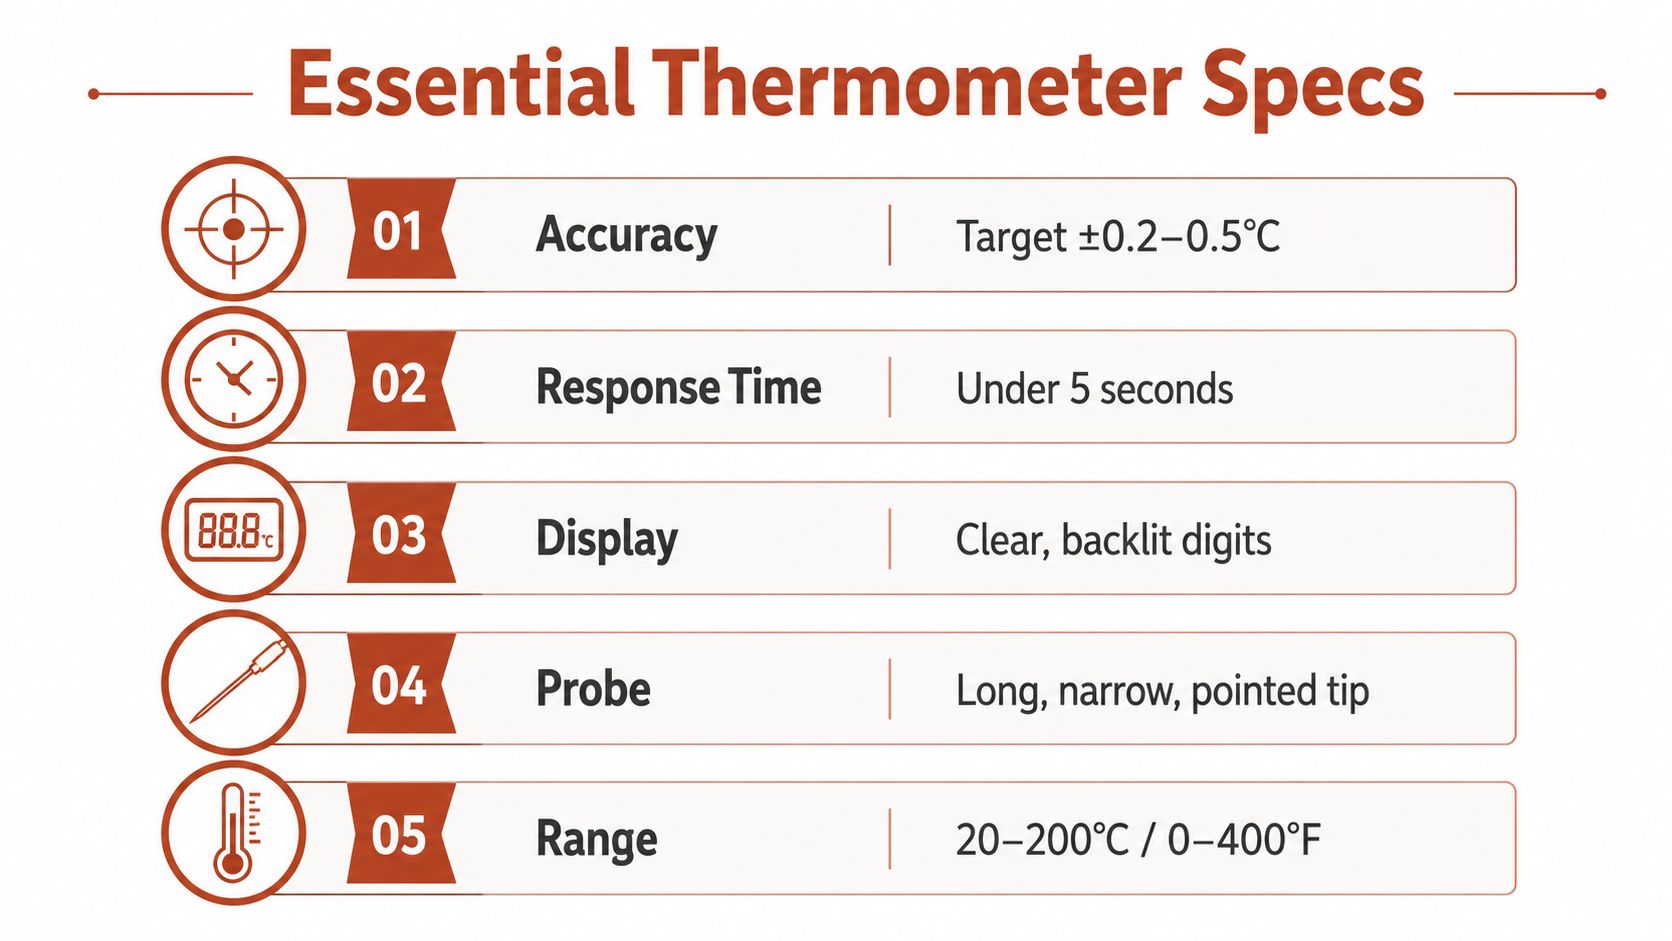
For serious tempering, target about ±0.2–0.5°C, based on your work and the thermometer's verified specifications. A pastry-chef benchmark near ±0.2°C leaves less room for measurement error, while approximately ±0.5°F can work for highly skilled users.
Benchmark: Look for accuracy close to ±0.2–0.5°C, not a vague “high precision” label.
Response time
A slow thermometer keeps the bowl over heat while you wait for the display. That delay can turn a controlled reheating step into an overshoot. Practical guidance favors roughly one to three seconds for a quick-contact thermometer. Laboratory guidance from Measurement Canada specifies a time constant under 15 seconds in flowing liquids, so the faster range is the better target for routine chocolate work.
Benchmark: Prefer a response time around one to three seconds.
Probe size
A thick probe is clumsy in a small batch and makes contact with the bowl more likely. Measurement Canada's direct-reading digital thermometer guidance uses a probe diameter of about 3 mm, or 1/8 inch. That is a sensible design reference for chocolate, since a slim tip can reach the center without moving much of the mass.
Benchmark: Choose a slim probe near 3 mm for small or shallow batches.
Temperature range
Buy one thermometer that covers melting, cooling, and reheating. Commercial tempering thermometers commonly span about 40–130°F, or 4–54°C, enough for the complete tempering cycle without changing instruments.
Benchmark: A range around 40–130°F covers the required stages.
Construction and calibration
Water resistance matters around steam, wet hands, and cleanup. Calibration access matters just as much, because a thermometer that can be checked or adjusted remains easier to trust over time. A clear backlit display, a folding or protected probe, and a body built for repeated kitchen use are useful extras. They come after the sensing method, accuracy, and response time.
Shopping floor: Choose a contact probe, target roughly ±0.2–0.5°C accuracy, favor one-to-three-second response, look for a slim tip near 3 mm, and cover at least the 40–130°F tempering range.
Technique Beats Tool When Tempering at Home
A thermometer cannot rescue careless sampling. Home batches have less thermal mass, especially in narrow bowls, so hot and cool pockets appear quickly. Stir before every reading, or the display may report a local temperature instead of the chocolate's working temperature.
Push the probe into the center of the chocolate mass, with the sensing tip fully surrounded by chocolate. Keep it away from the bowl wall and base, and never brace it against the container while waiting for the number. After stirring, move through more than one area when the batch is deep enough. Trust a stable reading, not the first number that flashes on screen.
A reliable checking routine
- Stir before measuring. Draw chocolate from the center toward the edges to distribute heat.
- Place the tip in the mass. Keep it clear of glass, metal, and the bowl's bottom.
- Wait for the display to settle. A fast thermometer shortens the wait, but a lagging reading still needs time. Acting on an unfinished reading is how chocolate overshoots.
- Check again after movement. Measure after stirring and after each brief reheating.
- Keep water away. Dry the bowl's exterior and handle the probe carefully. Condensation or a wet utensil can seize the chocolate.
The ThermoWorks chocolate tempering guide supports instant-read spot checks throughout tempering. It allows infrared readings during thin-layer tabling, where the chocolate is spread out and kept moving. That does not make infrared a reliable replacement for an internal reading in a bowl.
For the full seed-method walkthrough these habits support, see this guide to how to temper chocolate at home.
Check the instrument before the batch
An ice-water check gives you a quick screen before tempering. Put the probe into a well-mixed ice-water bath without touching the container, let the display settle, and compare it with the expected freezing-point reference. If the result is noticeably wrong, stop there. A thermometer that misses the reference point cannot guide a working range only a few degrees wide.
A thermometer that reads accurately in the wrong spot still gives you the wrong answer.
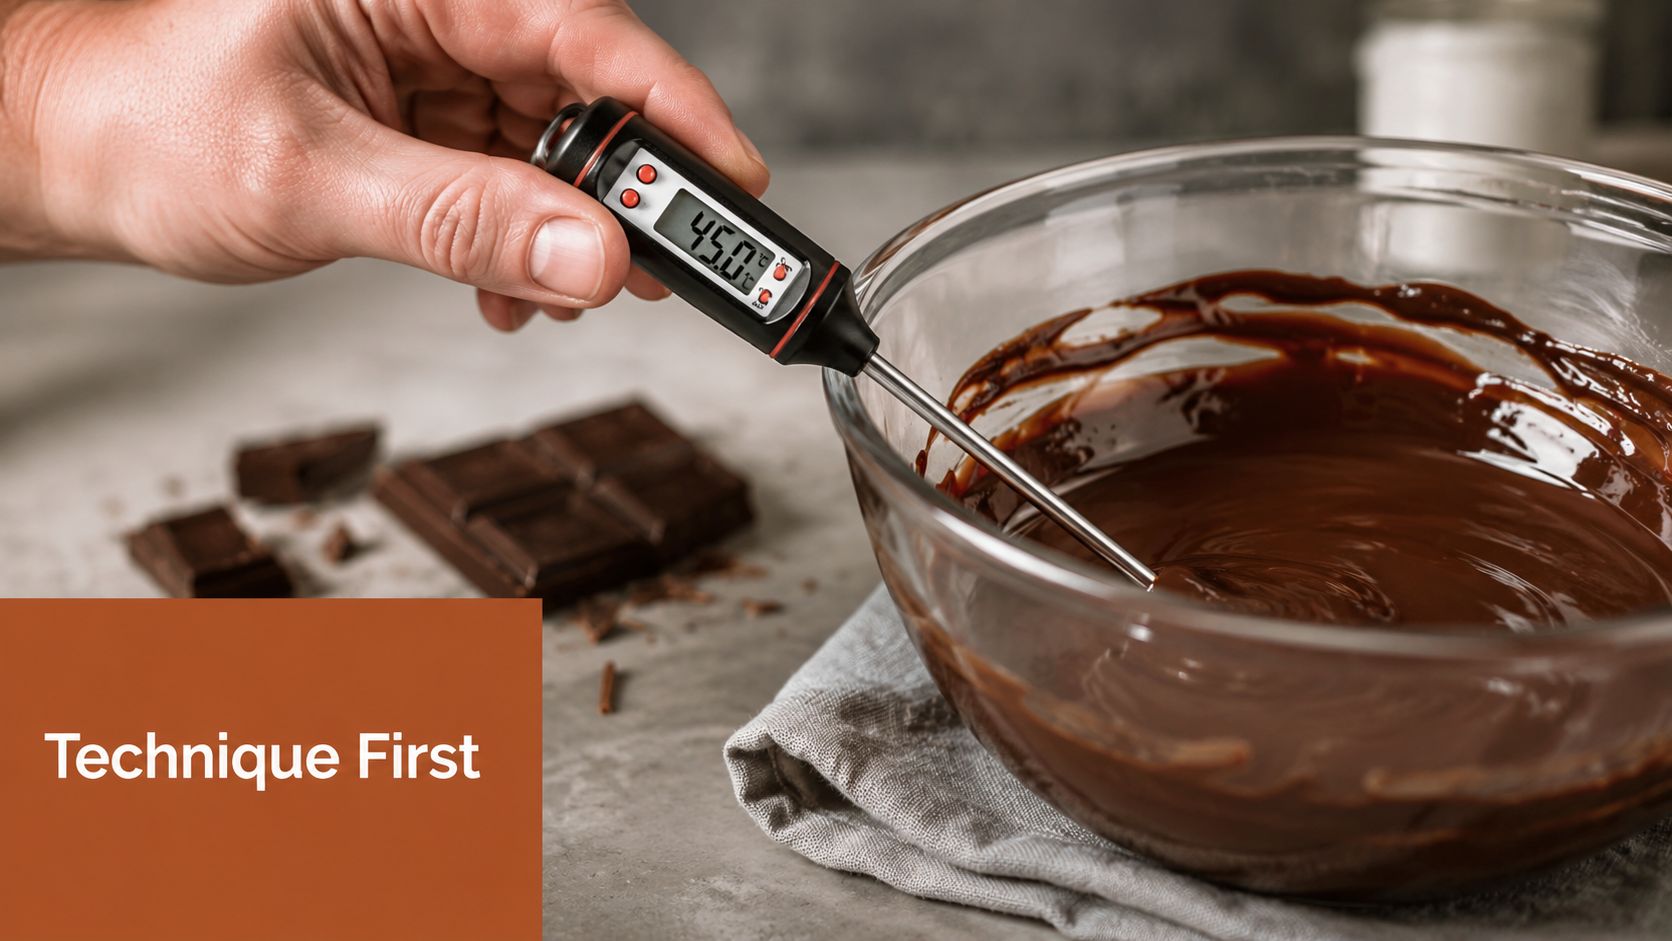
Do not stare at the display continuously. Stir, measure the mass, compare the result with the correct chocolate-specific window, then make small heat adjustments. That routine prevents more failed home tempers than another gadget.
Matching the Thermometer to Your Kind of Baking
The right thermometer depends on what you make and how often you make it. A casual bark maker doesn't need the same tool as someone producing molded bonbons every week, and a baker who also cooks sugar needs a wider range than someone who only tempers a small bowl of couverture.
Occasional bar maker
For occasional chocolate bars or bark, a basic instant-read contact probe is enough. Prioritize a readable display, a slim tip, and accuracy suited to the narrow working ranges. You don't need elaborate logging or remote monitoring, but you do need to stop relying on touch.
A simple probe also makes it easier to follow the seed method without guessing whether the chocolate has cooled far enough or warmed back into its working range.
Weekly bonbon maker
Frequent bonbon work justifies a faster, more repeatable tool. Look for a probe around 3 mm in diameter, response near one to three seconds, and calibration access. You'll be checking during multiple transitions, so a thermometer that settles quickly and can be verified is worth more than one with a decorative interface.
Bonbon work also exposes poor technique quickly. The probe has to move through the chocolate after stirring, and it can't be left against the bowl while you prepare molds.
Pastry hobbyist working across techniques
If chocolate shares your kitchen with bread dough, sugar syrups, and general cooking, buy a waterproof contact probe with a broad working range. A range around 40–130°F comfortably covers chocolate tempering, while a wider overall instrument range can make it useful for other kitchen tasks.
This is also where controlled surrounding conditions help. DBakerAid™ is a complementary baking system that controls fermentation and proofing temperature and time, with an optional steamer for oven humidity. It doesn't replace a properly placed chocolate probe, but a more consistent kitchen workflow can reduce the number of variables you're managing around delicate baking projects.
The decision is straightforward. Small occasional batches need a trustworthy basic probe. Regular bonbon work needs speed, slim design, and calibration access. Multi-purpose pastry work needs those qualities plus durable construction and a broader temperature range.
The Honest Buyer's Checklist and Where DBakerAid Fits
Start with the sensor, not the brand. For bowl tempering, choose a contact probe over infrared, then check the accuracy, response time, probe diameter, temperature range, and calibration options.
Use this shortlist before buying:
- Sensing method: Direct-contact probe for internal chocolate readings.
- Accuracy: Around ±0.2–0.5°C.
- Response: Roughly one to three seconds.
- Probe: Slim, ideally near 3 mm for small batches.
- Range: About 40–130°F covers melting, cooling, and reheating.
- Technique: Stir first, measure the center, and avoid bowl contact.
Infrared isn't useless. It's the wrong primary tool for most chocolate sitting in a bowl. Use it for thin, actively worked chocolate only if you understand what its surface reading can and can't tell you.
DBakerAid's controlled fermentation and proofing system belongs in the wider repeatability toolkit, not in place of a chocolate thermometer. The dependable setup is a sound probe, disciplined measurement, and equipment that keeps the rest of your baking environment consistent.
DBakerAid™ brings controlled fermentation and proofing into the home kitchen, helping you repeat demanding bread and pastry processes with less guesswork. Visit DBakerAid™ to see how the system fits alongside a properly chosen chocolate tempering thermometer.