

You've followed a rustic pizza dough recipe, waited for the rise, and still ended up with a crust that's pale, tight, or oddly sticky. The usual culprit isn't a lack of effort. It's a mismatch between hydration, flour strength, fermentation temperature, and timing.
A reliable dough needs more than “let it rise until doubled.” Use baker's percentages, judge the dough by feel and volume, and control the conditions around it. This guide builds a rustic crust with a blistered exterior, chewy interior, and irregular open crumb, while showing where cold fermentation, same-day dough, and precision proofing each make sense.
Table of Contents
- Why Most Homemade Pizza Dough Falls Short
- Ingredients and Hydration Targets for Rustic Crust
- Fermentation Timing and Temperature Control
- Mixing, Shaping, and Baking with Precision
- Rustic Dough Variations and Trade-Offs
- Troubleshooting Common Rustic Dough Failures
- Storage, Scaling, and Frequently Asked Questions
Why Most Homemade Pizza Dough Falls Short
A dough can follow the recipe exactly and still bake pale, tight, or sticky. The cause often appears in the kitchen conditions: a cool winter room, a humid summer day, or an oven that warms the dough before fermentation has finished. Instructions such as “add enough water,” “knead until smooth,” and “let it rise until doubled” leave too much room for those conditions to change the result.
Hydration is the first variable to check. Rustic pizza dough can range from roughly 55% to 85% water relative to flour, depending on style, as shown in the pizza dough baker's percentage reference. Firmer Roman tonda dough sits near 55% to 58%, Neapolitan and New York dough around 60% to 65%, while wetter pan styles commonly reach 70% to 80% or more.
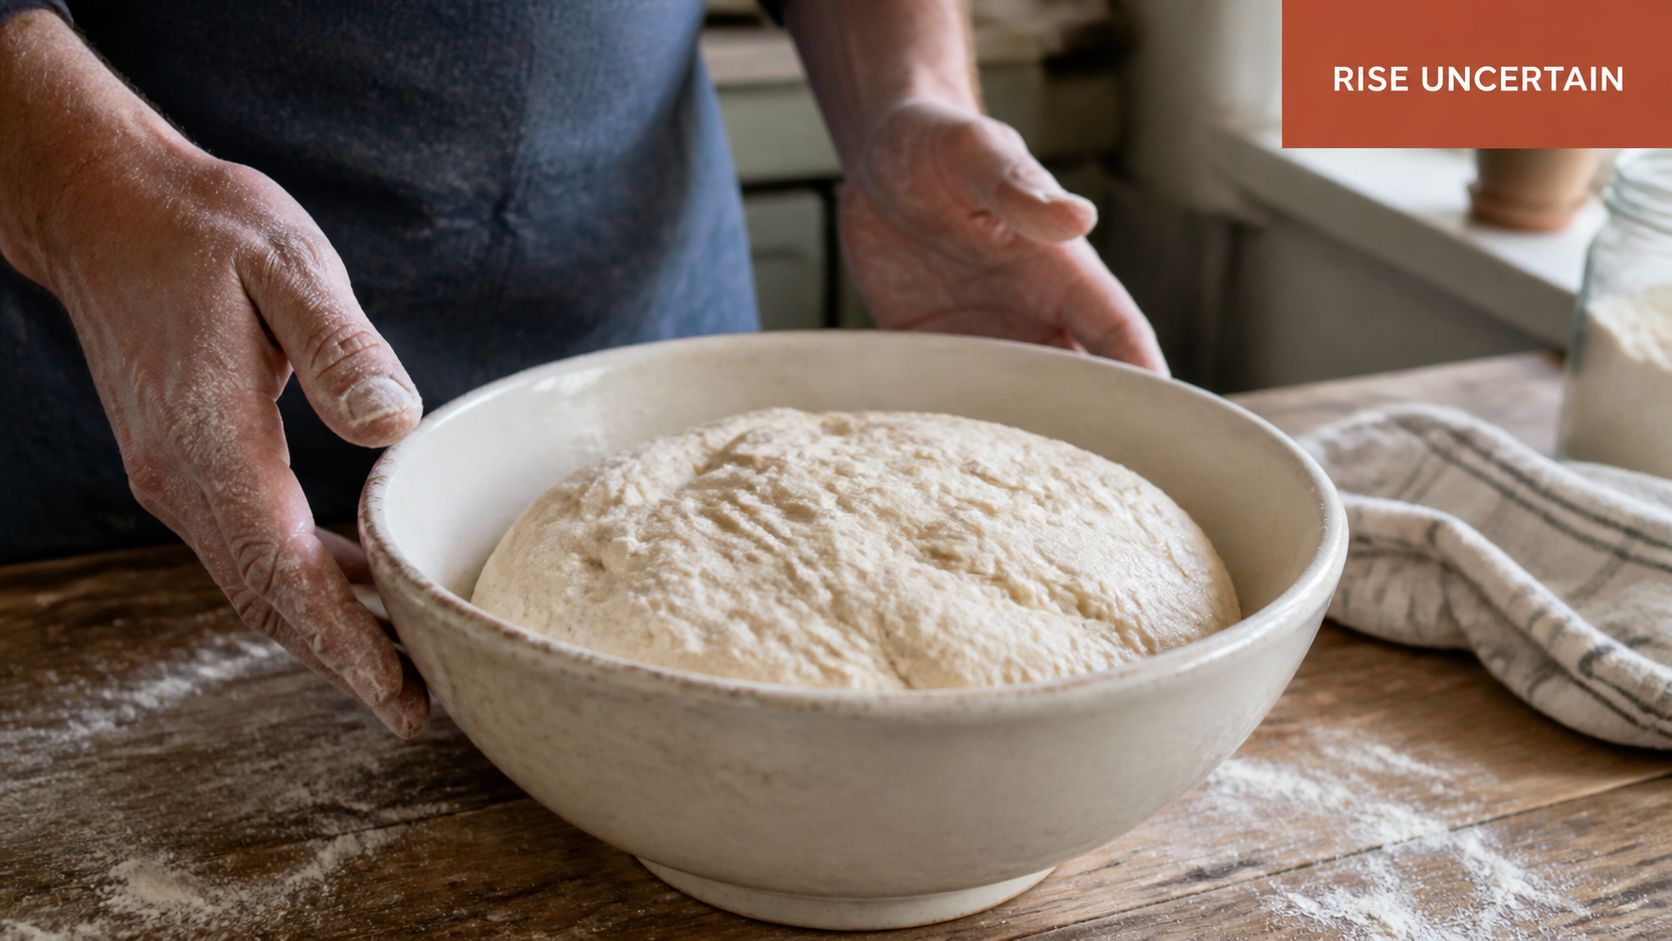
Lower hydration makes shaping easier and usually gives a crisper crust. More water can open the crumb, but it may require stronger flour, folds, pan support, or more deliberate handling. If the dough tears during stretching, adding water may worsen the problem. The flour may lack strength, or the gluten may need more time to develop.
The “doubled in size” problem
Volume gives only part of the picture. Fermentation also relaxes gluten and improves gas retention, so dough that feels tight after mixing can become flexible after resting. Use the 24-hour fermentation guide for rustic pizza dough as a timing reference, then judge the dough by its feel, surface activity, and ability to stretch rather than by volume alone.
Room temperature changes the schedule substantially. A warm room speeds yeast activity and increases the risk of over-fermentation. A cool room slows the dough, so a fixed rise time can leave it underdeveloped. Temperature control matters more than copying a rise schedule from another kitchen.
Salt and yeast also require measured adjustments. Many formulas place salt near 2.5% to 3% of flour weight, while yeast often falls between 0.1% and 0.6%, depending on fermentation time. Small changes affect strength, flavor, and how quickly dough moves from under-fermented to over-fermented.
Practical rule: A rustic crust comes from controlled fermentation with an intentionally irregular finish, not from imprecise guesswork.
D'BakerAid SureDough can stabilize that process with its Stage 1 yeast fermentation bowl and Stage 2 dough proofing bowl. A bowl and refrigerator can produce excellent dough, but a controlled environment reduces temperature swings and makes the same formula easier to repeat. D'Steamer can provide steam during baking when the oven setup needs help retaining moisture, supporting a more consistent crust surface.
Ingredients and Hydration Targets for Rustic Crust
Build this rustic pizza dough recipe from flour weight rather than cups. Flour is 100%, and every other ingredient is calculated against it. That approach makes scaling simple and lets you compare trials without confusing a different batch size with a different formula.
For a practical home baseline, use 60% to 68% hydration. That range covers many common pizza styles and gives you enough water for a supple, rustic crumb without making the dough unnecessarily difficult. A 65% hydration dough is a sensible starting point for hand-stretched pizza, while a lower target suits beginners, weaker flour, or a cooler oven.
| Pizza Style | Hydration Range | Crust Character |
|---|---|---|
| Roman tonda | 55%–58% | Firm, easy to shape, crisp |
| Neapolitan or New York | 60%–65% | Chewy, balanced, flexible |
| Rustic home pizza | 60%–68% | Open crumb, manageable handling |
| Detroit, Sicilian, or Roman al taglio | 70%–80% or more | Airier, softer, pan-baked |
Choose flour for the water level
Bread flour is the forgiving choice because its stronger gluten network handles moderate-to-high hydration well. Tipo 00 flour can create a delicate, extensible dough, but the label alone doesn't tell you how much water it can absorb. Whole-wheat flour adds flavor and color while absorbing water aggressively, so a fully whole-wheat dough often feels denser and less elastic than a white-flour blend.
For a first batch, combine bread flour with a modest portion of whole-wheat flour rather than replacing all the white flour. If you want more rustic flavor, increase the whole-wheat portion gradually while keeping fermentation and handling consistent.
Salt near 2.5% to 3% of flour weight gives the dough structure and seasoning. Yeast between 0.1% and 0.6% is appropriate across longer and shorter fermentation plans, but the warmer and faster the schedule, the more carefully you'll need to manage the yeast. Olive oil is optional. It adds tenderness and flavor, though a lean dough often gives a crisper, more bread-like rustic edge.
Adjust water in small increments
Don't make a dramatic hydration change after one sticky batch. The pizza hydration calculator guidance recommends adjusting water in 2% to 3% increments while keeping fermentation time constant between trials. That's the cleanest way to learn whether the issue is hydration rather than yeast, flour, or temperature.
Hold back a small portion of the water during mixing. Add it only if the dough feels firm after the flour has absorbed the initial amount. This method works better than correcting a wet dough with large additions of flour, which can leave the final crust dense and uneven.
For a dependable starting point, use bread flour, water at about 65% hydration, salt near 2.5% to 3%, and a restrained yeast quantity suited to your schedule. For more on matching flour characteristics to baking performance, see how flour protein content affects baking.
Fermentation Timing and Temperature Control
Dinner is planned for tomorrow, but the dough already feels loose in its container. That result usually reflects temperature and yeast activity more than the schedule written in a recipe. A refrigerator may run warmer than expected, while a countertop can shift several degrees during the day. Rustic dough responds to its actual environment, so measure conditions instead of trusting the clock alone.
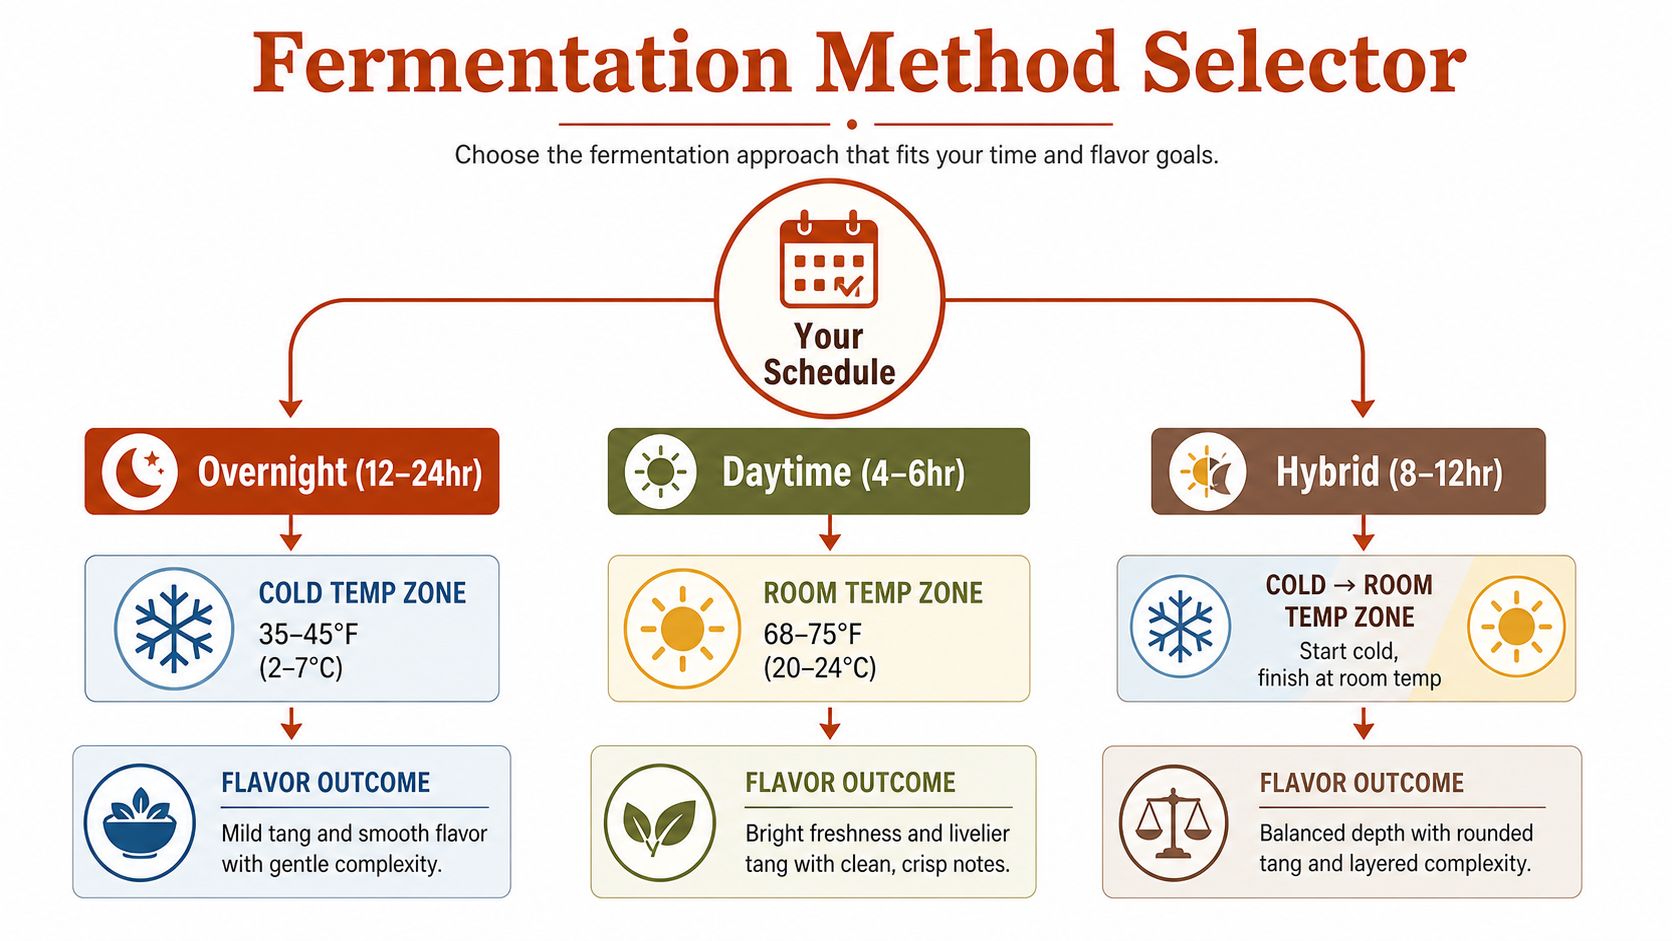
For cold fermentation, aim for 2°C to 5°C for 24 to 72 hours. This range supports fuller flavor, better extensibility, and easier stretching. Above about 5°C, yeast may remain active enough to shorten the useful fermentation window. Below about 2°C, enzymatic activity slows and flavor development becomes more limited. Check the refrigerator with a thermometer, especially if the dough repeatedly overproofs or shows little change.
Choose the schedule that fits your kitchen
A 24-hour cold fermentation suits a planned bake the following day. Mix the dough, let its initial structure develop, refrigerate it, then bring it back toward room temperature before shaping.
A 48-hour fermentation gives the dough more time to relax and develop character. Use it when mixing one day and baking later, provided the refrigerator stays within the target range. If the dough has already become loose or excessively gassy, more time will not repair it.
A 72-hour fermentation can produce excellent results, though the longer schedule demands stronger flour, restrained yeast, and dependable refrigeration. Stop extending the proof if the dough has weakened, spread across the container, or developed an unpleasantly sharp smell.
Same-day dough works when speed matters. Room-temperature fermentation can produce good pizza if the dough has enough time to relax and retain gas, although it generally offers less flavor complexity than a controlled cold proof.
Dough readiness matters more than the clock. Look for dough that is relaxed, visibly expanded, able to hold gas, and willing to stretch without snapping back immediately.
D'BakerAid SureDough uses a Stage 1 fermentation bowl and Stage 2 proofing bowl with claimed ±0.5°C temperature control. That consistency can reduce seasonal variation, but it cannot correct unsuitable hydration, excessive yeast, or overloaded toppings. Its practical recommendations appear in D'BakerAid's pizza dough fermentation resource.
Mixing, Shaping, and Baking with Precision
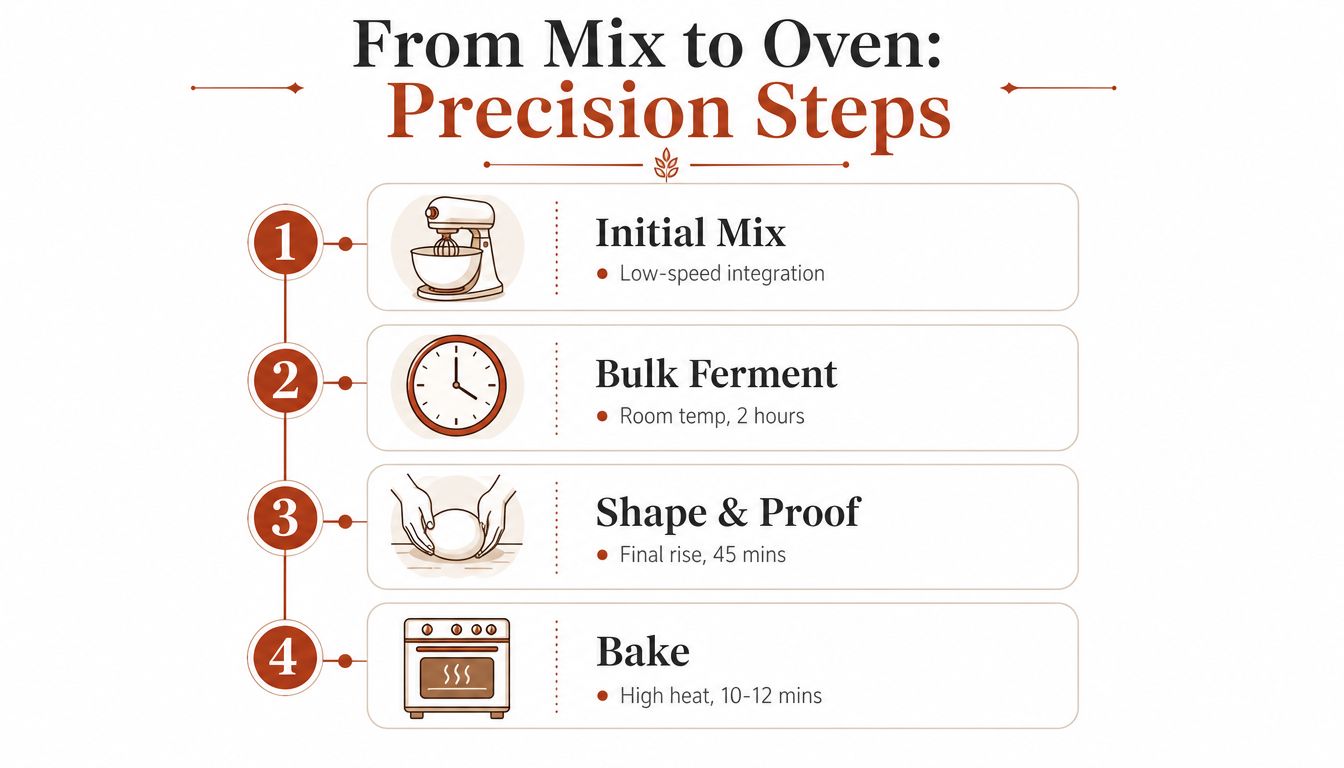
Start by combining flour, most of the water, and yeast until no dry flour remains. The dough should look shaggy rather than smooth. Letting that rough mass rest gives the flour time to hydrate before you ask the gluten network to become organized.
Add the salt after the initial rest, then mix until the dough gains strength. A stand mixer can do this at low speed, but hand mixing works if you use folds rather than trying to force the dough into a polished ball immediately.
Build strength without degassing
During bulk fermentation, perform stretch-and-folds when the dough still feels slack. Lift one side, stretch it upward without tearing, and fold it across the dough. Rotate the bowl and repeat until the mass feels more cohesive.
Divide the dough with a scraper and form each portion into a ball by drawing the edges underneath. Keep the surface tension gentle. Aggressive rounding pushes out the gas you're trying to preserve.
| Stage | What to do | What you're looking for |
|---|---|---|
| Initial mix | Combine to a shaggy mass | No dry flour |
| Bulk fermentation | Rest, then fold as needed | Stronger, smoother dough |
| Balling | Divide and tuck edges under | Taut but not compressed |
| Bench rest | Let portions relax | Stretchable dough |
| Final shaping | Press, lift, and stretch | Defined rim and even center |
For a rustic shape, press from the center outward while leaving the edge less compressed. Lift the dough by the rim and let gravity extend it. A rolling pin creates a more uniform base, but it also removes some of the uneven gas pockets that give rustic pizza its character.
Bake for bottom heat
Preheat your stone or steel thoroughly. A steel transfers heat aggressively and favors a browned base, while a stone gives a slightly gentler bake. A baking tray is more accessible and can work well for thicker pizza, but it won't behave exactly like a stone or steel.
Keep toppings restrained. Wet sauce, excess cheese, and heavy vegetables add moisture faster than a home oven can remove it, leaving the center soft while the edge browns.
The D'Steamer can add 82% to 88% humidity during the first minutes of baking, helping delay surface setting and support expansion before the crust dries. Use it as part of a controlled process, not as a substitute for adequate preheating. For checking whether your oven reaches the temperature it displays, use this oven-temperature testing guide.
The following video demonstrates the visual workflow from dough handling through baking:
Rustic Dough Variations and Trade-Offs
A standard cold-fermented dough is the best reference point because it lets you isolate changes. Once you understand its behavior, variations become useful choices rather than random substitutions.
Sourdough
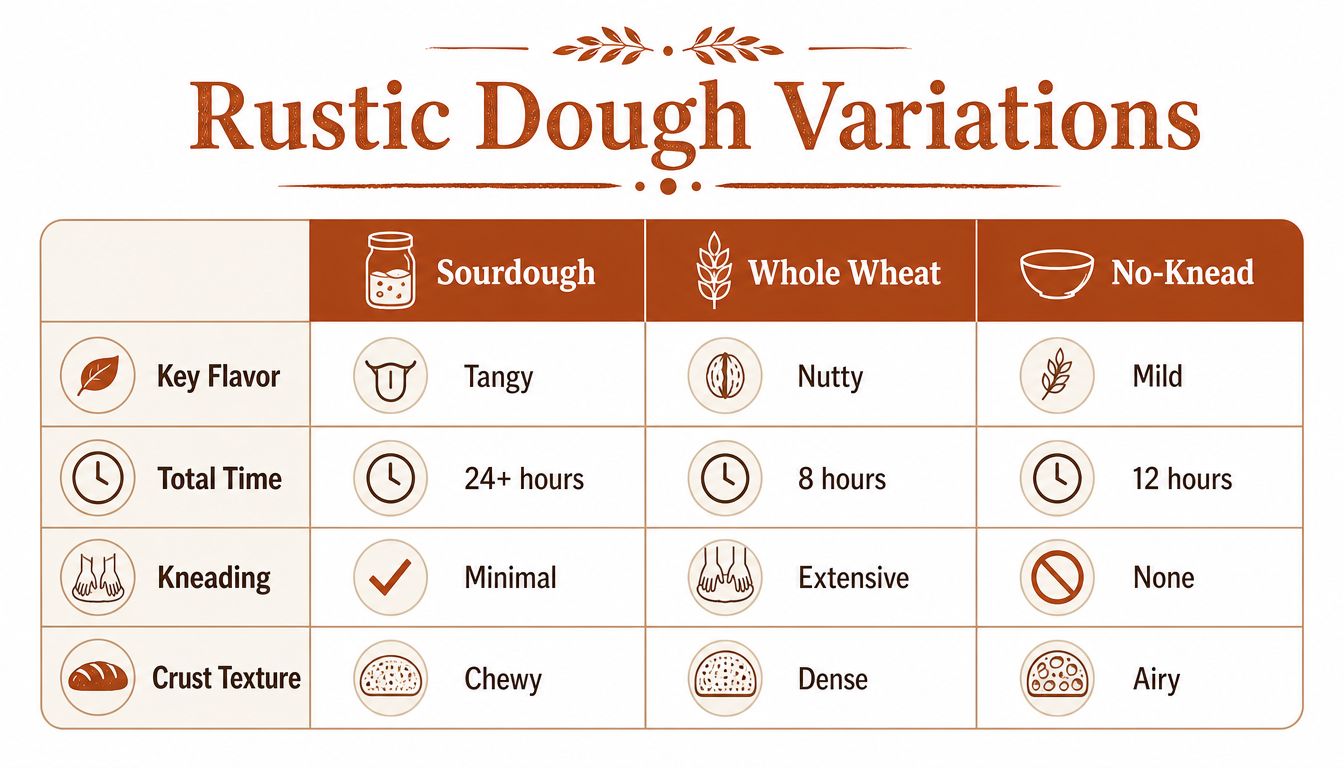
Sourdough brings a more complex, tangy flavor and can develop an appealingly chewy crust. It also introduces another variable, the starter's maturity. A young or sluggish starter may leave the dough tight and under-expanded, while an overly acidic starter can weaken the dough.
Use a longer fermentation window and judge readiness by volume, elasticity, and aroma. Sourdough rewards bakers who maintain a regular starter, but it isn't the fastest path to pizza when you haven't refreshed the culture.
Whole wheat
Whole wheat adds nuttiness, bran, and a darker crumb. Bran particles can interrupt gluten development, while the flour's absorption can make the dough feel dry even when the measured hydration appears generous.
A white-flour blend is usually easier to stretch than a fully whole-wheat dough. Increase whole wheat gradually, give the flour time to hydrate, and expect a somewhat denser crust with less dramatic oven spring.
No-knead
No-knead dough is convenient because time performs much of the gluten development. It suits a relaxed schedule and can produce an airy crust when the hydration and fermentation are well matched.
The trade-off is control. Without deliberate mixing or folds, the dough may lack the strength needed for a clean hand stretch, especially at higher hydration. A no-knead method is acceptable when convenience matters more than maximum structure, but it won't reliably deliver the same handling precision as a developed dough.
Troubleshooting Common Rustic Dough Failures
Longer fermentation isn't always better. The right correction depends on what the dough is doing in your hands, not on adding more hours automatically.
| Failure | Diagnostic cue | Likely cause | Fix |
|---|---|---|---|
| Under-fermented | Tight, resistant, pale after baking | Too little time or a cool environment | Extend fermentation or raise the controlled temperature |
| Over-fermented | Collapses, feels weak, stretches too easily | Excessive time or warmth | Shorten the schedule and reduce yeast or temperature |
| Over-hydrated | Sticky, tears during shaping | Too much water for the flour or oven | Reduce hydration in small increments and strengthen the dough |
| Under-hydrated | Dense crumb, cracks while stretching | Insufficient water or incomplete relaxation | Increase water gradually and allow a longer rest |
If the dough snaps back immediately, stop stretching it. Cover it and let it rest. Gluten often needs relaxation more than additional force.
If the dough spreads into a puddle, check temperature before adding flour. Warm fermentation can accelerate yeast activity and weaken the structure, while a weaker flour may be unable to support the chosen hydration.
The best diagnosis is a pattern, not a single symptom. Tight dough plus pale crust points toward insufficient fermentation. Sticky dough plus tearing points toward hydration, flour strength, or structure.
A dense bottom can also come from the baking surface or topping load rather than the dough formula. Preheat longer, reduce wet toppings, and check the oven's actual heat before rewriting the recipe.
Storage, Scaling, and Frequently Asked Questions
Refrigerate shaped dough balls during a cold fermentation, covered so the surface doesn't dry. For longer storage, freeze the balls after dividing and rounding them, then thaw them fully under refrigeration before allowing them to warm and relax for shaping.
To scale the recipe, keep the baker's percentages unchanged and use a larger fermentation vessel with enough room for expansion. Larger batches may need more mixing time to develop evenly, but don't judge strength by the clock alone.
Can I adapt this for high-altitude baking? Start by watching dough behavior rather than changing every ingredient at once. A cooler fermentation environment and careful hydration adjustments can help when the dough expands too quickly or dries out.
Can instant yeast replace active dry yeast? Yes, it can usually be mixed directly with the flour. Keep the overall yeast quantity and fermentation conditions consistent while testing.
How do I get a crispier bottom without a stone? Preheat a heavy steel or dark baking tray, use a restrained amount of sauce, and bake the pizza directly on the hot surface.
Will SureDough work for gluten-free pizza dough? A controlled proofing system can help manage fermentation, but gluten-free dough needs a separate formula and structure-building ingredients. Don't use the wheat-based rustic dough formula as a gluten-free recipe.
DBakerAid™ brings controlled fermentation and proofing to home pizza dough through its SureDough system, with separate stages for yeast fermentation and final proofing, plus the optional D'Steamer for early-bake humidity. Visit DBakerAid™ to explore the system and find a repeatable way to bake rustic pizza at home.