

You've shaped the dough, waited patiently, and opened the container only to find a sticky ball with a dry skin, a surface that tears when stretched, or a crust that bakes flatter than expected. The recipe may be sound. The overlooked variable is often the vessel holding the dough.
Pizza dough proofing pans control more than storage. Their geometry affects how far dough spreads, their material influences temperature recovery, and their lids help protect the surface from drying. Together, those details shape how easily the dough stretches and how evenly it rises.
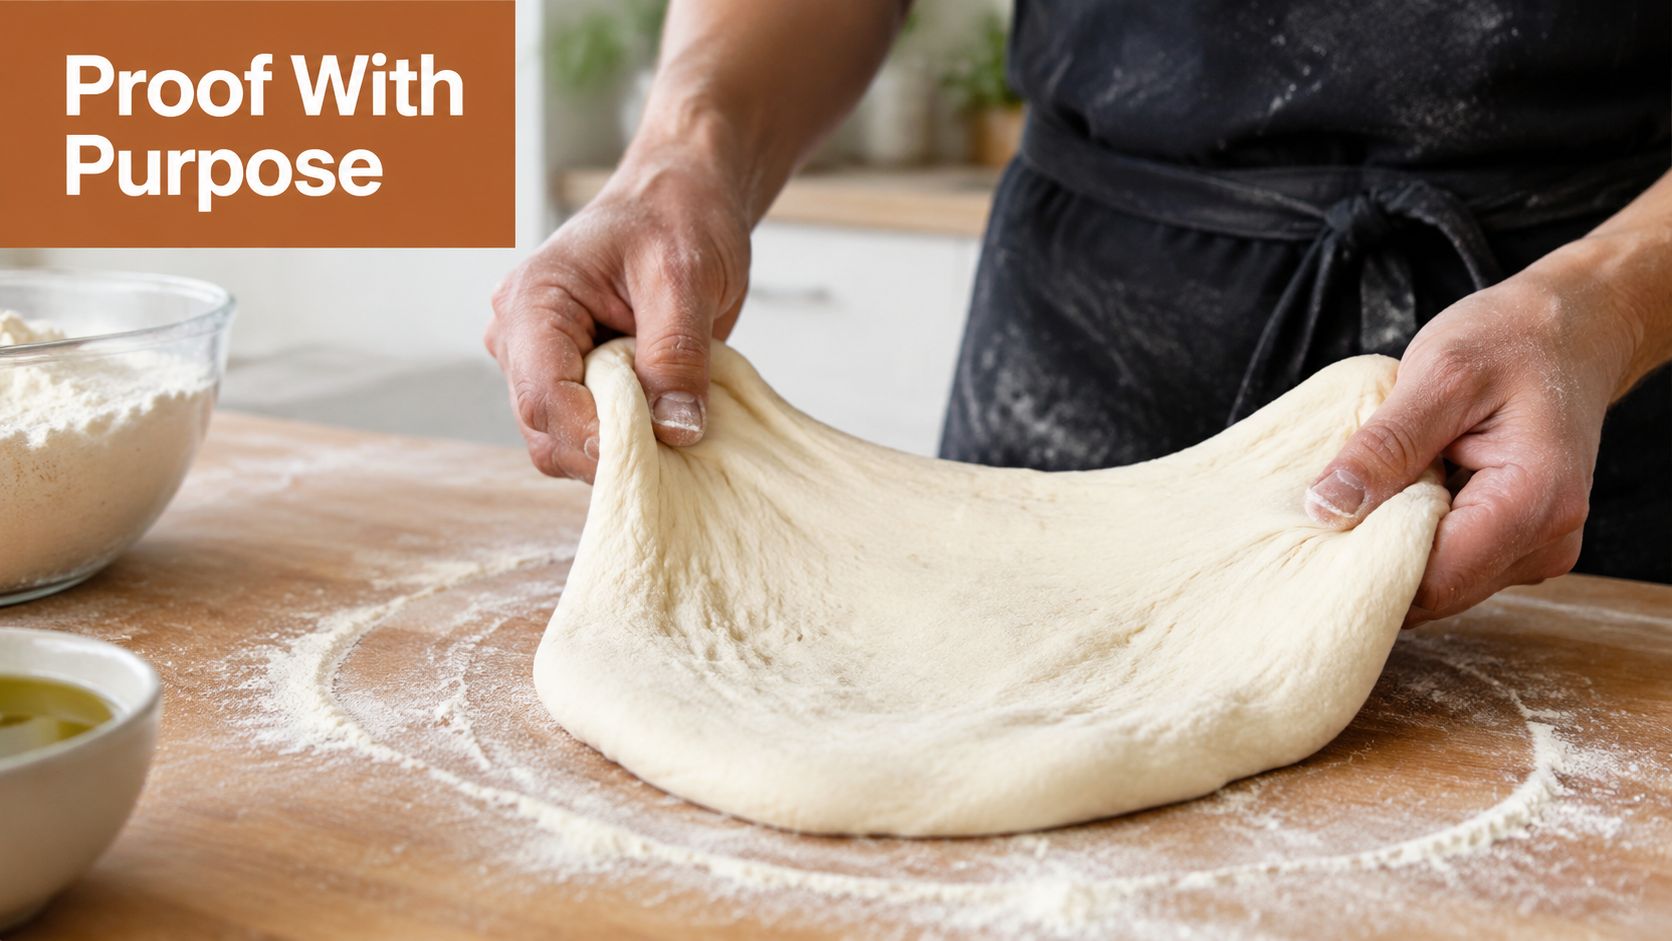
A good setup leaves you with dough that feels supple rather than brittle, expands without spilling into neighboring pieces, and holds enough gas to produce a lighter edge. It also makes timing easier to read because you can observe the dough instead of guessing from the clock.
For ingredients, the same principle applies. Fresh dough benefits from dependable flour, yeast, and toppings, so bakers sourcing premium pizza ingredients UAE can treat ingredient quality and fermentation control as two parts of the same process.

If your dough keeps resisting the stretch, the guide on how to proof pizza dough can help you connect the vessel, timing, and dough temperature rather than treating each problem separately.
Table of Contents
- Why Your Pizza Dough Needs the Right Proofing Pan
- What Pizza Dough Proofing Pans Are and How They Work
- Types Sizes and Materials Compared
- How Pan Choice Affects Fermentation Temperature and Humidity
- How to Select and Prepare Pans for Consistent Results
- Using Proofing Pans With DBakerAid for Reliable Pizza Dough
- Buying Considerations and Next Steps for Home Bakers
Why Your Pizza Dough Needs the Right Proofing Pan
A proofing pan acts like a small greenhouse for yeast. It gives the dough a defined floor, limits unnecessary airflow, and creates a repeatable space where fermentation can continue without the dough drying or spreading in every direction.
That matters because a dough ball changes during proofing. Yeast produces gas, the gluten network holds that gas, and the dough gradually becomes more relaxed and extensible. If the container is too shallow, the dough may spread widely and lose useful height. If it's too narrow, the sides can crowd the ball before it's ready to open.
The container changes what your hands feel
Consider two dough balls made from the same batch. One sits uncovered on a wide tray in a dry kitchen. Its surface develops a skin while the center continues fermenting. When you press it, the exterior feels tight and the dough resists stretching.
The second sits in a lightly oiled, covered pan. Moisture remains near the surface, the ball retains its smooth finish, and your fingertips can ease it outward without tearing the outer layer. The recipe hasn't changed. The microclimate has.
Practical rule: If the dough surface feels dry before shaping, improve coverage before changing the flour or adding more water.
Stackable pans also solve a workflow problem. A restaurant or small bakery may need to hold several batches at once, while a home baker may want separate dough balls ready for a planned pizza night. Stackable, lidded formats keep those pieces organized and reduce the temptation to move them repeatedly.
The best pan isn't automatically the largest or cheapest. It should match the dough ball, the fermentation stage, and the space available in your refrigerator or proofing area.
What Pizza Dough Proofing Pans Are and How They Work
A pizza dough proofing pan is a food-safe vessel designed to hold dough during fermentation, storage, or final proofing. Its job is to manage three physical conditions around the dough: space, moisture, and exposure to air.
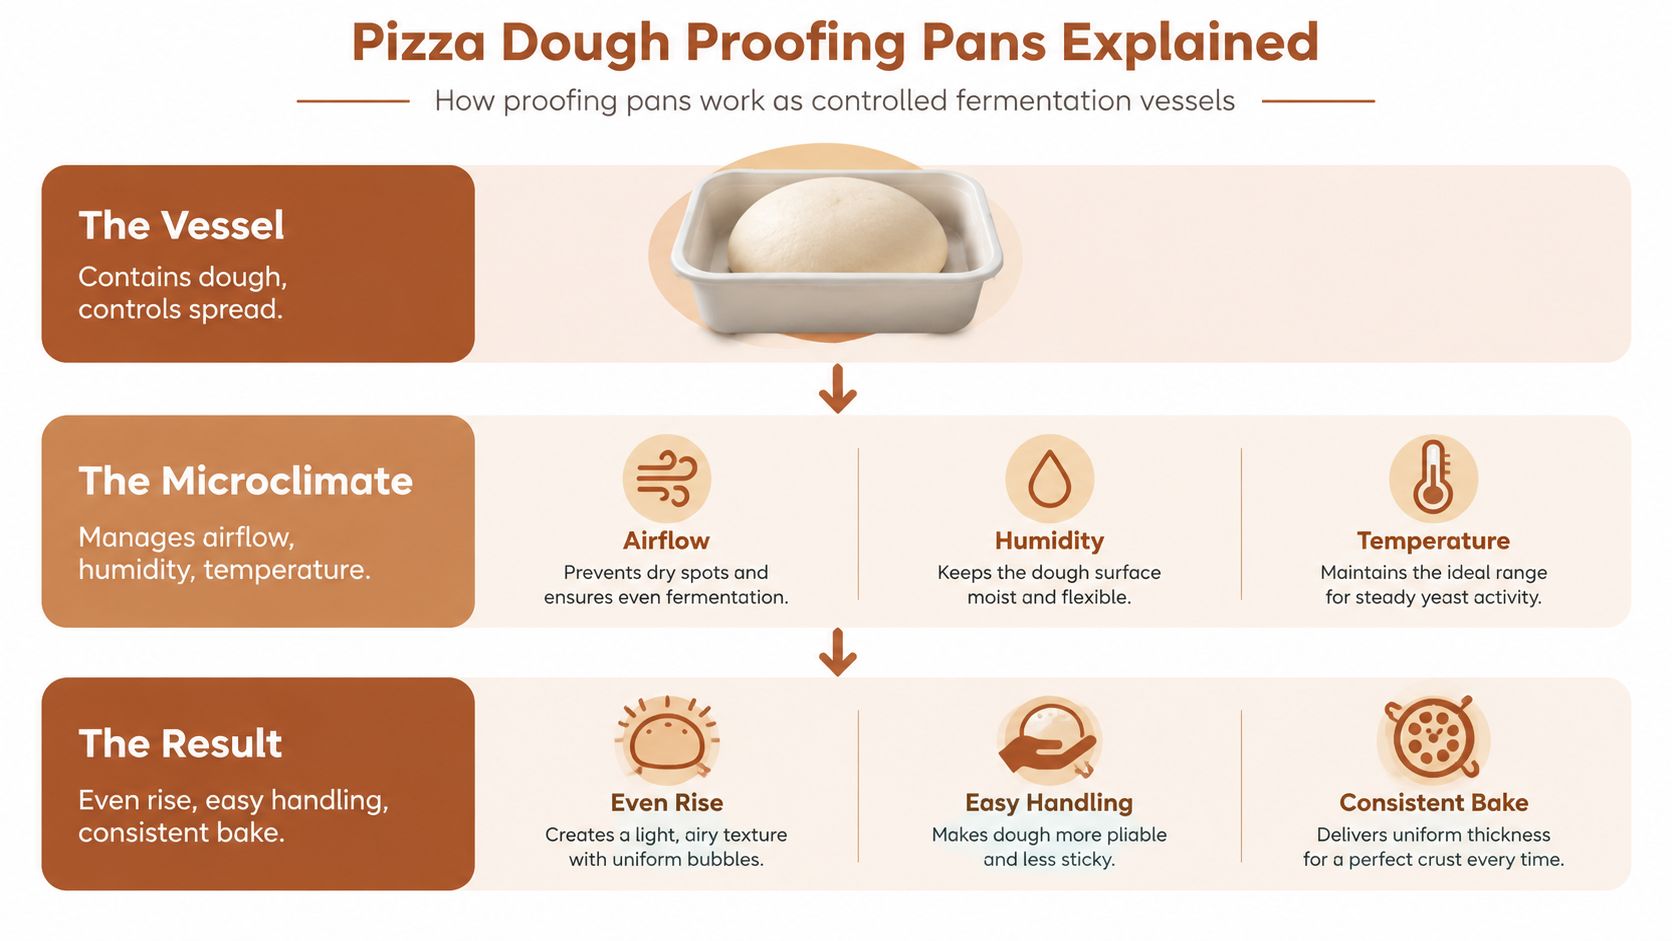
Think of the pan as the room where the dough grows. Straight sides make the room easier to measure because the dough's height or expansion is easier to compare over time. A tapered tub can still work, but its changing width makes rise tracking less precise.
Bulk fermentation and individual proofing
The first stage is usually bulk fermentation, when the mixed dough rests as one mass. A wide, low container gives the dough room to spread and makes folding easier. A straight-sided vessel also gives you a clearer visual reference for expansion.
After dividing and balling, the dough enters a different stage. Individual containers or compartments keep each ball from merging with its neighbors and give each piece a stable surface for final proofing. This separation also reduces handling immediately before shaping, which helps preserve the gas already developed.
The vessel doesn't create fermentation by itself. Yeast still needs suitable temperature, time, and moisture. The pan prevents those conditions from changing randomly around the dough.
Why lids matter
An uncovered dough ball loses moisture from its exposed surface. That loss can create skinning, a thin dry layer that stretches poorly and may interfere with expansion in the oven. A lid or well-fitted cover slows that moisture loss and protects the dough from drafts, odors, and accidental contact.
Stackable dough pans became useful in professional kitchens because they combine organization with fermentation control. Operators can store multiple dough balls in a compact footprint, move them together, and keep the upper surface protected with a lid or another properly fitted pan.
For home use, the same logic applies on a smaller scale. A covered pan is easier to manage than a loose bowl covered with film that touches the dough, especially when you need to check individual dough balls and return them to cold storage.
Types Sizes and Materials Compared
The practical choice usually comes down to three formats: individual round pans, wider sheet-style pans, and tubs or bowls used for bulk fermentation. None is universally correct. Each shape tells the dough how much it can spread and tells you how easily you can monitor it.
Independent foodservice listings show common round stacking dough pans in 8-inch, 9-inch, and 8.875-inch formats, with capacities from 48 ounces to 96 ounces and heights around 2 5/8 to 3 inches. These dimensions are commercial examples, not a universal home-baking standard, and they show why pan selection needs to follow dough quantity and workflow rather than a single “ideal” size. Choice stacking dough pans are also used for pizza dough, dinner-roll dough, and other bread doughs.
| Pan Type | Typical Size | Material | Best For |
|---|---|---|---|
| Round stacking pan | 8-inch to 9-inch formats, with depths around 2 5/8 to 3 inches | Aluminum or plastic | Individual dough balls, compact storage, repeatable final proofing |
| Sheet pan | Broad, shallow format | Aluminum or steel | Pan pizza, bulk portions, and dough that will be stretched into a rectangular bake |
| Straight-sided tub | Low-wide or deeper vessel | Plastic, glass, or food-safe metal | Bulk fermentation, expansion tracking, and refrigerator storage |
| Covered dough box | Large shared footprint with fitted lid | Plastic or aluminum | Multiple dough balls, transport, and batch handling |
Geometry first
Choose a low-wide vessel when the dough needs room to spread during bulk fermentation. Choose a round or smaller individual pan when you're proofing formed dough balls and want to limit sideways movement.
Depth supplies headroom, but extra depth doesn't automatically improve the result. Too much empty space makes visual tracking less intuitive, while too little space can allow the dough to touch the lid or neighboring pieces.
For bakers who also work with shaped bread, a fitted cover can help bake tidy loaves with a lid, but pizza dough still needs a geometry that suits its ball size and final handling stage.
Aluminum versus plastic
Pizza proofing pans are commonly made from aluminum or plastic. Aluminum conducts heat efficiently, helping the pan equalize dough temperature and reduce localized cold spots during fermentation, as discussed in pizza-industry metal equipment guidance.
Plastic is often lighter and less reactive to temperature changes. That can be useful for handling and storage, but it may recover more slowly after cold dough is loaded into a warmer environment. Aluminum with an anodized finish can offer a balance of conductivity and durability.
Select material according to your schedule. If you move dough frequently between cold storage and controlled proofing, thermal consistency deserves more attention than a small difference in purchase price.
How Pan Choice Affects Fermentation Temperature and Humidity
Yeast responds to its surroundings, and the pan helps determine those surroundings. A covered vessel can retain warmth and moisture around the dough, while a thin uncovered tray in moving air allows the surface to cool and dry more quickly.
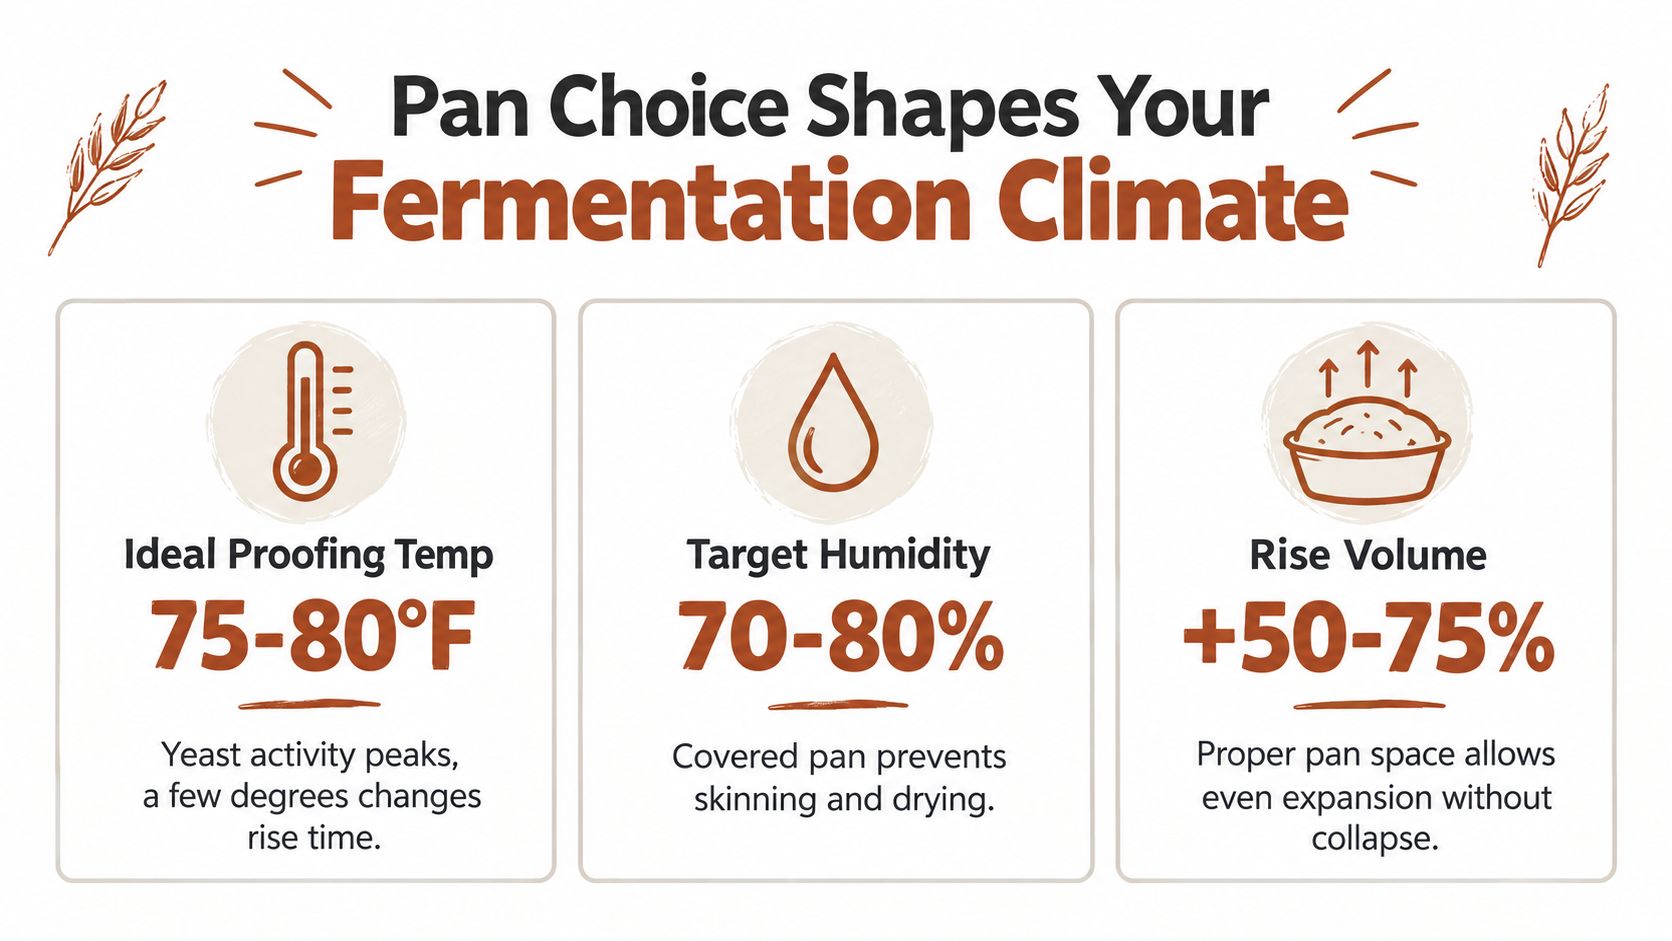
Pizza Today cites about 90°F and 75% relative humidity as useful operating conditions for pizza dough proofing, while foodservice guidance places sweet yeast dough at 95°F to 100°F and 80% to 85% humidity for a full proof. These are benchmarks, not a command to force every dough into one setting. Dough type, yeast level, hydration, and fermentation schedule still matter. Pizza Today's proofing guidance also describes partially proofing dough in pans before finishing it in a cooler, a staging method that helps professional kitchens balance timing.
Temperature changes the pace
A few degrees can change how quickly yeast produces gas. Baking technology guidance places optimal yeast growth around 25°C to 35°C, with peak carbon dioxide production in bread dough around 32°C to 38°C. It describes 35°C to 40°C as a typical prover range for conventional yeasted bread and 40°C to 43°C as an upper ceiling for most doughs. Proofing science guidance explains why the same dough can appear sluggish in a cool room and suddenly race ahead in a warmer one.
A conductive pan can help dough temperature equalize after loading. A suitable lid then keeps the surface from losing moisture while the center continues to ferment.
Humidity protects extensibility
Dry air creates surface skinning. Industrial proofing guidance places useful relative humidity around 70% to 90%, with 75% to 90% associated with soft, pliable dough behavior and 80% to 90% commonly used for final bread proofing. AMF's proofing whitepaper connects humidity control with preventing a dry surface that resists expansion.
For pizza, the symptom is familiar. The ball appears active underneath, but the outer layer pulls back when you stretch it. Coverage is the first adjustment to make.
Read more about the relationship between time, temperature, and dough strength in pizza dough fermentation.
How to Select and Prepare Pans for Consistent Results
Start with the fermentation stage, not the pan you happen to own. Bulk dough needs a vessel that supports mixing, folding, and expansion. Balled dough needs individual space, surface protection, and enough headroom for a rise that may reach 50% to 75% rather than doubling, depending on the recipe and conditions.
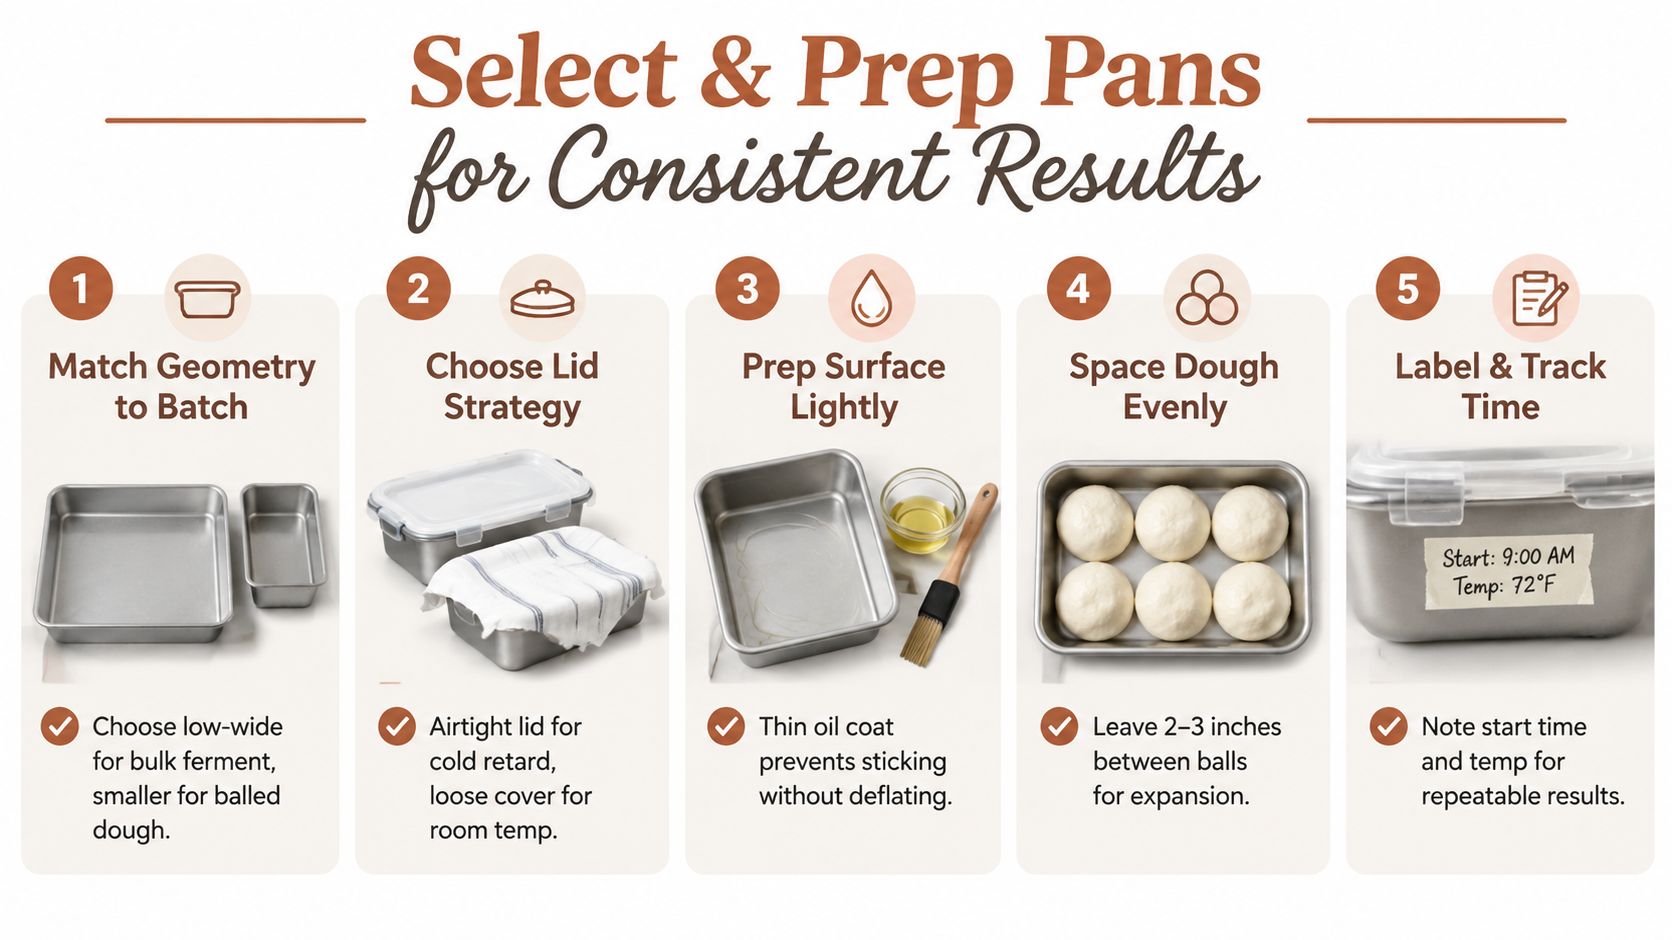
A repeatable preparation routine
- Match geometry to the stage. Use a low-wide, straight-sided container for bulk fermentation. Move the divided balls into smaller individual pans after shaping them.
- Choose the cover for the schedule. Use a close-fitting lid for cold fermentation, particularly when dough will remain refrigerated for 24 to 72 hours or longer depending on the recipe. For room-temperature proofing, a cover should still protect the surface while allowing you to avoid trapping excess condensation.
- Oil the surface lightly. A thin film reduces sticking without flooding the dough or making ball handling slippery. Excess oil can make it harder to judge the dough's true surface condition.
- Leave expansion room. Don't pack dough balls against one another or the sides. The exact spacing depends on ball size and pan geometry, but each piece should have visible room to relax and expand.
- Label the pan. Write the start time, dough type, and storage temperature on a removable label. You'll build a useful record of how your kitchen behaves without relying on memory.
At home, a draft-free covered area may be enough. The Home Baking Association's yeast bread temperature guide describes a simple proof box made by turning an oven on and off and placing a steaming bowl of water inside. Never leave the oven actively heating with dough inside unless the equipment and method are specifically designed for that use.
The video below shows how pan setup and proofing handling fit into the wider dough workflow.
Using Proofing Pans With DBakerAid for Reliable Pizza Dough
A pan can create the right local environment, but it can't correct every temperature swing in a warm kitchen or every timing error during a long fermentation. DBakerAid™ approaches the problem as a controlled system, with a Stage 1 yeast fermentation bowl, a Stage 2 dough proofing bowl, and a hub that manages temperature and time.
The system's four flour-specific programs hold temperature within ±0.5°C, according to the provided product information. That kind of stability is useful when dough moves from an initial fermentation into a final proof, because the baker can change stages without also introducing a large environmental swing.
Match the vessel to the dough
Use the pan or bowl that gives each dough ball enough room to expand without flattening into a thin disk. A fitted lid supports the humidity range needed to reduce skinning, while the controlled bowl provides a more consistent surrounding temperature.
Cold fermentation adds another transition to manage. Dough that has spent a long period refrigerated may need time to temper before stretching, because cold dough is less relaxed and less responsive under the hands. Moving it directly from cold storage to shaping can make the dough seem tight even when fermentation has progressed well.
A controlled workflow makes those changes easier to repeat. You can record when the dough entered cold storage, when it moved to the proofing stage, and how the surface and elasticity changed before shaping.
The companion recipe app at dbakeraid.app provides recipe support for the appliance system. Treat the machine as one method among several, not as a substitute for choosing suitable pan geometry, protecting the surface, or learning to read dough behavior.
Buying Considerations and Next Steps for Home Bakers
Choose a pan by asking five practical questions:
- Does the geometry fit the dough stage? Bulk dough needs width and visibility, while individual balls need separation and headroom.
- Does the lid fit securely? A poor seal can allow unnecessary moisture loss during storage.
- Will the material recover predictably? Aluminum offers strong heat conduction, while plastic prioritizes light handling and storage flexibility.
- Can you clean it easily? Oil, dough residue, and flour collect in corners and around lid edges.
- Does it fit your refrigerator? A pan that can't stack or store safely becomes a workflow obstacle.
One versatile straight-sided container may be enough for occasional pizza. A small set of stackable, covered pans becomes more useful when you prepare several dough balls, manage cold fermentation, or want to move from storage to final proof without reshaping the dough.
A controlled proofing setup doesn't need to be complicated. If you want to refine the wider home-baking environment, guidance on choosing a bread proofing box can help you compare coverage, temperature stability, and available kitchen space.
See the dough rise as a process you can observe, not a mystery you have to guess through. Start with the right vessel, protect the surface, and record what happens.
DBakerAid™ combines staged fermentation and proofing control with a companion recipe app, giving home bakers a way to make temperature and timing more repeatable around the pan. Visit DBakerAid™ to explore the system and choose a controlled proofing workflow for your next pizza dough batch.