

Choosing your first bake can feel harder than the recipe itself. You might be deciding between a simple loaf, quick bread, pastry, or pizza while wondering whether you have the right pan, whether the dough will rise, and whether your oven will behave. The best easy baking recipes for beginners reduce those unknowns with clear ingredient guidance, practical timing, visible readiness signals, and honest expectations.
This list starts with high-protein loaves because they solve a specific beginner problem: making bread that fits a high-protein lifestyle without relying on a weak, expensive store-bought slice. You'll find the equipment, approximate preparation and baking windows, difficulty level, visual cues, common failure points, and the situations where controlled fermentation and proofing can help. A mixing bowl, gram scale or measuring cups, baking tray, Pullman loaf pan, and oven thermometer will cover most home bakes. A scale is the better choice for dough.
D'BakerAid is optional for cakes, cookies, and quick breads. Its value appears with yeast doughs, where fermentation temperature and proofing time can change the result. Use the BarkerBooks recipe template guide if you're building your own repeatable recipe notes, then start with the loaf that matches how you eat.
Table of Contents
- 1. Whey and Sprouted Wheat High-Protein Bread
- 2. Vegan Pea and Whole Grain High-Protein Bread
- 3. Soy Multigrain Fitness High-Protein Bread
- 4. Seeded Whey and Flax High-Protein Bread
- 5. Collagen and Whole Wheat High-Protein Bread
- 6. Getting Started With High-Protein Bread Without a Machine
- 7. High-Protein Bread Versus Store-Bought Bread
- 8. The D'BakerAid System
- 8-Item Comparison: Beginner High-Protein Breads
- Choose Your First Loaf and Bake With Better Signals
1. Whey and Sprouted Wheat High-Protein Bread
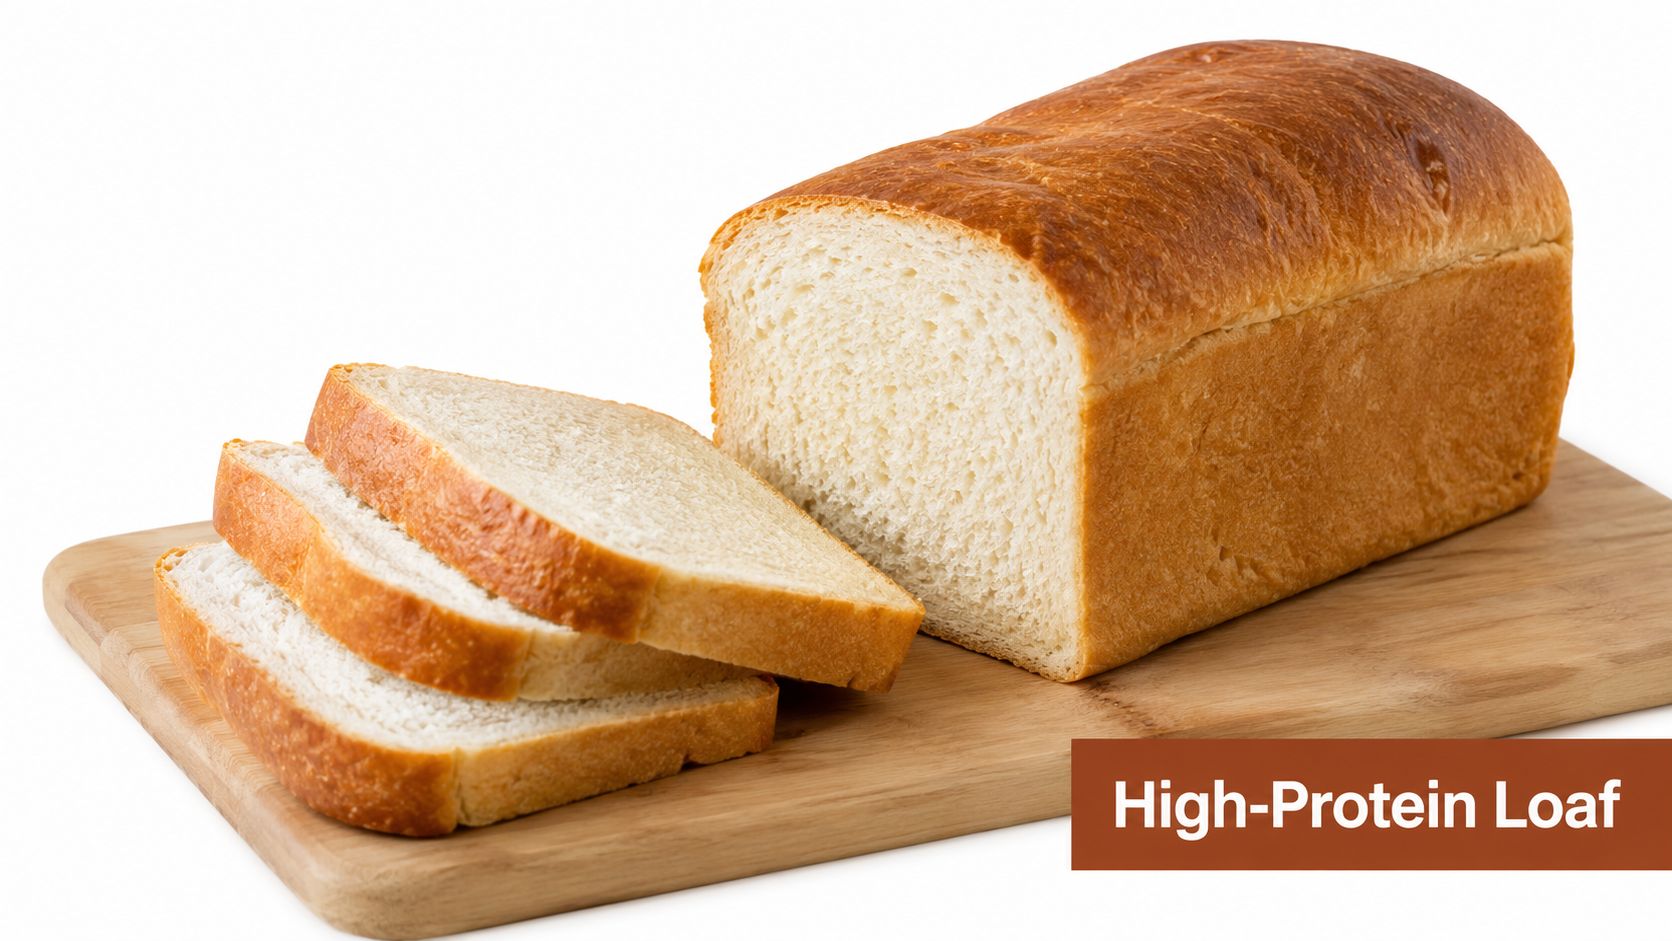
A whey-and-sprouted-wheat loaf gives beginners a familiar sandwich bread without the dense texture that often makes high-protein baking frustrating. The Pullman loaf combines whey protein isolate, wheat gluten, and sprouted wheat flour. A batch provides about 170 grams of protein per loaf, about 24 grams per 100 grams, and about 10.6 grams per slice when divided into about 16 slices, according to D'BakerAid's recipe app.
Difficulty: Moderate for a first yeast loaf.
Equipment: Gram scale, Pullman pan, oven thermometer, and the D'BakerAid system if you want tighter control of fermentation.
Timing: Mix and shape in one session, then allow about 8 to 10 hours of fermentation and 3 to 4 hours of proofing with the recommended profile.
Weigh the whey isolate rather than using a scoop. Aim for about 25 to 30 grams per loaf, since powder density differs by brand. Mix it with the dry ingredients before adding liquid. Adding protein powder to wet dough creates clumps that are difficult to break up. Expect a dough that feels firmer and slightly tackier than ordinary white bread.
Set Stage 1 to about 77 to 80°F. The dough is ready when it shows a 50% to 75% rise. A full doubling can leave this protein-rich dough over-fermented. Move it to Stage 2 at about 75 to 78°F, then proof until the dough just touches the Pullman lid. Score lightly because the dough has limited expansion. A D'Steamer can improve the crust break, but the loaf remains workable without it.
The main failure point is over-proofing. If the dough rises well above the target, the baked loaf can collapse or develop a coarse, uneven crumb. D'BakerAid helps by giving fermentation and proofing a controlled temperature and timing framework, which is useful when room conditions change.
Practical rule: Let the loaf cool for at least one hour before slicing. A warm, protein-rich crumb compresses under a knife.
Expect a tight, even crumb, a soft but heavier bite, and clean slices. The loaf works well for batch cooking. Bake several, freeze the slices, and use them for weekday sandwiches or a high-protein meal.
2. Vegan Pea and Whole Grain High-Protein Bread
Pea protein makes a useful plant-based loaf, but the dough needs closer observation than the whey version. The formula combines pea protein isolate, wheat gluten, and whole-grain flour, providing about 171 grams of protein per loaf, about 24 grams per 100 grams, and about 10.7 grams per slice across roughly 16 slices, according to the D'BakerAid recipe collection.
Difficulty: Moderate to advanced beginner.
Equipment: Gram scale, Pullman pan, mixing bowl, and a way to monitor fermentation.
Timing: Allow about 8 to 10 hours for fermentation, then proof until the dough reaches the lid.
Use an unflavored pea isolate if possible. Some powders leave a strong pea note that becomes more noticeable after baking. Expect a slight grey-green color and a faint beany flavor. Toasting the slices within a day improves the eating quality, while storage usually softens the flavor.
Whole-grain flour absorbs more water than white flour. Adjust hydration by about 5% to 8%, making small changes and recording the result. Avoid pouring in a large amount of water during the first few minutes, because the dough often becomes more workable as the flour and protein hydrate.
Set Stage 1 to about 76 to 78°F. The dough should gain volume without losing strength. Move to proofing when fermentation is complete, then stop when the dough just touches the Pullman lid. A rising surface that passes the lid is the clearest warning sign. Over-proofing can leave the baked loaf gummy or cause it to cave as it heats.
D'BakerAid can help by providing a temperature and timing framework for fermentation and proofing. That support matters when room temperature changes during an 8 to 10 hour fermentation, especially for dough that can progress quickly.
- For pre-workout meals: Three slices provide about 32 grams of protein, before adding almond butter or another topping.
- For lunch: Pair the bread with hummus, cucumber, tahini, or olive oil.
- For flavor balance: Miso, nutritional yeast, and almond butter stand up better than delicate fillings.
A D'Steamer can help the crust set more evenly by maintaining a humid baking environment. The estimated cost is about $4.04 per loaf, or about $0.25 per slice, based on the recipe's ingredient model.
3. Soy Multigrain Fitness High-Protein Bread
Soy makes this loaf a practical value choice for beginners who want a plant-based, high-protein sandwich bread. The dough combines soy protein isolate, vital wheat gluten, and a multigrain base of wheat, barley, millet, and flax. It provides about 170 grams of protein per loaf and about 10.7 grams per slice, while three slices provide about 32 grams, based on the D'BakerAid recipe data.
Difficulty: Moderate.
Equipment: Scale, Pullman pan, mixing bowl, and a reliable way to monitor fermentation.
Timing: Use a shorter first fermentation than the whey version, then watch the proof closely.
Soy provides all nine essential amino acids in one protein source, which suits bakers looking for a plant-based loaf with a more complete protein profile. The bread still needs a balanced meal around it, but it works well for breakfast, sandwiches, and meal preparation.
Expect this dough to ferment sooner than a whey-based loaf. Reduce Stage 1 by about 15% to 20% compared with the whey version, check it at about 6.5 hours, and continue only while the dough still feels elastic and supported. Set proofing to about 75 to 77°F. Move to baking when the dough reaches the Pullman lid, rather than waiting for it to double.
D'BakerAid can help organize fermentation and proofing checks when room temperature shifts. For this recipe, that guidance is useful because soy dough can pass its strongest point before the expected schedule ends.
The main failure point is over-proofing. A tall, airy surface can conceal weak structure. If the dough begins to wrinkle or feels fragile when the pan is moved, bake it immediately. A loaf that rises less but holds its shape usually has a better crumb than one that expands dramatically and collapses.
Soy may leave a mild undertone when the bread is fresh. Toasting it within the first day improves the eating quality, while storing it for a couple of days allows the flavor to settle. The estimated cost is about $3.56 per loaf, or about $0.22 per slice, making it the most economical of the dedicated protein recipes.
Serve it with cottage cheese and berries, use it for family sandwiches, or portion it for meal prep. Expect a tight, soft crumb rather than an airy one. That texture is the trade-off for fitting more protein into a familiar slice.
4. Seeded Whey and Flax High-Protein Bread
This loaf suits beginners who want a clearly textured bread, not just a high protein count. Whey isolate, vital wheat gluten, whole-wheat flour, flax, and mixed seeds create a brownish crumb, visible inclusions, and a firmer chew. It provides about 163 grams of protein per loaf, about 23 grams per 100 grams, and about 10.2 grams per slice, according to D'BakerAid's guided recipes.
Difficulty: Moderate.
Equipment: Gram scale, Pullman pan, small bowl for soaking flax, and an oven with reliable temperature control.
Timing: Ferment for about 9 to 11 hours, then proof for about 3.5 to 4 hours. Use the clock as a guide, then confirm the dough's condition before baking.
Measure 40 to 50 grams of mixed seeds. Use about 20 grams of flax and divide the rest between sunflower, sesame, and pumpkin seeds. Soak the flax for about 15 minutes before mixing. This prevents the dry seeds from drawing moisture from the dough and producing a dry crumb.
Mix the seeds with the dry ingredients for even distribution. For a seeded crust, brush the shaped dough lightly with water and press extra seeds onto the surface. A D'Steamer can help limit early browning, but check the crust during baking. If the seeds darken before the center has set, protect the top and continue baking.
The dough is ready for the oven when it reaches the Pullman lid and still looks supported rather than slack. Seeds add weight, so expect less expansion than with a plain flour loaf. The finished bread should slice cleanly, toast well, and have a slightly dense crumb with a roasted flavor.
The main failure point is underestimating hydration or proofing by volume. Dry flax can tighten the dough, while excessive proofing can leave the seeded top fragile. D'BakerAid can organize fermentation and proofing checks when room temperature changes, helping you judge whether the dough is ready instead of relying only on the schedule.
Serve it with almond butter and berries or use it for open-faced sandwiches. The estimated cost is about $5.04 per loaf, depending on seed and protein prices.
5. Collagen and Whole Wheat High-Protein Bread
Collagen and whole-wheat flour create the highest stated protein total in this group. The loaf provides about 184 grams of protein per loaf, about 26 grams per 100 grams, and about 11.5 grams per slice, according to the D'BakerAid recipe app. Collagen is an incomplete protein, so use this bread as a collagen boost and pair it with other protein foods rather than treating it as a complete sports-protein solution.
Difficulty: Moderate.
Equipment: Gram scale, Pullman pan, thermometer, and a small bowl for dissolving the collagen.
Timing: Ferment for about 8 to 10 hours, then proof for about 3 to 4 hours.
Dissolve the collagen peptides in water heated to about 110°F before adding them to the dough. This limits clumping and spreads the powder more evenly. Whole-wheat flour may need about 8% to 12% more hydration than white flour, but add the extra water gradually. During Stage 1, the dough should become cohesive and supple rather than stiff or watery. Correcting hydration aggressively after fermentation starts can weaken its structure.
Set Stage 1 to about 77 to 80°F and Stage 2 to about 75 to 78°F. Check the dough's rise and surface, not only the clock. It is ready to proof when fermentation has given it visible lift without making it slack. In Stage 2, wait until the dough just reaches the Pullman lid. Score deeper than you would for the whey loaf because bran restricts expansion and can reduce bloom.
The main failure point is overhydration combined with weak gluten development. A loose dough can spread, while insufficient hydration produces a tight, crumbly loaf. The crust may darken before the center finishes, so a D'Steamer can help manage browning. Bake fully, then cool the loaf completely before slicing because the warm whole-wheat crumb is delicate.
The estimated cost is about $6.81 per loaf, or about $0.43 per slice. Choose it when collagen matters enough to justify the premium cost.
6. Getting Started With High-Protein Bread Without a Machine
High-protein bread is difficult for a simple reason. Protein isolates and extra vital wheat gluten change the dough's water needs, density, elasticity, and fermentation behavior. A room that warms or cools during a long rise can turn a promising dough into a loaf with uneven expansion, gumminess, or collapse.
Manual baking can work, but the baker has to judge several variables at once. A whey dough that sits for about 12 hours at fluctuating room temperature may rise unevenly, especially when the kitchen moves between about 72 and 76°F. That's where a precision system earns its place. D'BakerAid's Stage 1 fermentation bowl and Stage 2 proofing bowl control the conditions that are hardest to reproduce in a normal kitchen.
Start with the whey or soy recipe. Pea dough ferments faster and gives beginners less room to ignore the clock. Weigh the flour, isolate, gluten, and liquid in grams. Cups and scoops hide density differences between protein brands.
- Check the midpoint: Inspect Stage 1 after about 4 to 5 hours so you can compare the dough with the final result.
- Use visual cues: A 50% to 75% rise is the target for these loaves, not a doubled volume.
- Proof to the pan: The dough is ready when it just touches the Pullman lid, not when it feels vaguely jiggly.
- Keep a log: Record protein brand, hydration, fermentation time, proof time, and bake result.
For a deeper explanation of temperature-controlled fermentation, read the D'BakerAid dough proofer guide. You can bake without the optional D'Steamer, but expect a somewhat thicker or darker crust. Bakers comparing equipment can also find commercial ovens and mixers, though a home baker doesn't need commercial hardware to begin.
7. High-Protein Bread Versus Store-Bought Bread
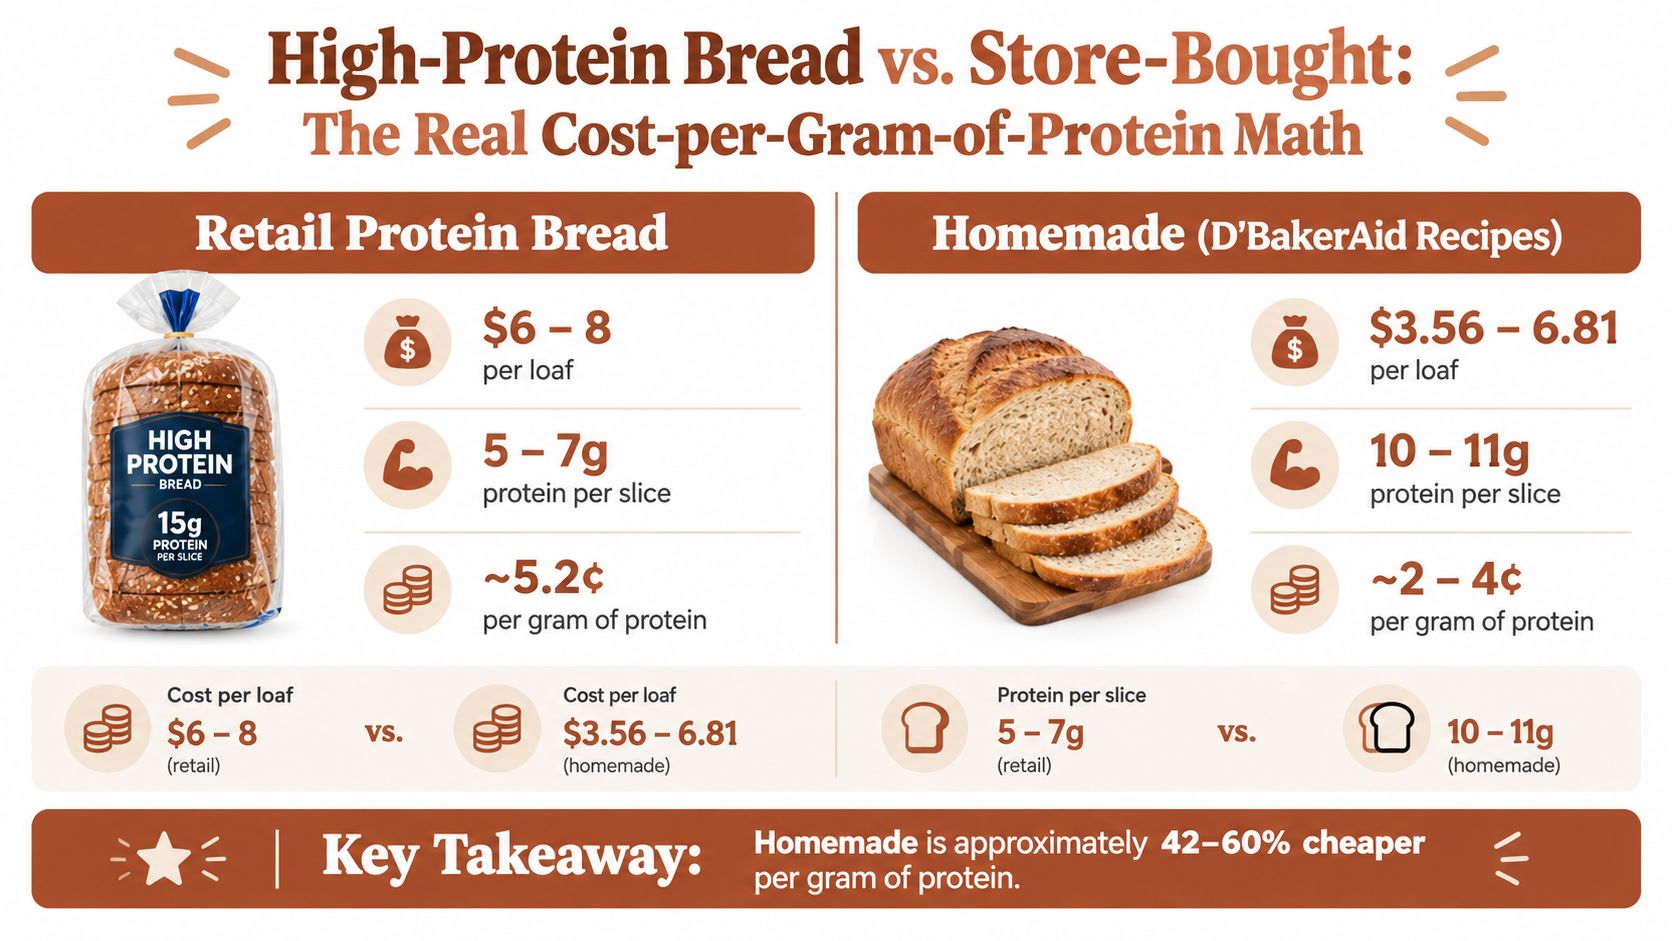
The cost comparison looks different when you measure protein instead of the price printed on the bag. Store-bought high-protein bread commonly costs about $6 to $8 per loaf and provides about 5 to 7 grams of protein per slice. The D'BakerAid recipes cost about $3.56 to $6.81 per loaf and provide about 10 to 11 grams per slice, depending on the recipe and slice thickness.
The homemade advantage is clearest for the macro-tracker who eats bread every day. A three-slice serving supplies about 30 grams of protein, which can replace a separate shake or make a sandwich fit a meal target. The trade-off is labor, planning, and the upfront cost of a precision appliance. Homemade bread isn't automatically cheap if you buy premium collagen or expensive whey.
The ingredient model places homemade loaves at about 2 to 4 cents per gram of protein, compared with about 5.2 cents per gram for retail protein bread. That makes homemade bread about 42% to 60% cheaper per gram of protein, or roughly half the cost, depending on the protein used and the retail product being compared. See the D'BakerAid baker's percentage calculator when you want to adjust a formula without losing control of the ingredient ratios.
The honest calculation: Protein powder drives the cost. These loaves aren't “pennies,” but the protein-per-dollar comparison can still favor homemade bread.
Plain white bread provides about 2.5 grams per slice, whole wheat about 3.5 grams, Dave's Killer and Kodiak products about 5 to 6 grams, and the best retail protein breads about 7 grams. D'BakerAid recipes land at about 10 to 11 grams, so the difference is meaningful for people who want bread to contribute to a meal rather than use up their protein budget.
8. The D'BakerAid System
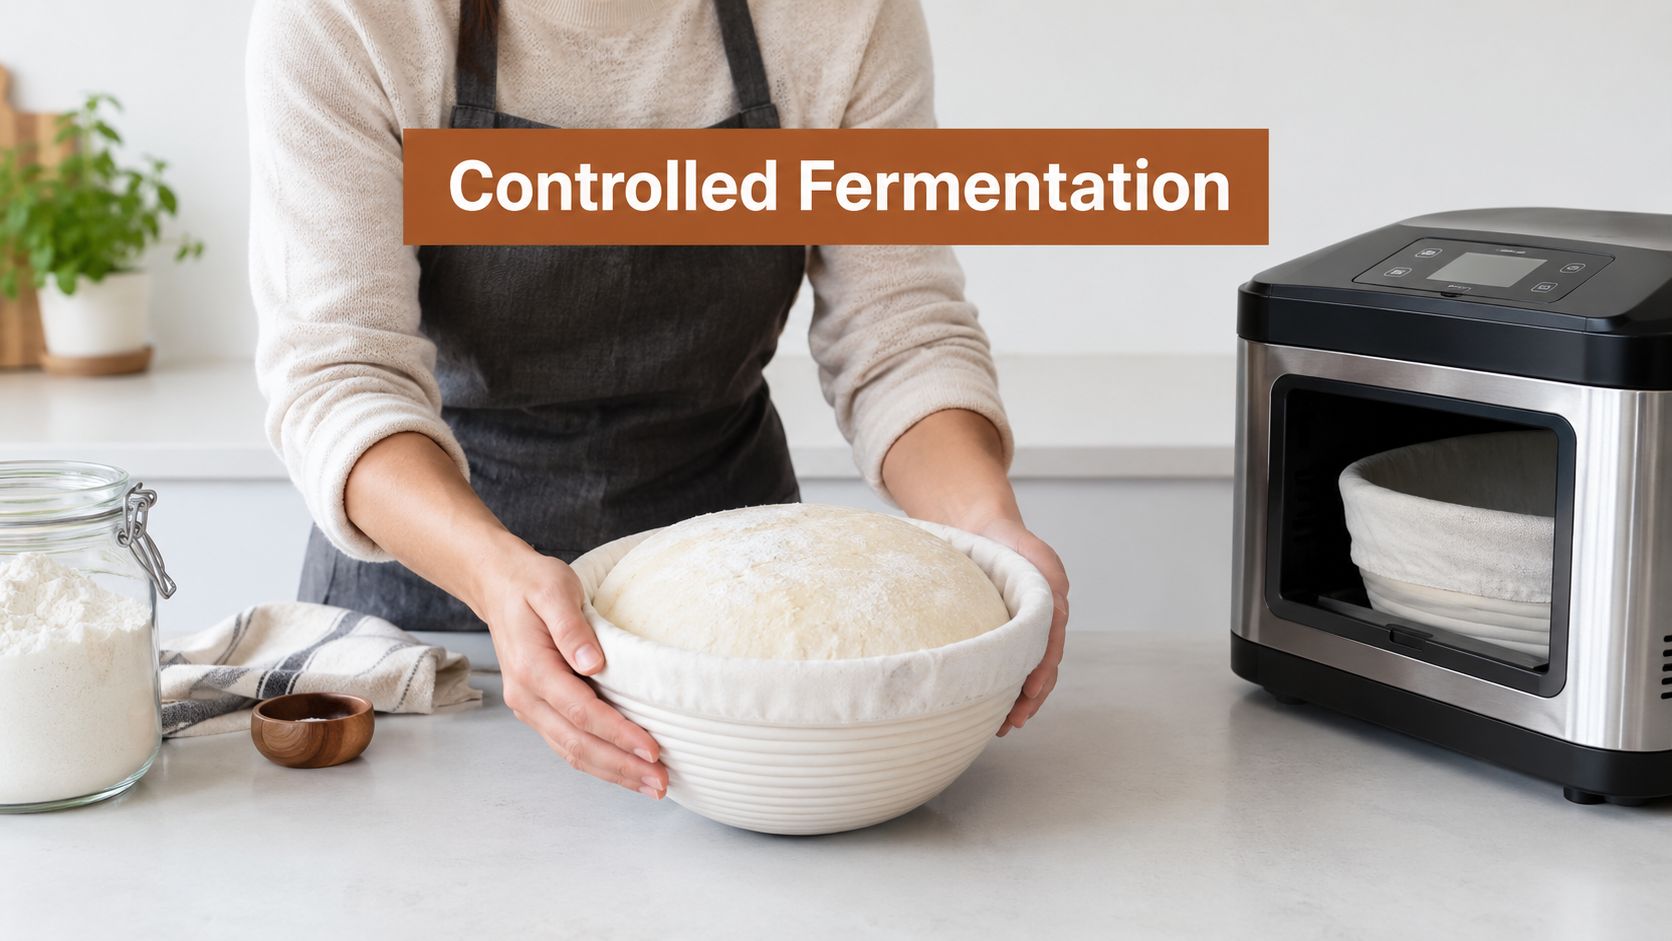
D'BakerAid separates breadmaking into fermentation and proofing. Stage 1 uses a fermentation bowl to hold a steadier yeast environment. Stage 2 uses a dough-proofing bowl and timed lift detection to show when the dough has expanded enough. The optional D'Steamer adds humidity during baking, which can help seeded and whole-wheat loaves form a better crust.
Protein dough needs those controls because whey, pea, soy, and collagen absorb water and ferment at different rates. The appliance reduces temperature swings and timing guesswork, but it does not replace ingredient judgment. Beginners still need to adjust hydration and stop proofing when the dough shows the right expansion.
Use a gram scale for every isolate and for wheat gluten. Scoop measurements vary with powder density. Record the protein brand, hydration, Stage 1 temperature, Stage 1 duration, Stage 2 duration, and crumb texture. A loaf that rises evenly, holds its shape, and has a fully set center gives you a useful reference for the next bake.
- Whey profile: Set about 77 to 80°F for about 8 to 10 hours. Expect a structured dough and an even crumb. Under-fermentation leaves the loaf dense.
- Pea profile: Use about 76 to 78°F and check earlier because fermentation can move quickly. A slightly grey-green crumb is normal. Excess proofing can weaken the loaf.
- Soy profile: Shorten Stage 1 by about 15% to 20% compared with whey. Watch for faster expansion and bake before the dough loses tension.
- Seeded and whole-wheat loaves: Use the D'Steamer to slow crust browning. The common failure is a dark crust around a center that still needs time to set.
The science behind D'BakerAid describes its fermentation and proofing approach. The companion app at dbakeraid.app provides guided recipes for these protein types.
D'BakerAid is listed at US$299.95 with a 4.9-star rating, according to the D'BakerAid product page. It suits beginners who plan to bake high-protein bread regularly and value repeatable fermentation. A machine is not required, but it directly addresses the temperature and proofing errors that make these loaves harder to repeat.
8-Item Comparison: Beginner High-Protein Breads
| Item | 🔄 Implementation complexity | ⚡ Resource requirements & cost | ⭐ Expected outcomes | 📊 Ideal use cases | 💡 Key advantages & tips |
|---|---|---|---|---|---|
| Whey + Sprouted Wheat High-Protein Bread (Hero) | Medium–High, dense dough, tight hydration control | Whey isolate (food-grade), vital wheat gluten (30–40g), Pullman pan, D'BakerAid recommended; ~$5.04/loaf | ~10.6g protein/slice; tight uniform crumb and repeatable results with controlled fermentation | Macro-trackers, fitness meal prep, busy households | Highest protein/slice; weigh powders, ferment 77–80°F (8–10h), cool fully before slicing |
| Vegan Pea + Whole Grain High-Protein Bread | Medium, faster fermenting, tighter hydration with whole grains | Pea protein isolate (neutral), vital gluten, whole-grain flours; D'BakerAid helpful; ~$4.04/loaf | ~10.7g protein/slice; fiber boost; grey-green crumb and mild beany notes that mellow | Vegan athletes, cost-conscious bakers, whole-grain seekers | Plant-based protein with lowest per-loaf cost; use neutral pea isolate, ferment 76–78°F, toast early to mask beany tone |
| Soy Multigrain "Fitness" High-Protein Bread | Medium, ferments faster, timing-sensitive | Soy isolate (non‑GMO optional), vital gluten, multigrain flours; D'BakerAid recommended; ~$3.56/loaf | ~10.7g protein/slice; complete amino acid profile; tan/brown crumb | Budget-conscious athletes, complete-protein marketing, multigrain preference | Complete protein and best value; reduce Stage 1 time ~15–20%, consider non‑GMO soy for premium positioning |
| Seeded Whey + Flax High-Protein Bread | Medium–High, seed weight slows rise and tightens gluten | Whey isolate, vital gluten, whole-wheat, mixed seeds (flax, sunflower, etc.); D'BakerAid; D'Steamer recommended; ~$5.04/loaf | ~10.2g protein/slice; adds ~2–3g ALA omega‑3s and mineral density; premium look | Functional-food seekers, artisan bakers, visual-focused brands | Adds omega‑3s and visual appeal; soak flax, extend Stage 1 slightly, top seeds before proofing to avoid burning |
| Collagen + Whole Wheat High-Protein Bread | High, whole‑wheat hydration + handling collagen peptides | Grass‑fed collagen peptides, vital gluten, whole‑wheat flour; D'BakerAid recommended; ~$6.81/loaf (premium) | ~11.5g protein/slice (highest); dense crumb; wellness narrative but incomplete protein | Wellness-focused consumers, premium buyers, ethical-sourcing audiences | Highest protein/slice but incomplete (lacks tryptophan); dissolve collagen in warm water, educate buyers, score deeply |
| Getting Started: Why High‑Protein Bread Is Hard Without a Machine | High, manual temp/proof control is difficult; many failure modes | Requires precise temperature/proof control; D'BakerAid removes major barriers (base ~$299.95) | With machine: repeatable success (≈95%+); without: high risk of over-proofing, collapse | Beginners tackling high‑protein doughs, home bakers wanting reliable batches | Machine stabilizes fermentation and proofing; start with Whey or Soy, use gram scale and a bake log |
| High‑Protein Bread vs Store‑Bought: Cost‑per‑Gram Math | Low, analytical comparison rather than baking | Basic tools for baking analysis; use recipes for cost savings | Homemade: ~10–11g/slice, ~2–4¢/g protein; Retail: 5–7g/slice, ~5.2¢/g | Cost-conscious bakers, meal preppers, value comparisons | Homemade is ~42–60% cheaper per gram of protein; batch-bake to maximize savings |
| D'BakerAid System Overview | Medium, initial setup and calibration required | Base system ~$299.95; optional D'Steamer ~$150; power and bench space | Stabilized fermentation/proof → reproducible high‑protein loaves across recipes | Regular home bakers, small-scale producers, people baking diverse high‑protein recipes | Automates proof detection and temp control; calibrate profiles per protein type and keep a log |
Choose Your First Loaf and Bake With Better Signals
Choose the Whey and Sprouted Wheat loaf if you want the most familiar appearance and a straightforward high-protein sandwich bread. It delivers the hero recipe's balance of a cream-colored crumb, mild flavor, and about 10.6 grams of protein per slice, depending on your ingredients and slice thickness. It's the best starting point for meal prep, toast, turkey sandwiches, and anyone who wants bread to contribute meaningfully to a daily protein target.
Choose Soy Multigrain if value matters and you want a plant-based recipe with a complete amino acid profile from soy. Choose Pea and Whole Grain if you're committed to vegan baking and are comfortable managing a quicker fermentation and a faint beany note. The pea loaf may need stronger spreads and more careful proofing, but it gives plant-based lifters a practical alternative to separate recipes built around eggs or dairy.
Choose Seeded Whey and Flax for texture, visual appeal, and a more substantial slice. It costs more than the soy loaf and may brown faster because of the seeds, but it works well for open-faced sandwiches and toast. Choose Collagen and Whole Wheat for the highest stated protein per slice in this lineup, while remembering that collagen is incomplete and should not be presented as a complete sports protein.
The checkpoints are simple, even when the dough isn't. Weigh the ingredients. Expect the dough to rise about 50% to 75%, not to double. Proof until it reaches the Pullman lid. Cool the loaf fully before slicing. If the crumb is gummy, the crust is too dark, or the loaf caves, change one variable at a time and write down what happened.
Nutrition and cost figures are estimates, not fixed promises. Protein brands, flour absorption, ingredient prices, baked weight, and slice thickness all change the result. The most useful comparison is still practical: these homemade loaves provide about twice the protein of typical retail protein bread and can cost roughly half as much per gram of protein, depending on the recipe and the store product.
For the full formulas, open See the high-protein recipes. For the controlled fermentation and proofing system, Shop D'BakerAid. You can also review the cost-per-gram comparison above and return to the machine explainer when you're deciding whether repeatable fermentation justifies the equipment.
DBakerAid™ offers guided high-protein bread recipes, controlled fermentation and proofing, and an optional D'Steamer for more consistent crust results at home. Visit DBakerAid™ to compare the system with your baking routine and choose your first loaf.