

You can follow the thermometer perfectly and still end up with chocolate that looks tired, feels soft, and blooms a few days later. That's the part most home bakers hate, because the failure doesn't always happen at the bowl, it shows up after the work is done.
Dark chocolate tempering is supposed to solve that. Done right, it gives you gloss, a clean snap, and chocolate that stays stable at room temperature, but the fix isn't just “hit the numbers.” The problem is usually one of three things, technique, formulation, or storage, and the first step is figuring out which one beat you.
Table of Contents
- Why Your Chocolate Keeps Failing
- The Science Behind Form V Crystals
- The Seeding Method Step by Step
- Tabling and Microwave Methods Compared
- Why Correct Temperatures Still Fail
- Diagnosing Tempering Failures
Why Your Chocolate Keeps Failing
A dull finish after all that stirring feels personal, but it usually isn't. You didn't miss the idea of tempering, you missed one of the conditions that lets cocoa butter crystallize correctly.
Tempering exists to control bloom and create a crisp, glossy finish, and that became an industrial standard by 1931. The molecular mechanism wasn't understood until the 1970s, which tells you something important, the process worked before people fully knew why it worked (PMC historical review on chocolate tempering). The foundation goes back much earlier, with Coenraad van Houten's cocoa press in 1828, the first modern chocolate bar in 1847, and conching in 1879, which made texture and crystallization control far more important for dark chocolate (same historical review).
What you're trying to make is chocolate that sets into the stable crystal structure that gives dark chocolate its snap, shine, and shelf stability. When that doesn't happen, the chocolate may still harden, but it won't harden well.
Practical rule: if the chocolate looked right at first and failed later, don't assume you “forgot how to temper.” The problem may be the chocolate itself, not just your hands.
That distinction matters because the thermometer only tells part of the story. A batch can be technically tempered and still perform badly if the fat phase, particle size, or storage environment works against it.
The Science Behind Form V Crystals
Cocoa butter is polymorphic, which means it can crystallize in more than one form. Only one of those forms, Form V, gives the finish, texture, and room-temperature stability people want in dark chocolate (solid chocolate fact sheet).
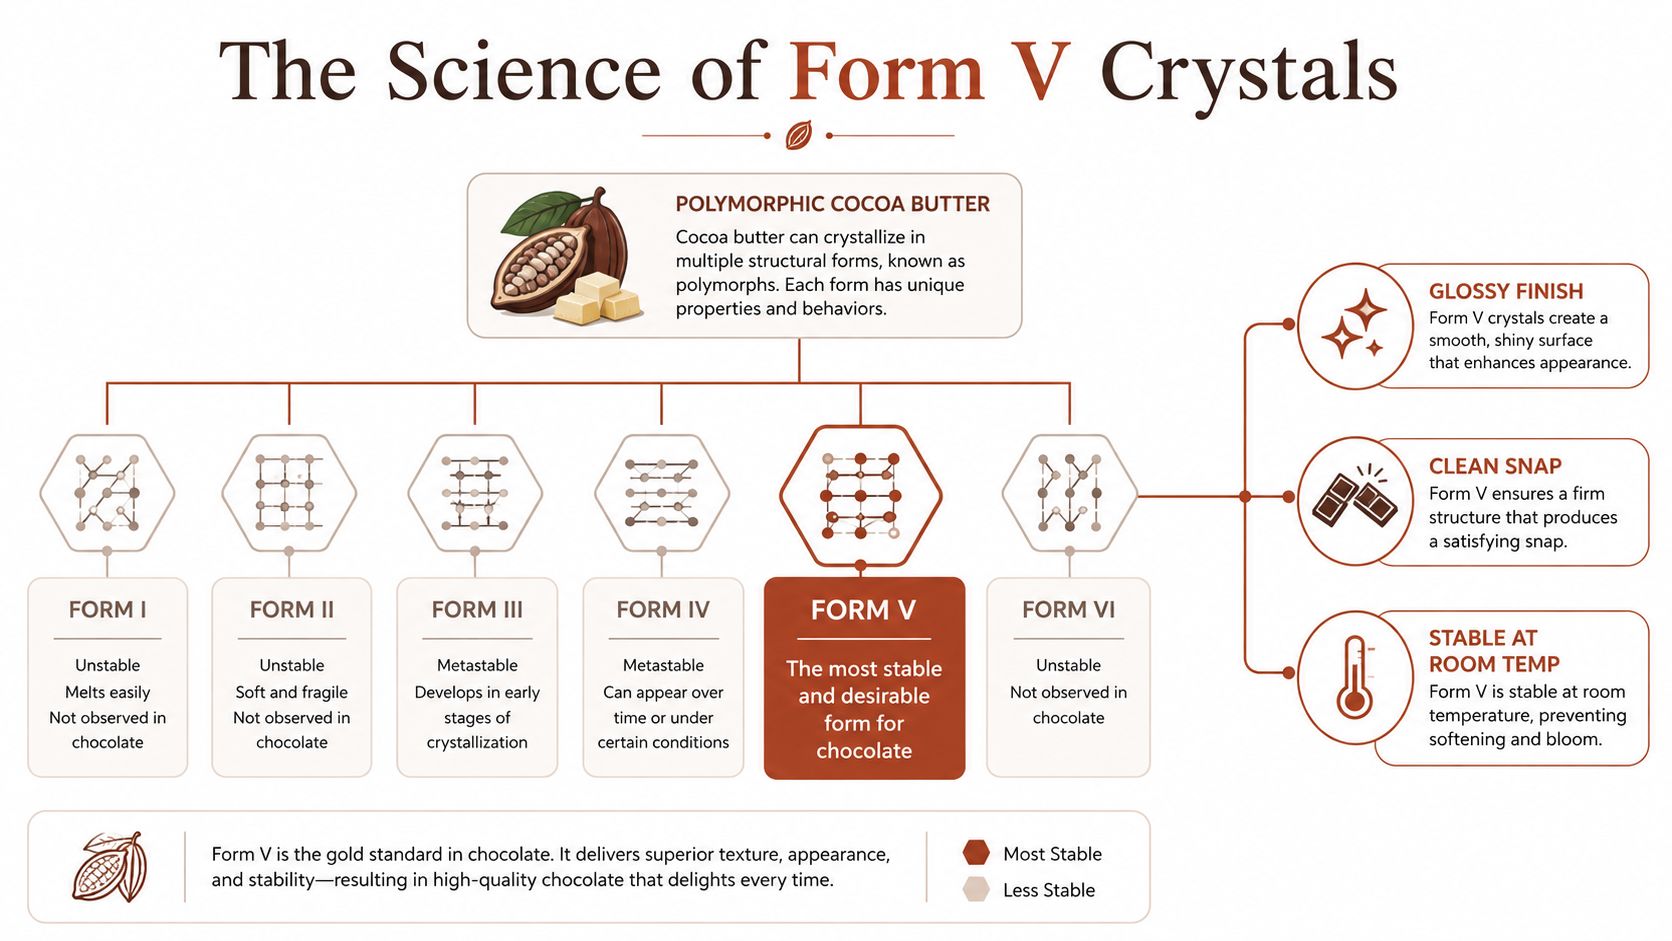
The point of the melt-cool-reheat sequence is simple. You fully melt the chocolate to erase unstable crystals, cool it so seed crystals can form, then bring it back to a working range without destroying the good ones. For dark chocolate, a typical working range is 31–32°C (88–90°F), and a common production sequence is heat to about 45–50°C, cool to roughly 25°C, then rewarm to about 30–32°C before molding (Alimentarium tempering guide).
That matters because Form V melts in the mouth, but stays solid on the counter. Its optimal melting range is about 34–36°C, which is why properly tempered dark chocolate feels firm in the hand and still melts cleanly when you eat it (Alimentarium tempering guide).
One small overshoot can ruin the whole setup. If you rewarm too much, you can dissolve the seed crystals you just built, and then you're back to a reset instead of a temper.
For a good cross-check on how temperature shapes a food's behavior, the McLaren Vale Cellars wine temperature and flavor guide is a useful parallel. The principle is the same, control temperature tightly, and you control the final result.
The Seeding Method Step by Step
The seeding method is the one I trust most for home kitchens because it gives you the clearest feedback. You don't need a marble slab, and you don't need to guess what the chocolate is doing, you watch it change as the seed melts into the batch.
Start by melting the chocolate to 45–48°C (113–118°F), which is the range that fully clears out unstable cocoa-butter crystals (Purdue Extension tempering guide). Keep the bowl dry, keep steam away from the chocolate, and stir often enough that the bottom doesn't overheat. Then remove it from the heat and add finely chopped seed chocolate, usually about one-quarter to one-third of the batch, stirring constantly as the mass cools.
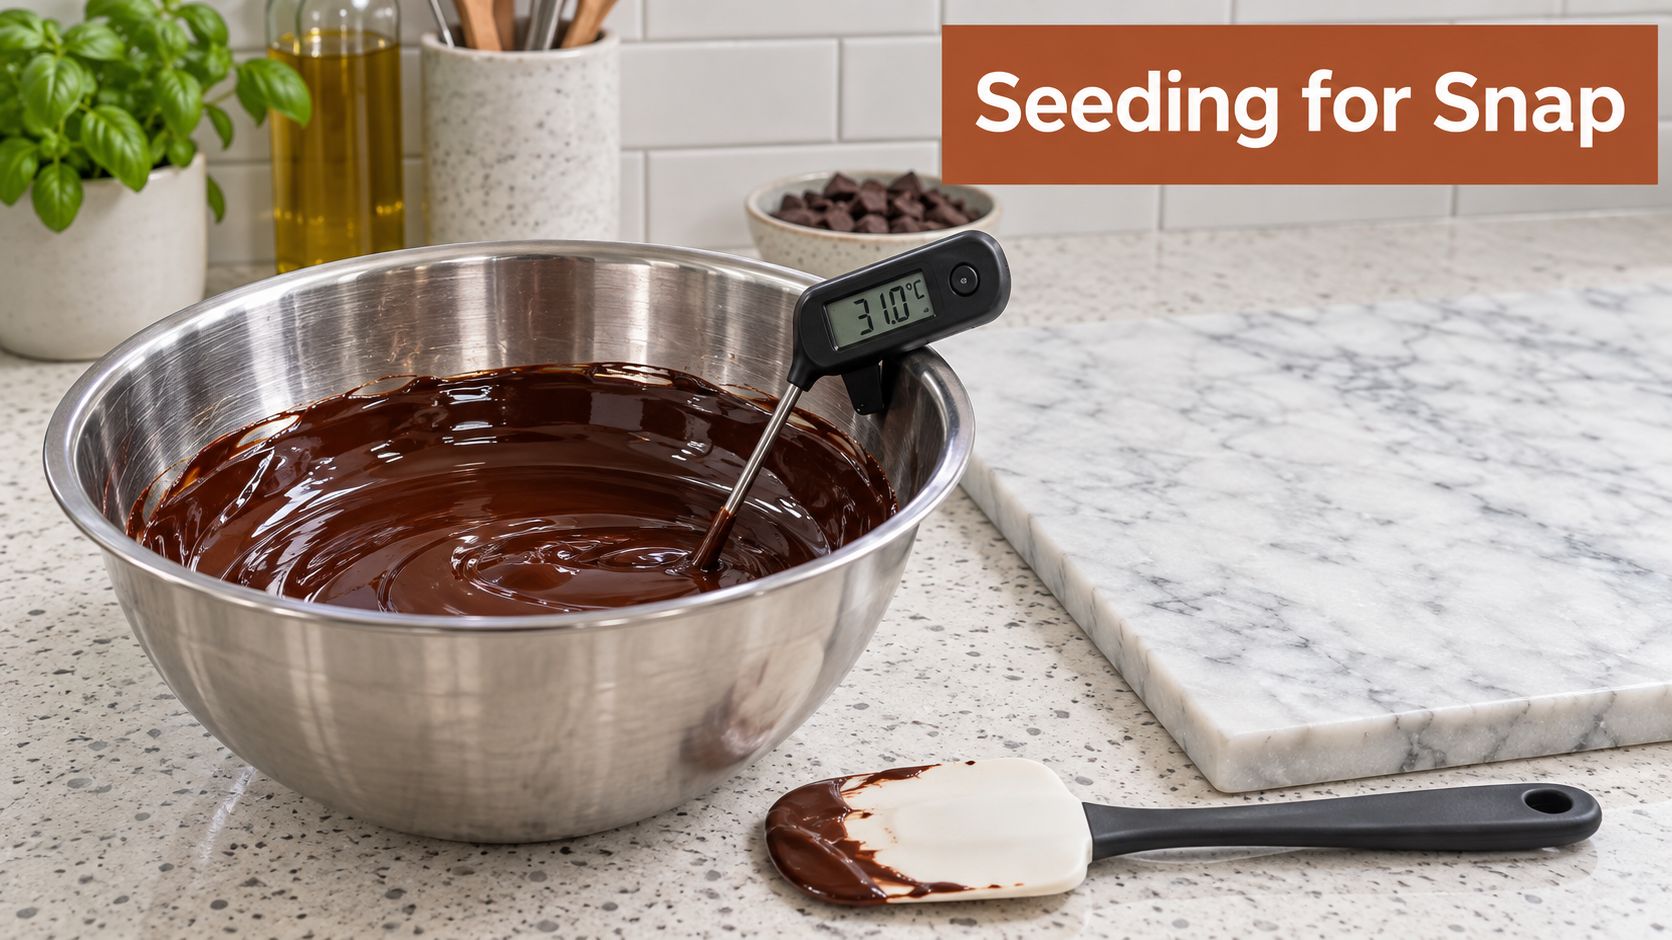
The working target for dark chocolate is 31–32°C (88–90°F), and the rewarm step should be gentle. A common benchmark is to bring the mass down to about 27–28°C (81–82°F) before nudging it back up to working temperature (Purdue Extension tempering guide). If the chocolate thickens too soon, it's usually too cool. If it loses body and behaves greasy, it's usually too warm or underseeded.
Keep the test simple. Spread a thin smear on parchment or wax paper and give it 3 to 5 minutes at normal room temperature to set. King Arthur Baking notes that tempered chocolate should set in that window, while untempered chocolate takes longer and may leave a fingerprint (King Arthur Baking tempering guide).
Practical rule: if you overshoot the working range by much, don't “force” the batch into shape. Cool it back down and re-establish seed crystals instead of trying to rescue it by stirring harder.
The seeding method is also where the common temperature warning matters most. Professional and educational sources consistently flag that dark chocolate's working band sits around 31–32°C, and that crossing above the safe melt threshold too aggressively can compromise temper and force a reset (Purdue Extension tempering guide).
Tabling and Microwave Methods Compared
Seeding gets the nod for control, but it's not the only path. Tabling and microwave tempering both work, they just fail in different ways and suit different kitchens.
Tabling gives you fast cooling and great visual feedback. You spread melted chocolate on marble, move it with scrapers, and watch it tighten as crystals form. It's excellent when you want hands-on control, but it takes practice and a clean, cool surface. Microwave tempering is quicker and uses less equipment, which is why many home bakers like it for small batches, but it can jump from warm to overheated fast if you don't stir between bursts.
| Tempering Methods Comparison | Equipment Needed | Best For | Skill Level | Common Failure Points |
|---|---|---|---|---|
| Seeding | Bowl, thermometer, chopped seed chocolate | Most home batches | Moderate | Overheating, underseeding, poor stirring |
| Tabling | Marble slab, scrapers, thermometer | Smaller batches, practiced users | Higher | Cooling too far, messy workflow, contamination |
| Microwave | Microwave-safe bowl, thermometer | Small batches, fast work | Low to moderate | Hot spots, overshoot, uneven melting |
A lot of guides flatten this choice into “pick what you like,” but that's not honest enough. If you're making dipped strawberries once in a while, the microwave can be plenty. If you're molding bars or shells, seeding is usually easier to recover from when you miss a step.
For a broader look at how a machine changes the workflow, this internal guide on chocolate tempering with a machine at home is worth keeping handy.
Why Correct Temperatures Still Fail
The frustrating part is that a beautiful temper curve doesn't guarantee a beautiful result. Chocolate behaves like a formula, not just a temperature chart, and the details inside the chocolate matter over time.
Particle size distribution changes texture. Fat content changes how crystals move and lock. Microstructure changes how the finished chocolate resists bloom and holds snap. A technically correct temper can still underperform after storage, especially if the chocolate has inclusions, a different cocoa-butter profile, or a formulation that isn't standard couverture (ScienceDirect article on tempering quality and microstructure).
That's why two bars can behave differently even when you use the same method. One may set perfectly on day one and soften later, while another looks a little less dramatic at the start but stores better. The newer perspective in the research is straightforward, tempering quality needs broader assessment than the classic three temperatures alone (same ScienceDirect article).
Different chocolate needs different judgment. The curve gets you in the zone, but the formula decides how forgiving that zone is.
That also explains why adding nuts, dried fruit, or flavorings can change the result. You're not just adding decoration, you're changing the way the fat phase behaves and how crystals organize across the batch. If you want a practical example of how additives alter chocolate handling, the internal note on coloring melting chocolate is useful because the same principle applies, added ingredients can shift the texture and stability of the finished mass.
Diagnosing Tempering Failures
When chocolate fails, timing tells you where the mistake lives. Immediate failure usually points to technique. Delayed failure usually points to formulation or storage.
Technique problems show up right away. The chocolate looks dull, doesn't snap, or never really firms up. Formulation problems are sneakier, because the batch may look fine at first and bloom later, especially if the chocolate brand, fat content, or inclusions vary from batch to batch. Storage problems tend to show up when the environment swings, warm rooms, humidity, or strong odors nearby can all undermine a batch that was otherwise properly handled.
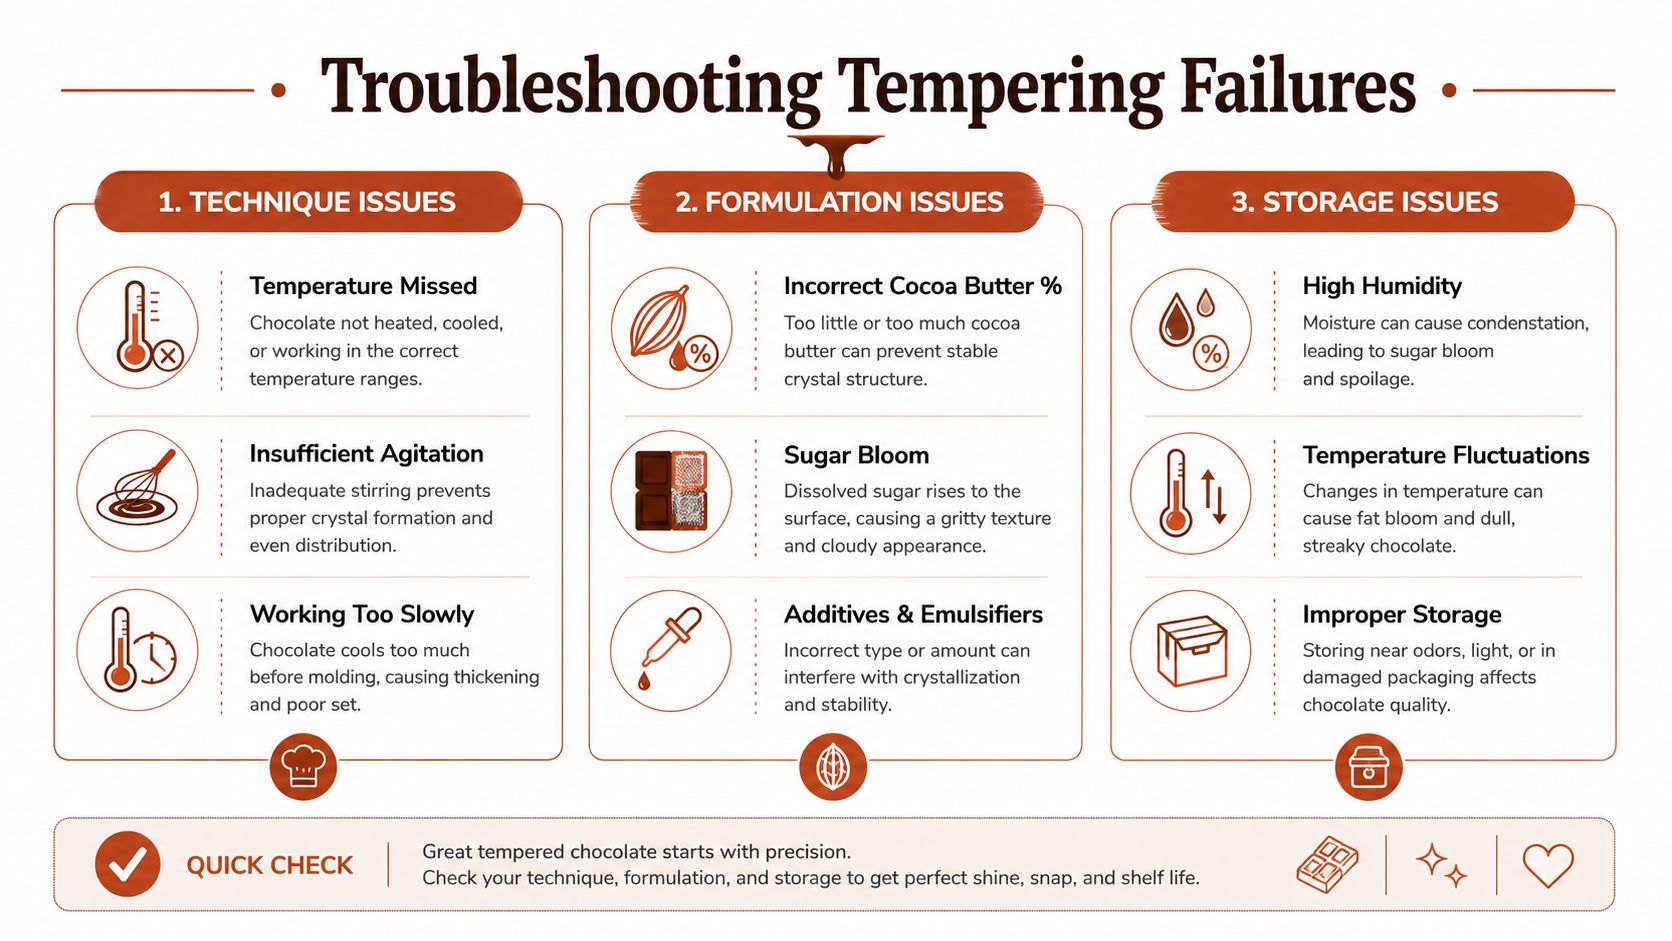
A good storage environment is consistent, cool, and dry. Chocolate keeps best when it isn't forced through repeated temperature swings, and it needs to stay away from humidity and stray odors. That's why a batch that looked perfect on the tray can still lose its edge later if it lives in a warm kitchen or gets packed next to aromatic foods.
The fastest way to troubleshoot is to isolate the variable. Test one chocolate brand, one method, one storage condition, and change only one thing at a time. If the problem appears in the bowl, fix the tempering method. If it appears after storage, start with the chocolate source and the environment, not your stirring hand.
For readers working with colored chocolate or compound-style additions, the internal guide on how to color melting chocolate is a useful companion because it reinforces the same diagnostic habit, start with what changed in the formula.
If you want a steadier way to handle the hard part of baking, DBakerAid™ brings controlled fermentation, proofing, and precision kitchen workflow into one system. It's built for bakers who care about repeatable results, and that same mindset applies to tempering, temperature discipline is what separates shiny, clean chocolate from a frustrating reset.