

A clay loaf pan is a fired-clay baking vessel, usually terracotta or another porous ceramic, shaped to hold one loaf and often used with a lid so the dough bakes in a small enclosed space.
You might be looking at one beside your usual metal tin, wondering whether it needs soaking, preheating, or a different recipe. The useful answer starts with the pan itself: wall thickness, glaze, moisture content, and the lid matter more than the word “clay.” Learn those details before changing your dough.
Table of Contents
- What a Clay Loaf Pan Is and Where It Came From
- Clay vs Metal and Stone Loaf Pans at a Glance
- How Clay Shapes the Crust and Crumb
- Size, Thickness and Fit for Your Oven and Bake
- Food-Safety Checks Before Your First Bake
- Caring for Your Clay Pan and Fixing Common Problems
- Using a Clay Pan in Your DBakerAid Routine
What a Clay Loaf Pan Is and Where It Came From
Think of a covered clay bread pan as a miniature oven chamber around a single loaf. Its base supports the dough, while the lid changes the environment immediately around it.
The basic idea predates modern bakeware. Early bakers cooked bread on hot stones and embers, then used inverted clay pots to protect dough from ash. European bakers reportedly covered dough with pots by the Bronze Age, according to this history of fire, clay, and flour.
The important inheritance isn't the rustic appearance. It's the enclosed space around the bread.
England's modern revival arrived in the late 1960s alongside interest in wholemeal baking. Mary Berry demonstrated flowerpot bread on television in 1974, and purpose-built vessels such as La Cloche gained visibility during the 1980s, as documented in that historical account.
The matching lid makes the covered-pot design easy to recognize.
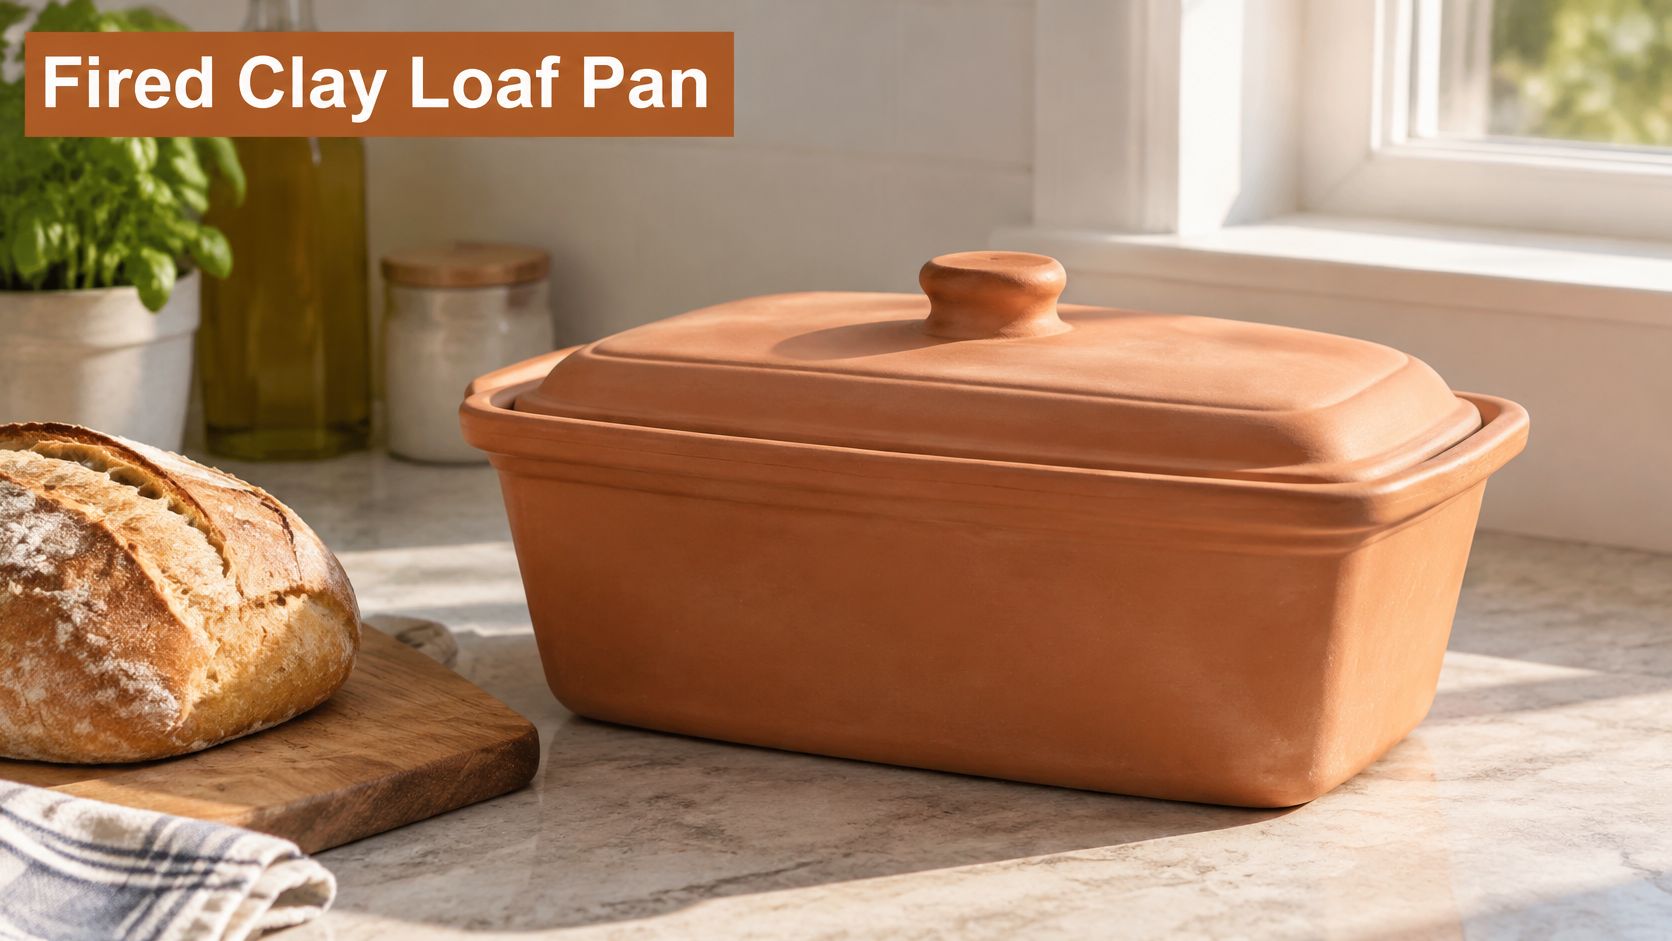
Product names overlap. Clay bread pan, terracotta loaf pan, and bread cloche can describe related designs, but check the actual shape, interior finish, and whether a lid is included.
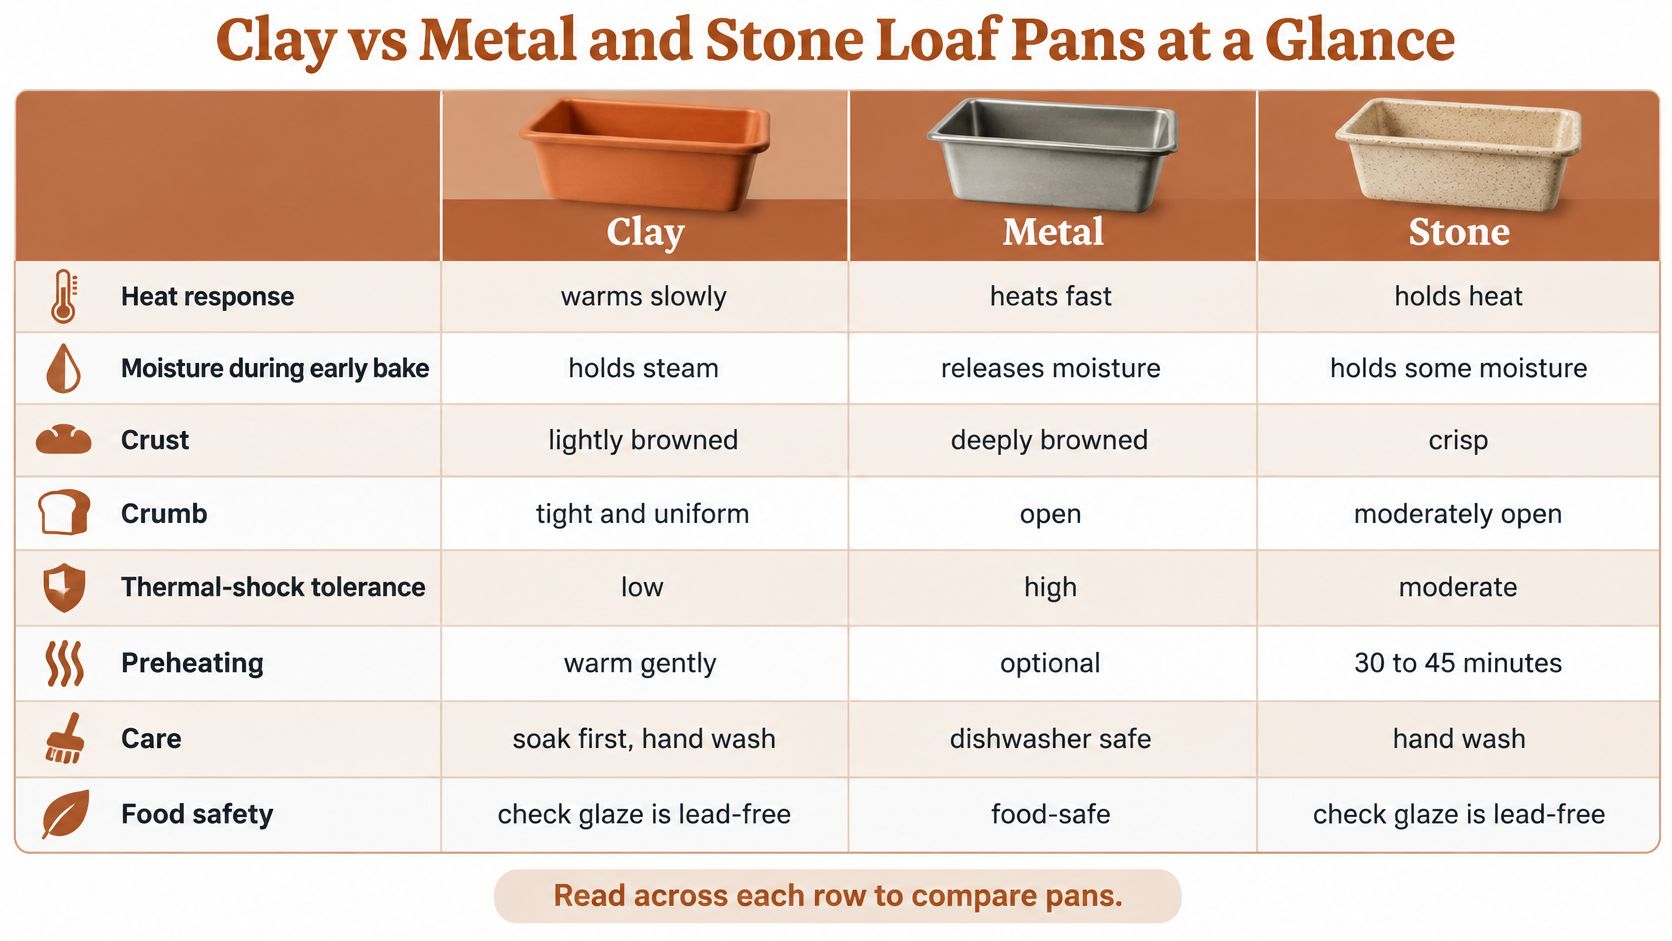
Clay vs Metal and Stone Loaf Pans at a Glance
| Criterion | Clay loaf pan | Metal loaf pan | Stone baking surface |
|---|---|---|---|
| Heat response | Gradual; depends on thickness and moisture | More direct with conductive metal | Depends on material and thickness |
| Moisture in early bake | Porous body and lid can help retain moisture | Depends on a lid or added steam | Usually needs a separate steam arrangement |
| Crust | Can favor a softer finish when covered | Side browning depends on finish and dough | Useful when a firm base is the goal |
| Crumb | Moisture retention can influence texture | Strongly dependent on recipe and proofing | Strongly dependent on recipe and shaping |
| Thermal-shock tolerance | Requires careful temperature transitions | Generally more tolerant than porous clay | Follow the manufacturer's restrictions |
| Preheating | Follow the maker's starting method | Recipe and coating determine the method | Follow product-specific guidance |
| Care | Check soaking, detergent, and drying instructions | Check coating and dishwasher instructions | Follow the surface manufacturer's guidance |
| Food-safety documentation | Verify intended use, glaze, and testing | Check food-use labeling and coating guidance | Verify intended baking use |
| Best use | Covered loaves when moisture retention is useful | Everyday pan bread and a familiar workflow | Free-form bread with direct base contact |
These are decision-making tendencies, not guaranteed results. In particular, a pan doesn't create an open crumb by itself. Dough formulation, fermentation, shaping, and proofing still matter.
Use the visual comparison as a starting point, not as a substitute for your pan's instructions.
Choose by the bake you actually make
Choose clay when you want to explore covered baking and can verify the vessel's food safety. Keep metal when you want to stay close to a familiar sandwich-loaf recipe, and consider a baking stone when you prefer shaping bread without supporting walls.
A covered vessel needn't be ceramic. An artisan cast-iron bread pot is another option, though its heating and handling instructions aren't interchangeable with clay.
Don't compare oven settings alone. Record heat-up time in minutes, starting conditions, and the finished loaf. Before buying an unlabeled clay pan, make the food-safety checks below.
How Clay Shapes the Crust and Crumb
Clay changes how heat and moisture reach the dough. Its fired ceramic body generally transfers heat more gradually than highly conductive metal, while porosity can help it retain moisture, as described in this review of terracotta cookware properties.
The finished loaf shows the combined effects of the dough, vessel, and baking method.
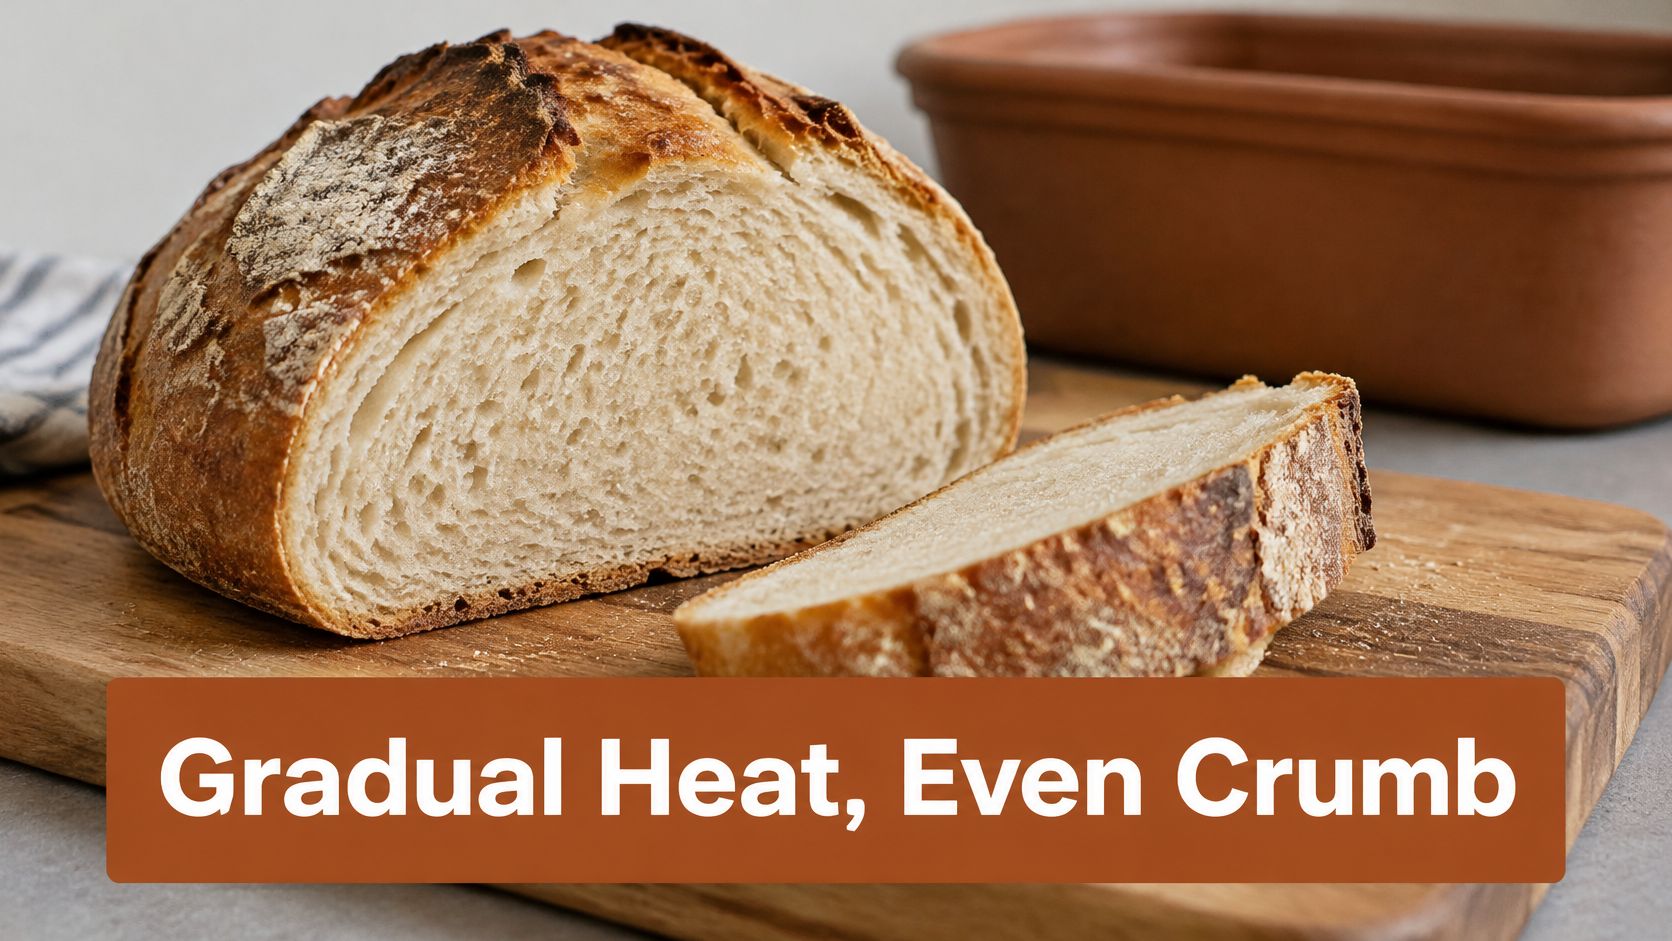
Gradual heat and a humid beginning
First, the walls warm progressively. Think of gentle, sustained heating rather than the direct contact heat you associate with a hot metal surface. That's an analogy, not a claim that a clay pan works like a slow cooker.
Second, porous clay can hold moisture. How much depends on the body and finish. A fully glazed interior won't behave exactly like exposed porous clay, so identical baking instructions shouldn't be assumed.
Third, the lid helps keep moisture near the loaf. A humid early environment can delay the surface from drying and setting. For practical background on managing that environment, see this guide to baking with steam.
Practical rule: Treat the lid and the clay body as separate variables. A lid changes moisture retention even when the vessel itself isn't absorbent.
Read the loaf rather than its color alone
You may see paler sides, a softer crust, or a moister crumb. Those observations are clues, not proof that clay always produces a particular texture. A tight crumb can also reflect the dough or its proofing.
Use a probe thermometer and the doneness target specified by your tested recipe. Don't assume a pale loaf is underbaked or a browned loaf is finished in the center.
For another visual reference while assessing your own baking method:
If the loaf is cooked through but the crust remains softer than you want, try an uncovered finishing period when the recipe and manufacturer allow it. Keep the other settings unchanged so you can judge the effect of removing the lid.
Size, Thickness and Fit for Your Oven and Bake
Buy from internal measurements and intended dough capacity, not the photograph. A thick-walled clay pan can have a larger exterior than a metal tin with similar usable space.
- Match the dough to the vessel. Compare your recipe's dough weight with the manufacturer's recommended capacity. Leave the expansion room required by that recipe, especially beneath a lid.
- Check the whole footprint. Measure the base, handles, lid height, and oven opening. Make sure you can lift the covered pan without striking a rack.
- Ask about wall thickness. One tested setup identified 10 mm clay as relatively efficient, but that isn't a universal ideal; the technical study of clay and ceramic baking pans also shows why moisture and construction belong in the comparison.
- Confirm dry or soaked use. Don't add a soaking step only because another clay baker requires one.
- Inspect the lid fit. Check that it sits securely without rocking and leaves room for the intended loaf.
- Plan safe handling. Prepare dry oven mitts and a stable, heat-safe landing surface before baking.
Run a repeatable heat-up check
Only test an empty pan if the maker permits empty heating. Begin with the manufacturer's approved starting conditions, place an oven thermometer beside the vessel, and record how long the surrounding oven air takes to reach your recipe's setting.
That reading measures oven air, not the pan wall. It's useful for comparing your setup, but it doesn't prove the clay has reached the same temperature. This guide to testing oven temperature can help you separate an inaccurate oven setting from a pan-related delay.
Keep a short log of pan condition, starting temperature, lid use, browning, and doneness. Before buying, measure the space, photograph the label, and request wall-thickness and maximum-temperature information.
Food-Safety Checks Before Your First Bake
Clay alone is not a safety certification. Neither are “natural,” “handmade,” or “unglazed.” The clay body, glaze, firing, and intended use all matter.
The FDA warns that improperly manufactured or fired lead-containing pottery can release lead into food. Its guidance on lead-glazed traditional pottery also explains that washing or boiling won't remove the underlying lead hazard.
Verify the vessel before adding dough
- Find explicit food-use labeling. Look for an identifiable manufacturer, baking instructions, and a maximum operating temperature. A decorative flowerpot isn't automatically suitable for bread.
- Identify the food-contact surface. Ask whether the interior is glazed and request information about the glaze and firing. Don't rely on appearance.
- Request quantitative leach-test documentation. A meaningful protocol can use 4% acetic acid for 24 hours, followed by laboratory measurement of lead and cadmium, as described in this pottery migration-testing reference. A surface swab isn't equivalent to that test.
- Inspect the finish and body. Look for crazing, chips, and cracks. Stop using a damaged food-contact surface, particularly where the underlying body is exposed.
- Check intended food use. Give acidic doughs, sourdough, and fruit-filled breads extra scrutiny because migration testing is especially relevant to acidic contact.
A pan can bake an attractive loaf and still have an unresolved materials-safety problem.
Handmade, vintage, imported, and marketplace pottery aren't automatically unsafe. The practical difficulty is that their provenance or test records may be harder to establish.
A “lead-free” statement deserves a follow-up question: what was tested, by whom, and under what conditions? Ask whether the documentation applies to the actual product and its food-contact finish.
If the seller can't establish that the vessel is suitable for baking and food contact, treat it as decorative. Choose a documented pan rather than trying to clean uncertainty away.
Caring for Your Clay Pan and Fixing Common Problems
Care should follow the specific ceramic body and finish. Don't borrow cast-iron seasoning advice or another clay pan's soaking routine.
A practical care routine
- Read the maker's instructions. Confirm whether soaking, empty heating, oiling, and detergent use are permitted.
- Use the approved heating sequence. If the maker specifies a cold start, follow it. Don't substitute a hot-oven method from a metal-pan recipe.
- Prepare a release layer. Use permitted oil, flour, or a parchment strip. Don't build up a baked-on seasoning layer unless instructed.
- Load and cover as directed. Follow the recipe's shaping and proofing method without improvising a transfer into dangerously hot pottery.
- Cool on a dry, heat-safe surface. Keep cold water and wet cloths away from the hot vessel.
- Clean gently. Use warm water and a soft brush, with detergent only as the manufacturer allows. Avoid aggressive scraping.
- Dry before storage. Leave the lid slightly open once the pan is completely dry.
The thermal-shock concern follows from the material behavior described earlier: avoid abrupt temperature changes, rather than trying to rescue a cracked vessel through gentler use.
Diagnose the symptom before changing the recipe
| Symptom | Likely cause | Fix |
|---|---|---|
| Hairline crack after first use | Thermal stress or a manufacturing flaw | Stop using it and ask the maker whether replacement is required |
| Loaf sticks to the base | Insufficient release layer | Try an approved light oiling, flour dusting, or parchment strip |
| Dark stains inside | Possible oil residue or mineral deposits | Clean gently; soak only if permitted |
| Pale, soft crust | Covered finish or insufficient oven heat | Verify oven temperature and adjust lid timing |
| Gummy center | Incomplete baking or slicing before cooling | Check the recipe's doneness target and let the loaf cool before cutting |
| Musty smell | Storage before complete drying | Clean as directed, dry fully, and store with ventilation |
Most troubleshooting starts with temperature, moisture, or release. Change the factor most closely connected to the symptom instead of altering flour, water, oven setting, and lid timing together.
A stain and a crack require different decisions. Don't scrub harder to fix structural damage, and don't assume a cosmetic mark means the pan has failed.
Using a Clay Pan in Your DBakerAid Routine
Separate dough preparation from vessel testing. Fermentation determines how the dough develops before baking; the clay pan then adds its own heating and moisture behavior.
Temperature control matters upstream. A bread-fermentation study found that its best tested treatment used 30°C for 120 minutes, producing 424.34% dough expansion, but those results belong to that particular formulation and experiment, not a universal proofing schedule. The fermentation temperature and time study supports controlling conditions rather than copying its rise figure into every recipe.
The illustrated workflow separates preparation controls from the baking vessel.
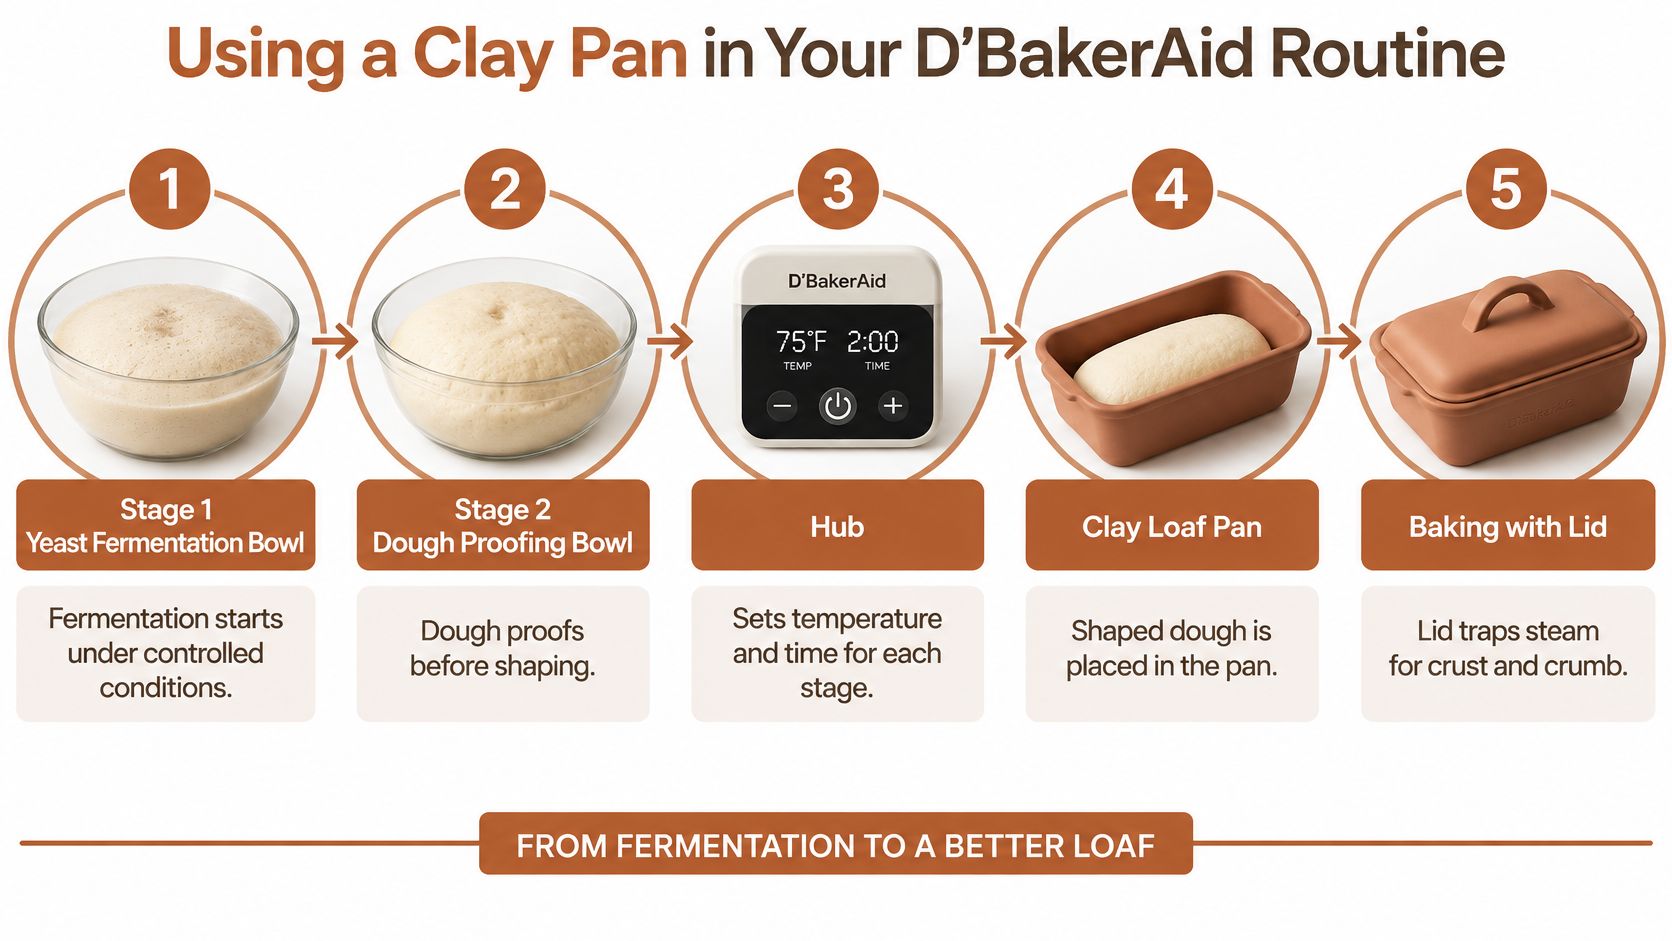
Keep the handoff simple
- Follow the recipe's rise cues. Don't require every specialty dough to double.
- Choose a compatible loading method. Use the pan's approved cold-start or preheating procedure. Don't transfer proofed dough into hot clay merely to follow a generic workflow.
- Bake with the prescribed lid sequence. If testing added steam, change that variable separately.
- Check the finished loaf. Record doneness, crust, crumb, and release before adjusting the next bake.
A third-party clay pan is an optional baking choice, not a required part of a proofing system. Choose it when its covered-baking behavior suits your loaf and its documentation is sound. Keep your familiar metal pan available as a useful comparison.
DBakerAid™ offers a temperature-and-time-controlled system with a Stage 1 yeast fermentation bowl, a Stage 2 dough proofing bowl, and a control hub, plus an optional D'Steamer. Pair controlled dough preparation with a verified clay pan and its manufacturer's baking method. Visit DBakerAid™ to explore the system and choose a setup for your bread routine.