

You know the feeling. The dough looked fine last night, the bowl sat on the counter, and in the morning the poolish has either sunk, gone slack, or pushed past the point you meant to use it. The problem usually isn't the formula, it's trusting a clock in a kitchen that never stays the same temperature twice.
Table of Contents
- Why Poolish Trips Up Even Experienced Bakers
- What Poolish Is and the Ratios You Need
- Mixing the Poolish the Night Before
- How to Tell When Your Poolish Is Truly Ready
- Folding Poolish Into Your Final Dough
- Same-Day Schedules, Whole Wheat Swaps, and Sourdough Tradeoffs
- A Repeatable Poolish Checklist for Better Loaves
Why Poolish Trips Up Even Experienced Bakers
A baker can follow a 12-hour poolish recipe to the minute and still pull a flat preferment from the bowl the next morning. That happens most often when the kitchen is warmer than the recipe assumed, or cooler, or both across the same night. Poolish is not difficult because the math is hard. It's difficult because the dough keeps working while you sleep.
That's why the same preferment can feel perfect in one home and overripe in another. Historical baking accounts describe poolish as a classic pre-ferment that became strongly associated with modern French bread in the 1840s, then spread through Paris from the mid-19th century through the early 20th century as commercial baker's yeast became available, before more automated methods displaced it in the 1920s (historical overview). The method survived because bakers valued what controlled fermentation does for dough, not because a fixed clock was always reliable.
The real failure is mistaking time for readiness
At home, a poolish can look unchanged for hours, then race to the finish. A recipe that says “leave it overnight” is giving you a window, not a finish line. In practice, the question isn't “Has 12 hours passed?” It's “Has this preferment reached peak expansion in this kitchen?”
Practical rule: treat poolish like a biological process. Time matters, but temperature, surface texture, and collapse point matter more.
That shift in thinking changes everything. Instead of apologizing for a dough that didn't fit the schedule, you start reading the preferment the way a baker does in a working bakery. The goal is a poolish that's ready when the final dough needs it, not one that's merely been sitting long enough.
What Poolish Is and the Ratios You Need
Poolish is a 100% hydration pre-ferment, so it uses equal weights of flour and water. It also uses only a tiny amount of yeast, usually about 0.1% to 0.25% of flour weight (Bakerpedia). That loose, batter-like texture is deliberate. It lets fermentation move fast enough to build flavor while still leaving the mix flexible for the final dough.
The basic formula and why it works
A poolish is not a sourdough starter, and it is not meant to act like a stiff levain. It is wetter, milder, and more direct. Food52 describes the standard formula as 100% flour : 100% water : 0.25% yeast (Food52), while other expert guides land near the same low-yeast range. That small yeast dose is what keeps the preferment from racing past its peak too quickly, especially in a warm kitchen.
In practical bread formulas, poolish is often only a portion of the total flour, not the whole dough. One instructional example sets the poolish at about 20% of the total flour mass, so a bread made with 500 g flour would use 100 g poolish, split as 50 g flour + 50 g water. That ratio makes it easier to scale up or down without changing the dough's character too much. If you want a plain-language explanation of why pre-fermentation helps yeast work in a steadier way, this note on instant yeast and pre-fermentation is a useful companion.
| Poolish Scaling Reference for Common Dough Sizes | |||
|---|---|---|---|
| Total Flour in Final Dough | Poolish Flour | Poolish Water | Poolish Yeast (0.2%) |
| 250 g | 50 g | 50 g | 0.1 g |
| 500 g | 100 g | 100 g | 0.2 g |
| 750 g | 150 g | 150 g | 0.3 g |
Keep one thing straight
Poolish is a portion of the final dough, not the entire dough. That distinction matters because beginners often confuse “the preferment” with “the recipe.” The preferment builds flavor and structure first, then the final dough carries that work into the loaf.
Ratios matter, but so does readiness. A poolish mixed at the right proportion can still be too young or overripe if the room runs hot or cold. Read the surface, the rise, and the point where the top starts to slacken, because that tells you more than the clock alone.
Mixing the Poolish the Night Before
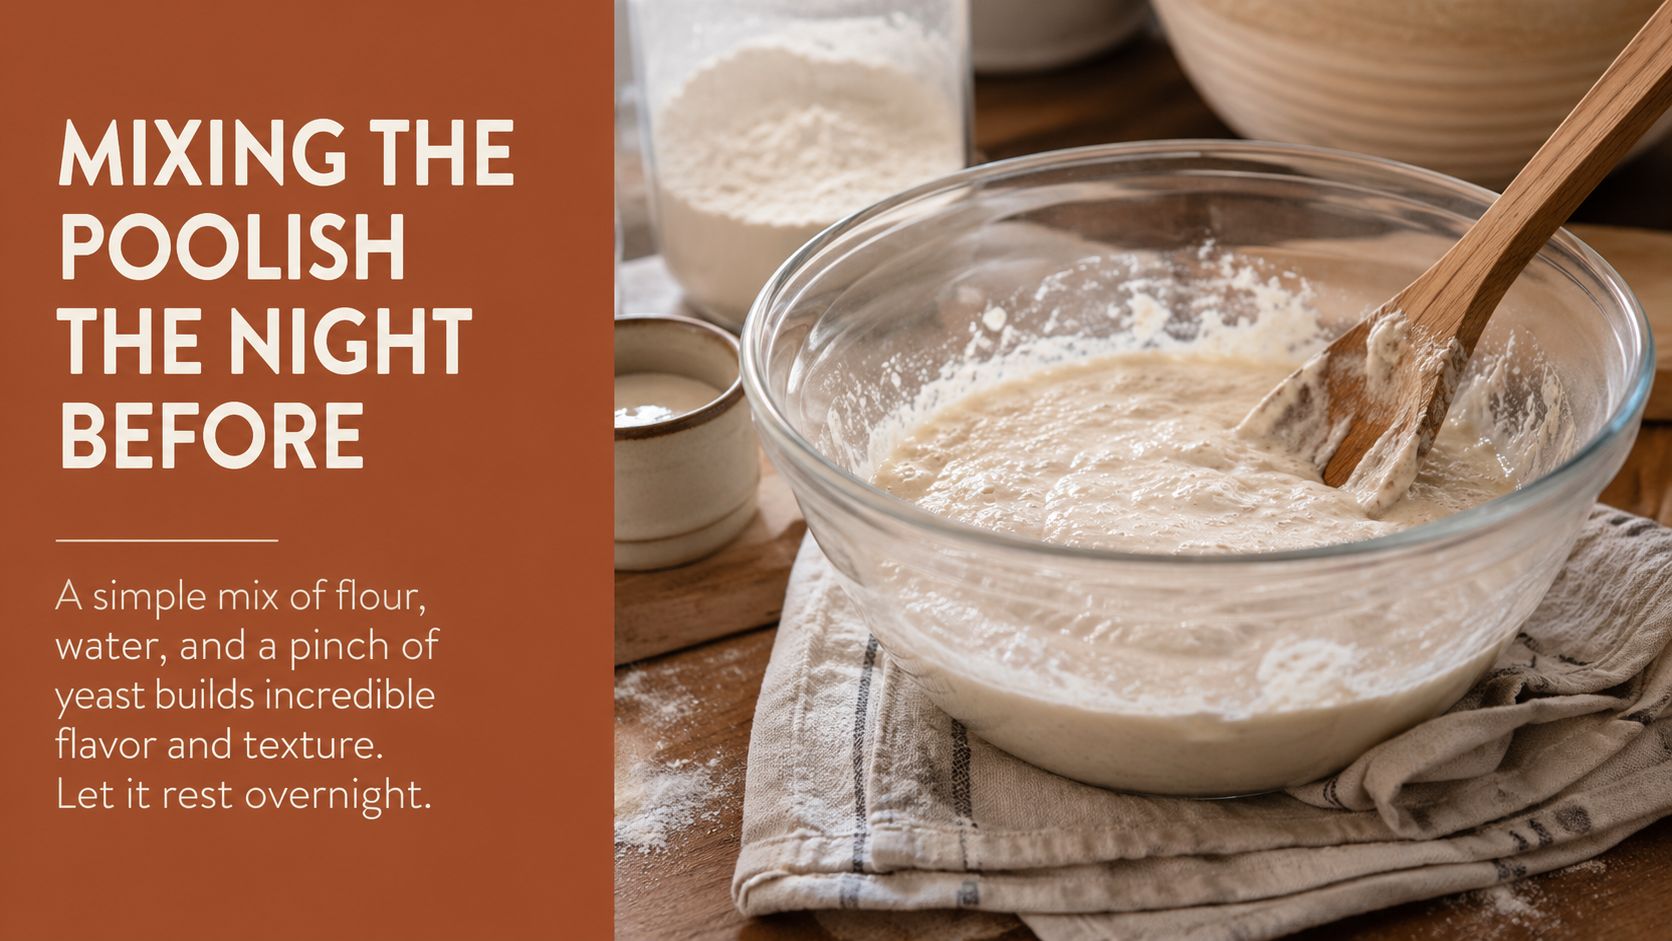
Mix the flour and water in a container that lets you see the rise clearly. A straight-sided jar or clear bowl works better than a wide, shallow dish because volume changes are easier to judge in the morning. Dissolve the yeast in the water first, then add the flour and stir only until no dry flour remains. You're aiming for a smooth batter, not a kneaded dough.
The target fermentation range is about 20-22°C / 68-72°F (temperature guidance). That range keeps the preferment moving steadily without pushing it into collapse too early. In a colder kitchen, the same mix may need more time. In summer, it may need less, even if the recipe hasn't changed.
Cover the bowl loosely, not airtight, so gases can escape without drying the surface. A cool oven with the light off, a shaded counter, or a spot near, not on, a warm appliance can work as a home substitute for controlled fermentation. The point is consistency, not warmth for warmth's sake.
The first few hours can look underwhelming, and that's normal. A poolish often appears quiet long before it starts to bubble visibly. Don't mistake that calm surface for failure.
There's a useful parallel in broader bread work, including the kind of guidance you'll find in a step-by-step sourdough companion, because the same patience shows up in many pre-ferments. The difference is that poolish stays much simpler. It's flour, water, yeast, and time, nothing more.
How to Tell When Your Poolish Is Truly Ready
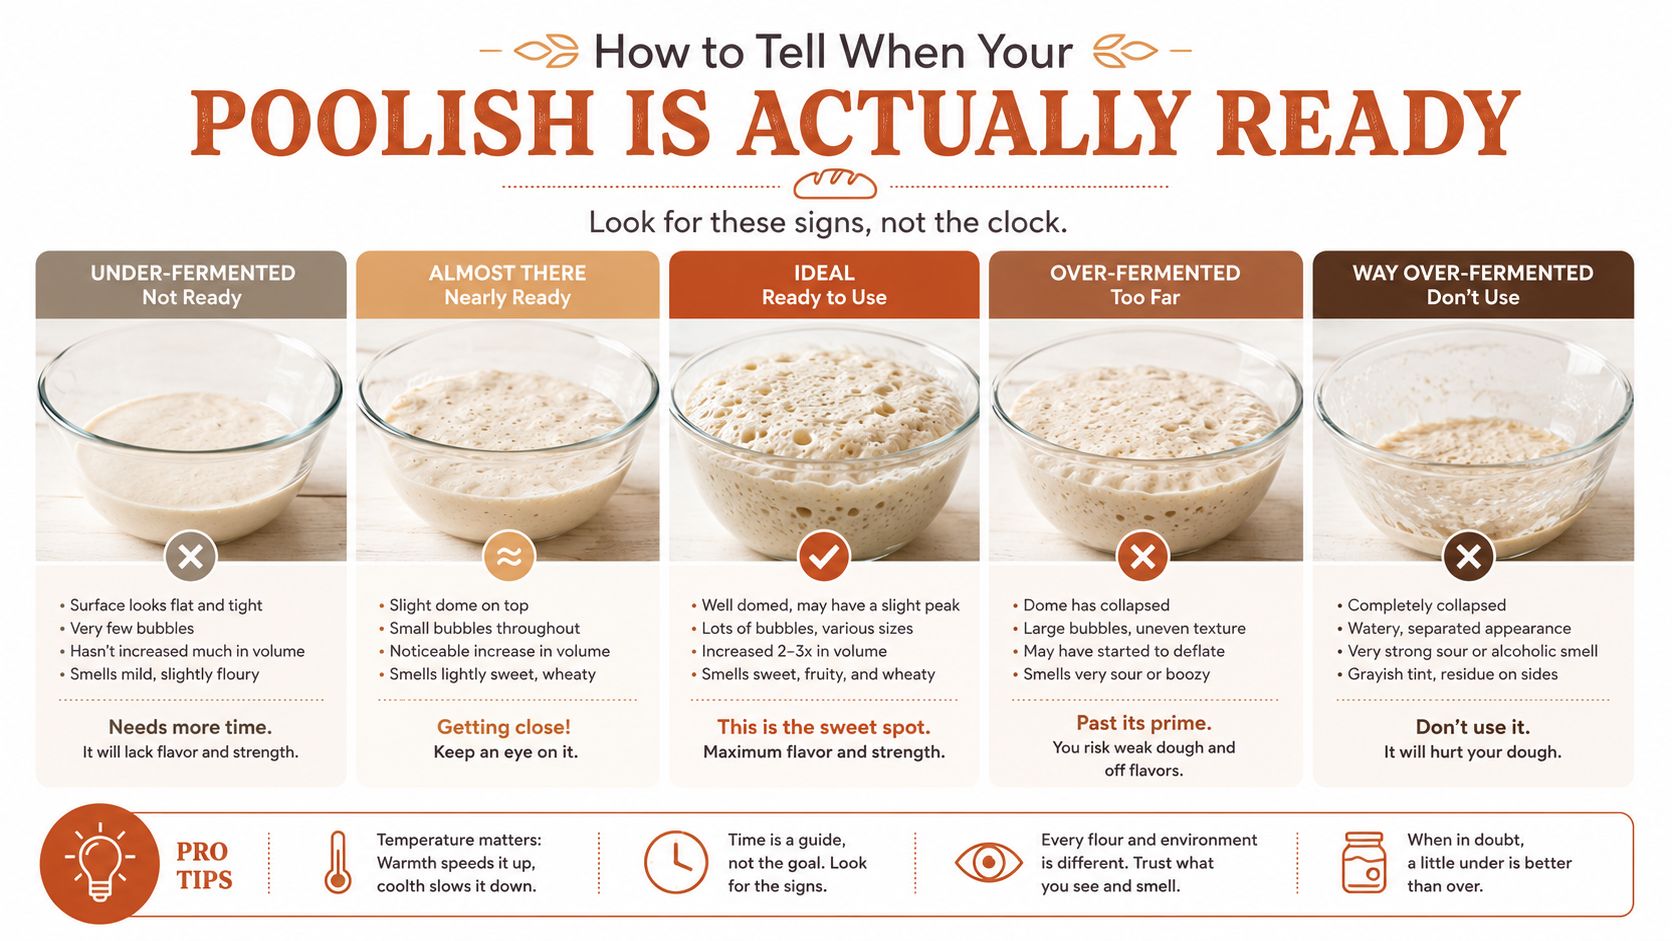
A poolish is ready when time, volume, surface, and collapse all point in the same direction. Time gives you the window, but it does not give you the finish line by itself. Across recipe sources, the fermentation window ranges from 8 hours to 24 hours, and that spread makes sense because kitchen temperatures vary so much. For a closer look at how temperature shifts yeast speed, see this practical guide on yeast fermentation temperature. In one practical example, a white-bread poolish made with 250 g flour, 250 g water, and 0.4 g instant yeast sits at 65-70°F for 12 to 14 hours until it's bubbly and nearly tripled in volume (bread example).
Read the bowl, not just the clock
A ready poolish should look bubbly, puffy, and domed, with small bubbles across the surface and a skin that looks slightly glossy. If your kitchen runs warm, those cues may show up earlier. If your kitchen is cool, they may take longer than the recipe suggests. That is why a fixed hour count is less useful than checking whether the surface has reached peak expansion.
The clearest signal is the collapse point. You want the dome to show a slight dip in the center and a little sag at the edges, not a fully deflated top. Karen's Kitchen Stories describes readiness as a poolish with a “little bump on top and starts to sink in a bit,” which matches what experienced bakers watch for in practice (readability cues).
If it still looks flat and dense, it is under-ripe. If it has fallen hard and smells sharply alcoholic, it is over-ripe.
That is the decision rule in one sentence. Under-ripe poolish will not give you much aromatic complexity. Over-ripe poolish can weaken the final dough and deflate the loaf before it reaches the oven. When the dome is just starting to settle, use it now.
Folding Poolish Into Your Final Dough
Once the poolish looks ready, scrape it into the mixing bowl with a spatula and weigh it before adding it to the final dough. That may seem fussy, but it keeps the formula honest. A little evaporation changes the water balance enough to make the dough tighter or looser than expected, and the final dough works better when you account for that right away.
Add the poolish to your autolyse or first mix, then subtract the water it already brought into the dough. Start on low speed for 3 to 4 minutes until the ingredients come together. Let the dough rest for about 20 minutes if you are doing an autolyse, add the salt, then mix again until the gluten starts to organize. In many home formulas, the final bulk fermentation runs 2 to 3 hours with 3 to 4 stretch-and-folds early in the rise, which is the point where the dough goes from slack to structured. For a clearer walk-through of that handwork, use the stretch-and-fold workflow as a reference for how the preferment and folds fit together.
A poolish that is mixed into the dough cleanly should disappear fast. If you leave streaks of raw preferment or mix so hard that the dough heats up too quickly, you make the later folds work against a messy base. Gentle mixing followed by timed folds gives the dough enough strength without flattening the flavor the preferment already built.
Don't bury the flavor work with extra yeast
One common mistake is adding too much yeast to the final dough because the poolish feels slow. That defeats the point of the preferment. The poolish already spent hours building aroma and structure, so the final mix should support that work, not replace it. A dough pushed too hard often tastes yeasty and feels underdeveloped in the crumb.
A poolish loaf should feel gently aerated, not rushed.
That matters even more when you want a lighter crumb and a clean crust. The dough should gain strength during bulk, not blow up in the bowl. If it stretches well after the folds and shows a little lift by the end of bulk, the preferment did its job. For a fuller set of formulas and shaping references, the sourdough bread bakers companion can help you compare dough feel across different artisan loaves.
Same-Day Schedules, Whole Wheat Swaps, and Sourdough Tradeoffs
A same-day poolish is possible, but it asks for tighter control. Push the preferment warmer, around 26–28°C, and reduce the yeast to about 0.1% if you want the whole process to fit into roughly 6–8 hours total (same-day poolish timing). That can work, but flavor and oven spring usually feel less developed than they do in a slower overnight schedule.
Whole wheat changes the pace
Replacing 20% to 30% of the white flour with whole wheat changes how the preferment behaves. The bran and germ absorb more water, fermentation slows a bit, and the dough usually benefits from a longer preferment rather than a shorter one. The result is a sturdier, more flavorful loaf, but it won't feel identical to an all-white poolish bread.
Poolish is not sourdough in disguise
Poolish uses commercial yeast, not wild culture. If you swap in a sourdough starter, you've changed the hydration, timing, and flavor profile enough that you're making a different preferment. That isn't a problem, but it's a different method, so the readiness cues won't transfer one-for-one.
A precision proofing chamber tightens the window even further. DBakerAid-style control with ±0.5°C stability makes fermentation easier to repeat at home because the dough stops drifting with room swings. In practical terms, the visual cues still matter, but they become more predictable when the temperature doesn't wander.
For bakers who like keeping a broader reference shelf, the sourdough bread bakers companion is useful context, because it highlights how much timing and temperature matter across fermented doughs. Poolish just asks for a narrower decision rule.
A Repeatable Poolish Checklist for Better Loaves
If the kitchen runs warm, the poolish can move fast. If it runs cool, the same mixture may still look underdeveloped when the clock says it should be ready.
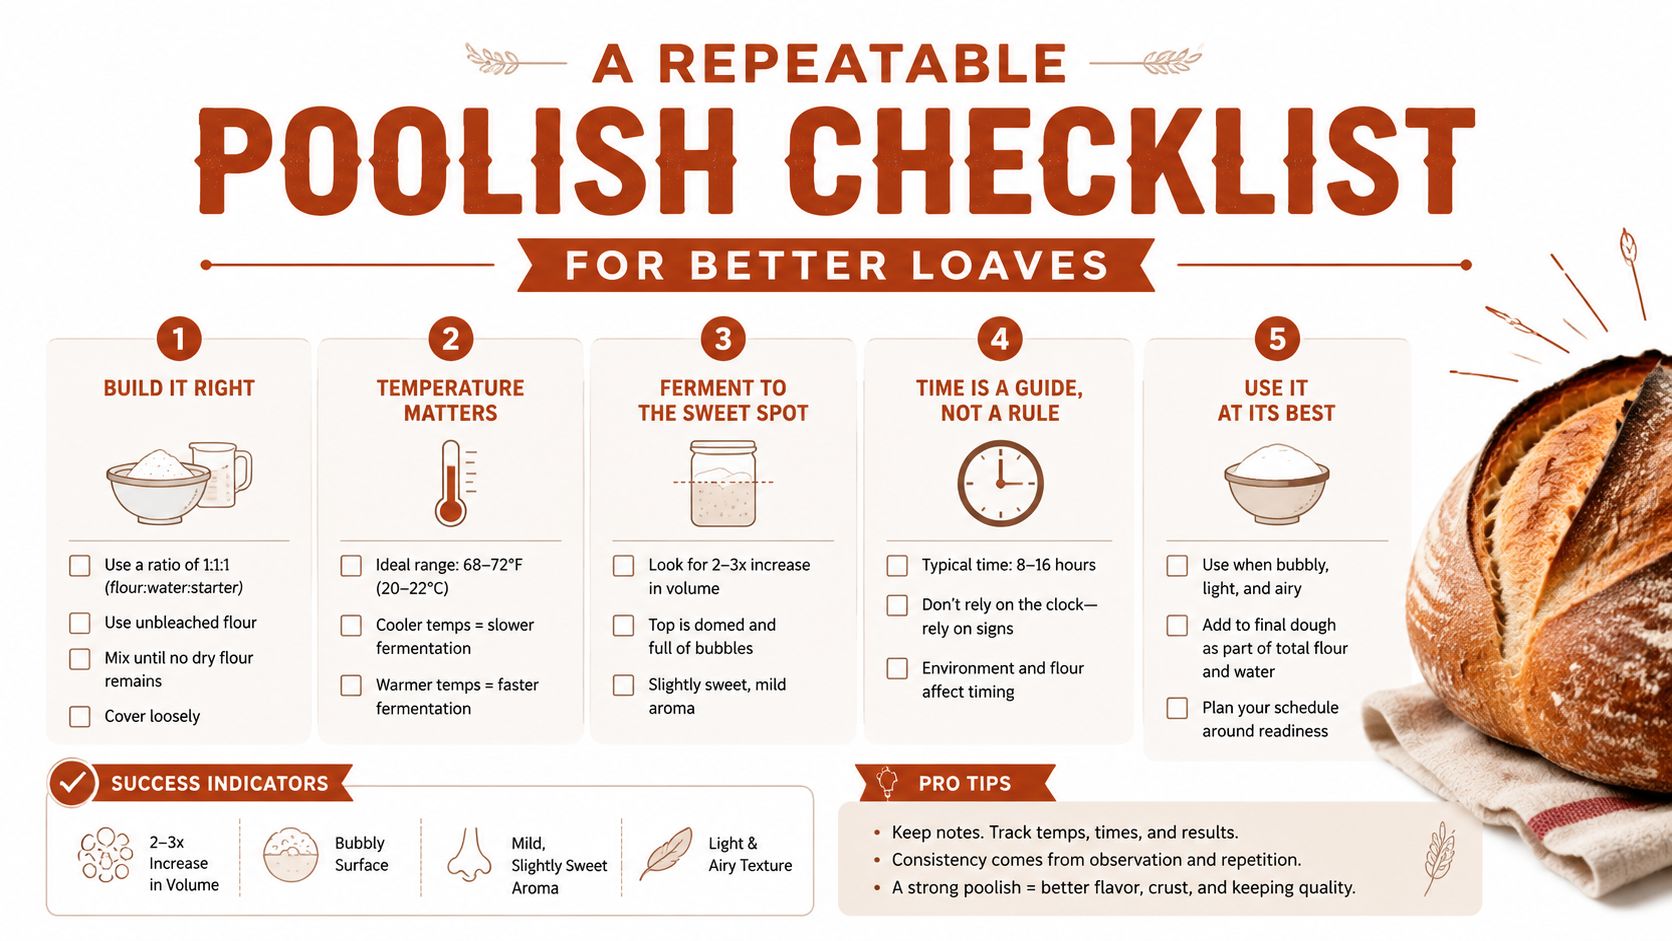
Use this checklist instead of chasing a fixed countdown.
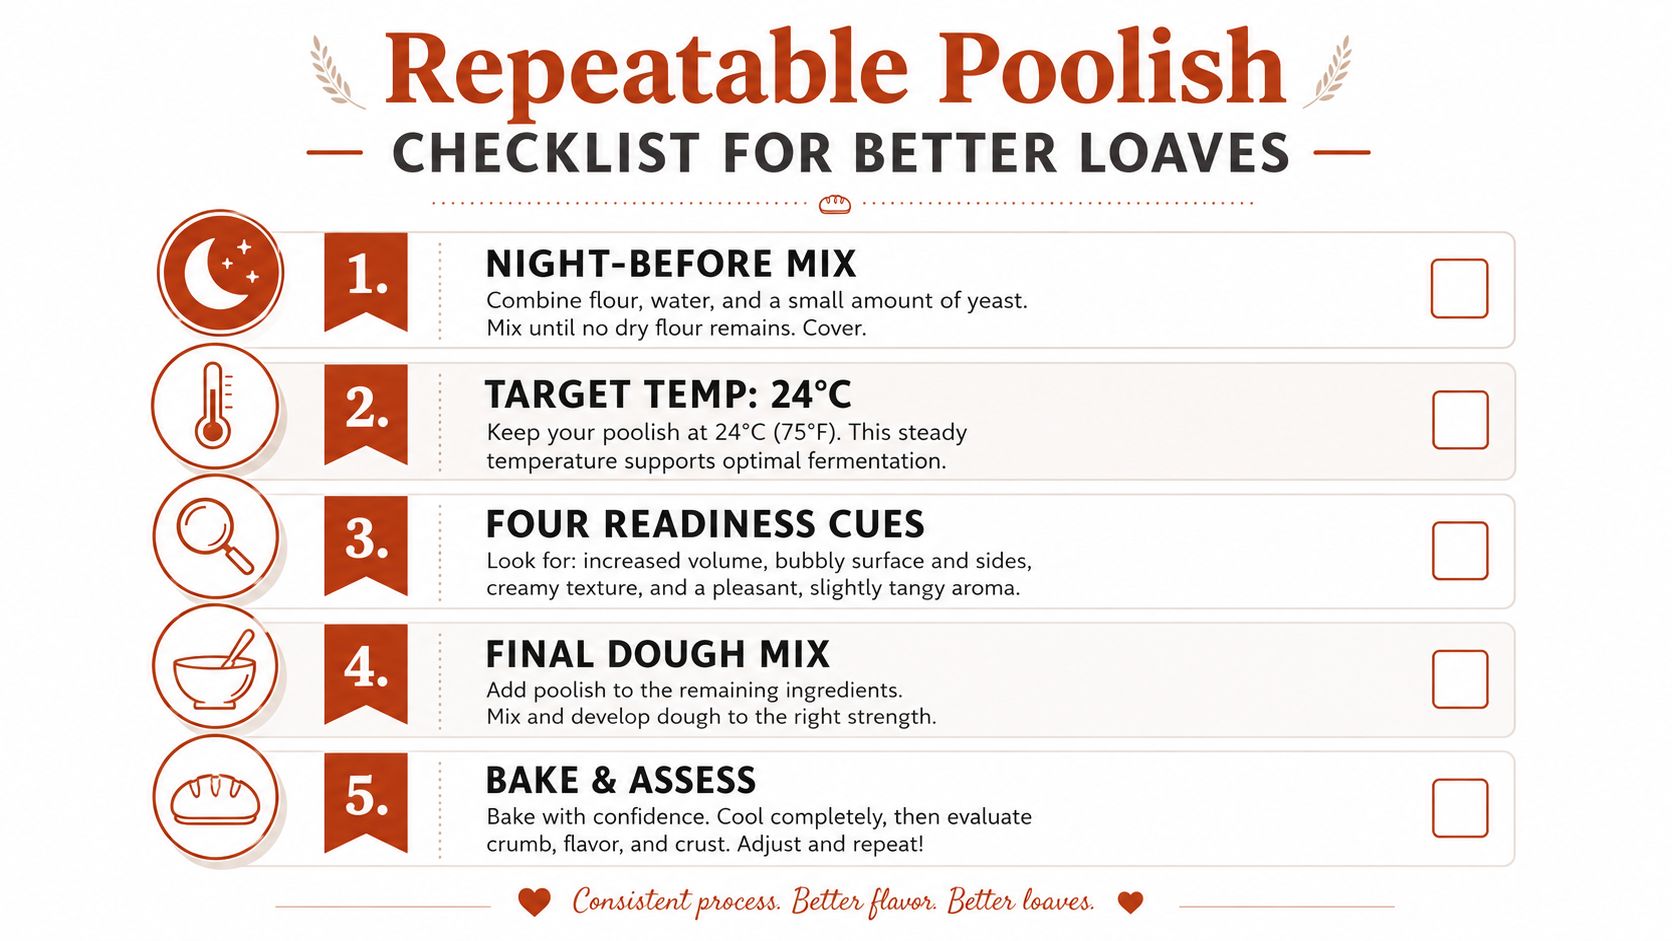
- Night-before mix: weigh equal flour and water, dissolve the yeast in the water, and stir only until no dry flour remains.
- Target temperature: keep the preferment around 20-22°C / 68-72°F unless you are deliberately pushing fermentation faster. If you want more control over that part of the process, you can also browse baking ovens NZ and compare equipment that helps hold a steadier baking environment.
- Four readiness cues: look at elapsed time, volume gain, a bubbly surface, and the slight collapse at the dome.
- Final dough fold-in: scrape and weigh the ripe poolish, then adjust the remaining water so the dough does not end up slacker than intended.
- Bulk and bake: build strength with early stretch-and-folds, then bake when the loaf has the lift and structure you expect.
Poolish rewards observation, not obedience to the clock.
That is what makes the process repeatable. A good poolish gives better crumb, deeper aroma, and a crust that browns with more character, but only when you use it at the right point. If you want to put that skill to work in recipes that depend on controlled fermentation, check the high-protein bread formulas and the other wet-preferment bakes at DBakerAid™.