

You pull a loaf from the oven, wait for it to cool, and slice into a dense center. The starter was active, the flour was good, and the recipe looked straightforward. Then you bake the same formula a few days later and get a flatter loaf with sharper acidity. The difference usually isn't a missing decorative tool. It's an uncontrolled variable.
The best sourdough tools earn their space by making temperature, mass, time, humidity, or dough structure easier to repeat. A scale can prevent an overfed starter. A thermometer can explain a slow bulk ferment. A correctly sized banneton can keep a shaped loaf from spreading. A Dutch oven can preserve steam, but it can't rescue dough that fermented too far.
The right buying question is therefore not “Which accessory do serious bakers own?” It's “Which tool fixes the failure I keep seeing?” That repeatability-per-dollar approach is more useful than building a large kit full of equipment that doesn't address your weak point.
Table of Contents
- Why Most Sourdough Loaves Fail Before Baking
- How Fermentation Variables Decide Which Tool Matters Most
- Precision Measuring Tools That Improve Every Loaf
- Bannetons Lames and Bench Tools Compared by Dough
- Dutch Ovens Steam Systems and Baking Heat Explained
- Proofing Boxes Mixers and Precision Systems in Real Kitchens
- Smart Buying Care and Final Recommendations
Why Most Sourdough Loaves Fail Before Baking
Most disappointing loaves go wrong during mixing, bulk fermentation, or final proofing. The oven only reveals the problem. If the dough enters the pot under-fermented, over-fermented, too warm, too cold, or too slack, better bakeware has limited ability to correct it.
Consider a common sequence. You feed the starter by eye, mix dough without recording its temperature, leave it near a window, and judge readiness by whether it “looks doubled.” On a cool day, the dough remains tight and underdeveloped. On a warm day, it becomes acidic and fragile before you shape it. The same flour and recipe produce different bread because the process changed.
A review of wheat sourdough breadmaking found that approximately 61% of documented fermentation processes used 30°C, while the typical optimal growth range reported for sourdough Lactobacillaceae was 30–40°C. Those figures don't create a universal home-baking setting, but they demonstrate why fermentation temperature is a measurable process variable rather than a matter of personal preference. The wheat sourdough breadmaking review also describes how temperature affects the balance between lactic-acid bacteria and yeasts, with consequences for acidity, gas production, dough strength, and fermentation time.
Diagnose before you upgrade
Start by matching the visible failure to the variable most likely responsible:
- Slow or unpredictable rise: Track dough temperature, starter maturity, feeding time, and the percentage rise in a marked container.
- Excessive acidity: Control fermentation temperature and elapsed time before buying a new baking vessel.
- Weak structure: Check hydration, flour strength, dough temperature, and mixing technique. A heavier Dutch oven won't create gluten development that never happened.
- Sticking or collapsed shaping: Reconsider basket size, flouring, dough handling, and transfer technique.
- Pale, thick, or torn crust: Investigate steam delivery and heat recovery during the first stage of baking.
The practical starter kit is smaller than most product roundups suggest. A digital scale, instant-read thermometer, covered container, dough scraper, suitable banneton, lame, and steam-retaining vessel solve more real problems than a drawer of specialized gadgets.
Buying rule: Spend first on the variable you can't currently observe or repeat. A thermometer is more useful than a premium lame if dough temperature keeps changing.
That rule also explains why a proofing box can be a better purchase than upgraded bakeware for some bakers, while a Dutch oven is the sensible first upgrade for someone whose fermentation is already reliable. The best sourdough tools aren't universal. They're tools that remove the largest source of variation in your kitchen.
How Fermentation Variables Decide Which Tool Matters Most
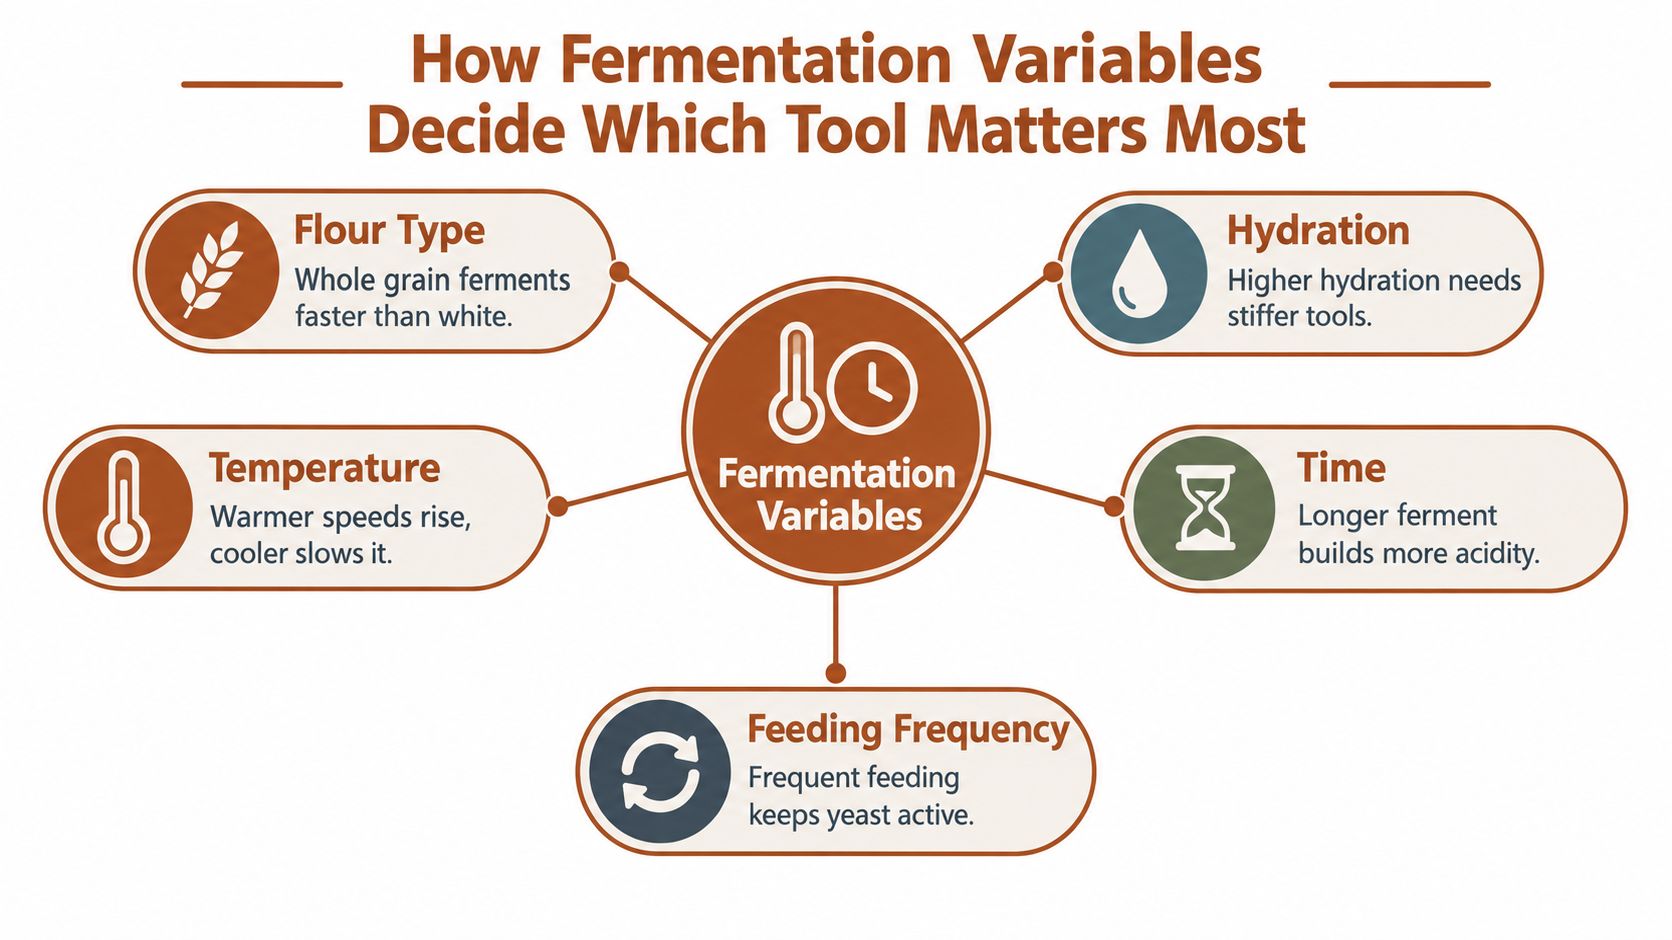
Sourdough behavior comes from several variables acting together. Flour type, hydration, temperature, time, and feeding frequency influence microbial activity, gas retention, acidity, dough strength, and the point at which the dough is ready to shape. Changing one variable can make a familiar schedule unreliable.
Temperature deserves special attention because it affects both speed and microbial balance. The sourdough review linked above reports that temperature and storage conditions have been estimated to account for 44% of variation in physical, chemical, and aroma characteristics, while fermentation processes using 30°C represented approximately 61% of the documented processes. The broader sourdough review makes the useful consumer point clear: a tool that records or stabilizes temperature may provide more consistency than another vessel or decorative accessory.
Match the symptom to the measurement
Flour changes the baseline. Whole-grain and rye flours generally ferment and absorb water differently from white bread flour. A schedule that works for one flour may leave another dough either sluggish or exhausted. Your first tool should be a scale and a dough-volume marker, because repeatable mass and rise observations help you compare batches.
Hydration changes handling. A wetter dough may need a rigid scraper, stronger shaping technique, and a basket that supports rather than stretches the dough. A thermometer remains useful, but it won't tell you whether the dough is too wet for the flour's gluten network. Record hydration and handling notes alongside temperature.
Temperature changes speed. A slow rise points toward temperature tracking and starter activity. A warm dough may move rapidly through bulk fermentation, while a cooler dough may need more time. An ambient thermometer helps, but an instant-read thermometer inserted into the dough gives you the more relevant measurement.
Time changes acidity and structure. Longer fermentation can build more acidity, but it can also weaken the dough if the gluten network has already peaked. A timer helps only when paired with temperature and visual observations. Time by itself isn't a reliable readiness test.
Feeding frequency changes starter behavior. A starter refreshed regularly may behave differently from one left unattended for a longer interval. Weighing feedings and noting peak activity turns “my starter seems weak” into a testable observation.
A useful symptom map looks like this:
| Failure symptom | First tool to prioritize | Why |
|---|---|---|
| Rise varies from batch to batch | Thermometer and marked container | Connects fermentation speed to temperature and volume |
| Dough tastes too sour | Timer plus temperature log | Separates excessive time from a genuinely warm ferment |
| Dough spreads during shaping | Scale, scraper, and suitable banneton | Improves mass control, transfer, and support |
| Crust tears or stays dull | Covered vessel or steam system | Protects surface flexibility during early baking |
| Starter peaks unpredictably | Scale, jar markings, and ambient thermometer | Makes feeding mass and growth easier to compare |
The central purchasing insight is simple. Controlled fermentation often produces a larger consistency gain than upgraded bakeware, especially when the recurring failure happens before shaping. A steam-rich oven can improve expansion and crust, but it cannot correct a dough that was never fermented to the right point.
Precision Measuring Tools That Improve Every Loaf
A scale is the least exciting tool in the kitchen and one of the most valuable. Weigh flour, water, starter, salt, and additions in the same bowl. Volume measures introduce variation before fermentation even begins.
Use an instant-read thermometer at two moments: after mixing, when dough temperature tells you how quickly fermentation may proceed, and during troubleshooting, when room conditions don't explain the result. A thermometer doesn't make the decision for you, but it replaces guesswork with a number you can compare against your own successful batches.
A marked, straight-sided container is equally useful. Mark the dough level after mixing and add another mark at the rise percentage that has worked for your formula. A sourdough dough may be ready before it doubles, and expecting a full doubling can push a warm or highly active dough past its strongest point.
| Tool | Failure It Fixes | Budget Pick | Pro Pick |
|---|---|---|---|
| Digital scale | Inconsistent flour, water, and starter ratios | Basic tare scale with readable increments | Large-capacity baker's scale with fast response |
| Instant-read thermometer | Unexplained fermentation speed | Simple probe thermometer | Fast-reading waterproof thermometer |
| Marked proofing container | Guessing whether bulk fermentation is complete | Clear food-safe container with rubber band | Straight-sided dough tub with volume marks |
| Timer | Lost fermentation and proofing intervals | Phone timer | Dedicated timer that stays visible during kitchen work |
| pH strips or meter | Unclear acidity endpoint | pH strips for occasional checks | Calibrated pH meter for repeated experiments |
For a deeper look at what matters in a baking scale, compare capacity, tare response, readability, and cleanup in this guide to a high-precision kitchen scale. The expensive option isn't automatically better. A scale that fits under your bowl and remains accurate is more useful than a feature-heavy model that lives in a cupboard.
Spend according to the failure
If your loaves are inconsistent but you don't know why, buy the scale and thermometer first. If you know the dough temperature but struggle to judge rise, add a marked container. If acidity is your recurring issue, pH measurement can clarify what your palate and timing notes are already suggesting, though most home bakers don't need laboratory equipment for every loaf.
A timer is the lowest-cost control because it prevents forgotten dough, but it has limited value without temperature context. Use it to create a record, not a rigid command. The same elapsed time can produce different dough when the flour, starter, hydration, or temperature changes.
Bannetons Lames and Bench Tools Compared by Dough
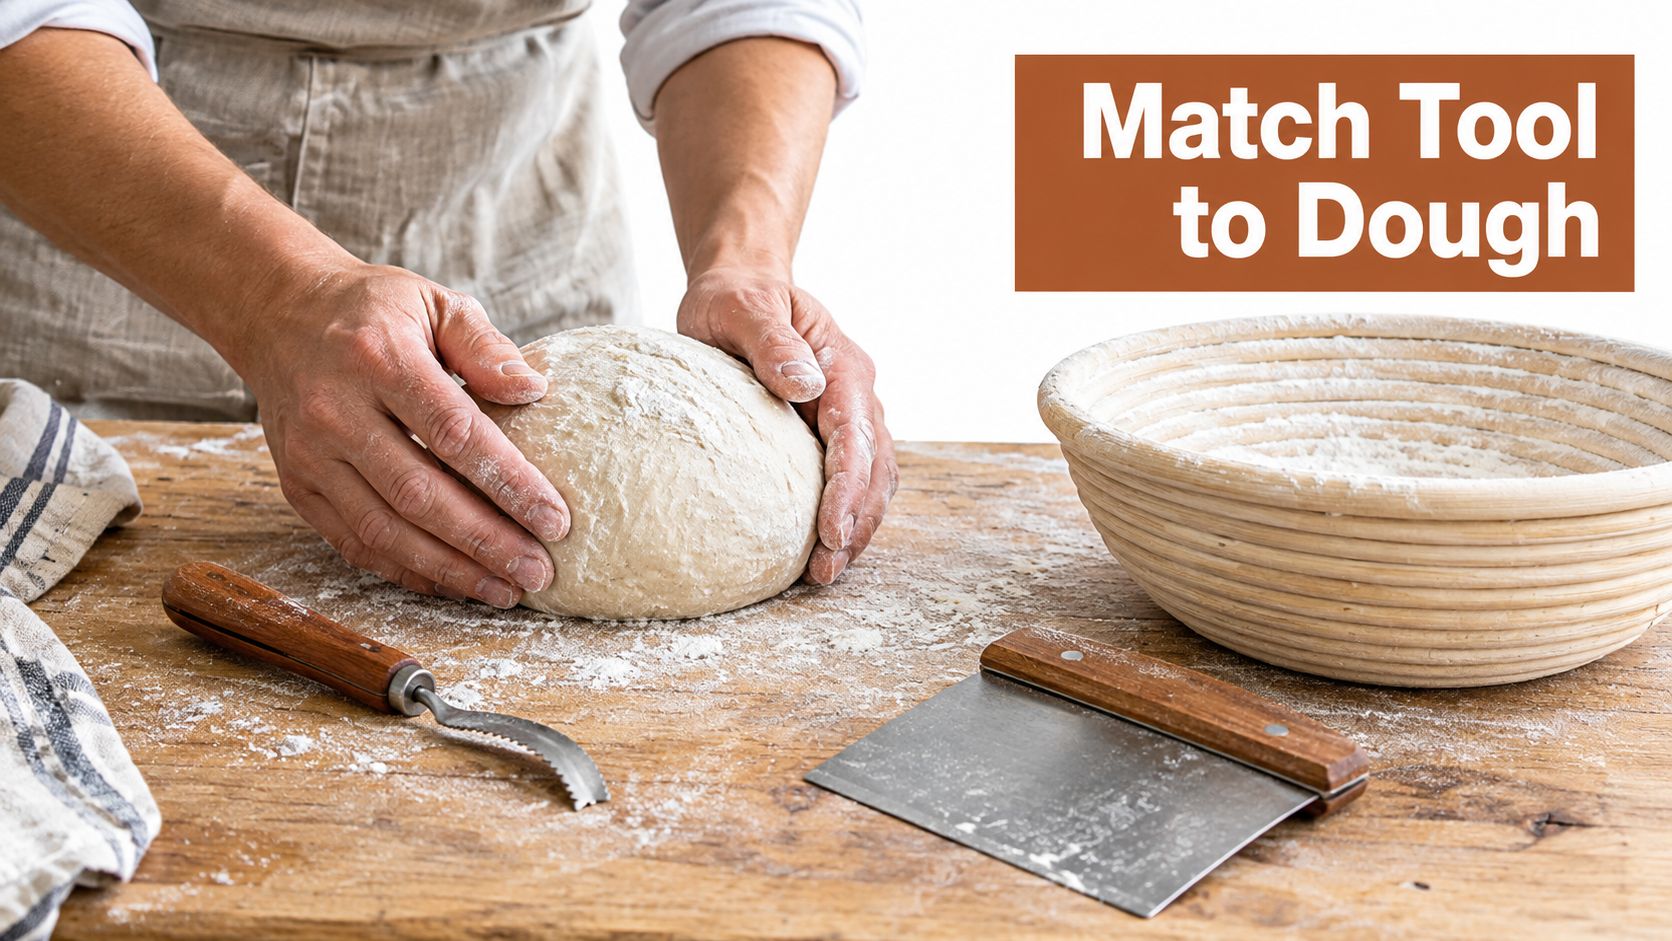
Shaping tools work best when they match the dough's mass and geometry. For a standard 800 g to 1 kg dough, a round banneton around 9 inches suits a boule, while an oval basket around 10 × 6 inches suits a batard. This banneton selection guide explains why capacity and shape matter more than a basket's appearance.
An oversized basket gives the dough too much room to spread laterally. That reduces surface tension and makes scoring less predictable. An undersized basket compresses the dough, encourages sticking, and can deform the loaf during unmolding.
Choose the basket by shape and release
Rattan baskets support the dough and leave a spiral impression, but they need careful flouring and drying. Rice flour can improve release, especially with wetter doughs. A cloth liner creates a smoother surface and can make unmolding easier, but it changes the airflow and release behavior of exposed rattan.
For a high-hydration dough, prioritize a basket with dependable release and enough structural support. For a firm whole-grain dough, the same basket may release easily but still need enough depth to support the shape during proofing. Cold-retarded dough can be easier to score because it feels firmer, but it may still stick if the basket was under-floured or damp.
A rigid bench scraper is more useful than a flexible bowl scraper for shaping. It lets you lift, rotate, divide, and tighten dough without dragging it across the work surface. That matters when you're building surface tension rather than just moving dough from one place to another. This banneton and proofing basket guide is useful when comparing basket capacity, liners, and loaf geometry.
Treat the lame as a control tool
A lame should hold a sharp blade securely and let you control angle and depth. Decorative handles don't compensate for a dull blade or hesitant movement. A shallow score may seal before expansion, while an overly deep cut can weaken the surface and produce an awkward tear.
Use the bench scraper to create tension, the banneton to preserve that tension, and the lame to direct expansion. Those jobs are connected, but they aren't interchangeable. A better basket won't fix loose shaping, and a sharper lame won't stop an over-proofed dough from collapsing.
Dutch Ovens Steam Systems and Baking Heat Explained
The bake phase has a different set of problems from fermentation. Once dough enters a hot oven, early steam keeps the surface flexible long enough for expansion. The steam then contributes to crust gloss, browning, texture, and the final relationship between crust and crumb.
A 2011 study tested 100, 200, 300, 400, and 500 milliliters of steam in a 200°C deck oven over 20 minutes and found that steam level significantly influenced bread quality. Low-steam baking could cause crust tearing, while insufficient steam generally produced a duller, thicker crust. Higher steam levels supported a shinier and more colorful surface. The steam injection study gives a useful physical explanation: steam condenses on cooler dough, transferring latent heat and supporting starch gelatinization, protein coagulation, and surface dextrinization.
Compare the main home setups
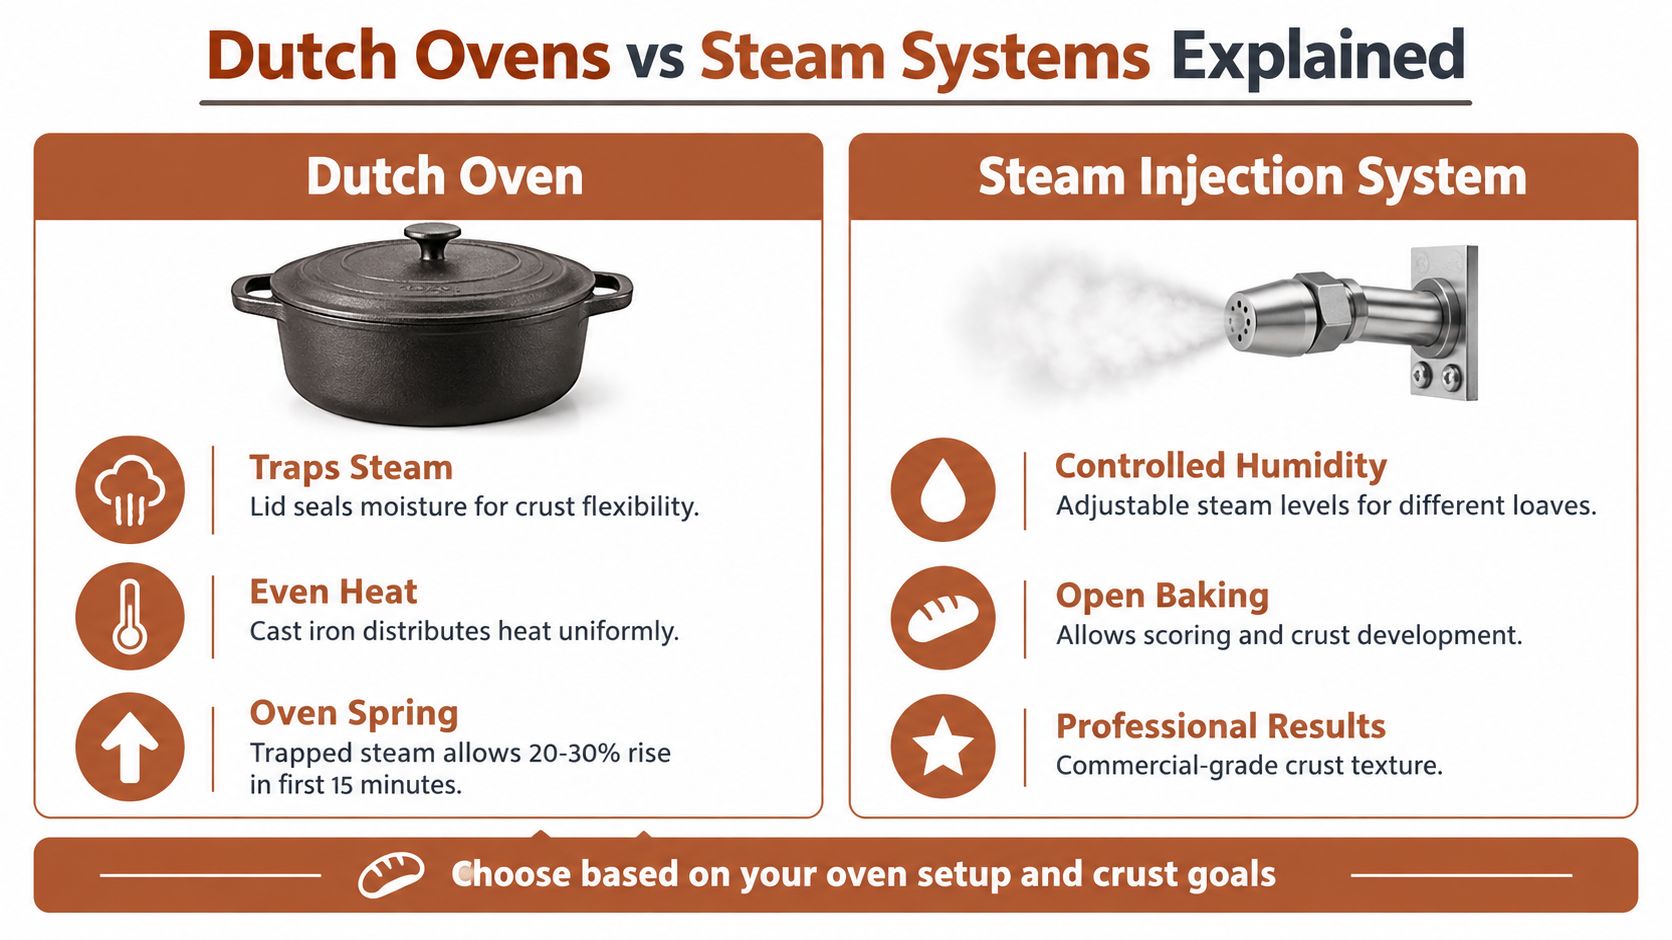
A Dutch oven is forgiving because the lid traps moisture released by the dough. It requires little setup and works well for one loaf, but it limits loaf geometry and can be heavy to handle. A combo cooker makes loading easier for some bakers because the shallow base reduces the need to lower dough into a deep pot.
A baking steel with a steam tray or cover gives more open space and can suit batards or multiple loaves. It requires better loading technique and more attention to steam safety. A dedicated injection system provides more direct control, but it adds equipment, cleaning, and cost.
The differentiator: Steam improves the environment around properly fermented dough. It doesn't replace fermentation control.
Research on steam also reported a highest measured specific volume of 5 milliliters per gram and crumb porosity reaching 86% when bread was baked on a stone at 230°C with 300 milliliters of steam. Crust porosity in related work ranged from 80% to 86%, depending on steam quantity, so steam delivery changes more than surface shine. It affects expansion and crumb structure as well.
Your oven's fuel and heat behavior matter when comparing open baking setups, preheating routines, and dedicated equipment. A practical baking oven fuel cost comparison can help frame that decision without treating energy use as an afterthought. For a home baker, the best setup is the one you can load safely and reproduce consistently. The guide to baking with steam offers another way to think about steam retention and delivery.
Proofing Boxes Mixers and Precision Systems in Real Kitchens
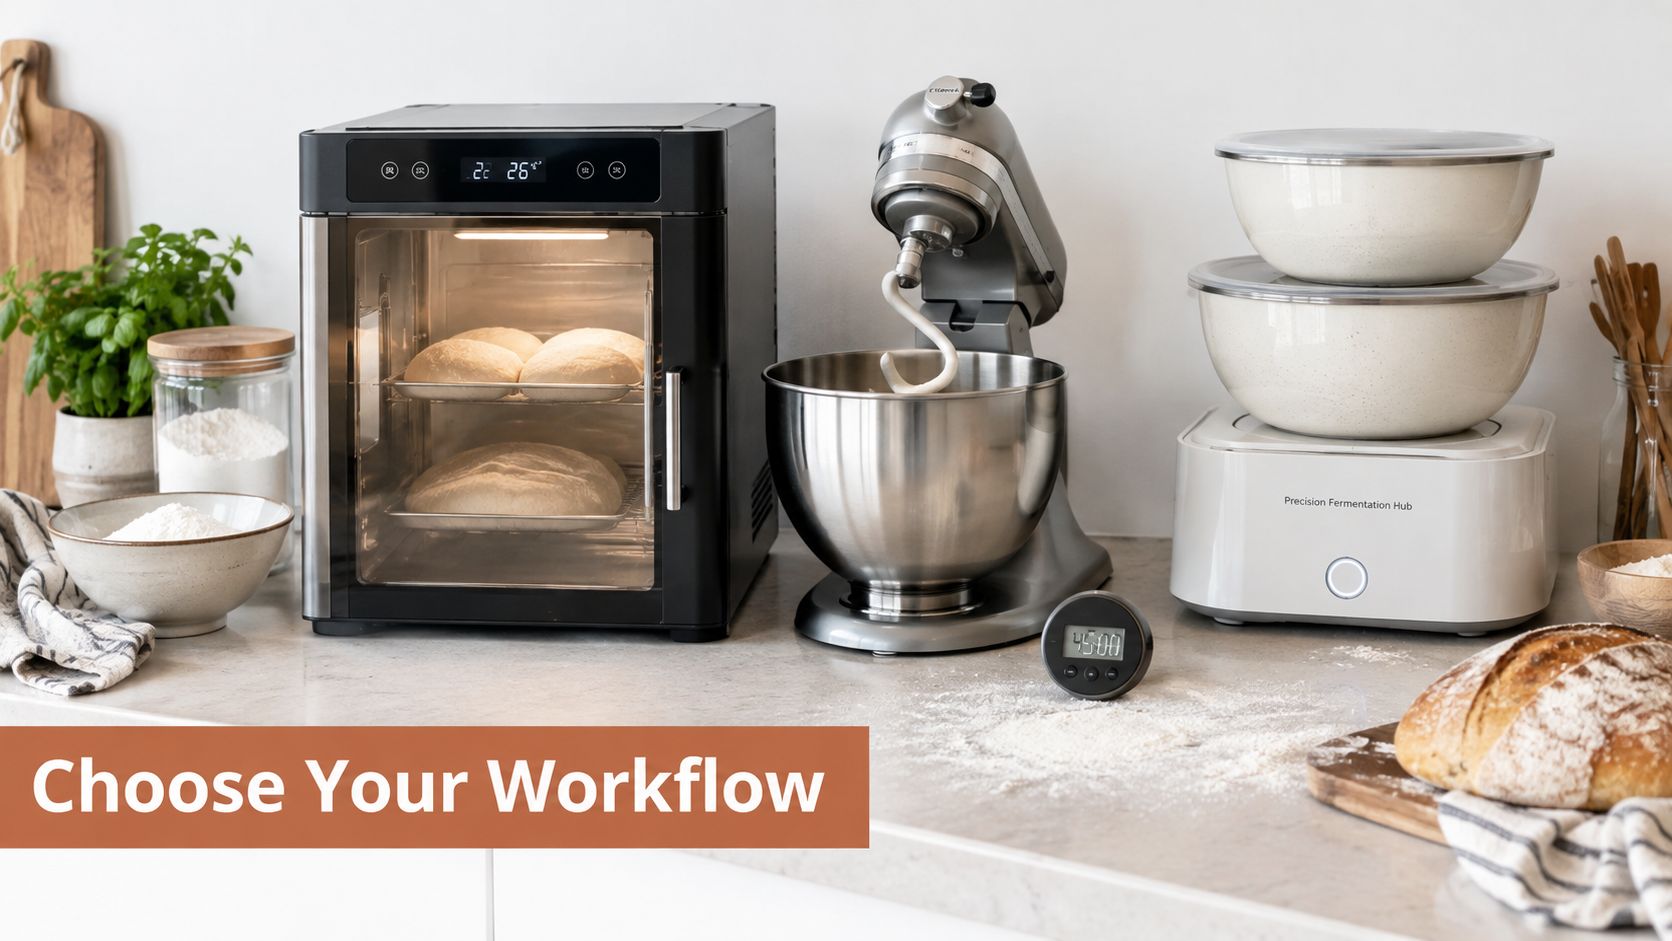
A standalone proofing box makes sense when room temperature swings are the recurring problem. It gives the starter or dough a more stable environment without requiring a full appliance system. For a baker who already mixes well and only needs temperature control, that focused purchase may be the most efficient upgrade.
A stand mixer solves a different problem. It saves hands-on effort during mixing and can help with stiff, enriched, or repeatedly baked doughs, but it doesn't decide when fermentation is complete. It also won't correct a hydration ratio that doesn't suit the flour or a dough temperature that climbed during mixing.
Build the workflow around the baker
A busy household benefits from tools that reduce monitoring. A marked container still matters, but a controlled environment can make a planned bake easier to schedule. Whole-grain bakers need adaptability because flour behavior changes the timing and dough strength. High-hydration bakers need reliable support during transfer and shaping as much as they need temperature control.
Experimental work on barley sourdough used different conditions across successive feeding stages, including approximately 30°C for 24 hours, 31°C for 14 hours, and 28.5°C for 12 hours. That pattern is a useful warning against treating one proofing temperature as universal. The study and sourdough guidance summarized by Agrarforschung Schweiz reinforce the need to match tools and schedules to flour, hydration, feeding stage, and desired result.
D'BakerAid is one integrated option for bakers who want a Stage 1 yeast fermentation bowl, Stage 2 dough proofing bowl, and a hub that controls temperature and time, with an optional D'Steamer for the oven phase. It's positioned as a precision bread-making appliance system rather than a replacement for every traditional tool. The companion recipe app is available at dbakeraid.app.
The workflow matters more than the product category. Mixers handle mechanical work, proofing boxes stabilize temperature, baskets support shape, and steam systems protect expansion. An integrated system can connect some of those steps, but you should still understand what each control is doing so you can adapt when you change flour or hydration.
A small kitchen doesn't need every category. Start with measurement and containment, then add temperature control if your schedule or climate demands it. The most capable setup is the one that fits your counter, your batch size, your flour choices, and the amount of attention you can give a loaf.
Smart Buying Care and Final Recommendations
Buy in the order your failures occur. For a beginner, that usually means a scale, instant-read thermometer, marked container, scraper, banneton, lame, and covered baking vessel. For an experienced baker with reliable fermentation but weak crust, improve steam and heat management instead of buying another proofing accessory.
Use this short checklist before ordering:
- Record the problem: Write down whether the loaf was dense, sour, sticky, flat, pale, or torn.
- Measure one missing variable: Check dough temperature, ingredient mass, rise percentage, or proofing time.
- Change one tool or process: Don't replace the vessel, flour, hydration, and schedule at the same time.
- Verify the result: Repeat the formula before deciding whether the upgrade worked.
Care keeps basic tools reliable. Dry rattan baskets completely before storing them, and brush away flour rather than soaking them. Replace lame blades when they drag. Wash and dry scrapers promptly. Preheat cast iron gradually when possible, protect it from sudden temperature changes, and keep a thermometer clean so residue doesn't affect readings.
A quick calibration check can prevent false conclusions. Confirm that your scale registers a known mass consistently, compare your thermometer with a second thermometer if readings look implausible, and mark your container at the same starting level for each batch. Keep a simple log with flour, hydration, dough temperature, room conditions, rise, and bake result.
If you sell or gift bread, presentation and customer follow-up can become part of the workflow. A tool such as try BonusQR for your store can help a small baking business connect packaging with feedback or repeat orders, but it doesn't replace process records or food-safe handling.
For a small kitchen, choose a compact scale, thermometer, one correctly sized basket, a reliable lame, and a Dutch oven. For a warm or inconsistent kitchen, add a proofing box before upgrading the oven. For a baker who wants connected fermentation and proofing control, consider an integrated precision system after confirming that temperature and timing are the variables causing the failures.
DBakerAid™ combines controlled fermentation and proofing with dedicated bowls, a temperature and time hub, an optional D'Steamer, and recipe support for bakers who want more repeatable results. Visit DBakerAid™ to compare the precision system, review the sourdough options, and choose the tools that address your own fermentation bottleneck.