

You've shaped a sourdough boule, dusted the surface, and reached for the knife. The blade catches. The dough wrinkles instead of opening, the score turns ragged, and the loaf bursts somewhere else in the oven. A bread lame solves that specific problem, but choosing one isn't as simple as buying the sharpest razor. Blade shape, handle balance, exposure, dough strength, and loaf design all change the result.
The best bread lame for a long batard isn't necessarily the best tool for a round boule or a Pullman loaf. This guide compares those choices by outcome, then applies them to difficult doughs, including high-protein bread. If your kitchen also includes a carefully selected quartz kitchen work surface guide, the same principle applies here: the right surface and tool should make precise work more repeatable, not merely look professional.
Table of Contents
- What a Bread Lame Is and Why It Matters for Home Bakers
- Blade Types and Shapes for Different Loaf Styles
- Handle Design and Ergonomics That Affect Control
- Scoring Techniques Angle Depth and Patterns
- Maintenance Blade Replacement and Safety Practices
- Choosing the Right Lame for Your D'BakerAid Workflow
What a Bread Lame Is and Why It Matters for Home Bakers
A baker can often tell when scoring has gone wrong before the loaf reaches the oven. The blade pulls at the gluten skin, the cut closes behind it, and the dough loses the clean opening needed for expansion. A butter knife drags. A serrated knife saws through the surface. Even a loose razor can work, but it's difficult to hold securely while controlling its angle and depth.
A bread lame is a thin, razor-style blade mounted on a handle for swift, shallow cuts made immediately before baking. The sharp edge passes through the dough surface instead of compressing it, which helps preserve the tension built during shaping. Historical accounts describe scoring as a practical way for households using communal ovens to identify their loaves, while modern artisan baking turned the cut into a visible sign of craftsmanship and controlled oven spring (Baking Heritage's history of bread scoring).
Practical rule: Score with one confident pass. Hesitation and sawing create drag, and drag tears the surface you've spent time developing.
The functional purpose hasn't changed. Scoring creates a controlled weak point, allowing trapped gas and moisture to escape through a planned route rather than forcing a random rupture. That's why understanding how oven spring works matters as much as buying a sharp blade. The lame doesn't create fermentation strength, but it lets the loaf use that strength predictably.
For wet sourdough, the difference is obvious. A clean shallow score can lift into an ear, while a blunt or unstable blade leaves a flat seam. High-protein dough brings a different challenge. It can feel stiffer, denser, and slightly tacky, so the blade needs to cut decisively without flexing or catching.
A lame also improves repeatability. You can hold the same angle, use the same stroke direction, and adjust depth according to dough strength. That turns scoring from a last-second gamble into part of the bake design.
Blade Types and Shapes for Different Loaf Styles
Blade geometry determines how the cut opens. The common choice is between a straight lame and a curved lame, but the better option depends on the loaf's shape and the kind of bloom you want.
A curved lame is technically preferred for batards and baguettes because its geometry helps the blade enter at a shallow 30 to 45 degree angle. That angle encourages the cut to lift outward, producing an ear instead of a vertical split, as explained in this guide to scoring sourdough. A straight lame suits boules and decorative marks because a more perpendicular cut opens symmetrically and gives you predictable line control.
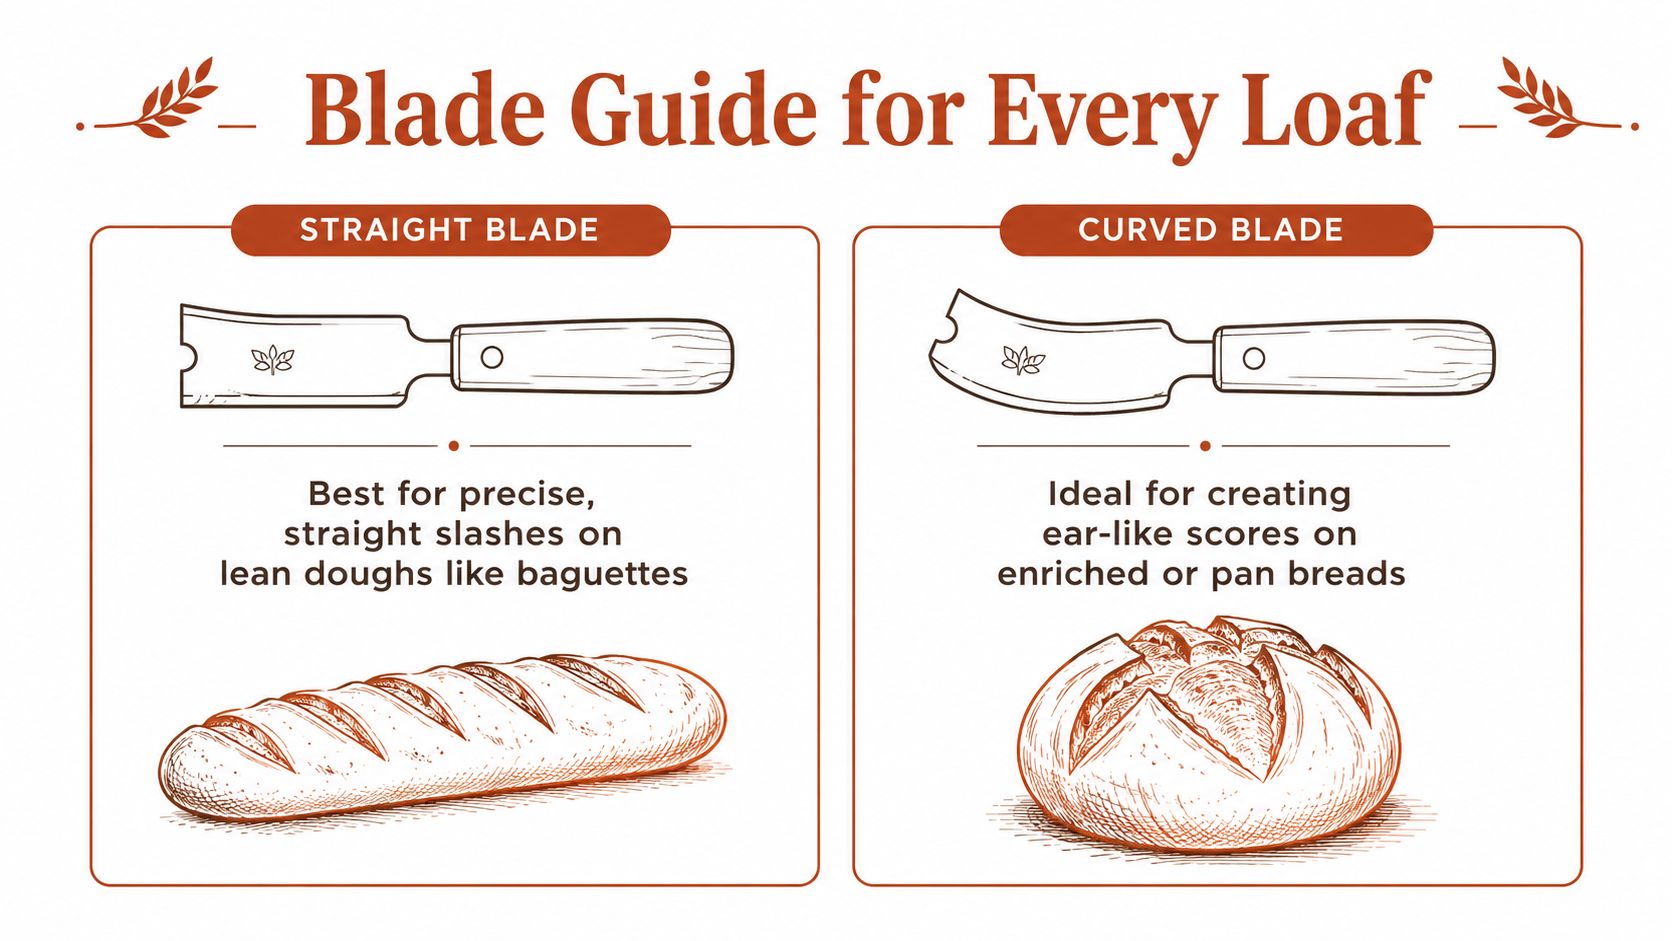
Blade Shape Comparison Guide
| Blade Type | Best For | Angle Approach | Result |
|---|---|---|---|
| Straight | Boules, decorative scoring, controlled line work | Perpendicular or near-perpendicular | Symmetrical opening and clean pattern control |
| Curved | Batards and baguettes | Shallow 30 to 45 degree entry | Directional bloom and a stronger ear |
The dedicated handle matters even when a loose razor is sharp enough. Holding a bare blade exposes your fingers, limits your grip, and makes it harder to maintain a consistent angle through a long stroke. A mounted blade also gives you more control over how much edge contacts the dough. That reduces wobble, particularly when the dough is cold, wet, or unusually elastic.
Blade thickness and exposure create a real trade-off. More exposed edge can make a long score easier, but it also increases safety demands and can make the tool feel unstable. A shorter, more controlled exposure usually suits beginners and decorative work, while experienced bakers may prefer more reach for baguettes.
The “best” bread lame therefore isn't a universal brand winner. It's the tool that matches the loaf. Choose curved geometry when you want the score to peel open along an elongated loaf. Choose straight geometry when symmetry, lettering, leaves, or geometric decoration matters more than an ear.
Handle Design and Ergonomics That Affect Control
A lame can have an excellent blade and still feel wrong in your hand. Scoring happens quickly, often over a lightly floured bench, and the hand must keep the blade stable while moving across a surface that may be tacky or uneven. Balance matters more than raw weight. A heavy handle with poor weight distribution can fatigue the wrist, while a lighter handle that keeps the blade aligned may feel more secure.
Wood, plastic, and metal each give a different experience. Wood often feels warm and stable, with enough visual and tactile definition to guide the grip. Plastic is usually light and easy to clean, though some shapes feel slippery when handled with damp fingers. Metal can provide rigidity and a precise connection to the blade, but it may feel colder and less forgiving during longer scoring sessions.
What to assess before buying
- Grip profile: A rounded handle encourages relaxed movement, while a flatter profile helps you orient the blade without looking down.
- Weight distribution: The handle should support the blade rather than pull your wrist away from the dough.
- Blade exposure: Look for enough exposed edge to complete your intended score, but not so much that your fingers approach the cutting path.
- Locking system: The blade must stay fixed. Any movement during a stroke can produce tearing and creates an avoidable safety risk.
- Cleaning access: Dried dough caught near the mount can interfere with later scores and complicate safe blade changes.
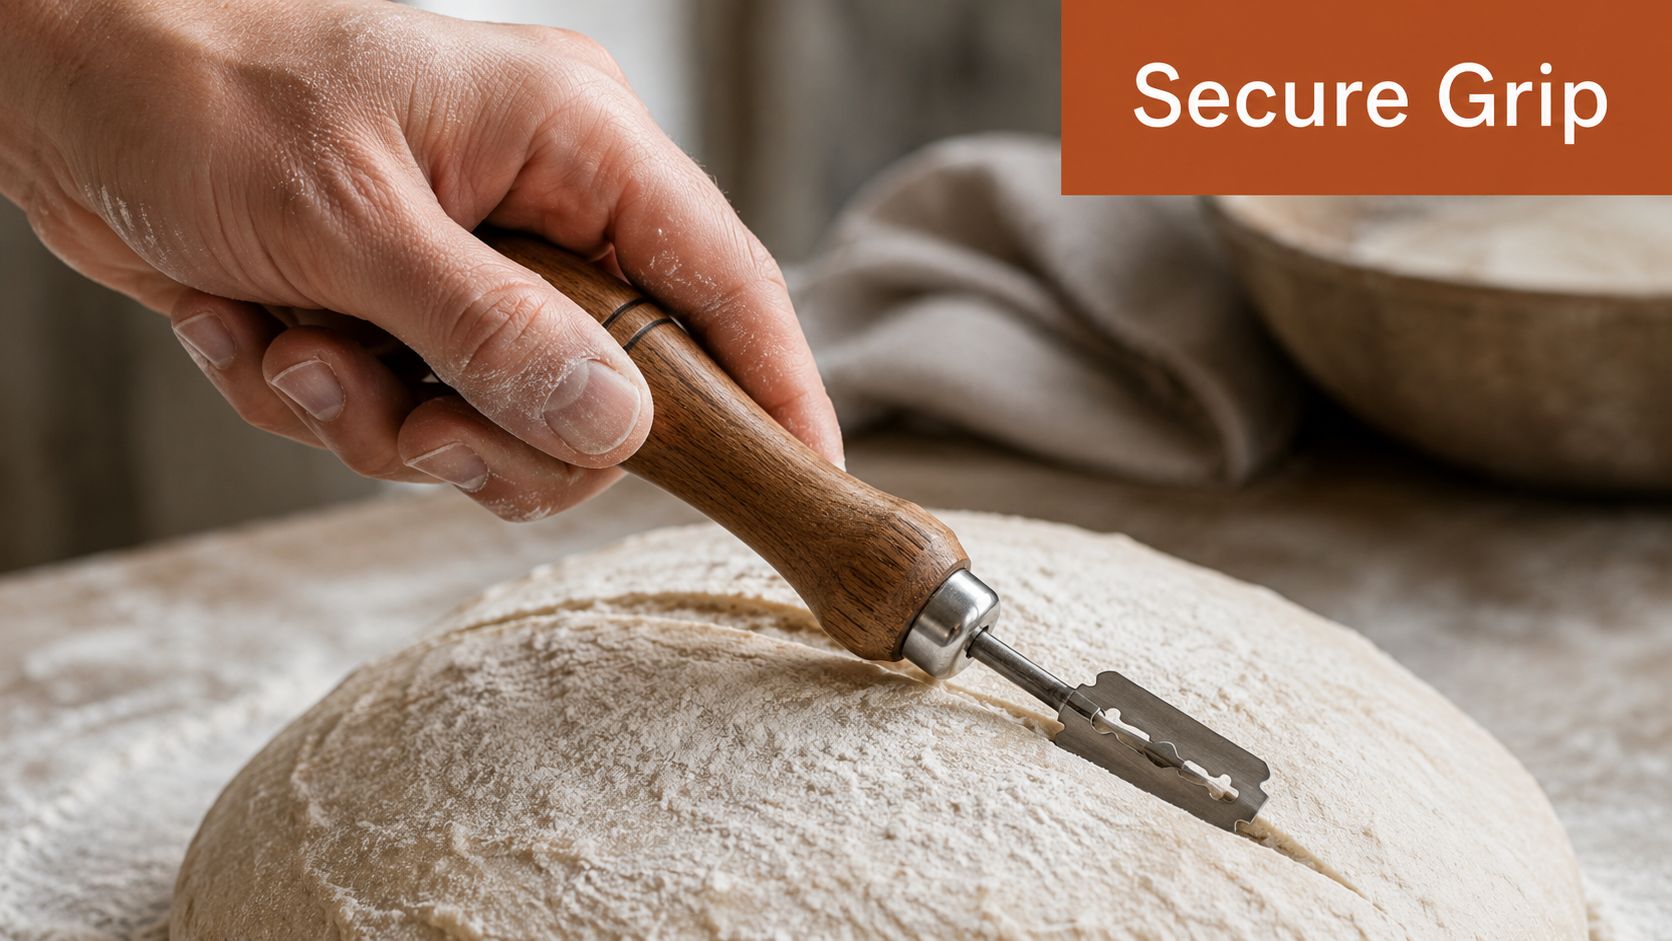
A comfortable handle isn't just a luxury for frequent bakers. It affects whether you make one decisive cut or several hesitant attempts. That distinction becomes more important with stiff high-protein dough, where extra pressure can compress the loaf instead of opening it.
Test the grip before committing to a tool if possible. Hold it as though you're scoring, keep your wrist neutral, and imagine drawing a single line across a batard. If the blade wants to rotate, the handle is too smooth, or your fingers sit close to the edge, the design will probably frustrate you in actual use.
Scoring Techniques Angle Depth and Patterns
Start with the blade angle, not the decoration. Hold the lame at roughly 30 to 45 degrees to the dough surface for a directional score, then move through the dough in one controlled stroke. This shallow entry creates a lip that can lift during oven spring, rather than leaving a cut that opens straight downward.
For many wet doughs, a practical scoring depth is 1/4 to 1/2 inch, with the exact adjustment depending on hydration, dough strength, and loaf style (Cook Harvest's bread lame technique guide). A weaker or very wet dough generally needs a gentler touch. A stiffer high-protein dough may accept the deeper end of that range, but pressing harder isn't a substitute for a sharp blade and correct fermentation.
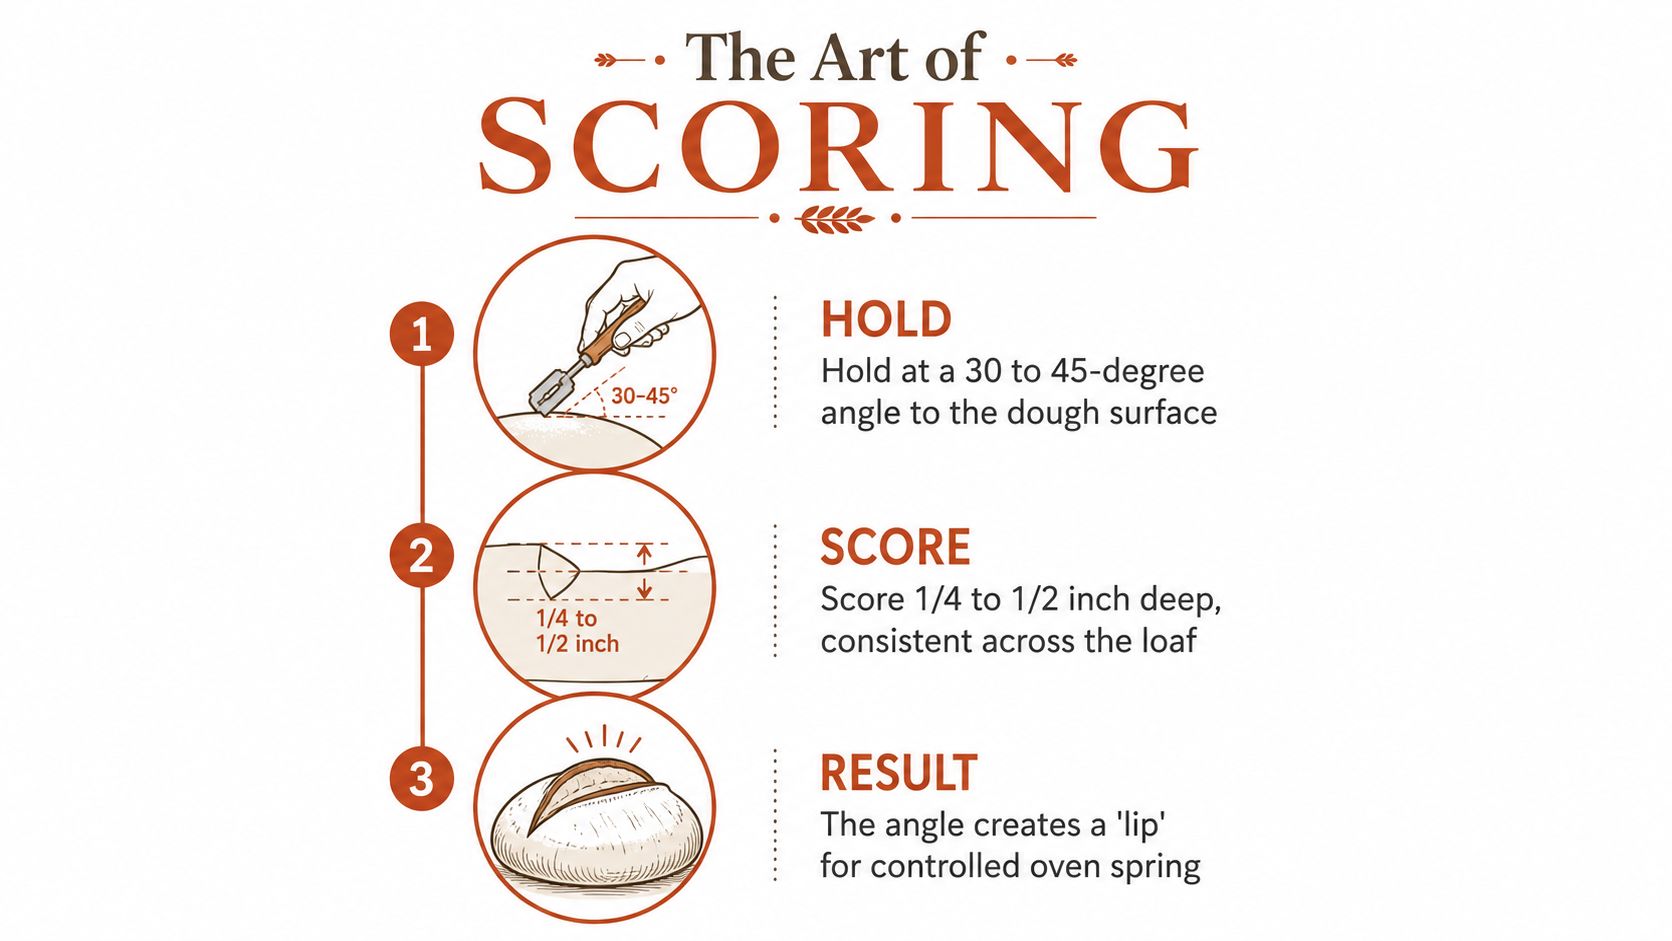
A reliable scoring sequence
- Prepare the surface. Turn the proofed loaf so the intended tension line is easy to reach. Brush away excess flour where the blade needs to travel.
- Set the angle. Place the edge against the dough at 30 to 45 degrees. Don't begin with a sawing motion.
- Commit to the stroke. Pull the lame smoothly and decisively. Lift it at the end rather than reversing direction.
- Adjust for structure. Use a shallower, lighter cut on delicate dough and a more assertive cut on firm dough.
- Bake promptly. The score is most useful immediately before the loaf enters the oven.
For a simple boule, one central slash gives the dough a clear expansion route. Parallel cuts work well on elongated loaves when they're spaced consistently and angled in the same direction. Decorative scoring requires restraint. A leaf pattern, lattice, or wheat-stalk design should sit on the surface rather than carve into the loaf, because too many deep cuts divide the tension skin and weaken the shape.
The direction of each stroke should follow the loaf's tension and intended expansion. Curved lames are especially useful when you want the score to open outward on a batard, while straight blades give finer control for small decorative marks. More examples of practical patterns and movement are available in this guide to bread scoring techniques.
Practice on dough that has been fermented correctly. A blade change won't rescue dough that has been overproofed, underdeveloped, or allowed to form a dry skin. Controlled proofing guidance places standard bread proofing around 24 to 28°C, with fermentation slowing below 20°C; very dry air below 60% relative humidity can skin the dough and interfere with rise and scoring (professional bakery proofing guidance). During final proofing, sources commonly recommend about 70 to 85% humidity, sometimes 80 to 90%, to keep the surface supple (final-proofing temperature and humidity guidance).
Maintenance Blade Replacement and Safety Practices
A dull lame doesn't feel less pleasant. It catches, drags, and pulls at the dough skin, so the first maintenance decision is recognizing performance loss. If the cut becomes inconsistent despite even pressure, or the edge collects dried dough and inclusions, replace or carefully rotate the blade rather than forcing the stroke.
Blade life depends on how often you bake, how much scoring you do, the dough you handle, and how the blade is stored. Some guides suggest replacement every 5 to 10 uses, but that's a general reference rather than a universal schedule (Must Kitchen Beast's lame guide). A baker making one principal score occasionally may use a blade far longer than someone producing elaborate designs several times a week.
A practical maintenance routine
- Inspect before every bake: Check the edge, the mounting point, and any dried dough near the holder.
- Use a paper test carefully: A fresh blade should cut paper cleanly. Keep the paper away from your fingers and don't treat this test as a reason to handle the edge.
- Clean the holder, not the edge: Remove residue without rubbing directly across the razor.
- Cover the blade: Use the manufacturer's guard or a rigid protective sleeve that won't scrape the blade.
- Replace at the first drag: Dough tearing is a more useful signal than a calendar schedule.
- Dispose securely: Wrap used blades in thick material or place them in a dedicated sharps container before discarding them.
Never leave a mounted lame loose in a drawer. A blade guard protects the edge and anyone reaching for nearby tools. Store it somewhere dry, because moisture and dried dough can make the mount harder to clean and may encourage corrosion on unsuitable blade materials.
Your fingers should remain behind the handle and away from the blade path throughout the score. Don't try to catch a dropped lame. Let it fall, clear the area, and pick it up only when the blade is visible and safely oriented.
The handle design affects maintenance as well as comfort. A secure locking mechanism prevents wobble, while a replaceable-blade system lets you maintain a consistently sharp edge without replacing the entire tool. Those details matter more over time than decorative materials or branding.
Choosing the Right Lame for Your D'BakerAid Workflow
The right lame depends on what you bake most often, not on a universal ranking. Start with the dough and loaf shape, then choose the blade geometry and handle that support the required stroke.
| Your usual bake | Better starting choice | Why it fits |
|---|---|---|
| Batards and baguettes | Curved lame | Supports a shallow entry and directional ear |
| Boules | Straight lame | Produces a more symmetrical opening |
| Decorative sourdough | Straight lame with controlled exposure | Makes fine lines and repeated motifs easier |
| Stiff high-protein dough | Balanced handle with secure blade mount | Reduces wobble when the dough resists the cut |
| Pullman loaves | Straight blade or shallow curved score | Depends on whether the loaf is scored for design or expansion |
D'BakerAid is a precision bread-making appliance system with a Stage 1 yeast fermentation bowl, a Stage 2 dough proofing bowl, and a hub that controls temperature and time. An optional D'Steamer supports baking conditions, while the companion recipe app is available at dbakeraid.app. The system is listed at 4.7 stars and US$299.95, according to the supplied product information, and its packaging includes a professional bread lame with five blades.
For the high-protein workflow, expect dough that's denser, stiffer, and slightly tacky. The supplied recipe data describes rises of about 50 to 75% rather than doubling, so the scoring decision should account for a tighter dough skin and a loaf that may not behave like airy white bread. A balanced handle and rigid blade mount are more useful here than an ornate design.
The five Pullman recipes use whey, pea, soy, or collagen isolate with vital wheat gluten and bread or whole-wheat flour. They produce approximately 163 to 184g of protein per loaf, about 23 to 26g per 100g, and roughly 10.2 to 11.5g per slice, depending on recipe, protein brand, and slice thickness. These are high-gluten loaves, not gluten-free, and the collagen version shouldn't be positioned as a complete sports-protein option.
Use a straight lame for decorative scoring on weekend sourdough, then switch to a curved model if elongated loaves and ears dominate your schedule. If your scores tear across several properly proofed bakes, test a fresh blade and a more stable handle before blaming the recipe. The broader equipment choices involved in a reliable setup are covered in this home bakery equipment guide.
The practical buying test is simple. Score one loaf with your current tool, watch for drag, inconsistent depth, and blade rotation, then repeat with a fresh, securely mounted blade. If the second cut is cleaner and more decisive, your tool is holding back the bake. If it isn't, focus on fermentation, surface humidity, shaping tension, and scoring timing.
See the high-protein recipes at dbakeraid.app/Recipes to compare whey, pea, soy, and collagen loaves, and match your lame to the shapes you'll bake.
DBakerAid™ combines controlled fermentation and proofing with recipe guidance for repeatable homemade bread, including high-protein loaves that need more careful dough handling. Visit DBakerAid™ to review the system, included scoring tool, and available accessories before choosing the lame setup for your baking routine.